Kalamata Olive and Cottage Cheese Sandwich
Creamy cottage cheese mixed with dark purple Kalamata olives, garlic, herbs, Balsamico vinegar, that's what I had in mind when I started my sandwich preparations. My plan changed abruptly as soon as I stirred the chopped olives into the crumbly cottage cheese, I stopped turning the spoon before the oily black mixture blended into the creamy white, the contrast looked so beautiful! I tried some of this puristic spread and I was so impressed by its intensity and simplicity that I dropped everything. This combination is too good, Kalamata olives (to me, they are the best black olives in the world!) plus cottage cheese, no distraction, no further addition, just a few slices of fresh baguette and one parsley leaf on top, that's all it needs! This is the quickest and most simple recipe I've made so far for my Sandwich Wednesday and it's already one of my favourite sandwiches!
If you're looking for a quick snack, a picnic treat, an easy dinner or just a nibble with some crackers, pull out some cottage cheese (200g / 7 ounces) and mix briefly with 50g / 2 ounces (or more) of chopped Kalamata olives. You could use other black olives as well but the large Greek fruits from the Peloponnese region have a wonderful aroma, exactly what you need if you mix only two ingredients. I didn't want to over mix it, I only stirred it twice before I spread the cheese on tiny slices of baguette. The green fleshy parsley leaves on top finished it off and added a fresh taste to this composition. I loved it so much that I ate one slice after the other, it was just enough for 2!
Bean and Bacon Salad with White Balsamico and Lemon Thyme
There is something really satisfying about deglazing tiny, crunchy cubes of bacon with sweet Balsamico vinegar. Be it the white or the dark one, both coming from Modena, this vinegar merges with the oily bacon juices to a thick, sweet and sour syrup. It is very concentrated, a great dressing to glaze hearty and crunchy salads like beans and cabbage. A few spoons enrich the vegetables with the whole range of the vinegar's aroma together with the meat's smoky saltiness.
I like to use this dressing for my traditional Bavarian cabbage salad as it brings out a sweet smoothness in the strong cabbage. Today it refines my fava beans, crunchy and green, cooked in salted water for around 6 minutes until they were al dente and rinsed with cold water. I peeled the beans out of their transparent shells for this salad and added some lemon thyme, salt and pepper.
As always, there is lots of peeling involved when there are fava beans on the table, I had 130g / 4.5 ounces of peeled beans after I started with 700g / 1.5 pounds of the fleshy pods. It was enough for the 2 of us as a side dish. I fried 30g / 1 ounce of bacon cut into tiny cubes in a little olive oil for a few minutes until they were golden brown and crisp before I deglazed it with 25ml / 1 ounces of white Balamico vinegar. I scraped the bits and pieces off the bottom of the pan and poured the syrup and bacon over the beans immediately. It just needed a little salt as the bacon added quite a bit of saltiness to it, some ground black pepper and a few fresh leaves of my lemon thyme on top and the salad was done!
Zucchini, Bell Pepper and Aubergine Moussaka with Lemon Ricotta
My Moussaka, truth be told, is a fruity ratatouille baked with a fluffy lemon ricotta soufflé on top. The traditional Greek Moussaka is made with a Béchamel sauce which I'm not too fond of. I like this creamy sauce in my lasagna or cannelloni but that's it. The ricotta tastes much lighter, enhanced with lemon zest, nutmeg, parmesan and fresh basil, it gives this dish more of a summer feeling. Contrary to the Greek version, I kept mine vegetarian, there's no minced meat involved, just zucchini, bell pepper, tomatoes, red onions, lots of parsley and a velvety layer of fried aubergine slices in between the vegetables and the cheese. It stops the ricotta from running into the juicy ratatouille.
When I cook a ratatouille I always make a big batch. This moussaka is perfect as a second day dish for ratatouille leftovers. Topped with the ricotta it just has to bake in the oven for half an hour, great if you have friend's over for dinner and not much time for preparations! I baked it in small casserole dishes closed with a lid so that each of us could have our own little pot.
Zucchini, Bell Pepper and Aubergine Moussaka with Lemon Ricotta
I bake the Moussaka in two 12,5cm / 5" casserole dishes with lids, you could use a big one instead but you may have to bake it a bit longer for the ricotta to set.
For 2-3 people you need
small aubergine, sliced into circles, 1
zucchini, sliced into circles, 1
red bell pepper, thinly sliced, 1
big red onion, quartered and thinly sliced, 1
big tomatoes, chopped, 4
garlic, thinly sliced, 3 cloves
parsley, chopped, 2 tablespoons
balsamic vinegar 2 tablespoons plus more to taste
olive oil for frying
salt and black pepper
For the topping
ricotta 260g / 9 ounces
organic eggs 2
Parmesan, grated, 30g / 1 ounce
small basil leaves, chopped, 30
lemon zest 1 teaspoon
lemon juice 1 teaspoon plus more to taste (I also added a little of the liquid of my Moroccan preserved lemons)
nutmeg, ground
salt and pepper
Spread the slices of aubergine on a baking dish and sprinkle with salt on both sides to pull some of its water out. Let it sit for around 15 minutes, rinse the slices and dry between kitchen roll paper. In a large heavy pan, heat a splash of olive oil and fry the aubergine for a few minutes on both sides on medium temperature until golden and soft, add a little more oil if necessary. Season with salt and pepper and set aside.
In a large pot, heat a splash of olive oil and fry the onion for a few minutes until golden and soft. Add the bell pepper and garlic and fry for 2 minutes before you add the zucchini. Fry the vegetables for 2-3 minutes and deglaze with 2 tablespoons of balsamic vinegar. Add the tomatoes, season with salt and pepper and cook for 10 minutes. Add the parsley and season with balsamic vinegar, salt and pepper to taste.For the topping, mix the ricotta, eggs, parmesan, basil, lemon zest and juice and season with nutmeg, salt and pepper to taste.
Set the oven to 200°C / 390°F top/ bottom heat.
Divide the vegetables between the 2 casserole dishes, cover with 3-4 slices of aubergine and spread the ricotta mixture gently on top. Cover with lids and bake for around 35 minutes until the ricotta mixture is set.
Aïoli and Wild Herbs Sandwich
When I went to Ibiza for the first time I got absolutely hooked on aïoli, I ate it every single day! It's more than twenty years ago and I had just turned thirteen. I was so happy to spend some time with my best friend at her parent's holiday home, it felt exciting to be on this island which is so famous for its parties (which I couldn't join as I was still too young)! I especially enjoyed the nights out at all the amazing restaurants we visited together, I have always loved Spanish food, tapas and barbecues, but in those days I was particularly fond of Ibiza's traditional appetizer, fresh bread and aïoli. In Spain, people usually go to restaurants quite late, at 9 or 10 in the evening, by that time I was already starving. As soon as we sat down and a basket full of warm bread and a bowl of creamy aïoli was brought to the table, nothing could stop me from emptying both!
It took me a while to make my own aïoli, a few years ago we had friends over from Barcelona and they introduced me to the traditional dip's secrets. It's surprisingly quick and easy to prepare:
For 4 sandwiches you drop 2 egg yolks into a mug which should be just big enough for a stick mixer to fit in it. You mix 3 crushed cloves of garlic with 4 teaspoons of freshly squeezed lemon juice in one bowl, and measure 100ml / 3.5 ounces of good quality olive oil in another. Pour 1/4 of the oil onto the egg yolks and start mixing with the stick mixer, add more oil and the lemon garlic mixture, a little at a time, mixing constantly. When the dip is thick and creamy season with salt. Spread on 4 thick slices of white bread and sprinkle with mixed wild herbs. I found a fantastic mixture of wild herbs which I don't use often, saltbush (orache), burnet, rucola, pigweed, edible chrysanthemum, yarrow, cheeseweed and chickweed. Every bite brought in new flavours, all strong and delicious together with the aïoli!
A warm Salad with Artichokes in Vermouth
Artichokes seem to follow me in the past few weeks, even when I don't buy them they end up in my kitchen. I got a bag full of beautiful purple baby artichokes as a gift, the tiniest I've ever seen. A friend of mine had bought too many and knowing that I use everything that finds its way into my space she was happy to pass them over to me. I had already made plans for dinner but the vegetables couldn't wait a day longer. When I looked at them, a warm salad came to my mind, a little snack in between. I imagined them sautéed and deglazed with vermouth and some parsley on top, so I brought out my pan and started the cooker.
As a starter for 4 you need 6 small baby artichokes. Cut off the artichoke stem if it’s too woody and pluck the hard outer leaves. Cut the artichoke’s tip off (1/3 – 1/2 of the artichoke), quarter them and scoop out the hairy choke. Keep the prepared artichokes in a bowl of cold water and the juice of half a lemon while you’re finishing the rest.
Sautée the prepared artichokes in a large heavy pan in a dash of olive oil and 2 tablespoons of butter for about 5 minutes together with 1 thinly sliced clove of garlic. Deglaze with 75ml / 2.5 ounces of vermouth and season with salt and pepper. Add 75ml / 2.5 ounces of water and 1 tablespoon of freshly squeezed lemon juice and let them simmer on a medium heat for about 10 minutes until al dente. Sprinkle with roughly chopped parsley and season with salt and pepper to taste.
A Field in the Forest, Beelitz and Asparagus Soup
A couple weeks ago I had a conversation about asparagus with my aunt and uncle, we talked about the various tastes depending on the vegetable's origin. The soil, the climate and weather have such a big influence on these delicate stems. I've enjoyed great asparagus in my life, green and white, but we agreed that the best is from Beelitz, an area 50 km (30 miles) outside Berlin. I always wanted to visit to see the large fields covered in foil keeping them dark, to watch the harvest and buy my asparagus directly from one of the farmers.
It's May, the seasonal peak for asparagus and there's no time to wait any longer! A few days ago we got on a train heading South-West to search for the famous Beelitz asparagus fields. We took our bikes with us to explore some of the quiet and hidden corners of the countryside, the forest and the fields and I can say that we found what we were looking for, asparagus heaven!
We got off the train at a tiny station, an old timber framed house which seemed abandoned for years. We noticed that we were the only travelers on the platform, we were happy about that and enjoyed the silence. When you live in the city the absence of noise is one of the biggest luxuries! The early afternoon sun felt just right, soft and warm, we jumped on our bikes, excited to start our trip.
Beelitz is a small town, it's peaceful and pretty. Old brick houses line the narrow cobblestone streets, little trees along the pavements blossoming in bright pink, a perfect picture book scene. It didn't take us long to leave the town behind us. The world in front of us turned into a glowing green, majestic trees with fleshy leaves, lilacs blooming at every corner spreading their sweet scent. The grass on the wide meadows looked fresh and juicy. We crossed a river and filled our lungs with the cleanest air we smelled in months! We turned into a tiny path and met an old man gathering grass for his rabbits. We chatted for a little while before we continued our drive along endless fields, on hidden alleys and through lonesome forest.
After driving through a dark forest of pine and fir trees for about half an hour we noticed a sparkle in the distance. At that point we weren't even thinking about asparagus anymore, we just enjoyed the peace and quiet, but there it was, right in front of us in the middle of hundreds of trees, an endless field of asparagus!
To keep the vegetables in the dark, they are covered with white foil which reflects the sun and creates a surreal, glittering scene, it felt like being on the moon! In the evening, on our way back to the train station we saw the pickers coming to harvest, creating dark shadows in front of a blinding white in the spotlight of the sinking sun. It was beautiful!
Behind the fields we spotted a farmer who offered thick and juicy white asparagus, the freshest I've ever bought. I filled my basket with the clean white stems knowing that I would turn a few of them into a delicious asparagus soup!
Asparagus Soup
For 4 people you need
white asparagus, peeled, the bottoms cut off, 1kg / 2 pounds
a pinch of sugar
water used to cook the asparagus 900ml / 2 pints
heavy cream 100ml / 3.5 ounces
nutmeg, freshly ground
salt and black pepper
tarragon, around 30 leaves for the topping
In a large pot, bring lots of water to a boil, add a pinch of sugar and salt and cook the asparagus for 20 minutes. Keep the water, take the asparagus out with a slotted ladle and cut into 3cm / 1" pieces. Set the heads aside and leave for the topping.
Bring 900ml / 2 pints of the water used to cook the asparagus to a boil and cook together with the cream on a medium heat for 5 minutes. Add the asparagus and purée with a stick mixer or in a blender. Season with salt, pepper and nutmeg to taste and serve in deep bowls sprinkled with the asparagus' heads and tarragon leaves.
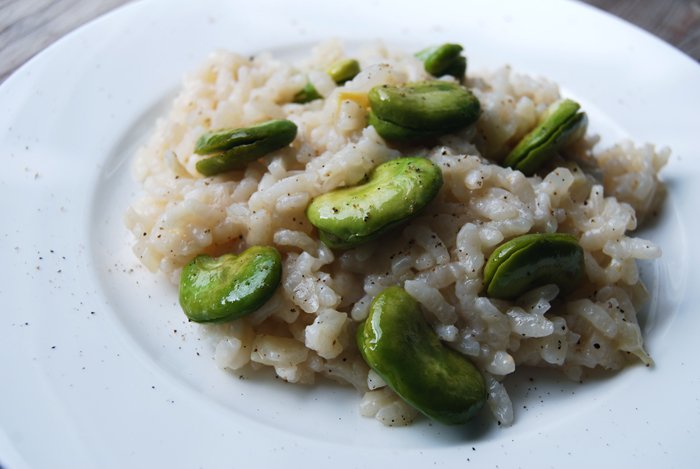
Parmesan Risotto with crisp Fava Beans
When my sister told me abut her latest risotto discovery from her trip to Italy, she sounded so thrilled that I couldn't wait to get the pot on the cooker. She was talking about a parmesan risotto which by itself isn't necessarily spectacular but this one is different. It's made with bigger pieces of cheese which are stirred into the creamy rice when the risotto is done. The parmesan melts, partly, but a few crumbs keep their crunchy center which makes it taste stronger, more concentrated. I was absolutely impressed, this method of preparation lifts parmesan risotto onto another level!
I had some fava beans left on my window sill which I added to the rice, I prefer to have some vegetables with my risotto. Be it a simple salad or some sautéed greens on the side, I need my vitamins as much as my carbohydrates! I fried the beans with some garlic, deglazed them with white wine and let them simmer for a few minutes. I wanted them al dente, a crisp topping for my smooth risotto!
I cooked the risotto with the water I had used to cook asparagus in a few days ago. It's a light broth which I always keep and freeze, great for recipes which need a soft vegetable aroma.
Parmesan Risotto with Fava Beans
For 4-5 people you need
Arborio rice 400g / 15 ounces
medium size onion, chopped finely, 2
broth around 2200ml / 4.5 pints
Parmesan, cut into 1cm / 1/2" cubes, 80g / 3 ounces
fava beans, peeled out of their pods and shells, 800g / 28 ounces (around 300g / 10.5 ounces peeled beans)
garlic, roughly chopped, 1 clove
white wine 120ml / 4 ounces
salt and black pepper
olive oil for frying
butter 2 tablespoons
In a large pan, heat a little olive oil and 1 tablespoon of butter, add the garlic and beans and fry on a medium heat for a few minutes until golden. Deglaze with half of the wine and let it cook for a minute. Season with salt and pepper and add the rest of the wine, close with a large lid and let it simmer for 5 minutes or until al dente. Season with salt and pepper to taste.
In a large pot, fry the onions in a little olive oil and 1 tablespoon of butter until golden and soft, stir in the rice and fry on a medium heat for a minute. Add some of the broth, the rice should be covered, stir and turn the heat down to medium-low. When the liquid has been absorbed add more broth, a little at a time stirring in between. Depending on the rice, it needs more or less liquid. When the rice is al dente and the broth is more or less absorbed take it off the heat, season with salt and pepper to taste and stir in the Parmesan, close with a lid and let it sit for a minute. Arrange on plates together with the fava beans.
Gorgonzola, Strawberry and Pink Peppercorn Sandwich
My first strawberries this year find their place on a sandwich together with the creamiest blue cheese of all, Gorgonzola! This cheese gets its name from its place of origin, the commune of Gorgonzola in the province of Milan. It's not as sharp and spicy as Roquefort or Stilton, it's more on the mild side, perfect for when I feel like a soft cheese aroma. That's what my strawberries needed, especially because their season has just begun here and they haven't reached their full spectrum of flavours yet. To bring some spice into this combination I added a few pink peppercorns, also gentle enough for the red fruits.
This sandwich is so sweet and creamy that a fluffy ciabatta bread felt like the right choice. I spread Gorgonzola (about 100g / 3.5 ounces for 2 people) in thick lumps on a few slices of the fresh loaf, I didn't want to spare on the milky creaminess before I covered the sandwiches with a couple slices of strawberries. Sprinkled with the pink peppercorns which are best when softly pressed before they join the red fruits, I felt a bit hesitant to take the first bite, this week's sandwich really is beautiful!
Stuffed Maltese Artichokes with Meat and Brandy
In Maltese cuisine, stuffed vegetables have a long tradition. The island's soil and climate offer the right conditions for fruits and vegetables to grow and ripen under the Mediterranean sun with strong tastes and in huge quantities. Tomatoes, onions, marrows, zucchini, aubergines, pumpkins, all fruits and vegetables that are perfect to be filled! Be it with meat, seafood, herbs or other vegetables, you can combine flavours of all kinds or even use your leftovers to create a completely new dish you would have never thought of before. When I'm in an experimental mood, I bravely mix whatever I find in my fridge and shelves, sweet, sour, spicy or bitter, I've never been disappointed, but often surprised!
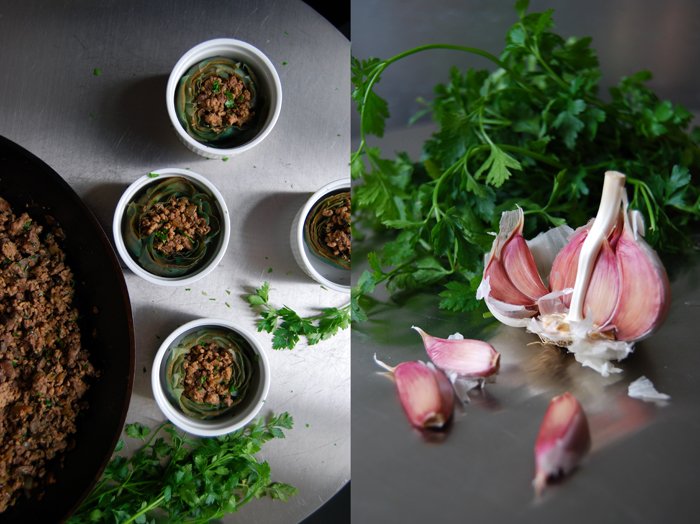
A few weeks ago I wrote about my stuffed zucchini, the filling was light and fluffy, made of ricotta, basil and lemon, perfect for the fruit's soft taste. When I decided to stuff some baby artichokes I had a stronger filling in mind, hearty, with minced pork and chicken liver which is an old, traditional Maltese recipe. To refine the meat's flavours I deglazed it with sweet brandy and infused it with an aromatic bay leaf and a pinch of cumin. I prepared everything in advance and warmed it up in the oven for a few minutes before dinner, in my little ramekins. The meal pretty and delicious!
Stuffed Artichokes with Minced Pork, Chicken Liver and Brandy
The artichokes can be prepared in advance and warmed up in the oven before serving.
For 6 stuffed baby artichokes you need
baby artichokes 6
minced pork 220g / 8oz
chicken liver, cleaned and finely chopped, 150g / 5 1/2oz
medium sized onion, finely chopped, 1
garlic, crushed, 2 cloves
brandy 40ml / 1 1/2fl oz
white wine 160ml / 5 1/2fl oz
bay leaf 1
cumin, ground, a pinch
parsley, chopped, the leaves of a small bunch
salt and black pepper
olive oil
juice of 1/2 lemon
Cut off the artichoke stems. If they are soft, peel and chop them finely and set aside. Pluck the hard outer leaves and cut the artichokes' tips off (1/3 – 1/2 of the artichoke), just the soft, fleshy part of the leaves should be left. Loosen the hairy choke with a knife and scoop it out with a spoon. Keep the prepared artichokes in a bowl of cold water and the juice of half a lemon once they are cut.
In a large pot, cook the artichokes in lots of salted water for about 10 minutes or until soft.
Set the oven to 200°C /390°F.
In a large heavy pan, heat a splash of olive oil and sauté the onion and garlic on medium for a few minutes until soft. If the artichoke stems are soft add them as well. Add a little more olive oil and fry the minced meat for 2-3 minutes. Add the liver, stir and fry for a minute. Add the bay leaf, parsley and cumin, deglaze with brandy and pour in the white wine, cook it down for 2 minutes. Season with salt and pepper and fill the artichokes with the minced meat mixture.
Place the artichokes in a big baking dish or 6 single ramekins, add a dash of white wine to cover the bottom of the dish and cook them in the oven for 5 minutes.
Buffalo Mozzarella, Cuore Di Bue Tomato and Mint Salad
When I saw these beautiful Cuore Di Bue Tomatoes in the vegetable department of my local organic shop I had to buy them. I know these tomatoes from Malta where farmers sell them from their vegetable trucks at every street corner in the towns. These mobile shops are piled high with ripe, colourful fruits and vegetables from the island, surrounded by women chatting and exchanging the latest gossip while waiting to have their vegetables weighed. Many of them have been going to the same farmer for years and I gladly follow this tradition. Whenever I'm there I buy my groceries from my vegetable man, Leli, twice a week he parks his truck under pink oleander trees in the middle of Msida. He is one of the most friendly, calm and humble people I know, he doesn't talk much but he always has a little smile on his face. Before we leave the island at the end of our holidays, we visit him one last time to say good-bye, I never know who is more sad, him or us!
Back to the Cuore Di Bue Tomatoes, I buy and eat them in bulk when I'm Malta. Their taste is far away from most of the tomatoes you can buy in the cities, they are strong and sweet, very intense, they taste like real tomatoes! Their name comes from their shape and size which is similar to an ox heart but I thought that the Italian name, Cuore Di Bue sounds a bit nicer than Oxheart Tomatoes!
I had a buffalo mozzarella in my fridge which had to be used soon, a quick salad mixed with my beautiful tomatoes was the first idea that came into my mind. I still love this Italian classic which can be a delicious starter or snack when it's made with good quality ingredients. Unfortunately, lots of restaurants offer it made with tasteless tomatoes and mozzarella, which has damaged its image a little over the years. Buffalo milk however creates a very strong mozzarella which is great for this salad, to add a green taste as strong as this cheese, I replaced the traditionally used basil with mint. Our salad for 2 was ready within seconds, 125g / 4.5 ounces of buffalo mozzarella roughly torn into bite sized pieces mixed with 2 ripe Cuore Di Bue tomatoes sliced thinly and a few leaves from my mint plant. The dressing was as easy, 3 tablespoons of olive oil whisked with 2 tablespoons of Balsamico vinegar, salt and pepper.
Chutney filled Dates wrapped in crisp Bacon
Devils on Horseback, dried fruit wrapped and baked in bacon, are a typical winter dish, but the temperature dropped, it's a bit grey outside and I wanted to try something new with my chutney. It's still a great finger food nibble, even in spring! After I made my rhubarb chutney I thought about new combinations besides the classics with cheese, meat or sandwiches. A package of dried dates caught my attention, I had bought them a couple weeks ago from a Turkish shop I discovered while strolling through the streets. I went inside to check out their meat section as you can get the best lamb from Turkish butchers but I was a bit late and the shop was closing. On my way to the cash point I grabbed a package of dates unsure of what I would use them for and hopped back out onto the busy streets.
The dates finally found their purpose, I filled them with chutney, wrapped them in slices of bacon and baked them in the oven. Sweet and sticky, salty and a bit sour, my chutney filled dates wrapped in crisp bacon! It sounds like an attack on the taste buds but it's actually a very harmonic combination, all the flavours melt together smoothly. My rhubarb chutney hasn't sat yet, I want to give it a couple more weeks, so I used my plum chutney (the same recipe, just with plums).
It's very easy to prepare these nibbles, you just need a few dried dates (as a snack for 3, I used 15 dates) and replace their seeds with some chutney (the plum chutney was very good but I tried one with rhubarb and it was good too). I cut a strip of thinly sliced bacon into 3 and wrapped each piece around a filled dated. Baked in the oven on 200°C / 390°F they turned golden and crisp after a few minutes!
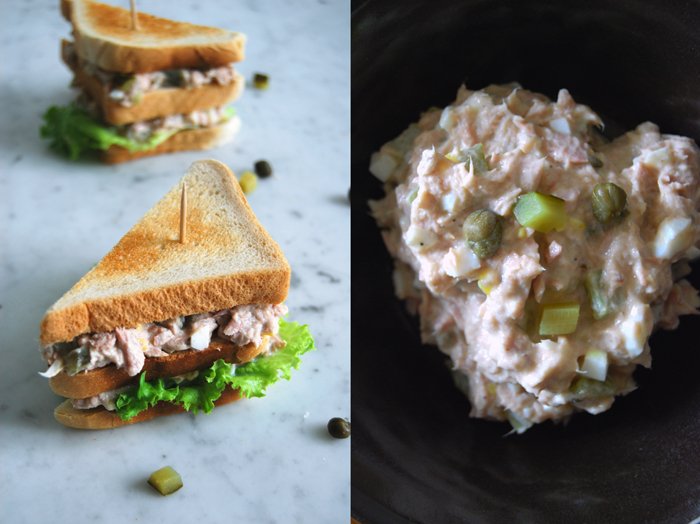
Tuna Club Sandwich and the advantages of old fashioned traveling
When I visit my mother I usually take the train as I prefer to cross the country on the ground rather than in the air. I like this old fashioned, slow kind of traveling, when you see the different landscapes passing by, the busy train stations, cities and villages flying passed your window. You really feel the distance and enjoy the changes instead of just getting it done.
My choice of transportation has another advantage. Before I jump on my train back home, my mother and I follow one of our many traditions, this one started many years ago. We have a cappuccino, a glass of wine or champagne and a little snack at an elegant hotel right opposite the city's famous, nearly 800 year old cathedral. Most of the time we sit right next to the windows of the hotel's old fashioned bistro, always amazed by the sight of the imposing gothic building which seems to grow right into the sky. Sometimes we sit at the bar, on leather covered bar stools, surrounded by a couple strangers reading newspapers, served by waiters who are as elegant as the women and gentlemen sitting at the small tables quietly talking. It's as if time stops at this place and I always loved it for this reason!
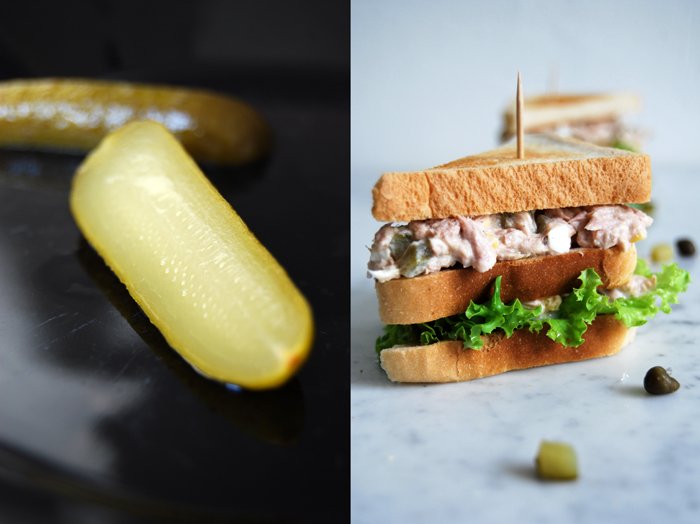
We enjoy our drinks and our last hour together before we go separate ways again. To feed my constant hunger I usually eat a snack as old as the hotel, a club sandwich. The earliest written proof of this sandwich's existence is from 1899, the hotel opened in 1857 and the current building was completed in 1893. The classic recipe for a club sandwich is made with turkey, bacon, lettuce, tomato and mayonnaise. Today I will share my club sandwich variation filled with a tuna dip mixed with gherkin, egg, capers, tomato paste and mustard, another one of my mother's recipes.
Unfortunately our favourite hotel is closed for renovations at the moment and we're still waiting impatiently for the reopening!
Tuna Club Sandwich
For 4 club sandwiches with 2 layers of tuna dip you need
white bread, toasted, cut in half, 12 slices
green lettuce 4 small leaves
For the tuna dip
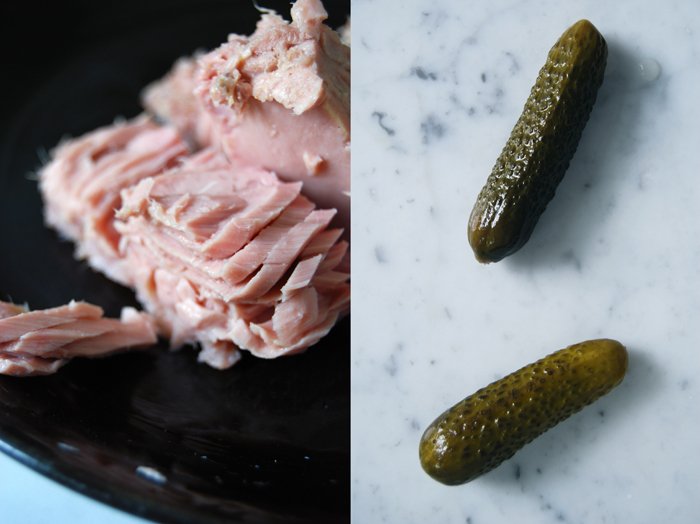
tinned tuna in water, drained well (it's best to squeeze the water out), 185g / 6.5 ounces
organic egg, hardboiled and finely chopped, 1
gherkins, finely chopped, 2
capers, finely chopped, 7-10
yoghurt 7 tablespoons
olive oil 1 tablespoon
freshly squeezed lemon juice 1 teaspoon
liquid from the gherkins 1 teaspoon
mustard to taste
tomato paste to taste
salt and black pepper
Mix the ingredients for the dip with a fork and adjust the flavours to taste. Lay a leaf of lettuce on half a slice of toasted bread, spread with tuna dip, put another slice of bread on top covered with tuna dip and a final layer of bread, fix with a tooth pick.
Tyrolean Cheese and Bread Dumplings
A traditional Tyrolean dumpling is one of the nicest things that can happen to white bread! Mixed with eggs and milk, enhanced with spices, herbs or bacon and finally poached in salted water, the bread turns into delicious little dumplings. Together with roast meat they are the ultimate mountain dish, their spongy texture is perfect to soak up the juices and gravy. They are usually cooked in big batches so that the leftovers can be sliced and fried in butter till golden and crisp.
Sometimes I just skip the first meal, the meat and the gravy and I fry the dumplings right away, filled with aromatic cheese like a strong, ripe mountain cheese, a Tyrolean grey cheese or Swiss raclette. You could also mix all the cheese leftovers which you find in your fridge, I do that sometimes and it can create some interesting results. This time I went for a ripe Swiss cheese, strong without being overpowering and it melted into the bread perfectly. I didn't wait until the next day to fry them, I just let the cooked dumplings dry on a wire rack for about half an hour before I threw them in hot butter and oil. Sometimes, the leftover meal is at least as good as the main!
Tyrolean Cheese and Bread Dumplings
For 3-4 people you need
white bread or buns, cut into 1 x 1cm / 1/2 x 1/2" cubes, 350g / 12.5 ounces
milk 250ml / 8.5 ounces
organic eggs 4
plain flour 130g / 4.5 ounces plus more if the mixture is too moist
salt 2 teaspoons
hard mountain cheese (like Appenzeller, Gruyère or Raclette), finely chopped, 100g / 3.5 ounces
medium sized onion, finely chopped, 1
butter for frying
olive oil for frying
salt and black pepper
chives, snipped, a small bunch
In a large pot, bring lots of salted water to a boil.
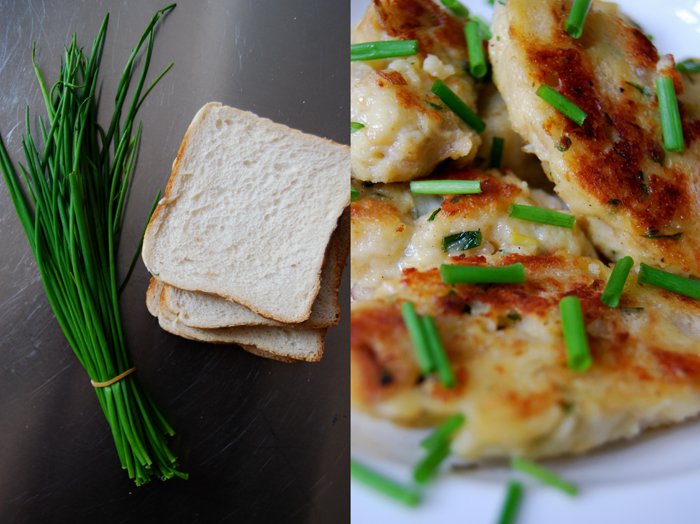
Fry the onion in a little butter for a few minutes till golden and soft. In a large bowl, mix the bread, fried onions, cheese and chives, leave a few tablespoons for topping. Whisk the milk with the eggs, salt and pepper and pour over the bread. Add the flour, mix with a spoon or your hands. The mixture will be sticky but shouldn't be runny, the dumplings should keep their shape. Add a little more flour if it's too soft. Fill a little bowl with water, wet your clean fingers and form the dumplings into long egg shapes (you need around a heaped tablespoon of the mixture). If you wet you fingers once in a while the mixture won't stick to your hands and it will be easier to form the dumplings.
Simmer the dumplings, in batches on a medium-low heat for about 12 minutes. Take one out with a slotted ladle to check if they are done. Let them dry and cool on a wire rack before you cut them in half (lengthwise) and fry them in a splash of olive oil and around 2 tablespoons of butter on medium temperature till golden brown and crisp on both sides. Season with salt and pepper to taste and sprinkle with chives.
Green Asparagus with my Egg and Lemon Yoghurt Dressing
Here is another variation on my raw green asparagus salad, I enjoyed it so much that I tried a few others since I wrote about it on the blog last month. This time I mixed the crunchy vegetable with boiled egg crumbles, chives and a sweet and sour creamy dressing. After my Mediterranean style salad with cherry tomatoes and parmesan I felt like a fresh and Nordic combination. I sliced the green stems thinly with my cheese slicer, they curled up around the eggy crumbles and mixed well with the thick and creamy dressing.
As a starter for 4 or a lunch for 2, you need 500g / 1 pound of raw green asparagus (the woody bottom part cut off), rinsed and thinly sliced (lengthwise). For the dressing I whisked 3 heaped tablespoons of yoghurt, with 3 tablespoons of heavy cream and 2 teaspoons of lemon juice but you should adjust the ratio of milky and sour to your taste. Seasoned with salt, pepper and 1/4 teaspoon of sugar, I dolloped it on the asparagus and finished it off with 2 hardboiled eggs, chopped and crumbled and a small bunch of chives, snipped on top.
Baked Aubergine Mousse with Rosemary and golden Polenta Slices
This pale aubergine mousse isn't a beauty but its taste and smooth texture make up for it! Something changes in the purple fruit's flavour when it has been cooking in the oven. If you fry it in a pan or cook it in a stew it's nice but only oven baking manages to extract the aubergine's finer qualities. Sliced, grilled and filled like my aubergine rolls or baked in foil which turns the aubergine into a soft mousse. Both recipes leave no doubt as to why aubergines are so popular in Mediterranean cooking!
Baking aubergines al Cartoccio together with spices and herbs allows them to become infused with lots of different flavours. The spongey flesh, its soft texture is perfect to absorb tasty liquids and aromatic steam which is why they are also know to soak up so much olive oil! Rosemary was my herb of choice this time which I also used for the golden fried polenta slices. I'm a big fan of this yellow corn, either turned into a thick purée and mixed with gravy and meat or fried, buttery and crisp.
Baked Aubergine Mousse with Rosemary and golden Polenta Slices
For 2-3 people you need
aubergine, cut in half, 1
garlic, 4 cloves in their skin
rosemary, the needles of 3-4 sprigs
olive oil 2 tablespoons
salt and pepper
Set the oven to 200°C / 390°F.
Place the aubergine on a big piece of aluminum foil, sprinkle with olive oil and some rosemary and season with salt and pepper. Turn the fruit's cut side down, add some more rosemary and the garlic and close the pouch. Bake on a baking sheet for about 40 minutes till soft. Check if the flesh is soft and scrape it out with a spoon. Mix in a bowl together with the soft roasted garlic, some of the roasted rosemary and season with salt and pepper, mash with a fork.
For the polenta
polenta 120g / 4 ounces
water 250ml / 8.5 ounces, plus around 100ml / 3.5 ounces for cooking
milk 250ml / 8.5 ounces
salt 1 teaspoon
olive oil 2 tablespoons plus more to grease the baking dish
butter for frying 3-5 tablespoons
rosemary, the needles of 2 sprigs
In a sauce pan, heat the water and milk, add the salt and bring to a boil. Take the pan off the heat, add the olive oil and polenta and whisk. Turn down the heat to the lowest temperature and put the pan back on. Cook the polenta for 10 minutes mixing and adding more water once in a while.
Grease a 28 x 20cm / 11 x 8" baking dish with olive oil. Pour the polenta into the baking dish, let it cool for around 10 minutes. When the polenta is cold and a bit hard, flip the baking dish gently around, either on cling film or directly on your working surface, mine is made of marble and it worked fine. Cut the polenta into diamond shapes and fry in hot butter together with the rosemary on both sides, just for a couple minutes till golden.
Fava Bean Pesto with Mint on a Sandwich
Finally, fava beans are back in season and just peeling them is a sensual experience! These beans are crunchy beauties wrapped in silky transparent shells, protected by the velvety inside of their fleshy pods. To peel them, smell them and finally taste them is a spring highlight to me! I know it sounds a bit overwhelming, but spring vegetables have this effect on me. Luckily, the preparations have a meditative side effect as you have to buy lots of beans to end up with just a handful of this green treasure, but the effort is worth it. The firm texture and fresh green taste stands for everything I love about spring!
Usually I peel the beans out of the shells to achieve a finer taste but for my pesto I skipped this part. The beans were so young, the skin so tender and soft that I could keep them in their shell which also has a nutritional value.
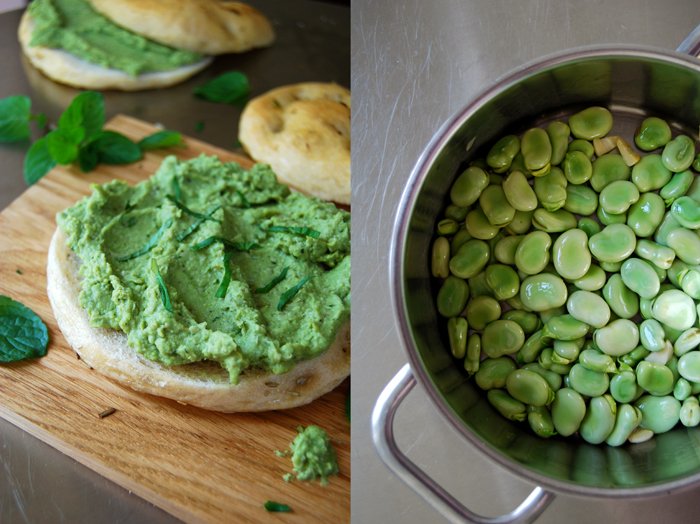
This time, I made a pesto out of my fava beans, cooked only 5 minutes and mixed with garlic, freshly squeezed lemon juice, olive oil and fresh aromatic mint. You could mix it with pasta and some grated Pecorino but I spread it on a sandwich. I covered my juicy focaccia bun with a thick layer which I sprinkled with even more chopped mint leaves.
Fava Bean Pesto and Mint Sandwich
For 4 sandwiches you need
focaccia or soft buns 4 (you could also use thick slices of ciabatta bread)
fava / broad beans, peeled out of the pods, in their shells, 900g / 2 pounds for around 260g / 9 ounces of peeled beans
garlic, quartered, 1 clove
water 100ml / 3.5 ounces
freshly squeezed lemon juice 3 teaspoons
olive oil 1 tablespoon plus more for frying
fresh mint, chopped, 1/2 - 1 teaspoon
salt and black pepper
In a sauce pan, fry the garlic in a little oil on medium heat for 1 minute and mix in the beans. Add the water, season with salt and pepper, close with a lid and simmer for 5 minutes. With a slotted ladle (you will need some of the liquid), take the beans and garlic out of the pan and purée in a blender (or with a stick mixer) together with 1 tablespoon of the liquid from the beans, the lemon juice ,1 tablespoon of olive oil and 1/2 teaspoon of mint. Season with salt, pepper and mint to taste and spread voluptuously on your sandwich.
Pizza Bianca with Moroccan Lemons, Chèvre and Rosemary
When I wrote about my Moroccan Preserved Lemons about a month ago, Kelly from My Soulfull Home got in touch. I met Kelly through a blog tour in February which she had organised. She asked me to join the tour together with 15 other bloggers, it was carnival and I shared my family's Berliner experience. A few weeks ago she told me about a delicious pizza bianca with lemons and rosemary which one of her friend's makes and she told me that I should give it a try as soon as my lemons were ready. Here they are, sour, soft and juicy!
When I had the first piece of my own preserved lemons in my mouth, I felt a bit excited! My aunt was with me in my kitchen, she was the one who inspired me to preserve lemons in the first place. The first bite was intense, a bit salty as I forgot to rinse the slice of lemon, too much excitement! When I let some water rinse off a bit of the saltiness (for 2-3 seconds), they were perfect! The preserving liquid, concentrated juices of all the lemons, tastes as good and is great for strong sauces and stews.
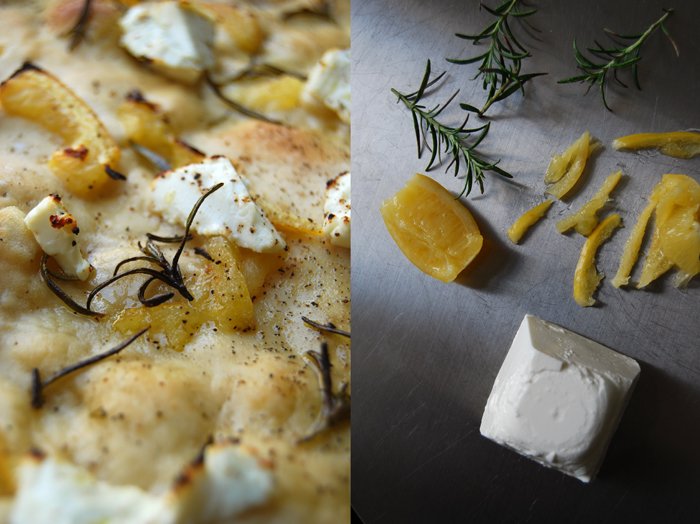
For my pizza bianca, I decided to add some chèvre to mix its smooth milkiness with the lemon's sourness and the woody rosemary. Ricotta would have worked too, but I wanted the strong aroma of this soft goat cheese. I sprinkled some olive oil on top which gave it a bit of a focaccia feeling, some sea salt and pepper and enjoyed this absolutely delicious summery snack. Thank you Kelly!
If you like pizza as much as I do, you can also try my Aubergine and Pecorino Pizza or my Spinach and Ricotta Pizza.
Pizza Bianca with Moroccan Lemons, Chevre and Rosemary
I always start to prepare the dough 2 hours before I bake it to give it enough time to rise. I bake my pizza on a hot baking sheet which has a similar effect to a pizza stone.
For 1 large pizza (size of 1 baking sheet) you need
For the topping
chèvre or ricotta, 200g / 7 ounces
preserved lemon, rinsed and thinly sliced, 1(you could also use lemon zest)
fresh rosemary, the needles of 5 sprigs
olive oil 4-6 tablespoons
salt and black pepper
For the dough
plain flour 350g / 12.5 ounces plus more for mixing
dry yeast 1 package (for 500g / 1 pound of flour)
water, lukewarm, 190ml
olive oil 3 tablespoons
salt 1 teaspoon
Combine the flour with the yeast and salt, add the lukewarm water (you might not need all of it) and olive oil. Mix with your dough hooks for a few minutes. The dough shouldn’t be moist and sticky at all, more on the dry side. Continue kneading and punching with your hands until you have an elastic dough ball, not too hard, not sticky. Put the dough back in the bowl, cover with a tea towel and let it rise in the warm oven (35°C / 95°F) for 40 minutes. This works really well but make sure that your oven is set to top/ bottom heat and not to fan.
When the dough is well risen, roll it out on a very well floured working surface (this is very important or you'll have problems taking it off again). It should be a bit smaller than the size of your baking sheet. Cover with a tea towel and let it rise for another 10-15 minutes.
The pizza
Set your oven to 260°C / 500°F. My oven has a special pizza setting but you can use top / bottom heat as well. Put the baking sheet on the bottom of your oven to heat it (for around 10 minutes).
Take the hot baking sheet out of the oven, turn it around and place it carefully on two stable wooden boards or mats as it will be very hot. Place your risen dough carefully but quickly (best done by two people) on the baking sheet, push it gently into place if necessary. Sprinkle with the slices of lemon, rosemary and olive oil and dollop the chèvre with a tea spoon on top.
Put the baking sheet back into the oven, on the bottom again, and bake for a few minutes until the pizza is golden, season with salt and pepper.
Vichyssoise with crunchy Garlic Chips
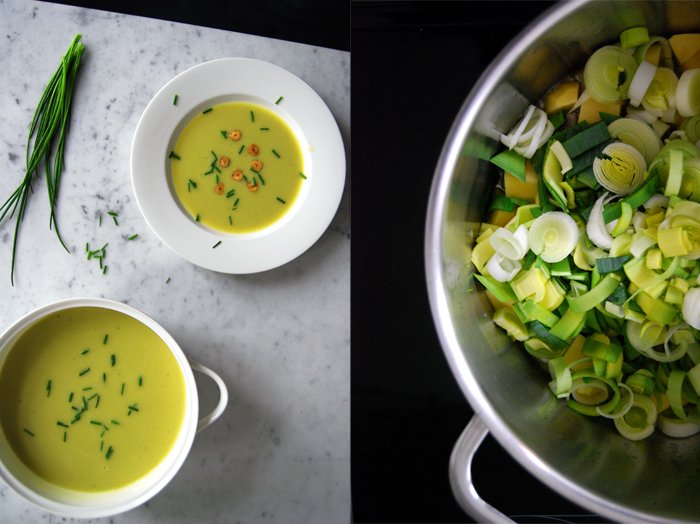
Velvet in a bowl, vichyssoise! This traditional soup is made with only a few ingredients, potatoes, leek, heavy cream and broth besides the spices which were garlic, bay leaf, salt, pepper and nutmeg in my case. There is an ongoing dispute if the recipe is a French or an American invention. Louis Diat from a French town close to Vichy who was a chef at the Ritz Carlton in New York claimed that he cooked the first vichyssoise in the early 20th century, in remembrance of his mother's and grandmother's cold potato and leek soup. The first written proof is found in 1923 in French culinary magazines which relate it to the American cooking. Either way, it's such a simple yet delicious soup and one of the first recipes I made on my own when I started cooking.
I always preferred to eat this soup warm and not cold as I'm not too fond of cold soups in general. My vichyssoise is quite leeky and light, I go easy on the cream and want the vegetable's flavours to be prominent. My addition of garlic and bay leaf is also a variation on the original recipe. That's what recipes are for, to evolve and adapt them to your own taste!
Vichyssoise with Garlic Chips
For 4 people you need
potatoes, peeled and cut into cubes, 450g / 16 ounces
leek, sliced, 350g / 12.5 ounces
vegetable or chicken broth 1300ml
heavy cream 75ml
bay leaf 1
nutmeg, freshly grated
salt and pepper (black or white, as you prefer)
butter 1 tablespoon
olive oil for frying
garlic, thinly sliced, 4 cloves, for the topping
chives, snipped, a small bunch, for the topping
In a large pot, heat the butter and a splash of olive oil and sweat the potatoes and leek for a few minutes. Add the broth and spices and simmer for 25 minutes on low heat. Take out the bay leaf and purée the soup in a blender or with a stick mixer. Whisk in the cream and bring to a boil, cook for about 5 minutes and season with salt, pepper and nutmeg to taste.
In a sauce pan, heat a splash of olive oil and fry the slices of garlic for a few seconds until golden and crisp on both sides. Don't burn them as they will taste bitter.
Either serve the soup immediately, sprinkled with the garlic chips and chives, or let it cool and chill in the fridge.
White Asparagus wrapped in Crêpes with Sauce Hollandaise
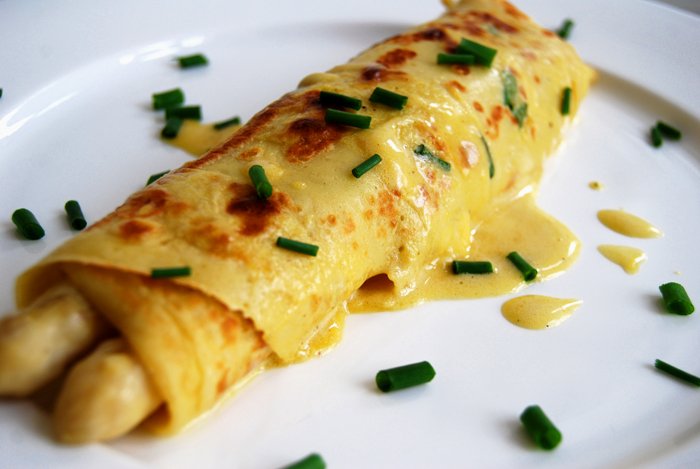
A bag full of white asparagus is laying on my kitchen top, so crunchy and fresh, that its juices start running as soon as I cut the bottoms off. Their short season which ends in late May or early June has just started. It's a delicate gem, also referred to as the royal vegetable, white gold or edible ivory. While green asparagus grows above the ground, the white shoots stay covered in soil and ripen in the dark which prevents photosynthesis, hence the white colour. This technique is called blanching in horticulture, it creates a delicate flavour and makes them tender and less bitter. Unlike their green relatives, white asparagus has to be peeled and also needs to cook a little longer, around 8 minutes to keep them al dente.
One of the most common recipes which puts the focus on the pure taste of the asparagus, is white asparagus served in brown butter with breadcrumbs and slices of cooked ham and new potatoes on the side. A very popular variation on this meal which is also my favourite, is to replace the butter with a sauce Hollandaise, homemade of course as it's not as complicated as one may fear. The taste of this sauce, buttery, eggy, enhanced with Dijon mustard and lemon brings the best out of this royal vegetable. There is some helpful information put together on Food52 for dressings which demand emulsification like sauce Hollandaise or aioli.
I wrapped my first white asparagus of the year in thin crêpes with chives and baked them with a thick and fluffy sauce Hollandaise under the grill, just for a few minutes until it had a golden bubbly crust.
White Asparagus wrapped in Crêpes with Sauce Hollandaise
For 4 people you need
white asparagus, peeled, the bottoms cut off, 1.5kg / 3 pounds
In a large pot, cook the asparagus in plenty of salted water for about 8 minutes till al dente.
For the crêpe
organic eggs 4
milk 400ml
plain flour, sieved, 200g / 7 ounces
salt 1 teaspoon
chives, chopped, 1 bunch
Whisk or mix the ingredients for the pancakes until well combined, stir in the chives at the end. Fry the crêpes thinly in a large non-stick pan in a little butter for 1-2 minutes. They should be golden on both sides.
For the sauce Hollandaise
butter melted 120g / 4.5 ounces
organic egg yolks 4water 4 tablespoons
freshly squeezed lemon juice 2 tablespoons
Dijon mustard 2 tablespoons
salt and black pepper
In a sauce pan, whisk the egg yolks with the water, lemon juice, mustard, salt and pepper for the sauce Hollandaise till fluffy. Put the pan on a low temperature, the pot should become warm but not hot. Whisk the melted butter into the egg mixtures, adding just a tablespoon at a time and whisk well in between. If the sauce becomes too hot, take it off the heat immediately or add a little more water. When its all combined continue whisking for 1-2 minutes, off the heat if it's already thick and creamy or on the heat, but mind the temperature. Season with salt and pepper and more mustard to taste.
For the crêpe roll
Roll 2-3 asparagus in each crêpe, put the wraps flat onto a large baking dish and pour the sauce over it. Bake under the grill for a couple minutes until the sauce starts bubbling and turns a golden brown. Serve immediately.
If you don't need all of the sauce for the asparagus you can keep it in the fridge until the next day and eat it with potatoes or mixed in an omelet, both are great with chopped chives!
Cucumber Salad with Dill and Sour Cream Dressing
Lots of amazing food was gathered on my own and on my friend's and family's tables in the past couple days, we enjoyed some special culinary treats, had a great time, and of course ate lots of sweets, cakes and chocolate. No complaints but it's time for a break! I love to feast for days, especially together with the ones I love. Treating others and myself to good homemade food, spending time together at a long table, trying out and sharing new recipes, I need and appreciate this so much. It's like taking a break from the daily routine when time is tight and work is always waiting. These feasts caress my soul, I treasure these moments highly and most of the time they become my most beloved memories!
But each feast has its end, otherwise it wouldn't be so special. Therefore I gladly enjoy a light salad, simple and quick. It combines a lot I love about spring, juicy and tasty cucumber which is such a pleasure after months of watery winter cucumbers, fresh dill, strong and aromatic, and a smooth dressing with sour cream and lemon. For the two of us, I sliced 1 small cucumber very thinly and dolloped my milky dressing over it. I whisked 2 heaped tablespoons of sour cream with 1 tablespoon of olive oil and 2 tablespoons of heavy cream and added 1 tablespoon of freshly squeezed lemon juice, salt, pepper and a pinch of sugar. This is just a rough guideline, adjust the ingredients to your own taste, or add some more herbs like chives or parsley or some other vegetables like cherry tomatoes or lettuce. I was happy with my puristic combination, just cucumber, the dressing nicely balanced between sweet, sour and milky, and some freshly chopped dill sprinkled on top.


