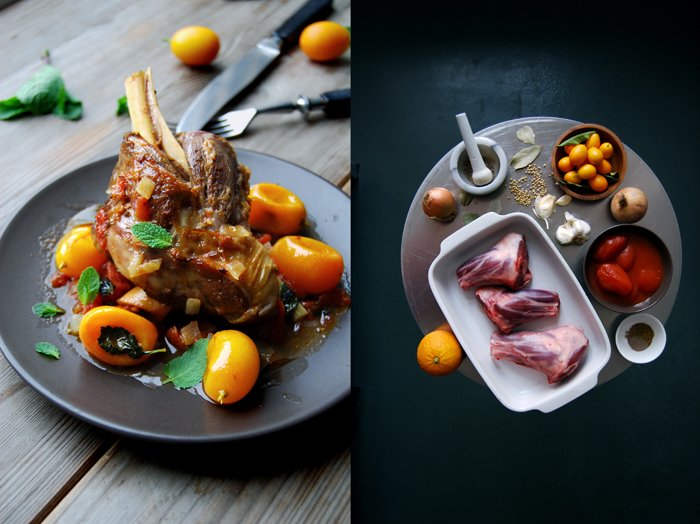
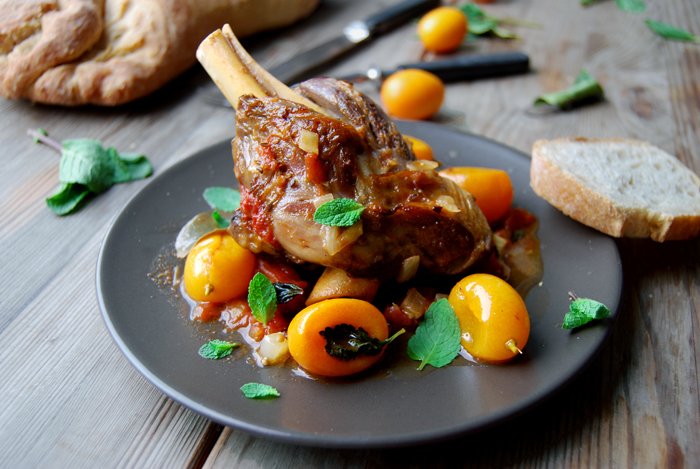
Braised Lamb Shanks with Kumquat, Fennel, Cardamom and Mint
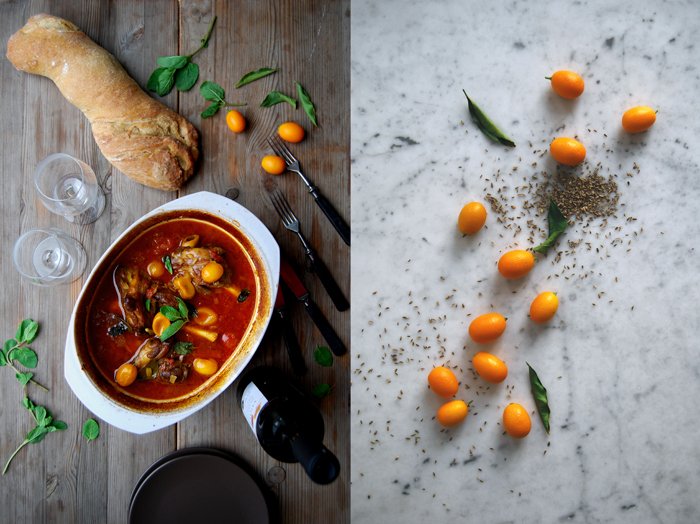
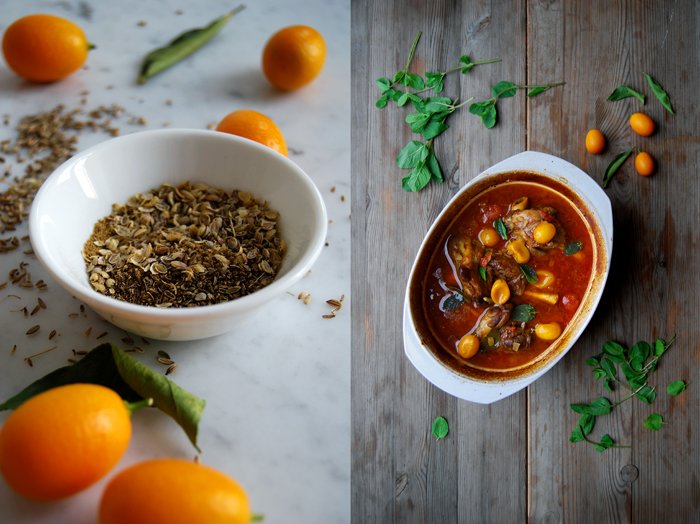
This is the most tender, aromatic and colourful braised dish you can possibly have on your plate at this time of year, at least in the Northern hemisphere. Cardamom, cumin, fennel and coriander seeds refine the deep red juices of summery (tinned) tomatoes cooked with succulent lamb shanks before tiny yellow kumquats add their bittersweet fruitiness. The fresh mint leaves on top are more than just pretty in this warming composition, their job is to freshen it up! A sheer explosions of aromas!
Over the years, I have become a big fan of shanks in my kitchen whenever I'm in the mood for a stew. Be it beef, veal or lamb, I prefer this cut over chuck steaks. The meat around the bone is packed in fat which keeps it juicy and tender while it braises in a fragrant broth of wine, fruit and vegetables. Shanks usually taste quite strong, they can easily deal with spices and herbs, perfect for Mediterranean comfort cooking with lots of rosemary, thyme, sage and garlic, or to find some inspiration in the Arabic cuisine. All those spices, those warming corns, pods and powders, cumin, turmeric, cayenne, cinnamon and many more, this is the best moment to let their qualities shine. Spices are great on their own but even better in a team. Be experimental, combine your favourites and use a little bit more than you usually would, the meat and sauce can take it!

Braised Lamb Shanks with Kumquat, Fennel, Cardamom and Mint
You need an oven proof dish / casserole dish with a lid for this recipe.
For 3-4 people you need
lamb shanks 3-4
fennel seeds, crushed in a mortar, 2 teaspoons
coriander seeds, crushed in a mortar, 1 teaspoon
ground cardamom 1 teaspoon
ground cumin 1 teaspoon
medium onion, finely chopped, 1
garlic, cut in half, 4 cloves
white wine 400ml / 1 pint
tinned tomatoes of good quality (it's worth going for a good brand!) 400g / 14 ounces
bay leaves 2
orange peel 4 long strips
kumquats, rinsed, 8
sea salt and pepper
olive oil
fresh mint leaves, a small handful
Set the oven to 160°C / 320°F.
In a casserole dish, heat a splash of olive oil and sear the shanks for a few minutes until golden brown on all sides. Take the meat out and set it aside but keep the casserole dish on the heat. Add a little more olive oil and the fennel seeds, coriander, cardamom and cumin, cook for about 20 seconds on medium heat or until you smell the spices, stir constantly. Add the onions and garlic and cook for 1-2 minutes. Mix the lamb shanks with the spices and onion and pour the wine over the meat. Season with salt and pepper. Add the orange peel, bay leaves and tomatoes, chop them roughly, mix everything and bring to a simmer. Close the casserole dish with a lid and cook in the oven for 1 1/2 hours. Add the kumquats (whole, not cut) and cook for another 30 minutes or until the meat is tender and you can lift it with a fork off the bone.
If necessary, take out the meat when it's done and cook down the sauce. Season to taste and serve with fresh mint leaves and thick slices of white bread or flatbread.

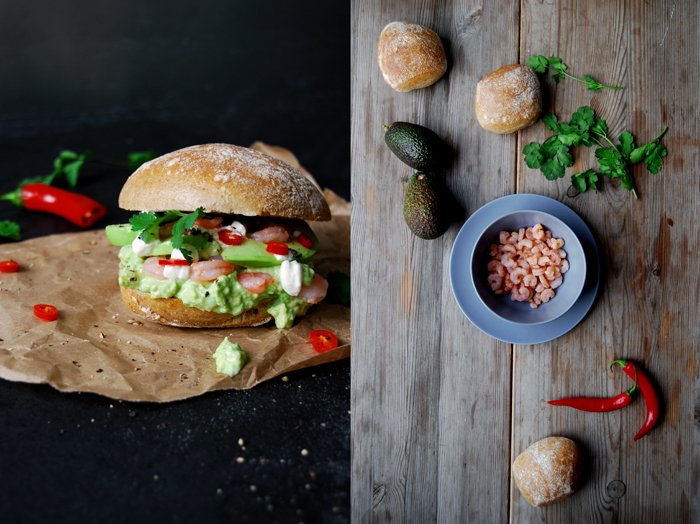
Shrimp Sandwich with Cumin Guacamole, Coriander and Chili Peppers
Sometimes I sit in my kitchen, or on my sofa in the living room, I close my eyes and imagine food. Just food. I can see colourful ingredients, vegetables, seafood, spices and herbs, or beautiful dishes carefully prepared on plates. I don't have to do anything, these pictures appear naturally in front of my inner eye. It's a helpful gift and the reason I never fear running out of inspiration, as long as I take my time to sit down with a cup of tea, relax and let go my kitchen ideas will come to me.
Culinary daydreams are fun and I particularly enjoy the ones about new sandwich creations. It makes me feel like a child in a toy shop. I can pull any ingredient out of the imaginary shelf, mix wildly and create whatever comes to mind on the plates, or I can keep it simple and work (or dream) minimal. Fruit and ripe cheese is always a great match, but there's so much more, sweet and salty, creamy and crunchy, sour and spicy, fresh and aged aromas, there are endless possibilities.
It's an exciting process as I never know how it will taste until I finished taking the last picture and enjoy the first bite. Some recipes are hard to imagine but I always follow my gut feeling (literally) and that's quite reliable. Today I felt like cumin guacamole, it's a great fusion of this distinctive spice and the wonderful velvety fruit, they truly bring out the best in each other! I merged this duo with the salty taste of the sea, fresh herbs and some hot spiciness. Shrimp, avocado, coriander and red chili peppers stuffed between a bun, my daydreaming was right, it was delicious!


Shrimp Sandwich with Cumin Guacamole, Coriander and Chili Peppers
For 2 sandwiches you need
buns, cut in half, 2
shrimps, cooked and peeled, 100g / 3.5 ounces
small ripe avocados, peeled, 2
sour cream 3 tablespoons
freshly squeezed lemon juice, to taste
a pinch of cumin
salt and pepper
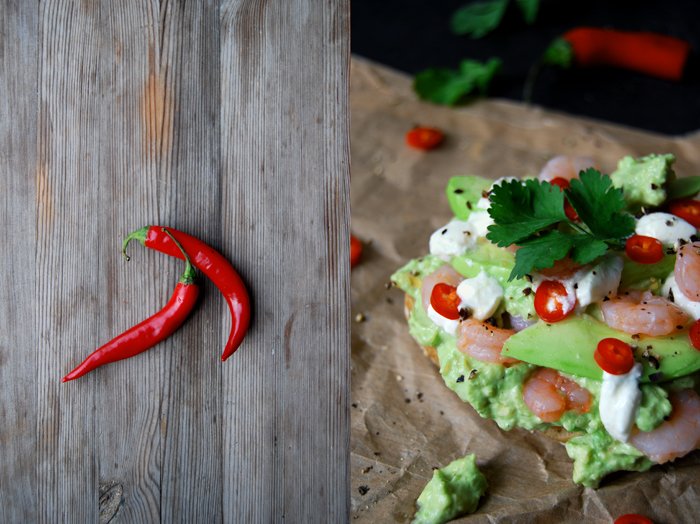
fresh red chili pepper, thinly sliced, 1
fresh coriander leaves, a small handful
black peppercorns, crushed in a mortar, for the topping
Cut 1 avocado into slices, chop the second one with a fork and mix with 2 tablespoons of the sour cream. Season with lemon juice, cumin, salt and pepper to taste.
Divide the guacamole between the 2 buns and spread it voluptuously on the bottom half. Lay the shrimp and avocado slices on top and sprinkle with the remaining sour cream, the chili pepper, crushed pepper and coriander leaves. Enjoy!


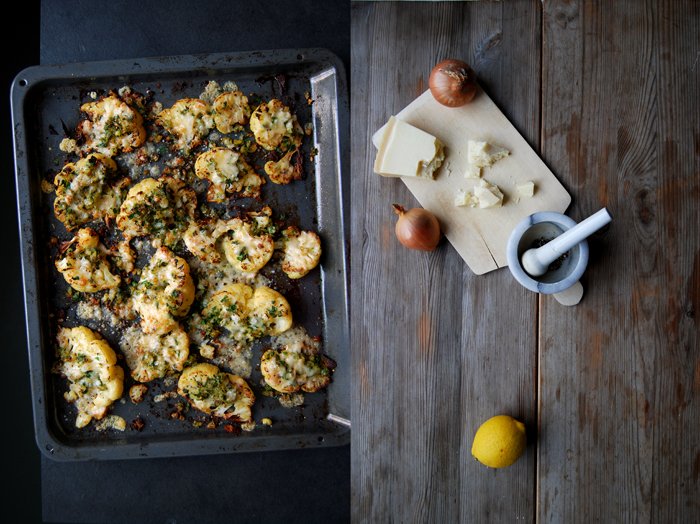
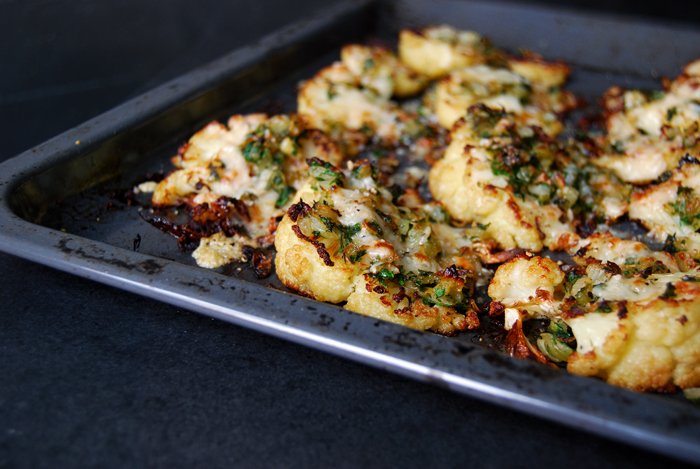
Oven Roasted Cauliflower Wedges with Parmesan, Parsley and Onions
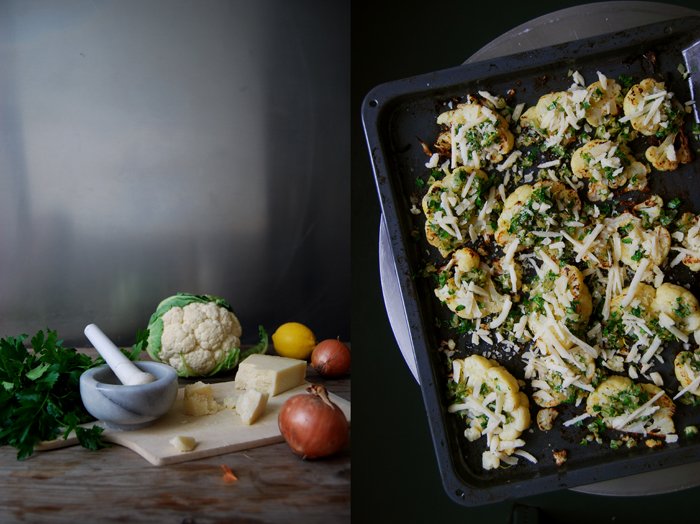
Oven roasting creates certain flavours and aromas in vegetables that you'd never achieve with other cooking techniques like blanching or sautéing. Sometimes it just adds a little finesse to the root, cabbage or squash's own qualities, but in some cases it puts the whole experience on another level. Aubergines are a great example. To me, they show their most delicious side when brushed with olive oil, sprinkled with sea salt and crushed black pepper before they reveal their whole impact under the grill. The exceptional taste of a slice of perfectly grilled aubergine is the best that can happen to this fruit, in my eyes!
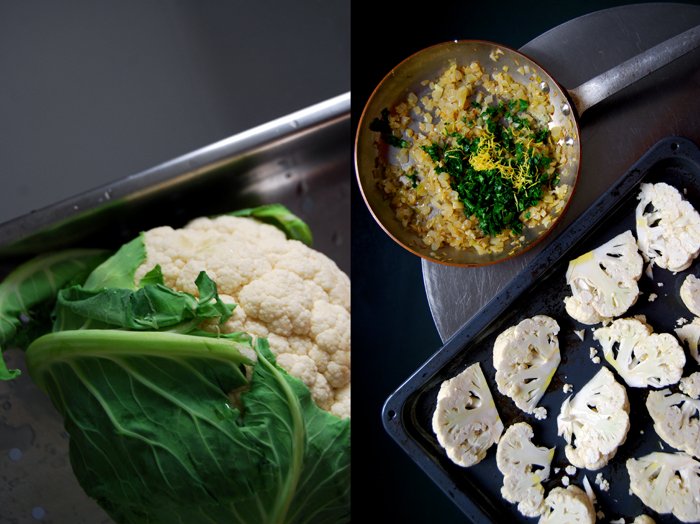
A few days ago, I wrote about my low enthusiasm for cabbage this winter, I'm just not in the mood, but still, I had to buy this little head of cauliflower cuteness when I saw it at the market. Sometimes you just need to the see and smell the food on your plate to wake up the taste buds. Oven roasting came to mind and seemed like the right approach to deal with this pretty vegetable. I remembered my baked fennel with homemade sausage I wrote about a year ago, I topped the blanched bulbs with a crust of fried onions, garlic, parsley and parmesan and roasted them under the oven. I prepared my cauliflower the same way, added some lemon zest but left out the pre-blanching. Cut into slim wedges, they only needed 15 minutes to turn into crunchy bites, al dente and with the wonderful aroma of all the roasted flavours.

Oven Roasted Cauliflower Wedges with Parmesan, Parsley and Onions
For 2-3 as a main or 4 as a side dish you need
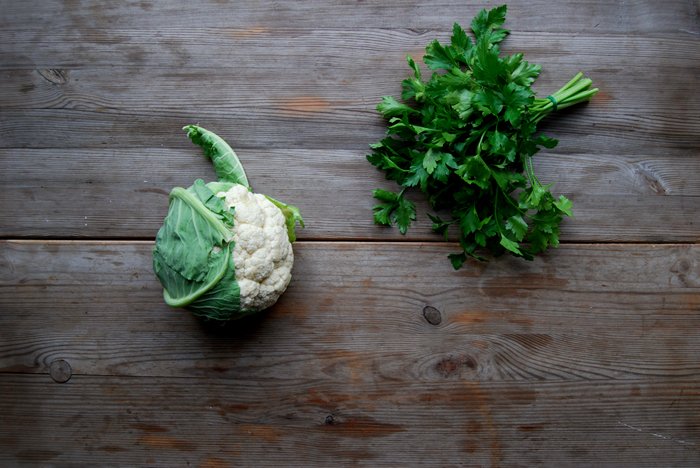
small cauliflower, cut into slim wedges, 1
medium onions, finely chopped, 2
garlic, crushed, 2 big cloves
fresh parsley, chopped, 3 heaping tablespoons
lemon zest 1 teaspoon
Parmesan, freshly grated (coarse, not fine), 80g / 3 ounces
olive oil 4 tablespoons plus more for frying
coarse sea salt
black peppercorns, crushed in a mortar, to taste
Set the oven to 220°C / 430°F (I used the Rotitherm setting).
Heat a splash of olive oil in a pan and cook the onions for a few minutes until golden and soft. Add the garlic and cook for another minute, stir in the lemon zest and parsley and set aside.
Spread the cauliflower wedges on a baking sheet and coat them with 4 tablespoons of olive oil. Sprinkle with sea salt and pepper and roast in the oven for 10 minutes. Turn the wedges and roast for another 5 minutes. Cover the cauliflower with the onion parsley mixture and sprinkle with Parmesan. Bake for 4-5 minutes or until golden brown.
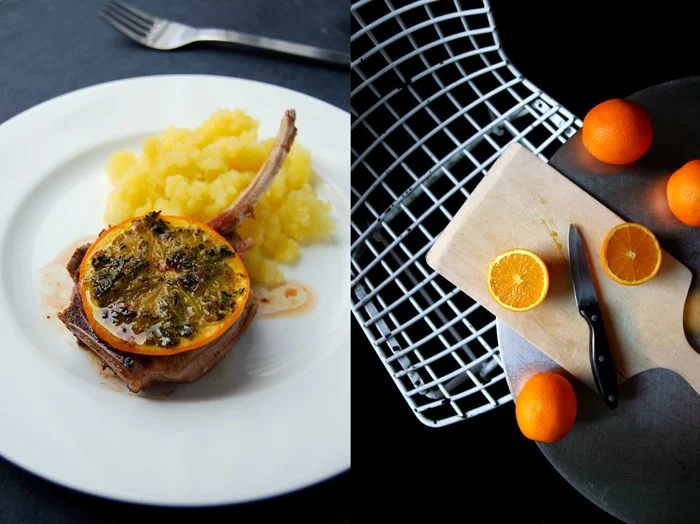
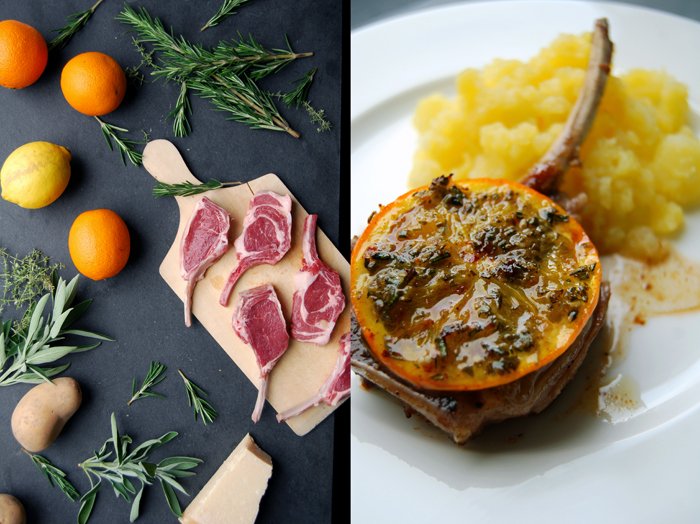
Lamb Chops with Orange-Herb Crust & Mediterranean Mashed Potatoes

When the popular German food magazine Lust auf Genuss asked to feature eat in my kitchen in their February print issue I was more than excited. This magazine is a culinary gem! Their fantastic team creates so many amazing recipes and shares detailed information about our every day ingredients. I really love their special columns about wine makers and other fascinating food producers and their delicious products, just reading through the pages and seeing the pictures makes me want to cook!
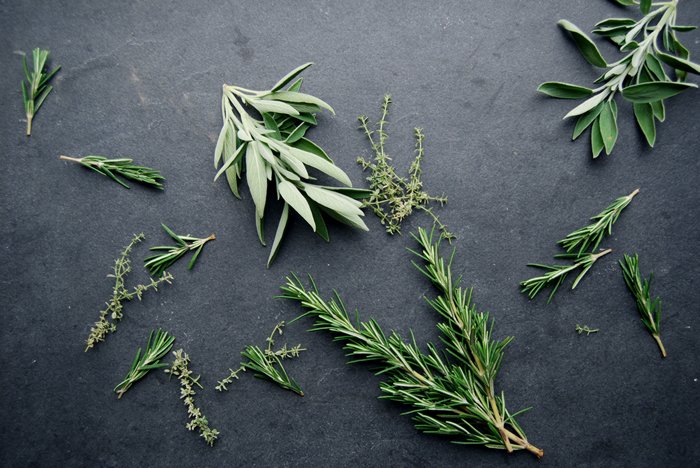
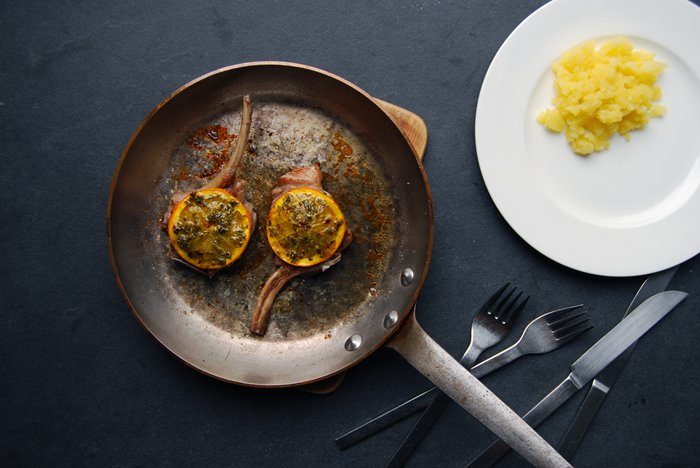
I was very lucky, this month's issue was about citrus fruits which made my pleasure even greater, there is barely a recipe without oranges, lemons or tangerines coming out of my kitchen at the moment. So a whole magazine dedicated to my beloved powerful fruits felt like the perfect surrounding for a feature about me and the blog, especially because I was asked to contribute a new recipe which wasn't on the blog yet. My first choice was guinea fowl with lemon ricotta stuffed under the skin but the magazine's own cooking team had a similar recipe in mind. Lamb chops were next on my list. Easter is close and there'll definitely be lamb on the table at one point, it also combines wonderfully with citrus flavours. It seemed just perfect. The decision for the final recipe was actually made in the forest, during an afternoon walk with my mother. We chatted about the feature and within seconds the idea was set: the chops quickly seared and topped with a thin slice of orange then finished under the grill. The orange coated in a layer of chopped, fresh herbs (rosemary, thyme and sage) mixed with parmesan and olive oil. The ripe cheese creates a fine crust in the oven and adds its wonderful aroma to the composition.
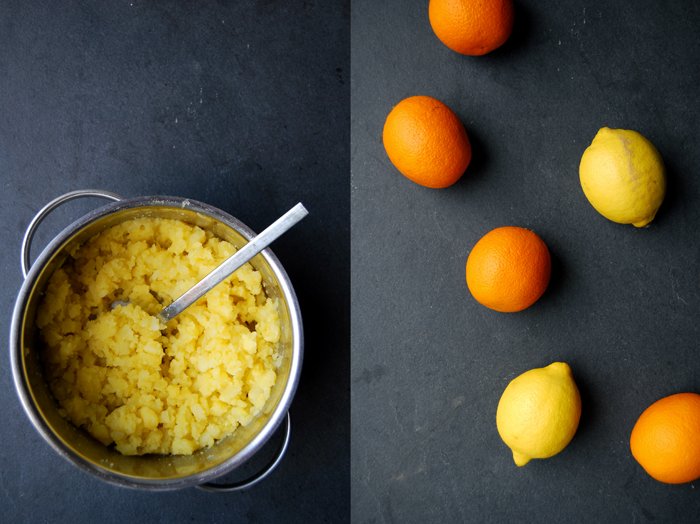
I served the lamb with lemony Mediterranean mashed potatoes to keep it pure and simple, just olive oil, sea salt and a bit of lemon zest chopped with a knife into the roots. This is the right meal to get into the mood for spring and all its culinary pleasures!

Lamb Chops with Orange Herb Crust & Mediterranean Mashed Potatoes
For 2 people you need
For the lamb chops
lamb chops (1 1/2-2cm / 3/4" thick) 6, about 450g / 16 ounces
organic orange, ends cut off, very thinly sliced, 1 (you'll need 6 slices)
olive oil 3 tablespoons plus more for frying
mixed fresh herbs (rosemary, sage, thyme), finely chopped, 1 tablespoon
freshly grated aged Parmesan 2 tablespoons
salt and pepper
Set the oven to grill (broiler), the oven has to be hot when you put the meat in.
Whisk the olive oil, herbs and Parmesan and coat 6 slices of orange generously with the herb oil on both sides. Heat a splash of olive oil in a pan and sear the lamb chops over a high heat for 1 minute on each side. I like them rare, keep them in the pan for another 30 seconds if you prefer them medium. Take the pan off the heat and season with salt and pepper. Lay 1 slice of herb coated orange on each piece of meat and put the lamb chops under the hot grill for about 1 minute (just let cheese melt and the rind turn golden brown). Serve with the mashed potatoes.
For the mashed potatoes
potatoes, peeled and cooked in salted water, about 400g / 14 ounces
olive oil 50ml / 2 ounces
lemon zest 1 1/2 teaspoons
sea salt
Chop the warm potatoes with a knife until they have a lumpy texture adding the oil constantly. Stir in the zest and season with salt.

Grilled Endive, Ham, Raclette and Pear Sandwich
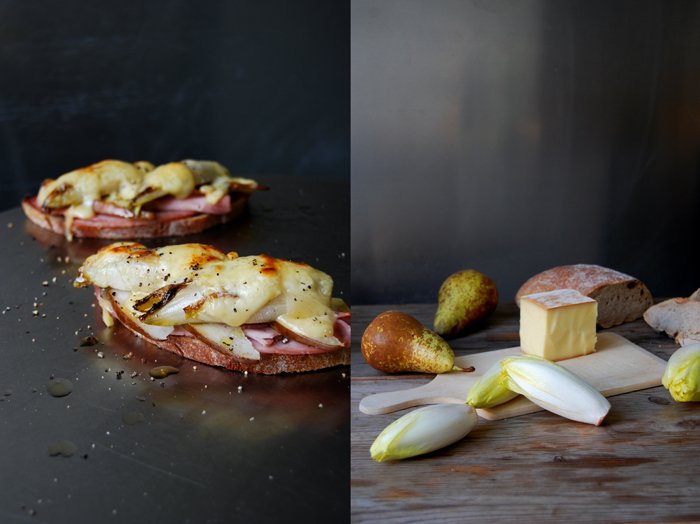
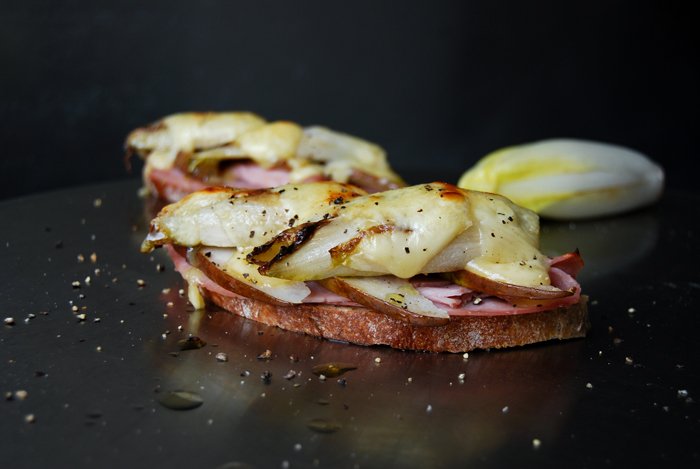
The thought behind this sandwich is simple: 1. I love the bittersweet combination of endive and pear, 2. the rustic duo of ham and endive gives me a cosy feeling which I desperately crave in February and 3. melted hearty raclette fits to (almost) everything. Just the idea of combining these four ingredients in a grilled sandwich sounded so promising that I could barely wait to take the first bite of my new creation. Usually, I'm quite disciplined while I take pictures for my posts but this time I truly suffered behind the camera. It didn't really help that the smell of this little beauty was even more tempting than its mouthwatering good looks, it was quite a cruel teaser!
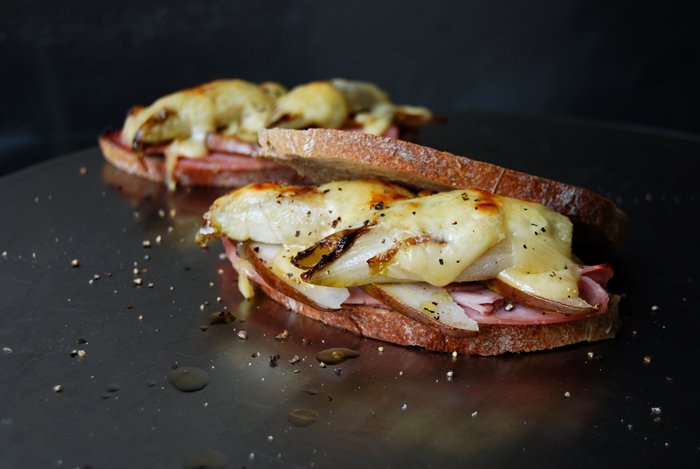
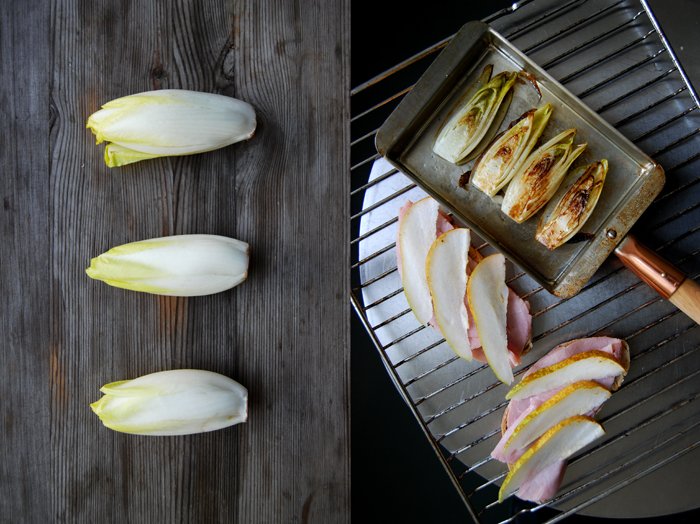
The result was so pleasing that I quickly prepared a second batch as the first one went down so well. You can use any hard cheese for this sandwich as long as it melts well and tastes strong enough to stand up next to the other ingredients. I can imagine a ripe blue cheese or camembert would be just as good. I'm a big fan of raclette, its powerful aroma is just made to merge with vegetables, meat or pasta. This Swiss cheese is far from being shy without being obtrusive, and it forms these little smoky bubbles under the grill which smell and taste fantastic. The preparation is quick and easy, I sautéed the endives on both sides before I stacked them on a rustic bun between ham, pear wedges and a generous slice of cheese. Just a few minutes under the grill and the raclette took over my kitchen!
Grilled Endive, Ham, Raclette and Pear Sandwich
For 2 sandwiches you need
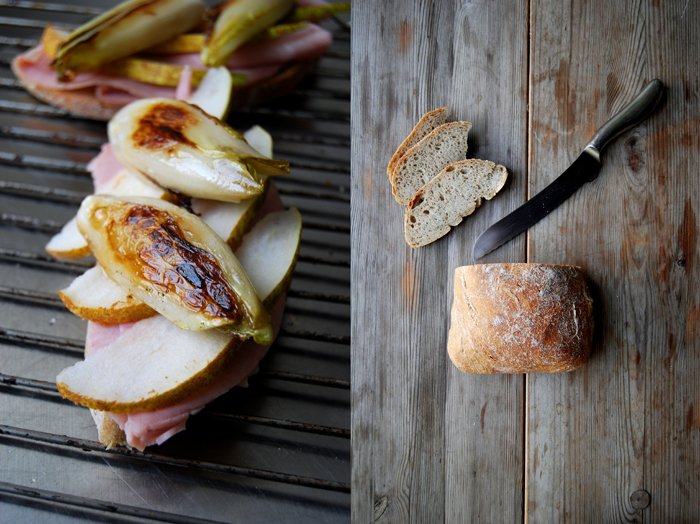
sourdough bread 4 slices
small Belgian endives, cut in half (lengthwise), 2
ham 4 slices
pear, cut into thin wedges, 1/2
raclette cheese, sliced, 80g / 3 ounces
black peppercorns, crushed in a mortar, for the topping
salt
olive oil
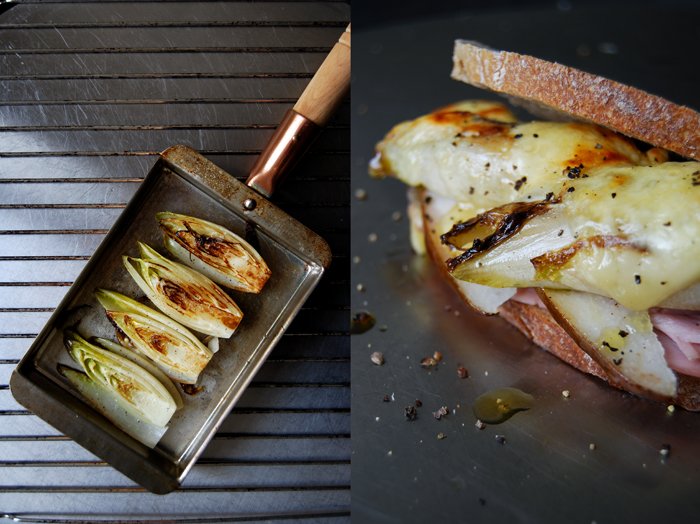
Heat a splash of olive oil in a pan and sauté the endives on medium heat for 1-2 minutes on each side, season with salt and pepper.
Lay 2 slices of ham on a slice of sourdough bread, spread the pear on top and finish with the sautéed endive. Spread some cheese over the vegetable and continue with the second sandwich. Put both sandwiches under the grill for a few minutes or until the cheese starts bubbling. Sprinkle with pepper and enjoy!


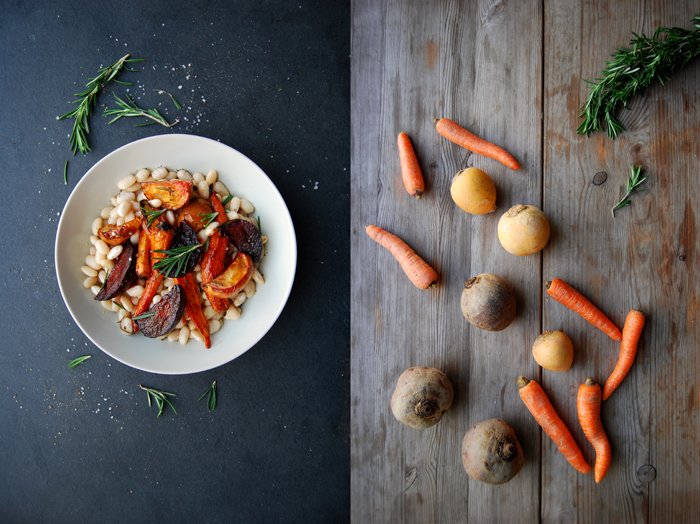
Rosemary Butter Beans with Maple Roast Roots

I don't know why but this winter I didn't really get into the mood for cabbage. Give me beans, lentils, all kinds of legumes and I'm happy. And whenever I pulled roasted roots out of my oven I was almost ecstatic, but cabbage, unfortunately, left me a bit uninspired. This is quite unusual for me, I would sometimes cook it every week in big batches in the cold season, cauliflower, kale, red cabbage heads and savoy, my freezer was always full with leftovers from my various cabbage creations.
I believe that you should follow your taste, your gut feeling in life. Whatever your appetite calls for stands for something that your body needs at that moment, not only when it comes to food. Lets leave out the excessive consuming of chocolate and cakes, this doesn't count in my train of thought, that's more for the soul rather than for the body, which is as important. My appetite definitely calls for legumes and roots! There weren't many cabbage recipes on eat in my kitchen this winter, just three, my Ginger Lemon Ricotta stuffed Cabbage Rolls, Savoy Cabbage with Coriander and Maltese Sausage and the Christmassy Roasted Red Cabbage with Orange Wedges. Roots, beans and lentils, that's what I put into my pots and pans most of the time.
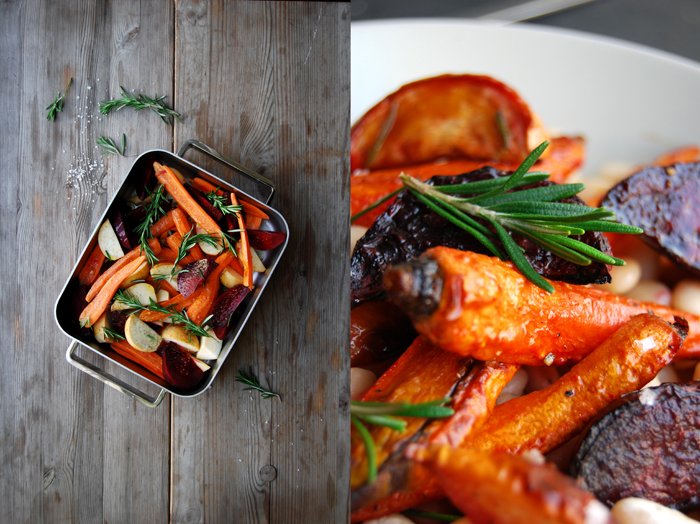
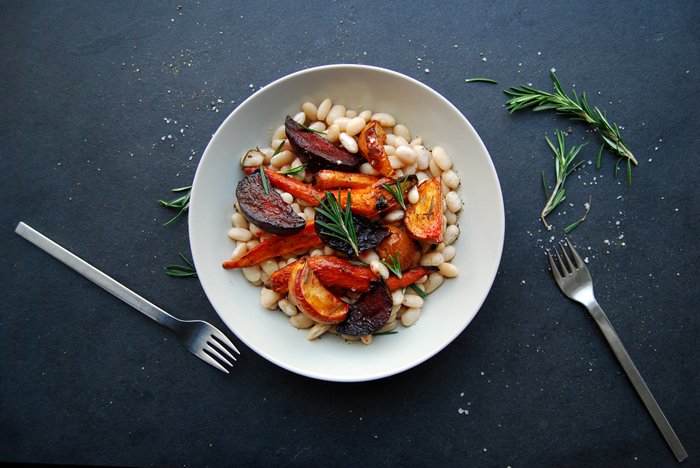
Today's recipe combines both, velvety butter beans cooked with rosemary and caramelized mixed roots roasted in the oven in sticky maple syrup olive oil. The carrots, beetroot and Navet roots (yellow turnip) were still a bit crunchy and just as good when they were cold. This was our energising snack together with yesterday's olive oil bundt cake while we remodeled the kitchen. This dish works as a warming meal or a rich salad, just prepare a bigger batch and enjoy it for days!

White Rosemary Beans and Maple Roast Roots
For 3-4 people you need
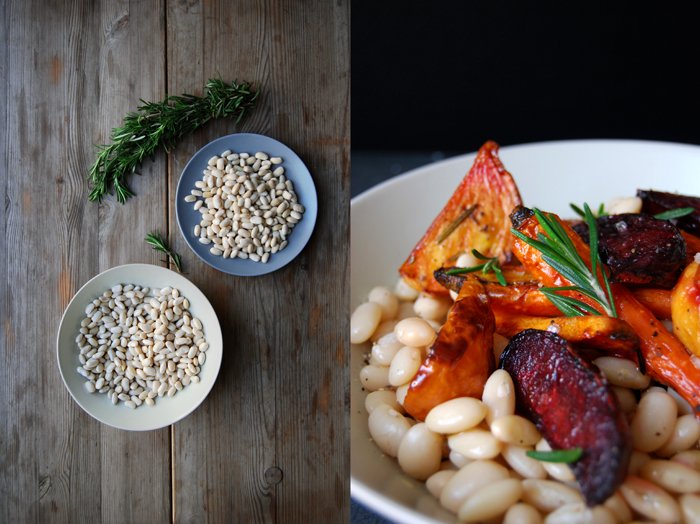
dried butter beans, soaked in lots of water overnight, 250g / 9 ounces
broth to cook the beans (or 1 carrot, 1/4 celery root and 1/4 leek)
fresh rosemary, a small bunch
Navet roots (yellow turnip), cut into wedges, 3 (or 1 small rutabaga, peeled)
medium beets, peeled and cut into wedges, 2
carrots, peeled, cut in half (lengthwise), 10
cloves of garlic, in their skin, 6
olive oil 6 tablespoons
maple syrup 1 tablespoon
balsamic vinegar 1 teaspoon
coarse sea salt and pepper
In a large pot, cook the beans in enough broth - or in water with the carrot (cut in half), celery (peeled) and leek (cut in half) - for about an hour, don't add any salt. Add a sprig of rosemary in the last 15 minutes. When the beans are done take them out with a slotted ladle and mix them with 1 tablespoon of olive oil, balsamic vinegar, salt and pepper. Season to taste.
Set the oven to 200°C / 390°F (I used the Rotitherm setting).
Whisk 5 tablespoons of olive oil with the maple syrup and pepper. Spread the Navet roots, beets, carrots and garlic in a large baking dish or on a tray and coat them with the maple oil, add a few sprigs of rosemary. Sprinkle the roots generously with coarse sea salt and roast in the oven for about 45 minutes or until golden brown and al dente, turning them every 15 minutes. Serve on top of the beans.

Homemade Malloreddus Pasta with Parmesan Butter
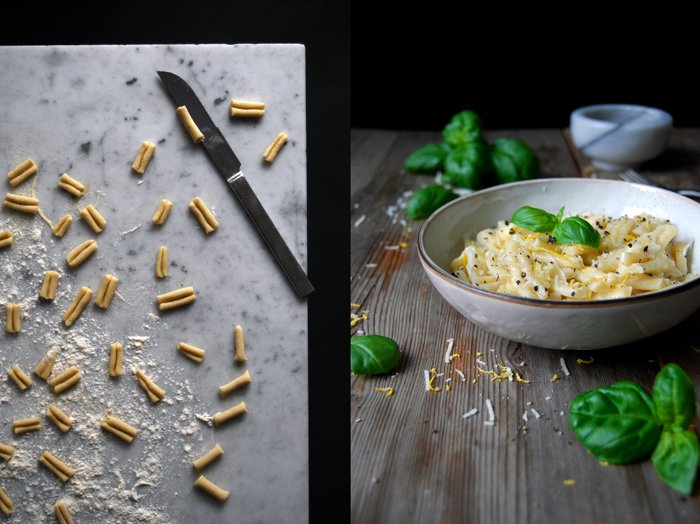
When I make my own malloreddus pasta at home, with a glass of Chianti in reach and crackling vinyl on the record player, I'm almost in Italy. Shaping pasta without a machine is pure meditation and it's just as relaxing. The dough is firm yet elastic and it feels so nice to roll it in your hands to a thin sausage shape. It takes a while, this isn't a 10 minute dinner, it's not something to have on the table as soon as possible, this is slow food, literally. Some people like to knit or sew, repair old radios or play an instrument to calm down, I like to roll my pasta.
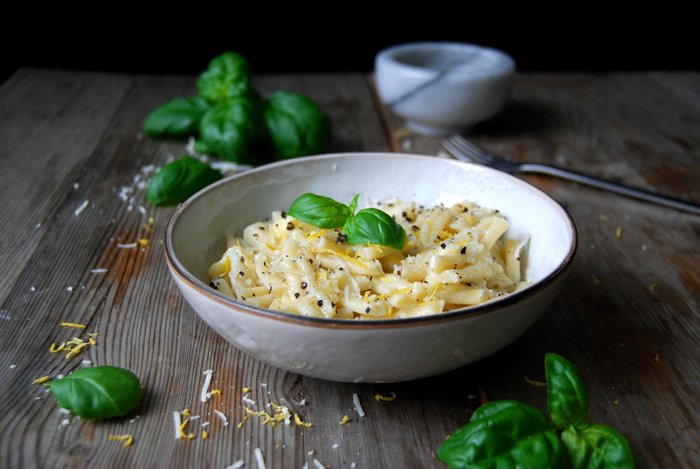
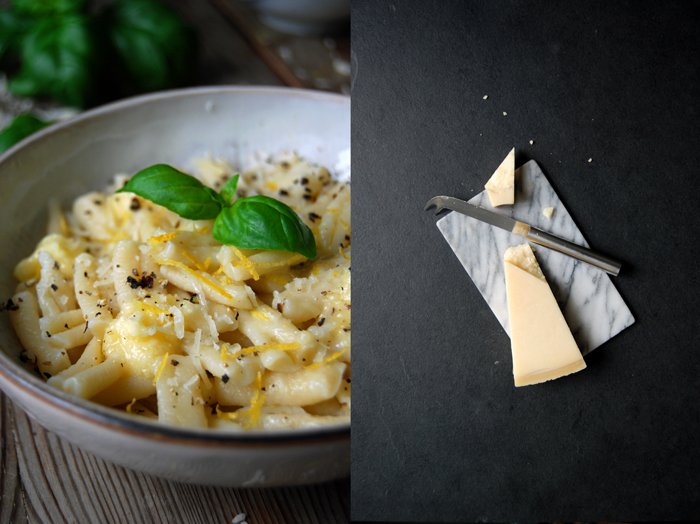
Malloreddus is an old Sardinian pasta made of semolina flour often refined with saffron. Traditionally, it's rolled over a ridged surface that gives it a similar look to gnocchi and led to the second name, Gnocchetti Sardi. I learned another technique, here the pasta is pressed against the back of a knife which gives it a slightly bend shape, perfect to collect all kinds of sauces and meaty juices. Today I kept it simple, I wanted to enjoy the pure and honest taste of the semolina pasta so I just made a velvety parmesan butter. This is one of the many culinary tips from my mother, we visited her last week and I came home with lots of recipes and enough inspiration for the next few months. Her parmesan butter is mixed in a blender and unfolds a beautiful aroma when it's stirred into the pasta, it just needed some lemon zest, fresh basil and crushed pepper - Italian perfection!
Malloreddus with Parmesan Butter
For 2-3 people you need
durum semolina flour 300g / 10 1/2 ounces
plain flour 50g / 2 ounces
salt 1 teaspoon
water 170ml / 6 ounces
olive oil 1 tablespoon
black peppercorns, crushed in a mortar, to serve
flaky sea salt, to serve
lemon zest, to serve
fresh basil leaves, to serve
freshly grated Parmesan, to serve
For the Parmesan butter
butter, at room temperature, 40g / 1 1/2 ounces
freshly grated Parmesan 40g / 1 1/2 ounces
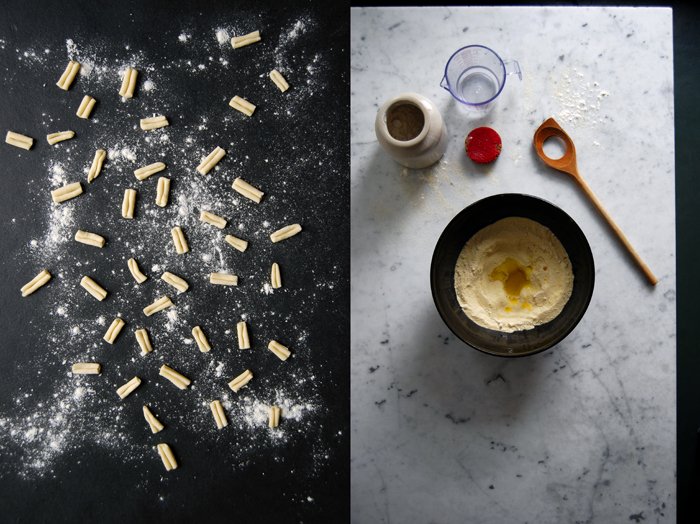
Combine the semolina, flour and salt, make a well in the centre and add the water and olive oil. Mix with the electric mixer or a spoon until combined. Continue kneading with your hands for a few minutes until elastic, the dough shouldn't be sticky but firm and stretchable. Form a ball and wrap it in cling film. Let the dough rest at room temperature for at least 30 minutes. You could also keep it in the fridge for a few hours.
Take a small piece of dough (keep the remaining dough wrapped) and roll it between your hands or on the kitchen top until it's about 7mm / 1/4" thick. Cut it into 2cm / 3/4" pieces and press them against the back of a knife (lengthwise). If you prefer the traditional ribbed surface you can roll the single pasta over a gnocchi ridger. Keep the malloreddus on a floured baking sheet and continue rolling the remaining dough.
In a large pot, bring salted water to the boil and cook the malloreddus for 4-5 minutes or until al dente.
Mix the butter and Parmesan in a blender (or with a tablespoon) until smooth.
Serve the pasta on warm plates mixed with a spoonful of the Parmesan butter, salt, pepper, lemon zest and basil.


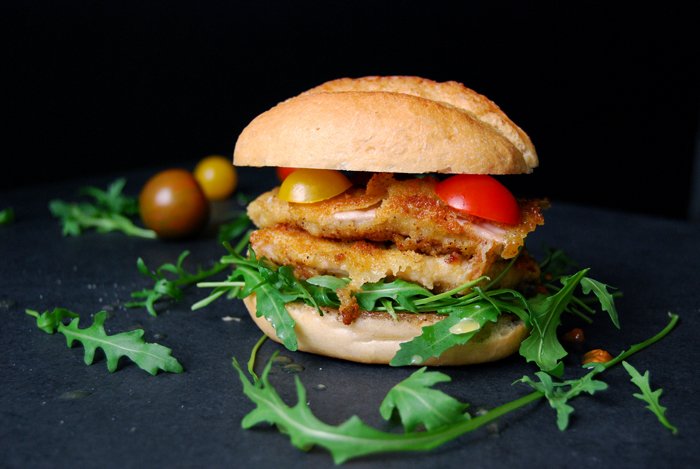
Schnitzel Sandwich with Lemon Butter, Rucola and Cherry Tomatoes

If you ever want to seduce a (non vegetarian) man, make schnitzel, and if you want to be 100% sure that he'll definitely fall for you, make a schnitzel sandwich! There must be something in this rustic snack that men absolutely love. When I fry schnitzel, I always prepare a bigger batch as I know that the leftovers are more than welcome the next day. To see the satisfaction in someone's face after the first bite of this breaded piece of meat stuffed in a bun is impressive. If the man of your heart is a true schnitzel connoisseur this will send him straight to culinary heaven!
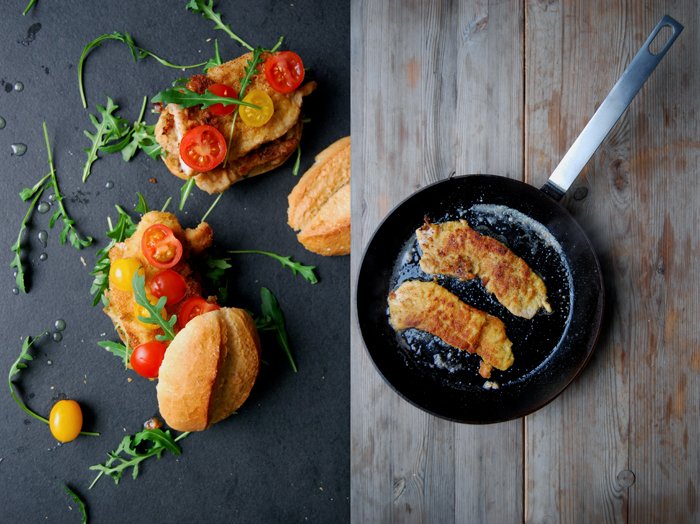
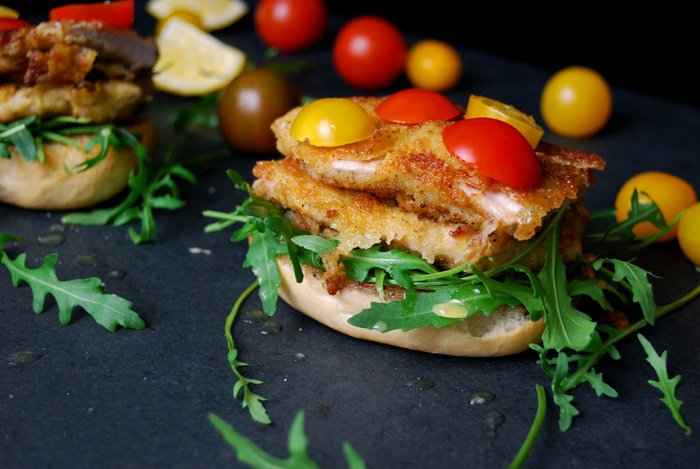
You could put the cold meat on a slice of white bread and keep it simple which is already delicious, or you could take it to the next level. Serve the schnitzel warm, fresh out of the sizzling pan and combine it with crunchy rucola and sweet cherry tomatoes. I drizzled lemon butter over it and that made it absolutely irresistible!
Here's another one of my schnitzel recipes with Swabian potato salad!

Schnitzel Sandwich with Lemon Butter, Rucola and Cherry Tomatoes
For 2 sandwiches
white buns, cut in half, 2
schnitzel, 5mm / 1/4″ thin, lightly pounded, 2 (each about 125g / 4.5 ounces)
organic egg, beaten, 1
dry breadcrumbs
plain flour
butter 1 tablespoon for the lemon butter plus 1-2 tablespoons to fry the schnitzel
freshly squeezed lemon juice 1 tablespoon
cherry tomatoes, sliced, 6-8
rucola, a small handful
olive oil
salt and pepper
In a large heavy pan, heat a generous splash of olive oil and 1-2 tablespoons of butter over a high temperature, the bottom of the pan should be covered. Prepare 3 large, deep plates, fill one with the egg, the other with flour and the last with breadcrumbs. Lightly dust and turn the meat in the flour first, then turn it in the egg and finally, quickly turn it in the breadcrumbs until covered. Fry the schnitzel for 1–2 minutes on each side until golden brown. Season with salt and pepper and take the meat out of the pan. Dip the inside of the buns into the pan and let them soak the juices.
In a saucepan, warm up 1 tablespoon of butter and the lemon juice. Take it off the heat when it's hot.
Spread some rucola leaves on the bottom of each bun and put the schnitzel (cut in half) on top. Drizzle the lemon butter over the meat and lay a few tomato slices on top. Close the bun, squeeze it and enjoy in good company!


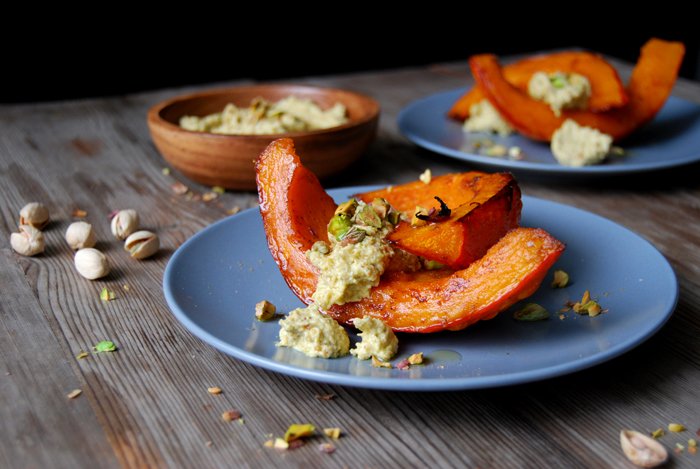
Oven Roast Pumpkin with Pistachio Cumin Feta
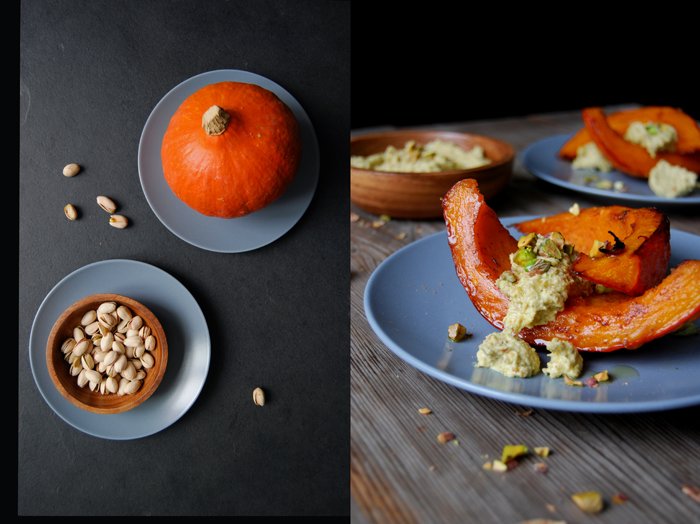
Oven roasted pumpkin has always been on the top of my list of winter favourites but I recently found out about a combination which makes this dish even more tempting: pumpkin, pistachios and feta cheese!
The woman who introduced my taste buds to these culinary highs wrote a wonderful cook book called Persiana which I happily found under our Christmas tree. Sabrina Ghayour managed to come up with an amazing collection of beautiful recipes from the Middle East and beyond that caught my attention from the first page. Her family's Iranian background combined with the fact that she grew up in England, let the self-taught chef create magical and manageable recipes praising her big culinary love, the Persian cuisine, by using ingredients that can easily be found at every supermarket. I find great relaxation and inspiration in this little gem, in the way she talks about food in general and about single aromas in particular.
Although I didn't have the time to cook many of her creations yet, I already read through the book three or four times. Her butternut squash with pistachio pesto, feta and pomegranate struck me every time I passed the page.
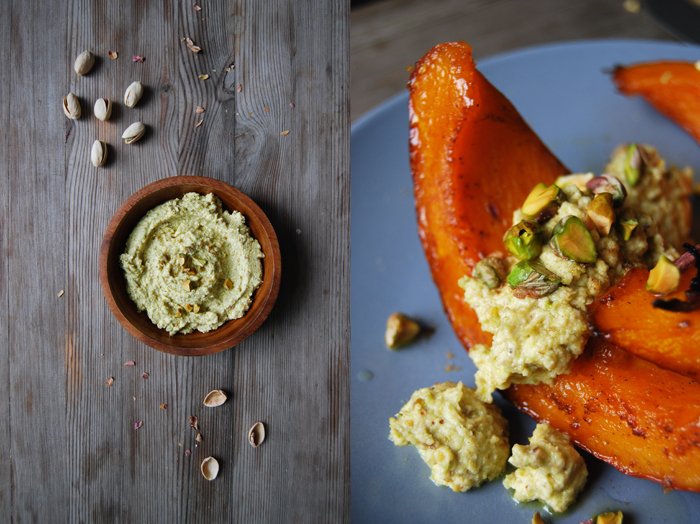
I rarely follow cook books to the letter, I love to work with them and develop my own ideas, that's what happened with Sabrina's butternut dish. I roasted Hokkaido wedges the way I always do and added a little cumin to the olive oil which is very nice with the squash's sweetness. Her pesto didn't make it into our dinner, but I whipped salty feta cheese with lots of pistachios, olive oil and cumin to a thick dip that I served on top of the warm squash. The combination of nutty, sweet and salty aromas is simply brilliant!
Oven Roast Pumpkin with Pistachio Feta Cheese
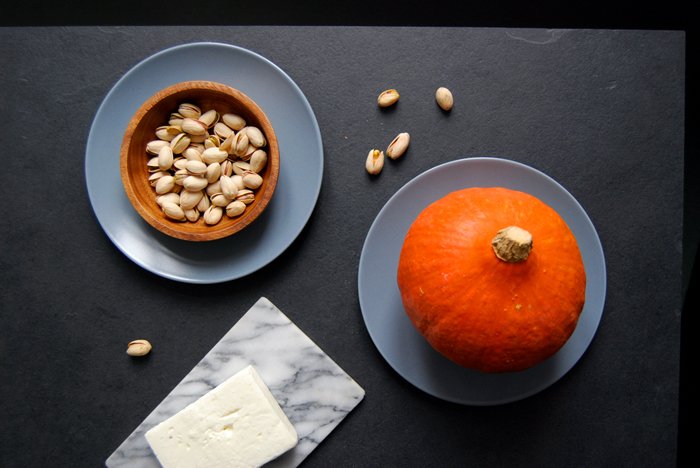
For 4 people you need
Hokkaido pumpkin or butternut squash, cut in half, the seeds and fibre scraped out, 1kg / 2 1/4 pounds
feta cheese 180g / 6 1/2 ounces
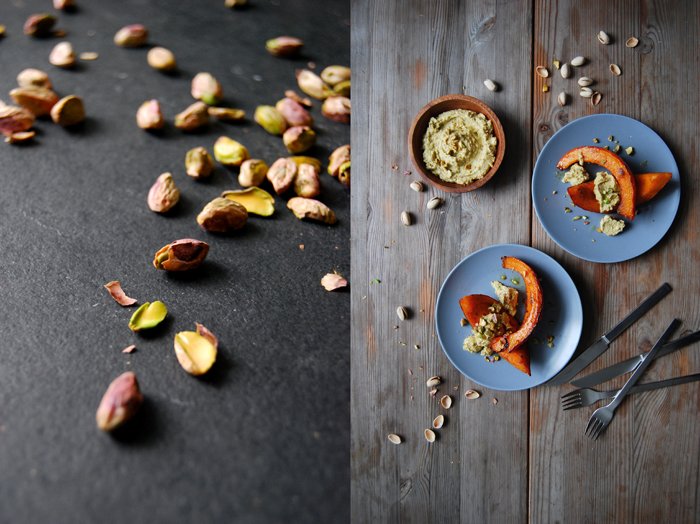
pistachios (in their shells) 200g / 7 ounces
olive oil 50ml / 1 3/4 ounces plus 3 tablespoons for the feta
ground cumin
coarse sea salt and pepper
Set the oven to 200°C / 390°F.
Cut the pumpkin into large wedges, don't peel it. Whisk 50ml (1 3/4 ounces) of olive oil with pepper and 1 teaspoon of cumin. Spread the pumpkin in a baking dish and coat with the spice oil. Sprinkle the wedges with salt and bake in the oven for 15 minutes. Turn the wedges and cook for another 7 minutes (Hokkaido) or 15 minutes (butternut) or until golden brown and soft.
Grind 60g / 2 ounces of the peeled pistachios in a food processor and purée with the feta cheese, 3 tablespoons of olive oil and 1/4 teaspoon of cumin until smooth and well combined. Season to taste.
Arrange the warm pumpkin and the pistachio feta on plates. Peel and chop the remaining pistachios and sprinkle them over the cheese. If you like, add a little more cumin (to taste).I
f you choose Hokkaido, you can eat the skin, but if you went for butternut squash, you have to scrape it out of the skin (you can do that on your plate).

meet in your kitchen | Isa's Beetroot Risotto with Chèvre and Mint

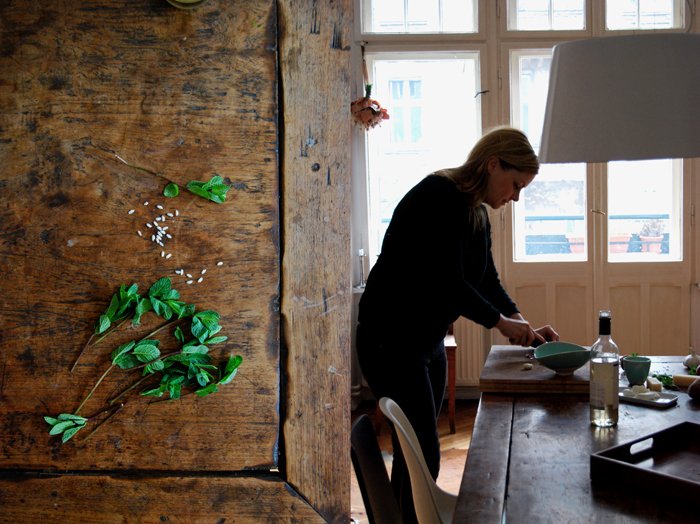
On to part II of Berlin's Hauptstadtmutti cooking session! The popular mother, fashion and lifestyle blog is run by Isa and Claudia, both such vibrant and inspiring ladies that I had to visit both of their culinary spaces. Two weeks ago, I learned how to make Claudia's Ukrainian Pelmeni dumplings (you can read about it here) and now it's time to cook in Isa's kitchen.
It was cold and snowy as I made my way to meet Isa, the city was wrapped in a wintery grey and, although it was already 10 in the morning, it was quite dark when I reached the old house where the young mother lives with her little family of four. The imposing building is one of the few on the street which hasn't been renovated, the facade crumbling between the majestic window frames which gives it quite a morbid charm, you can still see the beauty of the past. It looks a bit like an abandoned house in a fairy tale, it's more than impressive and it sparked my fantasy when I walked up the creaking steps to knock on Isa's wooden door. But then, when I entered her home, I was speechless, endless rooms and corridors, herringbone parquet floors, high ceilings lined with decorative stucco and large windows which let in the most dreamy light. Within seconds I fell in love with this elegant but cosy home!

Isa started Hauptstadtmutti in 2011 together with Claudia. In the first part of our cooking series I talked about their fascinating and complementary personalities which led to the two meet in your kitchen features. Both women share an international upbringing which confronted them with various cultures at a young age. Claudia grew up with an Eastern European background and Isa had quite an adventurous childhood, she lived in Baghdad in Iraq during the first 4 years of her life. Her father was a successful engineer who used to live in East Germany with his wife before his skills took him and his young family to the Middle East to design pump stations. Back in East Germany, he was also involved in the construction of the GDR's first nuclear power station. Despite this experience, or perhaps because of it, the whole family turned to a more alternative lifestyle in the following years. They became politically active, focussed on natural home grown food and raised awareness for healthy living.
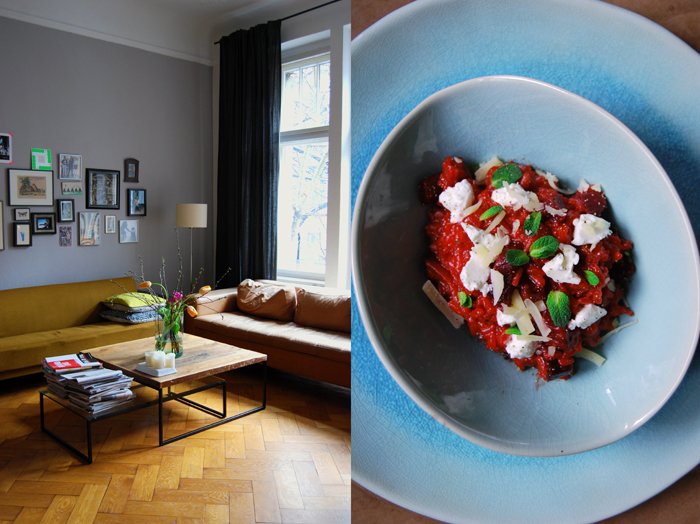
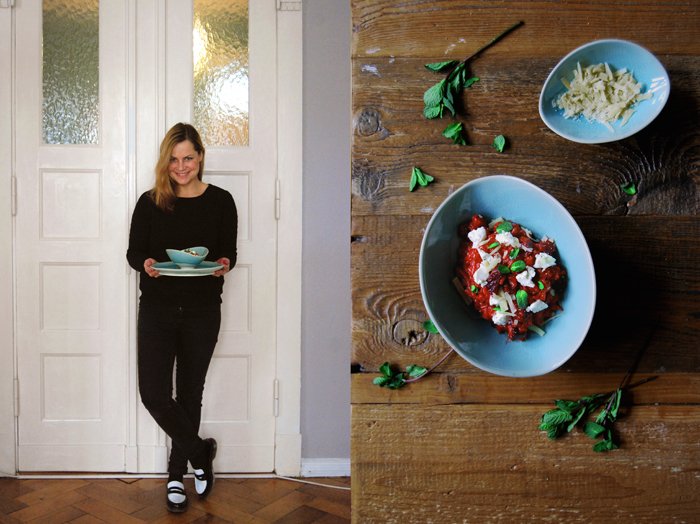
As a teenager, Isa joined yoga and meditation classes together with her father and mother. Today, her parents practice Tai Chi together with their friends in the family's grand garden which is part of an old farm established by Isa's grandfather. The family takes their well-being into their own hands, one generation after the other, and the next one is waiting in line. Isa passes her experiences on to her children and although they are still quite young they can already enjoy her delicious food. Isa's cooking truly pleases the taste buds, she creates culinary moments of bliss without regrets, her food is healthy, with organic ingredients, and full of flavour. She made a fantastic beetroot risotto for me, it was cooked to perfection, the rice corns and roots were al dente, just how I like it. She refined her composition with chèvre, parmesan and fresh mint - a great composition I can only recommend!
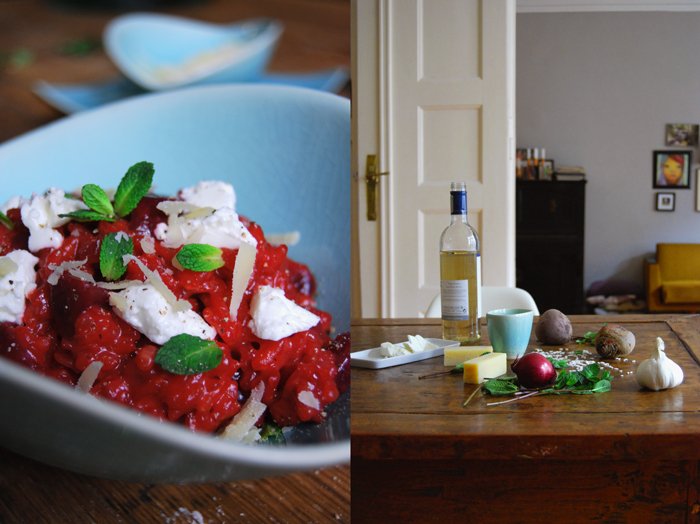
Beetroot Risotto with Chèvre and Mint
For 2-3 people you need
small beetroot 2
risotto rice (Arborio) 250g / 9 ounces
onions 2
clove of garlic 1
honey 1 tablespoon
a shot of white wine
vegetable broth 1/2-1 l / 1-2 pints
freshly grated Parmesan, a handful
butter 1 tablespoon
olive oil
salt and pepper
mint 4 small branches
fresh goat cheese (chèvre), for the topping
Peel the beetroot, garlic and onions and cut them into cubes. The larger the beetroot cubes, the more bite they'll have. Warm up the broth in a saucepan, it should be simmering.
In a large pan, heat some olive oil and cook the onions and garlic until glassy and soft. Add the beetroot and honey to the onion and let it caramelise slightly, add the rice and let it cook for a minute. Deglaze with a splash of white wine and add a ladle of broth. When the liquid has been absorbed add more broth, a little at a time stirring in between. When the rice is al dente, take the pan off the heat. Stir in the butter and Parmesan cheese and let them melt into the rice. Season with salt and pepper to taste and sprinkle with chèvre and mint to serve.

You spent the first three years of your life in Iraq due to your father's work as an engineer before your family moved back to East Germany. How did this experience influence your family and how did it effect your own personality?
Concerning that I should probably explain that my parents were neither in the communist party nor in the homeland security of former East Germany so it was quite a mission for them to get to live and work outside the country. But they made it because of their skills and raised my brother and I to believe that "You can get everywhere if you really want it". That really brought me to a lot of places and made me later want to live in other countries as well. We also have a very open minded attitude towards other cultures in our family.
Do you think traveling is important for children to get to know different cultures and mentalities? Can you give some tips for traveling with young children?
If they are very young I don't know. They will not really remember it. We did not travel too far away with our kids yet. Switzerland, France, Denmark. It is not that stressful for them but sometimes for us, the parents. Sometimes it is more fun to spend a week at the Baltic Sea than to travel for hours and hours. It is always good to have plenty of books with you, especially Wimmelbücher (picture books).
Your parents encouraged a great awareness for natural food and a healthy lifestyle by their own way of living. How did they influence your consumption, your cooking and the food you buy?
Oh yes, my mother was very into healthy food when we were young and still is. She cooks her own jams from the fruits of her garden and we always ate fruits and vegetables from the garden. She always uses fresh and natural ingredients. The older I get, and of course with children, I try to live as healthy as I can too. I usually buy local or organic fruits and vegetables.
You went to high school in the US for one year, what fascinated you about this new culture? What are your culinary memories?
Everybody was very very friendly and I just had a very great teenage time there. Culinary memories? Donuts, cheeseburger, tacos and ice cream (smiling)!
As an au pair in Paris, you also experienced the French cuisine for one year. What did you like about the food there?
It is very pure, many vegetables and beef and lots of seafood. I liked that very much and the oysters. I learned how to eat oysters. Delicious!
Did your cooking change since you became a mother? Do you have any tips to make cooking for and eating with young children easier?
I really changed into organic and local food. Eating with young children is easy. I always cooked the baby food by myself. This is totally easy and does not take a long time. What I learned is that young children want a variety and a change of food every day. They do not like to eat the same thing every day over and over. My tip is to always try to eat the same as your kids. They copy you and will (often) try more.
What was the first dish you cooked on your own, what is your first cooking memory?
The first dish was Spaghetti Bolognese. I learned this when I was 12 when my mother was away for an allergy cure and our father taught it to my brother and I.
As a fashion observer and blogger, which are your 3 most helpful fashion tips for young mothers?
1. Always carry a large scarf for nursing in public.
2. Get a new haircut. It makes you feel good.
3. Buy at least 3 shirts or dresses which make nursing comfortable.
Where do you find creative inspiration?
In Berlin, walking around the city and on the internet reading international blogs and magazines.
What are your favourite places to buy and enjoy food in Berlin?
I love to eat at Cordobar. Great food and the largest selection of wine. And I like to buy food at Mitte Meer.
What did you choose to share on eat in my kitchen?
Beetroot risotto.
If you could choose one person to cook a meal for you, who and what would it be?
Janine (a friend), roasted root vegetables.
You're going to have ten friends over for a spontaneous dinner, what will be on the table?
Risotto!
What was your childhood's culinary favourite and what is it now?
Spaghetti Bolognese and now it is fish, especially Sushi.
Do you prefer to cook on your own or together with others?
Together with others.
Which meals do you prefer, improvised or planned?
Planned.
Which meal would you never cook again?
Octopus.
Thank you Isa!


Spice Roast Chicken Legs with Butter Beans and Mint

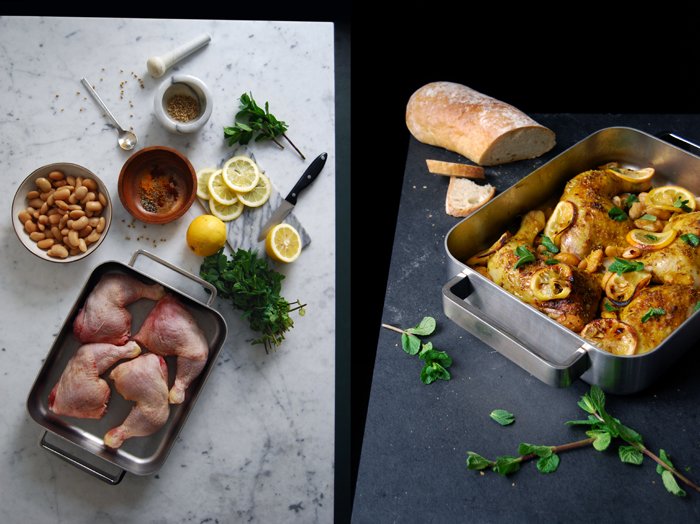
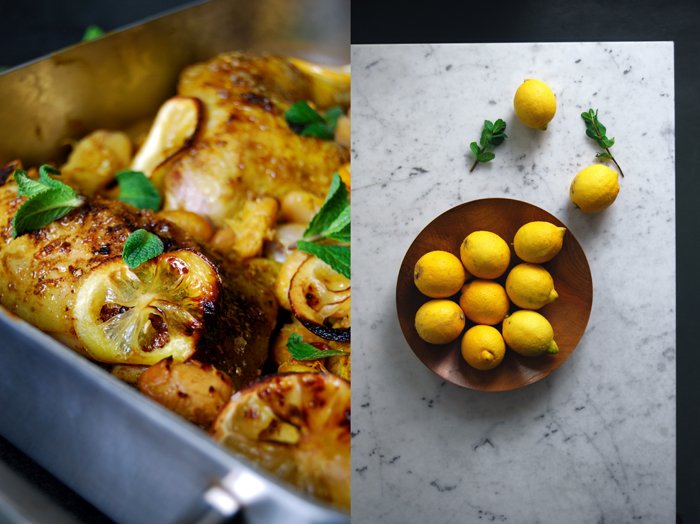
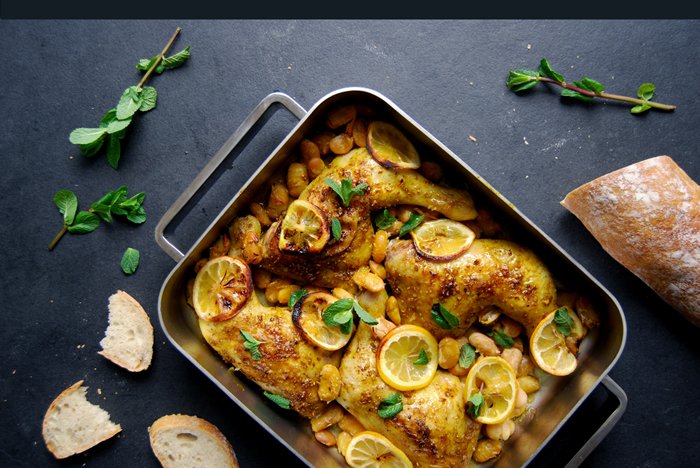
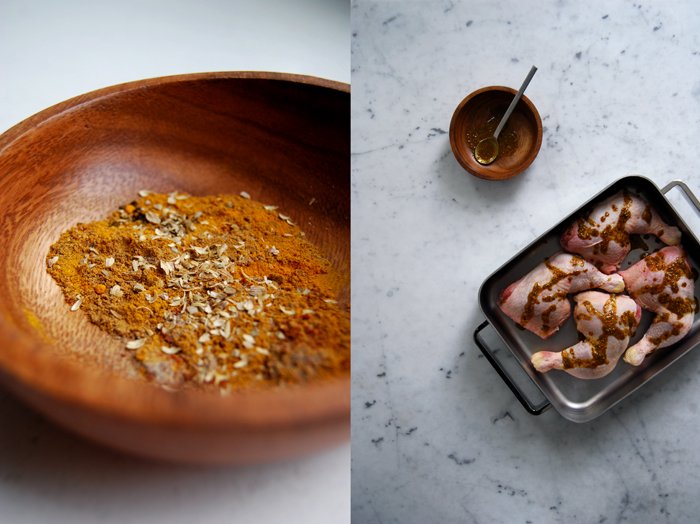
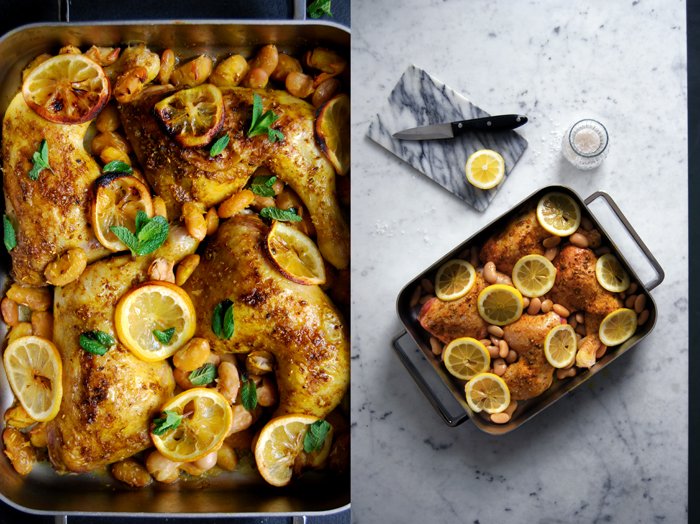
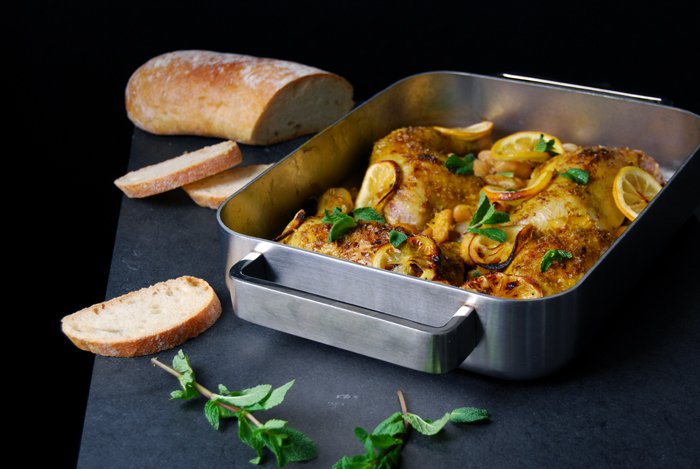
Five tasty C's: coriander seeds, cumin, curcuma longa (turmeric), cardamom and cayenne pepper! The list of spices for my roast chicken legs is long but each single one adds its strong character to the aromatic result. I mixed a generous amount of their fragrant qualities into a golden marinade made of olive oil and lemon juice to let them infuse the chicken's sizzling skin while cooking in the oven. The air in the kitchen smelled just wonderful and so did the meat when I put the tray onto the table. I also cooked some slices of lemon and butter beans in the spiced oil, the legumes skin burst and their velvety, soft inside mixed with the juices. It literally asked to be soaked with fresh ciabatta bread!
My mother often makes chicken legs in larger quantities when she has many people staying at her house, when my cousins visit to help her in the garden, or when her grandchildren visit and she isn't up for an extensive dinner. I completely understand why, this dish is the ultimate comfort food, it's easy to prepare (all you have to do is put the chicken legs on a tray and cook them in the oven) and you can easily customize the recipe. In late summer I cooked chicken legs with Moscato wine, grapes and thyme and in spring I glazed the skin with honey and roasted the meat with carrots and sage. You could also adjust my chicken with spiced peaches and work with the legs instead of the whole bird and enjoy the fruit's sweetness together with the tender poultry. There are so many options! Sometimes my mother just cooks it with olive oil, salt, pepper and garlic, plain and simple. Just the idea of sitting in her garden eating the chicken leg with my fingers makes my mouth water!
Spice Roast Chicken Legs with Butter Beans and Mint
For 2-4 people you need
chicken legs 4
canned butter beans, rinsed and drained, 250g / 9 ounces (double the amount for 4 people)
coriander seeds, crushed in a mortar, 1 teaspoon
ground cumin 1 teaspoon
ground turmeric 1/2 teaspoon
ground cardamom 1/4 teaspoon
cayenne pepper 1/4 teaspoon
black peppercorns, crushed in a mortar, 1/4 teaspoon
lemon, cut into thin slices, 1, plus 1 teaspoon of lemon juice
olive oil
coarse sea salt
fresh mint leaves, a small handful, to serve
Set the oven to 200°C / 390°F (I use the Rotitherm setting which works perfectly for poultry).
Whisk 3 tablespoons of olive oil with the lemon juice and spices. Arrange the chicken legs in a baking dish, rub them on all sides with the spiced oil and sprinkle the skin generously with sea salt. Mix the beans with a splash of olive oil and arrange them around the meat. Put the slices of lemon on top and cook in the oven for about 20 minutes or until golden brown. Pour some of the juices over the meat a couple times while it’s cooking. Check the meat with a skewer, only clear juices should come out when it's done. If you like, turn the grill on for a few minutes until the skin starts sizzling. Serve with fresh mint and ciabatta bread.

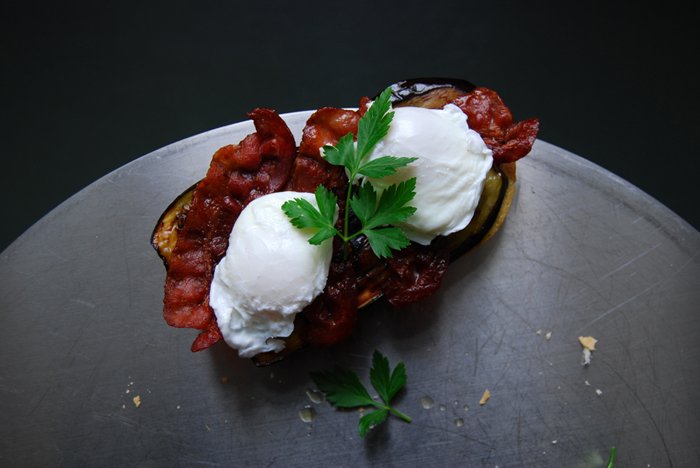
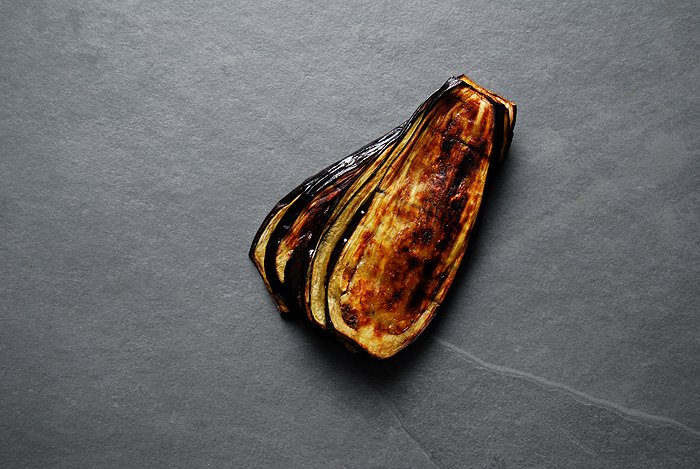
Poached Egg, Grilled Aubergine and Crisp Bacon Sandwich
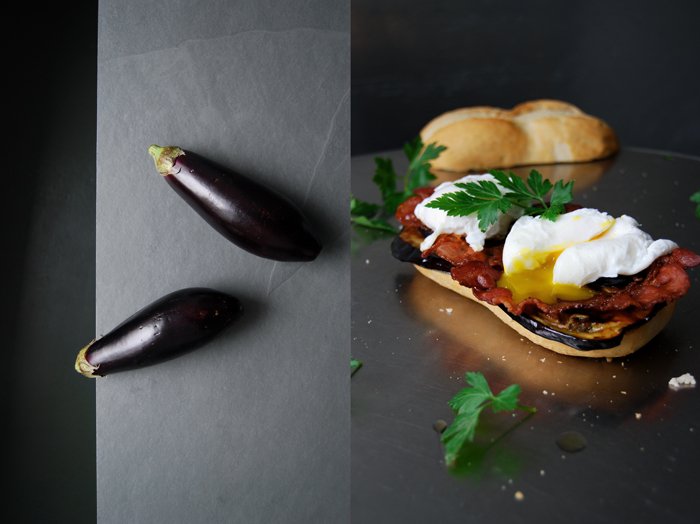
Excitement in the kitchen! I made my first poached egg and it worked out perfectly. After a quick introduction to the art of egg poaching on Food52 I felt ready to give this challenge a try. To my surprise, it was much easier than I had expected so I could take my time and focus on the other ingredients for this week's sandwich, grilled aubergine and crisp bacon.
My inspiration came from the great Sabih sandwich. I thought about it in the past couple days, how it combines all that lusciousness between two slices of bread, rich hummus, grilled aubergine and a boiled egg merged to true deliciousness. It could easily be too much but somehow this Middle Eastern sandwich classic does it just right. The egg and the eggplant are a great duo, they complement each other perfectly, so I used this idea but added a new flavour, salty bacon. I packed everything in between a large baguette bun and finished it off with some crunchy parsley leaves. I should warn you, this is more than a snack, it's a proper meal, but anything smaller wouldn't have worked, this sandwich has the same addictive quality as the scrumptious Sabih!
Poached Egg, Grilled Aubergine and Bacon Sandwich
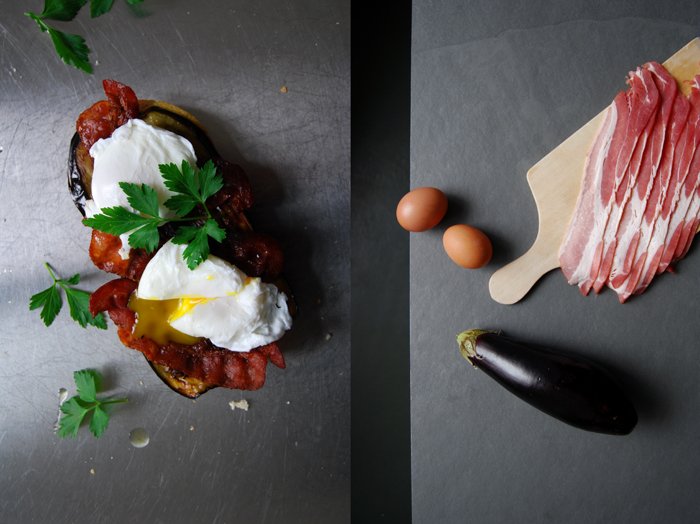
For 2 large sandwiches you need
large, crunchy baguette buns, cut in half, 2
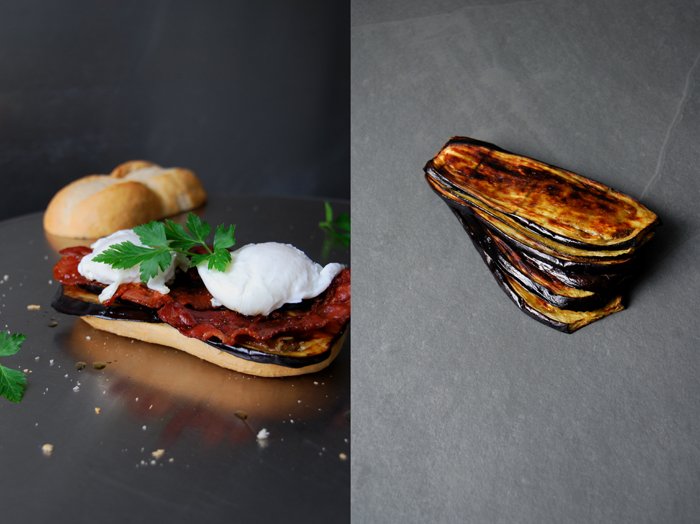
aubergine, cut into 1/2cm / 1/4" slices, 1
breakfast bacon 6 slices
eggs 2-4
olive oil
coarse sea salt and pepper
fresh parsley leaves, a small handful
Brush the aubergine slices with olive oil on both sides, season with salt and pepper and put them under the grill for about 6-7 minutes on each side. Watch them as they should be golden, partly brown, but not burned. Take them out of the oven and put the slices on top of each other on a plate, that will keep them moist.
Heat a little olive oil in a pan and fry the bacon for a few minutes on each side on medium heat until golden brown and crisp. Lay them on kitchen paper to remove excess fat.
Put 2-3 slices of grilled aubergine on the bottom side of each bun and lay 2-3 slices of bacon on top.
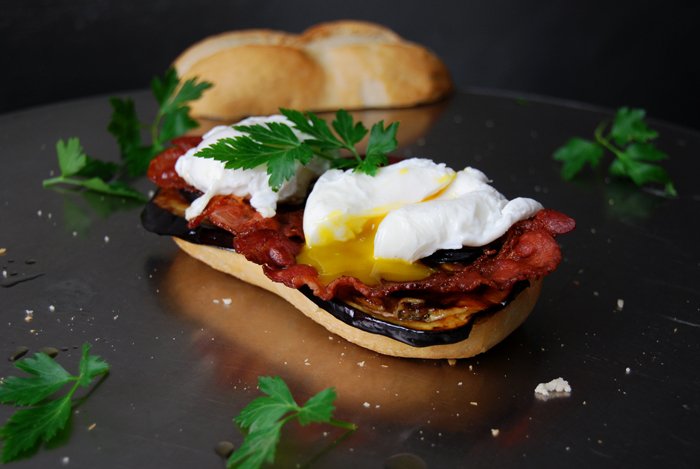
In a saucepan, bring water to the boil, add some salt and turn down the temperature, it should be simmering, not bubbling! Crack an egg open and put it into a small bowl. Put a large spoon (the largest you have) on the surface of the simmering water and gently pour the egg onto the spoon. Hold the spoon with the egg in the water and put the egg back into place with a second tablespoon if it slips off the spoon (I had to do this a couple times). It needs around 3 minutes. When the egg is done, take the spoon out, let the excess water drip off and carefully scrape the poached egg onto the fried bacon with a second spoon. Sprinkle with parsley, close the bun and enjoy!
It's best to poach one egg at a time but if you are impatient, you can cook two at once. In that case, let the first egg float in the water after cooking it on the spoon for 1 1/2 minutes (mind that it doesn't stick to the bottom when you let it float). Poach the second egg on the spoon and take both eggs out after they have cooked for 3 minutes each.


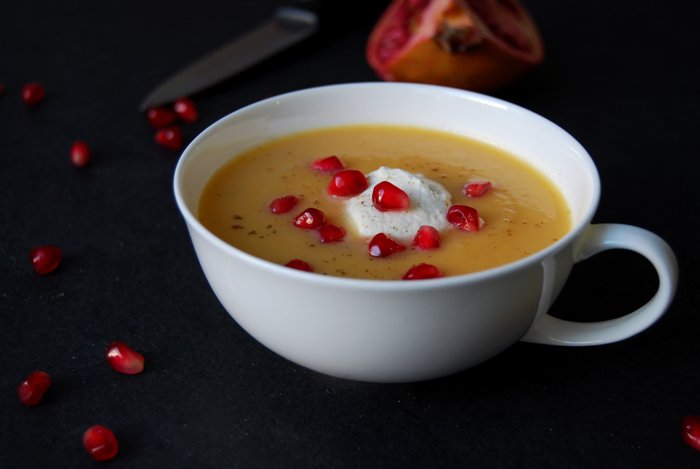
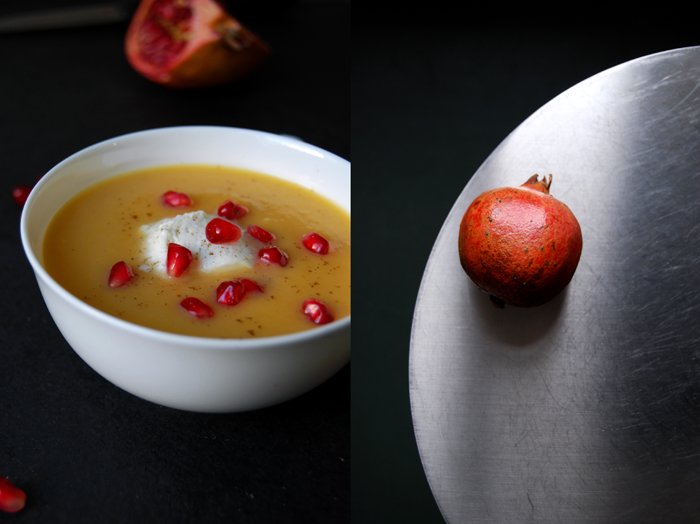
Parsnip & Sweet Potato Soup with Pomegranate & Mascarpone
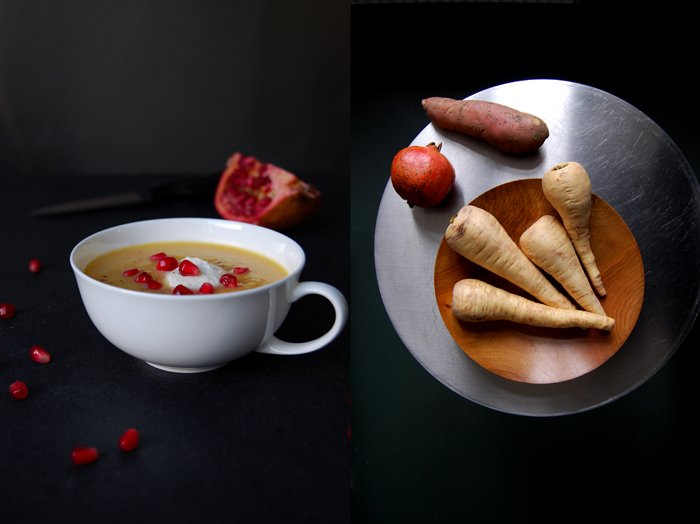
Roots and fruits are a great match for puréed soups, they merge to a deliciously warming treat full of fragrant flavours. They often balance each other out, like the strong parsnip which has such an overpowering impact that it's best in combination with other ingredients that underline its subtle sweetness.
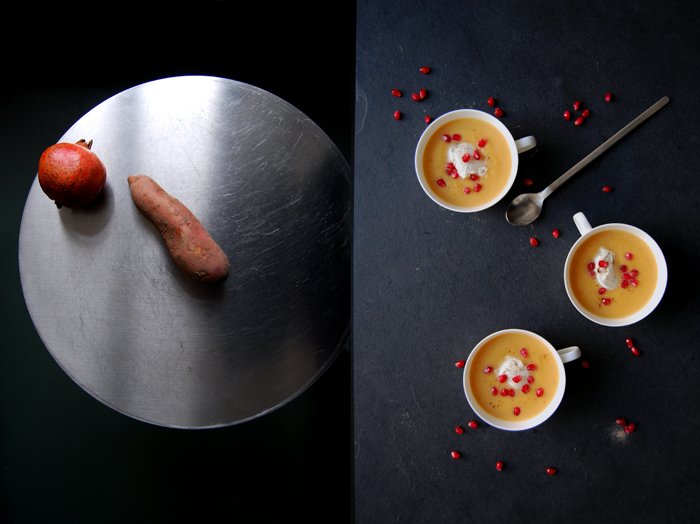
I went for robust sweet potatoes, a great team player, and juicy pomegranate seeds, their sourness is a wonderful addition to the earthy aroma. And, of course, their dramatic look is quite a stunner on the root's pale pink! When I cook these kind of soups I like to spare on heavy cream, I just stir in a little bit to support the natural creaminess which is already given through the puréed vegetables. It doesn't need much of the dairy product otherwise it will turn into a heavy meal and that's the opposite of what I'm after. I prefer to refine the roots with another kind of milkiness, a discovery I made in October for my parsnip and pear soup. I used whipped mascarpone cheese, just a small spoonful, but this time I mixed it with cardamom and a bit of orange juice, it literally melted into the root composition!
Parsnip & Sweet Potato Soup with Pomegranate & Cardamom Mascarpone
For 4 as a starter you need
parsnip, peeled and chopped, 300g / 10.5 ounces
sweet potato, peeled and chopped, 200g/ 7 ounces
medium onion, chopped, 1
vegetable broth 800ml / 2 pints
bay leaf 1
rosemary 1-2 small sprigs
olive oil
heavy cream 75ml / 2.5 ounces
salt and pepper
honey 1-2 teaspoons, to taste
ground cardamom
mascarpone 100g / 3.5 ounces, for the topping
freshly squeezed orange juice, to taste, for the topping
pomegranate, peeled, 1, for the topping
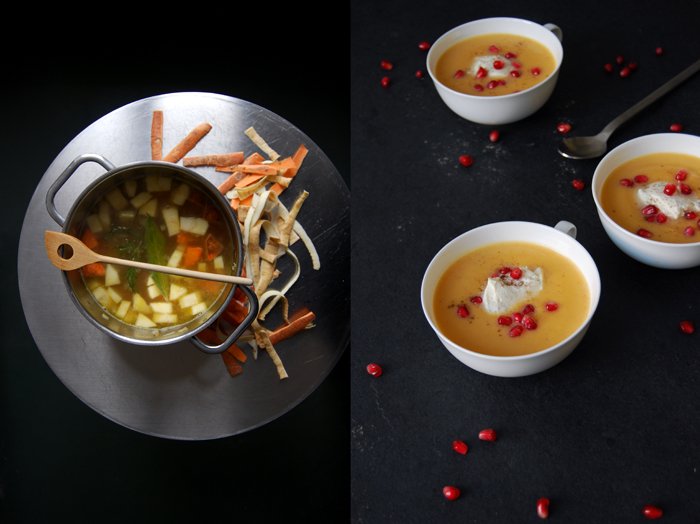
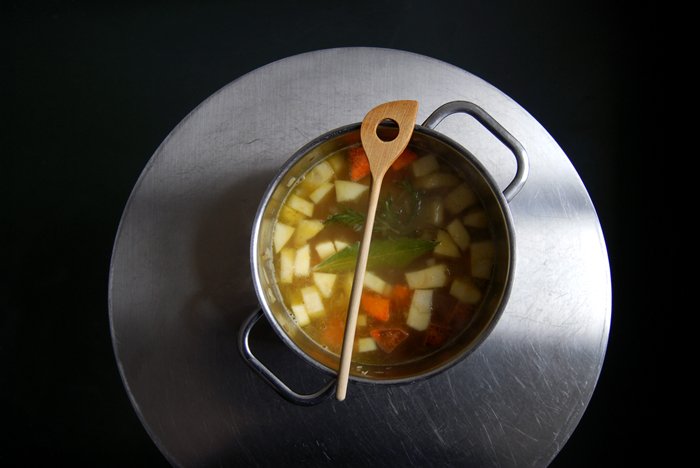
In a large pot, heat a splash of olive oil and cook the onion on medium heat until soft. Add the parsnip and sweet potato and cook for a minute. Pour in the broth and add the bay leaf and rosemary. Season with salt and pepper and cook for about 20 minutes or until the roots are soft. Take the rosemary out after 10 minutes and the bay leaf when the soup is done. Purée the soup in a blender or with a stick mixer, stir in the heavy cream, honey and a pinch of cardamom, season to taste.
Whisk the mascarpone with 1/4 teaspoon of cardamom and a splash of orange juice. Add a bit of heavy cream if it's too thick and season to taste.
Serve the warm soup with a dollop of mascarpone, pomegranate seeds and some cardamom sprinkled on top.
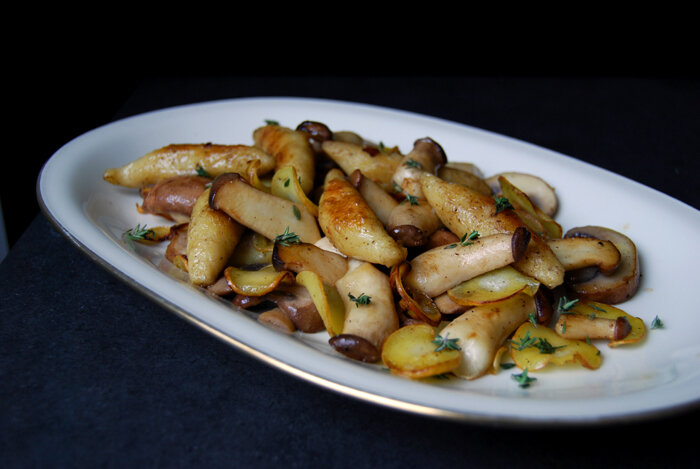
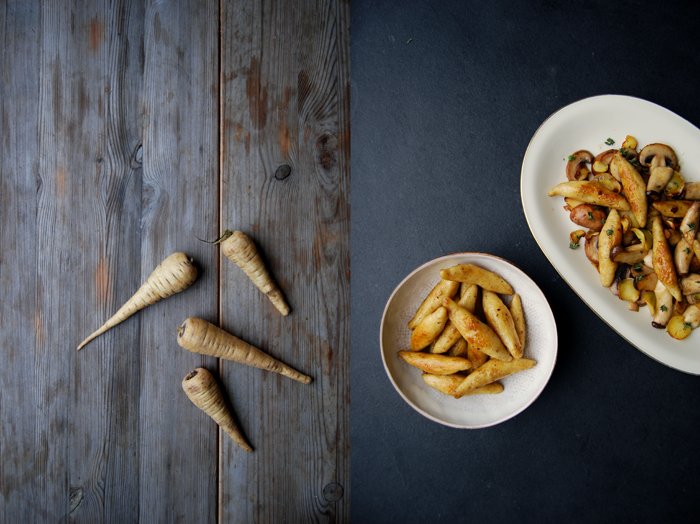
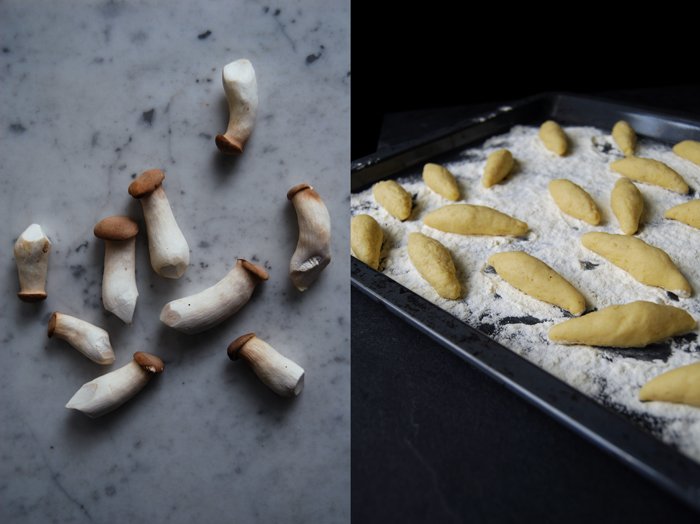
Rolled Potato Noodles with Parsnip, King Trumpet & Portobello Mushrooms
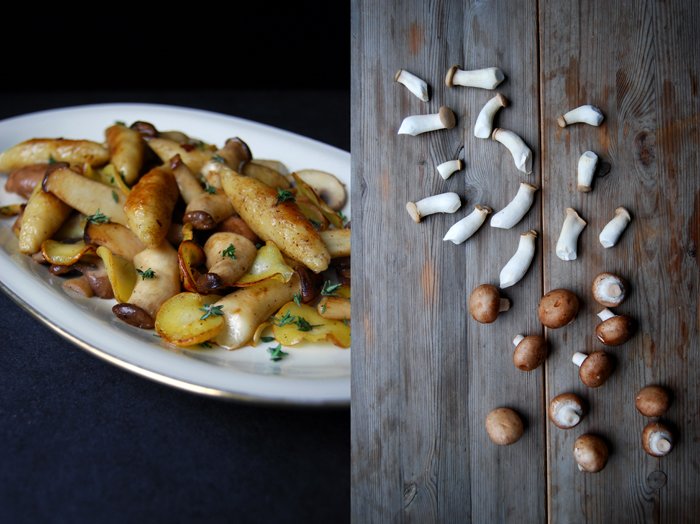
Hearty! This word describes best how I feel about this dish, hearty Swabian potato noodles called Schupfnudeln in German (meaning rolled noodles) meet king trumpet and portobello mushrooms sautéed with the thinest slices of parsnip and fresh thyme. This is another one of those dishes that puts me into the mood for a cosy hideaway, a little hut in the forest, lit up with candles and an open fire. I think I need a holiday, each meal I cook at the moment, each ingredient, whatever its origin may be, pulls my mind out of my kitchen into another dreamy scene and they all have one thing in common, silence, peace and seclusion.
As there's nothing planned, I have to take these precious little moments of my imaginary / culinary holidays and rest my mind wherever my kitchen activities may take me. Be it on an imposing mountain top with a sandwich in my hand and the wide horizon right in front of me, or in a wooden hut in the dark forest which calls for a warming soup while I sit on a wooden bench wrapped in warming blankets. I could go on and on, a long walk on a lonely beach and a little crumbly piece of quiche (something I used to do when I lived in Whitby in England), or a paper bag full of fish and chips savoured at the harbour while I watch the fishermen scrub their boats. But I'll stop this now, my real world appetite calls for a real meal and it can't get any better than a plate full of these scrumptious golden Schupfnudeln and Mushrooms!
Schupfnudeln are similar to Italian gnocchi, the dough is a bit more firm and their shape is long. You can eat them straight after being cooked in water but I like to fry mine to golden, buttery bites which puts them right on the next level. They are so good that I always eat more of them than I should, especially in combination with thyme, mushrooms and parsnip, both cooked with a bit of bite, it's too good!

Potato Noodles with Parsnip, King Trumpet and Portobello Mushrooms
For 4-6 people you need
For the potato noodles/ Schupfnudeln
potatoes, cut into cubes, 420g / 15 ounces
butter 1 heaped tablespoon
organic egg yolk 1
plain flour 250g / 9 ounces
nutmeg, freshly grated
salt 2 1/2 teaspoons
pepper
olive oil, to fry the Schupfnudeln
butter 1-2 tablespoons, to fry the Schupfnudeln
Cook the the potatoes in salted water until soft (around 15 minutes). Drain them when they are done. Press the drained potatoes through a potato ricer and mix immediately with the butter and egg yolk. Put in a cool place (in the fridge) until the mixture is completely cool (!).
In a large pot, bring plenty of salted water to the boil.
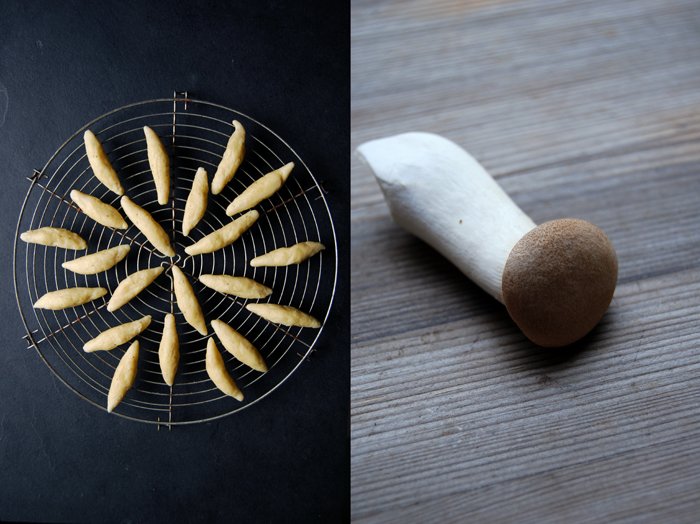
With a spoon (or your hands), mix the cold potato mixture with the flour, salt, nutmeg and pepper until combined, add more flour if the mixture is too sticky. Dust your hands with flour and take a small walnut sized ball off the dough and roll between your hands to a sausage/ Schupfnudel shape as you can see in the pictures (the ends should be pointy). Keep them on a floured baking sheet.
Cook the Schupfnudeln in batches in the boiling water for 3-4 minutes, when they start to come up and float on the surface take them out with a slotted ladle and put them on a wire rack to cool.
In a large heavy pan, heat a splash of olive oil and the butter and fry the Schupfnudeln until golden on all sides, season with salt and pepper.
For the mushrooms
king trumpet mushrooms, bottom cut off, cut in half (lengthwise), 250g / 9 ounces
portobello mushrooms, bottom cut off, cut into 1/2cm / 1/4" slices, 550g / 1 1/4 pounds
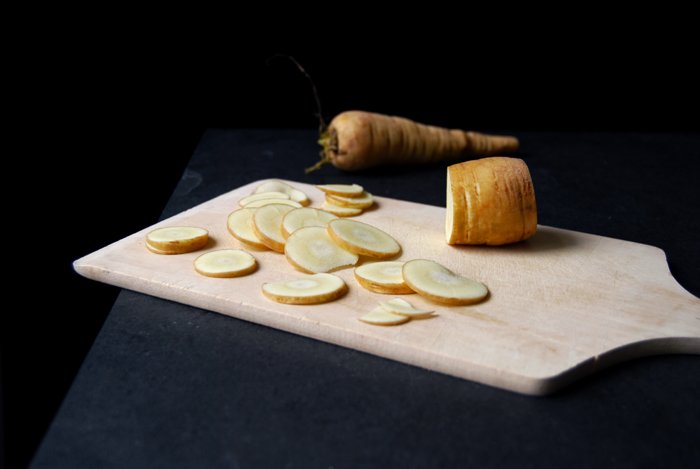
small parsnips, scrubbed and cut into very thin slices, 3
fresh thyme, a few sprigs
olive oil
butter 1-2 tablespoons
salt and pepper
Fry the parsnips in a splash of olive oil on medium-high for about 5 minutes or until golden and al dente, stir constantly. The rim should be light brown but not black!
Heat a splash of olive oil and some butter in a large pan and sauté the king trumpet mushrooms for 1 minute on each side on high temperature, they should be al dente. Season with salt and pepper, add some thyme leaves and take them out of the pan. Keep them on a covered plate while you cook the portobello mushrooms.
In the same pan, heat some more olive oil and butter and sauté the portobello mushrooms for about 2 minutes on each side (also on high temperature). Season with salt and pepper, gently mix with the king trumpet mushrooms, parsnips and some fresh thyme leaves. Serve on a warm plate with the fried Schupfnudeln.


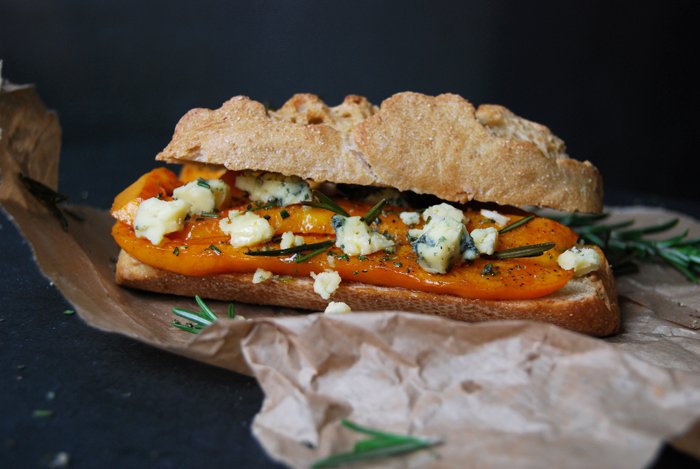
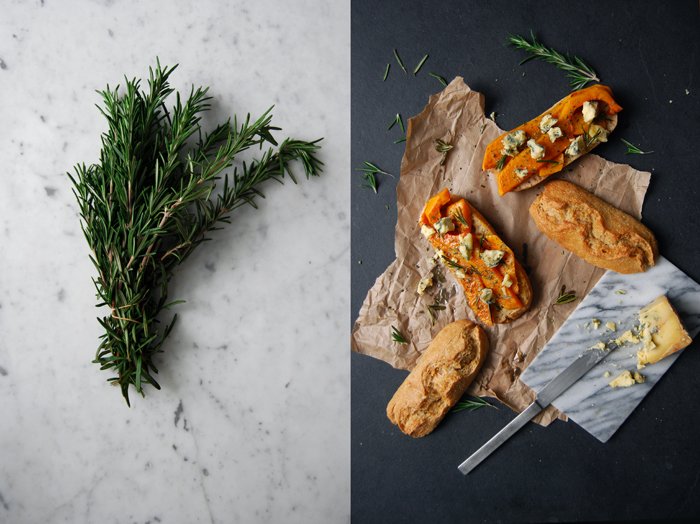
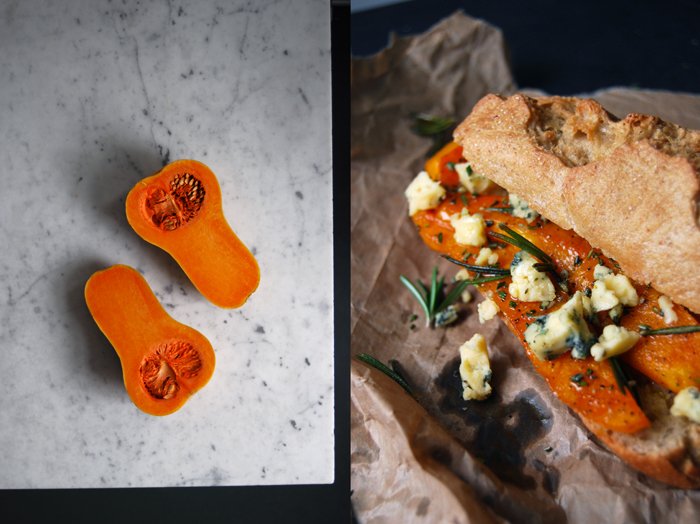
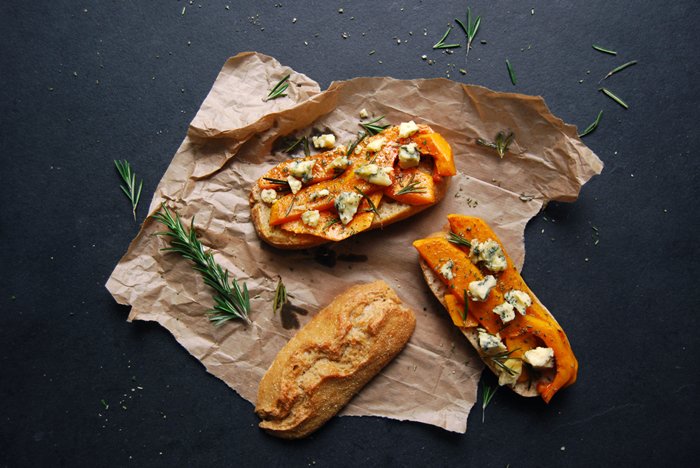
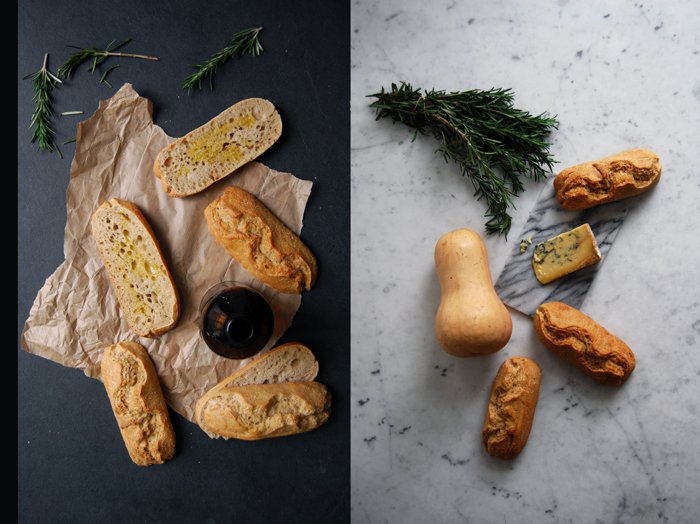
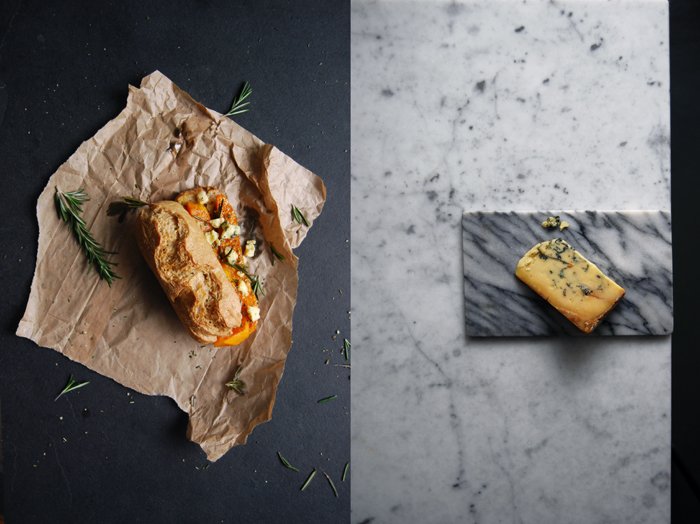
Roasted Pumpkin, Stilton and Rosemary Bun
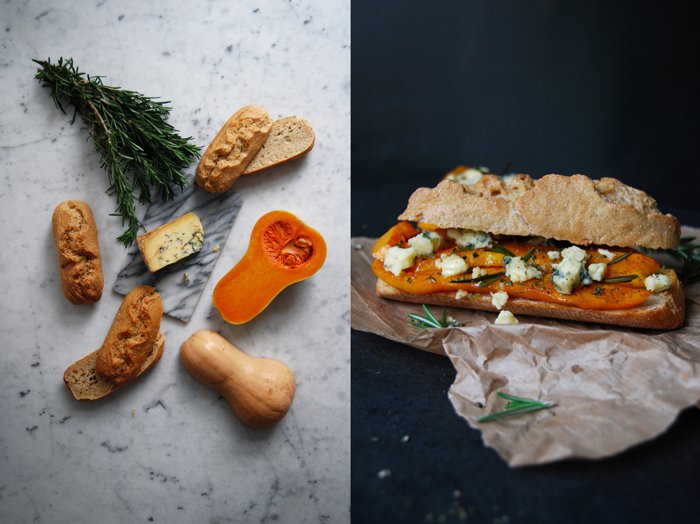
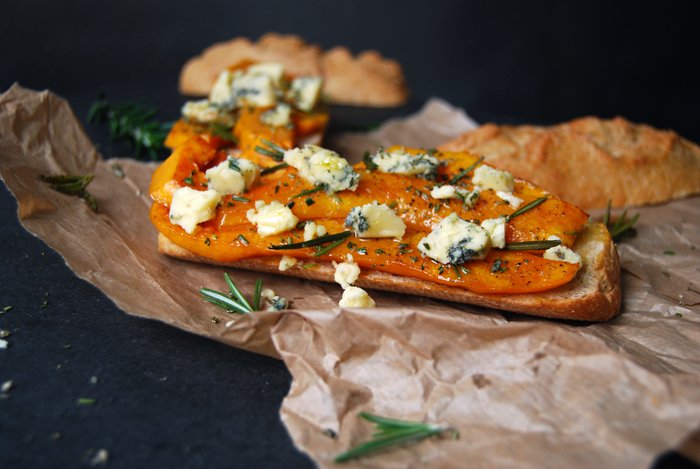
Sweet butternut squash steaks grilled in the oven to caramelized perfection, sharp Stilton and woody rosemary, these are the simple but convincing components of this impressive sandwich. What can I say, we loved it! After the obligatory initial doubts from my boyfriend, who, sometimes, prefers to see some slices of crisp bacon and melted cheese on his sandwich rather than my extravagant kitchen experiments, we finally met at the kitchen table for our little snack date and savoured with great satisfaction.
The task was easy, the nearly overpowering sweetness from the squash had to be controlled somehow and the steady British blue cheese did a great job. This cheese works so well with the ripest fruits, with figs and peaches melting in your mouth, or pears dripping with juices, so why shouldn't it cooperate with a robust butternut squash that's been forced (by me, the oven and a little sugar) to resemble honey?
Butternut Squash, Stilton and Rosemary Bun
For 3 sandwiches you need
rustic white buns, cut in half, 3
small butternut squash, peeled, the seeds scraped out, cut into long 1cm / 1/2" thick strips, 1 half
Stilton (or any other strong blue cheese), crumbled, 100g / 3.5 ounces
rosemary, finely chopped, 1 teaspoon plus a few sprigs
granulated sugar 1 1/2 teaspoons
Fleur de Sel
pepper
olive oil
butter 1 teaspoon
Set the oven to 200°C / 390°F.
In a pan, heat a splash of olive oil and the butter. Add the pumpkin steaks to the pan, fry for 1 minute and sprinkle them with half the sugar before you turn them around. Sprinkle with the remaining sugar and turn them after 1 minute. Take the pan off the heat after 30 seconds and spread the butternut squash steaks in a baking dish, sprinkle with the rosemary (chopped and sprigs) and roast in the oven for 4 minutes or until the pumpkin is soft.
Brush the inside of the buns with olive oil, lay 2-3 warm slices of pumpkin on each of their bottom halves and sprinkle immediately with Stilton, rosemary sprigs, pepper and Fleur de Sel. Enjoy!

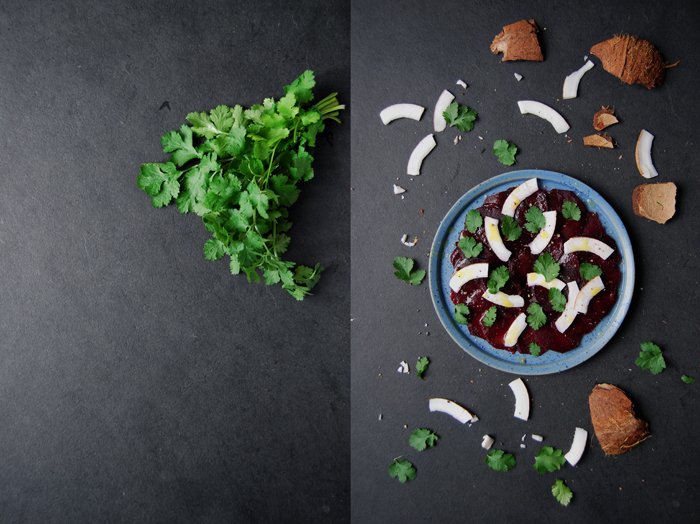
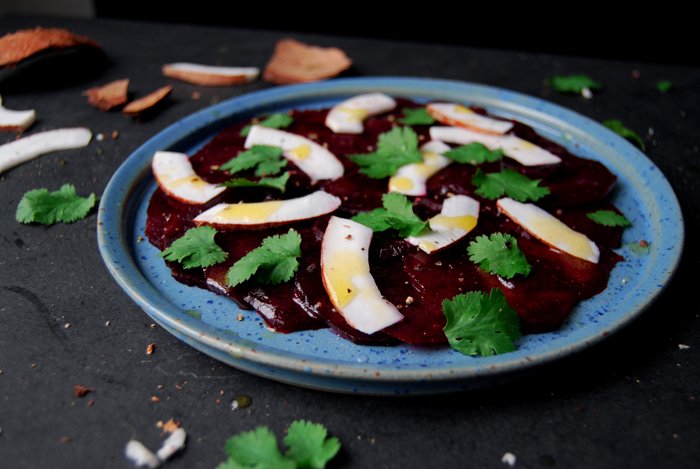
Beetroot Carpaccio with fresh Coconut and Coriander

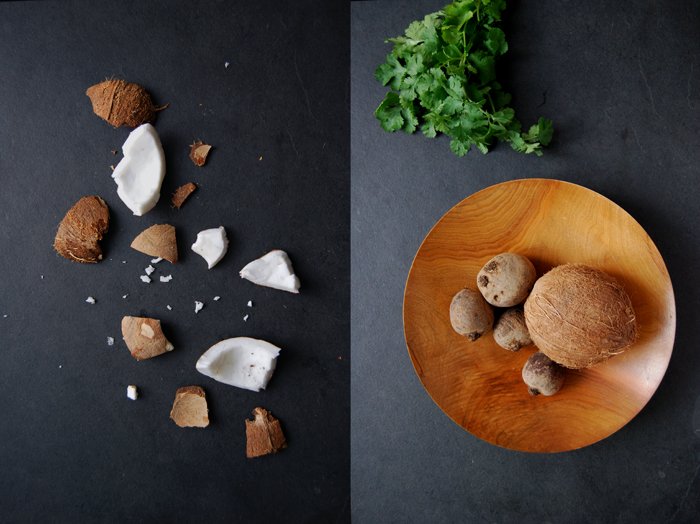
Sometimes I must have a coconut in my kitchen, not because I'm so crazy about the taste, more because I love the whole ceremony of opening them. First I punch 3 holes into the top to pour out the coconut water (which I like a lot) and then I hammer it open. It really makes you feel like you have to work for your food, which is a rare experience in our culture. I don't know how often I hit my thumb and swore I would never do it again, but I can't help it, here I am again with a big hard nut on my kitchen floor, fighting for my food.
As soon as the white meat is peeled out of the shell I keep it in a bowl of water as it dries out really quickly. It's quite a nice snack to nibble on but for today's lunch I had different plans, I had a beetroot carpaccio in mind, sprinkled with crunchy coconut slices and fresh coriander. I used the coconut's water for the dressing and whisked it with olive oil, orange juice and some of Arnold's Maltese Orange Blossom honey (I still have a little bit left and treat it like a treasure!). The earthy beetroot can take the combination with strong flavours and this one is quite exotic, if you're up for something more simple, try the combination with apples and pomegranate!

Beetroot Carpaccio with fresh Coconut and Coriander
For 2 you need
small beetroots 4
bay leaf 1
fresh coconut 1/4
fresh coriander leaves, a small bunch
coconut water 1 tablespoon (from the coconut)
olive oil 2 tablespoons
freshly squeezed orange juice 2 tablespoons
quality honey (liquid) 1/4 teaspoon (if it's frim, warm it up in a pan)
salt and pepper
Cook the beetroots with the bay leaf in salted water for about 45 minutes, rinse with cold water and let them cool.
Carefully punch (or drill) 3 holes into the top of the coconut (I use a clean screwdriver and a hammer) and pour the water into a glass, crack the hard skin of the coconut and peel out the white meat. Cut about 1/4 of the coconut into very thin slices.
For the dressing, whisk the coconut water, olive oil, orange juice and honey and season with salt and pepper to taste.
Peel the beetroots, cut them into thin round slices (with a cheese or vegetable slicer) and arrange them on plates. Sprinkle with the coconut slices, the dressing and coriander.

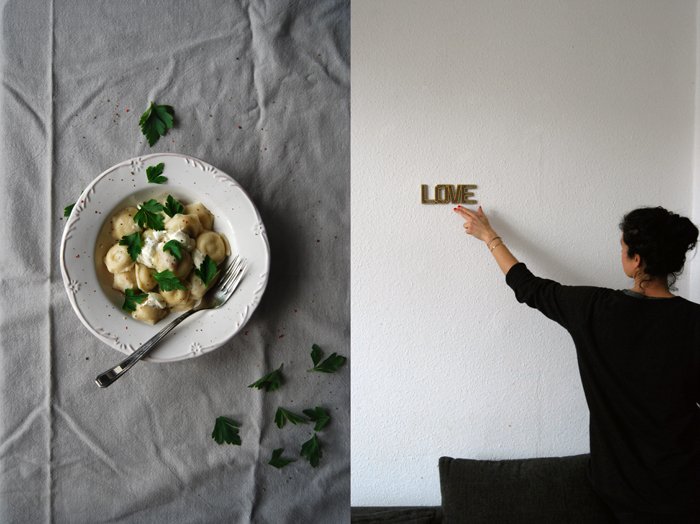
meet in your kitchen | Claudia's Ukrainian Pelmeni Dumplings
Claudia and Isa from the popular blog Hauptstadtmutti are like sisters, when you're in a room together with them you can feel their closeness and loyalty. Their characters seem aligned, despite their entirely different personalities. They call themselves an old couple, which is one of the biggest compliments for a friendship as it shows the respect and appreciation for each other, at least in their case! The mutual understanding also comes from the fact that the two women live similar lives, they are young, working mothers, they share similar interests and daily issues but also a big passion for fashion! Claudia and Isa only met five years ago and made a big step together, the energetic art director and journalist brought their different qualities together and merged them into their daily blog Hauptstadtmutti (meaning mother of the capitol in German). It soon became a vivid space for Berlin's mothers, their individual style and creative personalities. Pure elegance meets cool effortlessness and eclectic practicality, these mothers defy conventions and break with expectations. Clicking through the blog's street style portraits is an inspiration for any woman!
We planned to have a joint cooking session in one of their culinary spaces, but as both of them are so fascinating and their lives and personalities offer so much to talk about, we decided to split the Hauptstadtmutti kitchen series into two parts. So today, we'll start off with part I, in Claudia's cosy old rooftop flat where she lives with her 5 year old son, a true gentleman who welcomed me with a handshake.
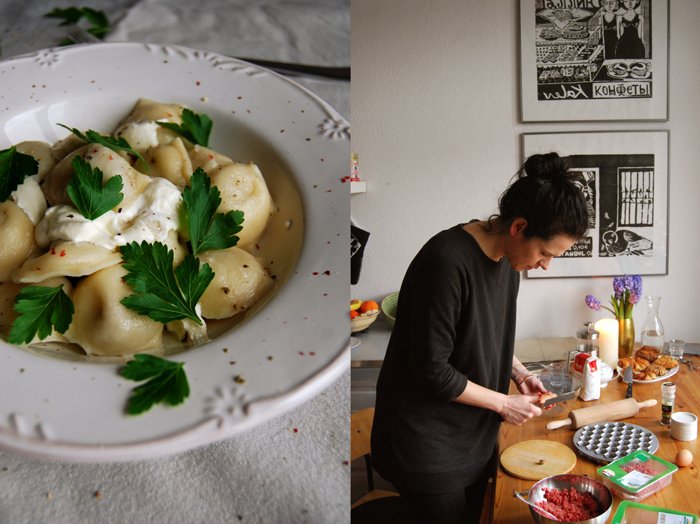
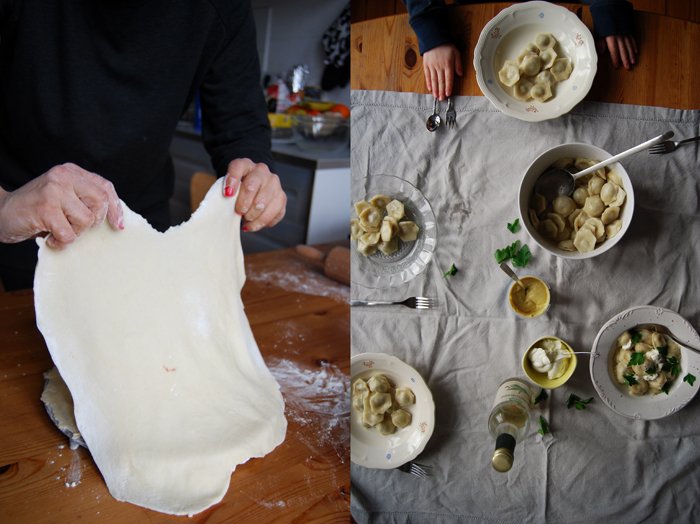
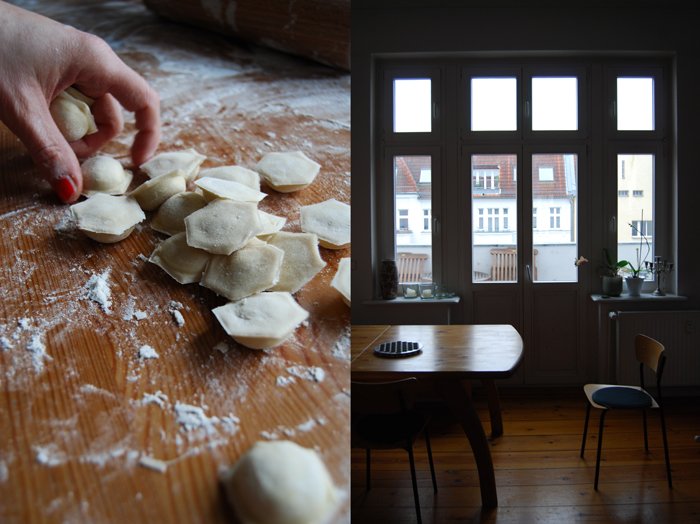
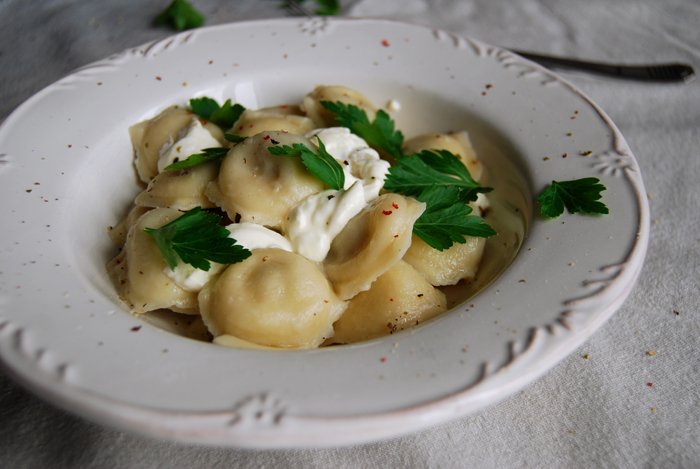
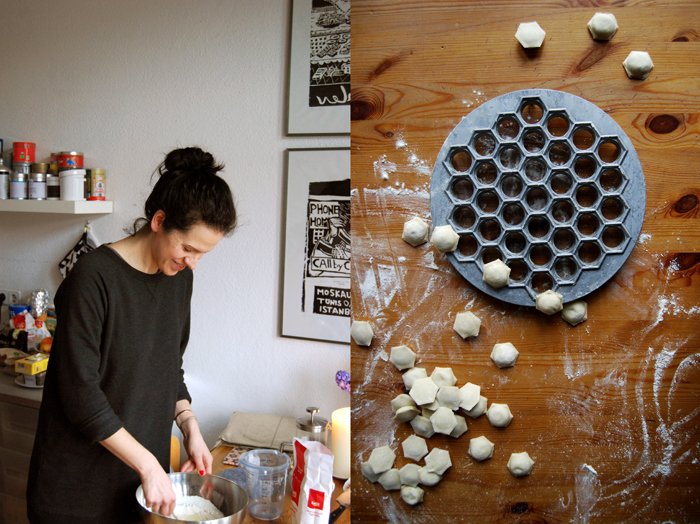
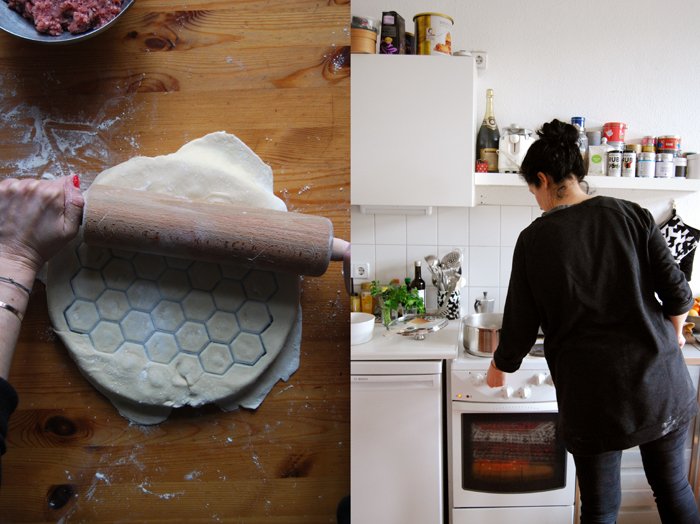
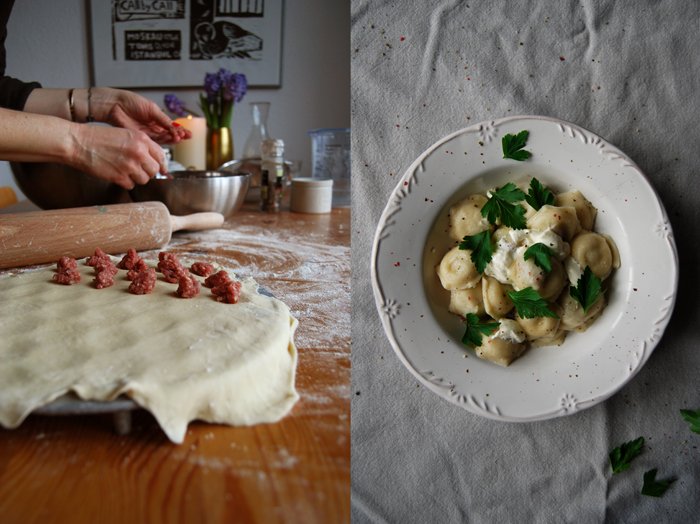
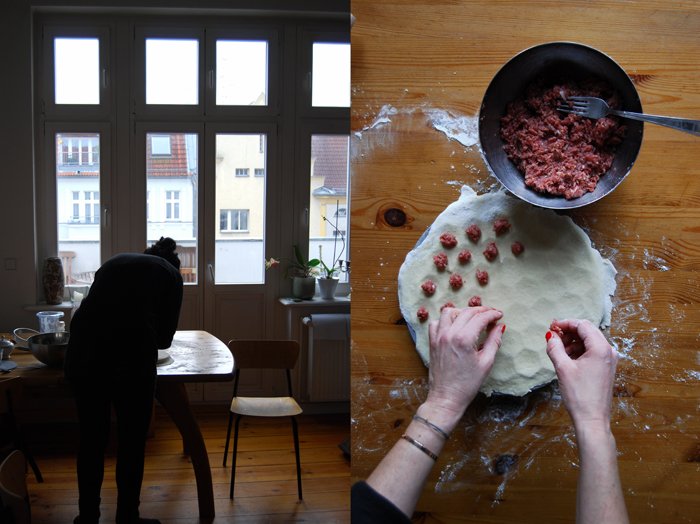
Claudia's mother is from the Ukraine which brought an Eastern European influence to the family's cooking. I'm not very familiar with the country's cuisine so I was very happy when she offered to cook one of the most popular traditional specialities for me. Claudia shared her old family recipe for little meat filled dumplings called pelmeni with me which are traditionally served with crème fraîche, white wine vinegar, mustard and parsley. She uses a beautiful utensil for the preparation which looks a bit like honeycombs made of iron. For the dumpling preparation, she covered this pelmeni maker with a thin layer of pastry, filled each comb with a little ball of spiced minced meat and put another pastry layer on top before she gently rolled over it with a rolling pin. Within seconds, the dumplings were closed and cut into perfectly shaped pelmenis! When I saw Claudia pushing the dumplings out of the frame with her fingers I understood why her little son loves to cook this dish together with her, this is fun!
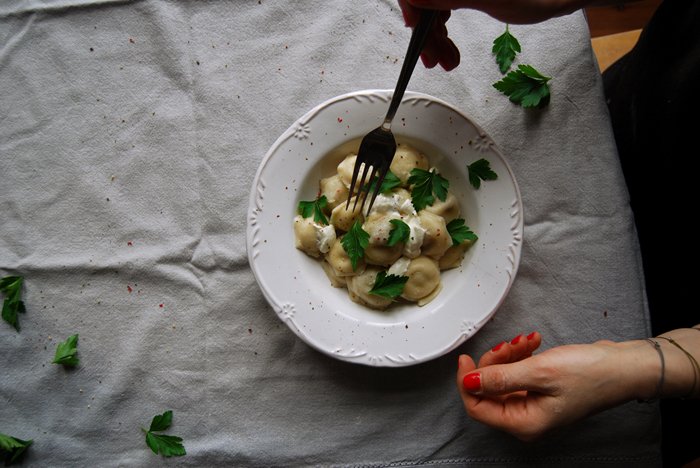
As much as I enjoyed the preparation, savoring this meal was a delight. There's no doubt why this is her son's favorite meal, it's delicious, honest comfort food. Claudia said that the older generation in the Ukraine still shapes the dumplings with their fingers, the traditional way, without the iron pelmeni maker. I can just see the families standing around a wooden table in the warm kitchen, rolling out dough and filling the pelmenis, like we did on a cold January day in Berlin!
Soon I'll meet Isa in her kitchen for the second part of our Hauptstadtmutti cooking series - to be continued!
Ukrainian Pelmeni Dumplings
For 6 people you need
For the dough
plain flour 500g / 1 pound
salt 1 teaspoon
water 250ml / 1/2 pint
egg 1
Put the flour in a large bowl and form a well in the middle. Add the salt, water and egg, mix with a fork and slowly stir in the flour from the sides. Knead well with your hands to a firm dough, add more flour if necessary. You should be able to tear the dough when it's done. Let it rest while you prepare the filling.
For the filling
minced meat (pork and beef) 400g / 14 ounces
medium onion, finely chopped, 1
egg 1
salt 1 teaspoon
pepper
Mix the ingredients for the filling and shape little meat balls (thumbnail sized).
For the pelmeni
meat broth, well seasoned, 2l / 4.5 pints
melted butter, for serving
mustard, for serving
crème fraîche, for serving
white wine vinegar, for serving
parsley, for serving
crushed pepper, for serving
Bring the broth to the boil.
Take a handful of the dough and roll it out very thinly on a well floured surface. If you have a pelmeni maker, cover it with a layer of dough and fill each comb with a little meat ball. Close it with another thin dough layer and gently roll over it with a rolling pin to seal the dumplings and push them through the wholes.
If you want to shape the dumplings by hand, lay the thinly rolled dough on the working surface, spread the meat balls evenly, cover with another layer of dough and cut small squares or circles with a knife or a pizza cutter. Seal each dumpling well by pushing the rim together.
Gently add the dumplings (in batches) to the hot broth and cook on medium-low heat (simmering) for about 7 minutes. Take them out with a slotted ladle and mix the pelmenis with the melted butter. Serve the dumplings with a spoonful of mustard and crème fraîche and sprinkle with pepper, vinegar and parsley.
How would you describe the Berlin mothers you feature on your blog Hauptstadtmutti? What fascinates you about them?
Berlin's mothers are diverse, their style is individual and independent. We love all of them because each single one is special in their own way, and that's her own charisma. We've been taking pictures for our Mama-Streetstyle series for 4 years and we never get tired. The nice thing is that we also get into conversations with them, we have a little interview and get to know some of their secrets, desires and thoughts.
What role does fashion play in your own life? A mother's life is very much determined by practicality, is it possible at all to keep her style and fashion uncompromised?
Fashion occupies and surrounds me. I just enjoy seeing trends and developments evolve, and how they are translated in different cities. My main focus is on mother's fashion as there is still a high degree of practicality involved which shouldn't be underrated. My own shopping and styling has sped up considerably. I don't have the time to shop for hours anymore, that's why I'm very happy that I can buy and discover so much online.
Where do you find your creative inspiration?
Exhibitions, theater and movies, interviews, great people, long chats at the table with friends, traveling the world, the internet and long walks through the city.
How did your cooking change since you became a mother? Can you give any tips for cooking with and for young children?
I try to cook with more time, and good ingredients since my son was born. I set the table nicely, as you eat with your eyes first. My advice to parents is to let your kids eat what is on the table, no extra dishes. And conversation at the table is important, to ask about each other's day, and to eat together with many people, that's fun and social. Children tend to eat better in company.
You've lived in Prague and Kiev, your family roots are Ukrainian, Russian and East-German, how would you describe the Eastern European cuisine you grew up with and the cooking you experienced while you lived in the Czech Republic and the Ukraine?
Eastern European cooking is primarily heavy! It has to satisfy the appetite. The Ukrainian cuisine also relies on fish and vegetables which I love a lot. The recipes are often very easy to prepare, and in the end, the table is full of lots of different dishes, not just one plate with one meal, which I find boring anyway. All Eastern European meals are connected with long conversations at the table and, of course, lots of alcohol. My grandmother in the Ukraine would feel ashamed to put just one dish on the table. That's why we spend days in the kitchen cooking for festive events and family feasts. She asks me all the time what I cook for my son and if he eats properly, she's convinced that I don't give him the right food.
This is what I associate with my time in Prague: many young, committed chefs who traveled the whole world before they came back home, new restaurants opening with the most exquisite, modern Czech kitchen. Great! Always surprising! Apart from that, I remember the delicious apricot dumplings by my friend Andrea's grandmother, with lots of sour cream, to die for!
What was the first dish you cooked on your own, what is your first cooking memory?
A soup made of grass, soil and water in a little doll's cooking pot in my grandmother's garden in the Ukraine. My dolls loved it, with fresh apricots for dessert!
Who influenced and inspired your culinary style the most?
My grandmother in the Ukraine, but I also like to get inspired by my friends who cook for me.
What are your favourite places to buy and enjoy food in Berlin?
Turkish markets for fruits and vegetables, the Russian supermarket Stolitschnaja on Landsberger Allee in Berlin for Russian products.
What did you choose to share on eat in my kitchen?
Pelmeni, Ukrainian dumplings.
If you could choose one person to cook a meal for you, who and what would it be?
You, Meike, and some fish!
You're going to have ten friends over for a spontaneous dinner, what will be on the table?
Pelmeni!
What was your childhood's culinary favourite and what is it now?
Wareniki (dumplings with cherries and sour cream) by my Ukrainian grandmother, today it's all kinds of variations of fish and aubergine.
Do you prefer to cook on your own or together with others?
Together with others.
Which meals do you prefer, improvised or planned?
It depends on my mood and the guest.
Which meal would you never cook again?
A Jamie Oliver recipe with meat, I forgot which one it was ....
Thank you Claudia!


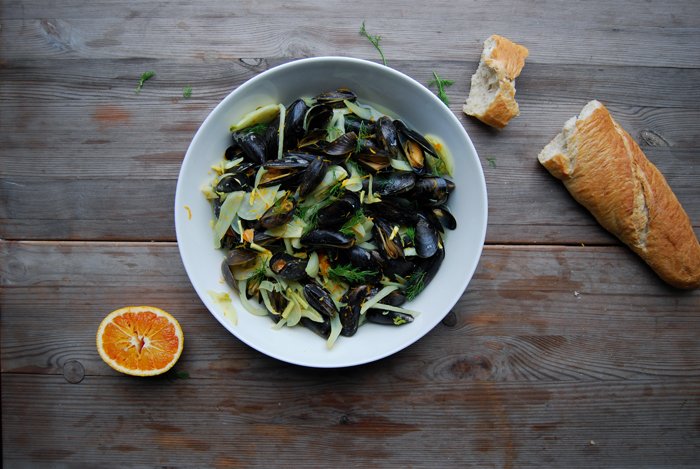
Blood Orange Mussels with Fennel, Ginger and Turmeric Roots
I'm still in my post Christmas meat-reduced phase, I just don't feel inspired to throw a heavy roast in the oven, or put a steak in the pan. Although the annual feasting is already a month ago, my appetite calls for vegetables and seafood, light on the body and preferably refined with lots of citrus fruits, herbs, spices or whatever comes into my mind.
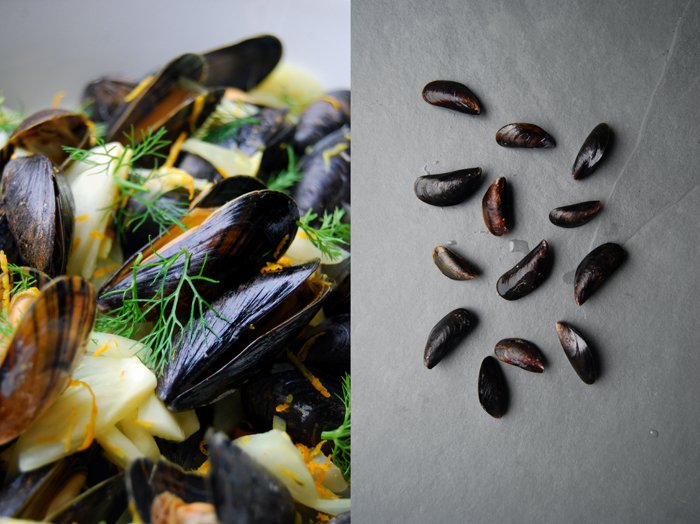
Out of all the wonderful culinary gifts we get from the sea, mussels are one of the easiest to prepare and luckily, they're still in season. I like to be brave when it comes to seasoning their cooking juices, I want each single flavour to be present to infuse their meat, this is not the time to be shy! Today's recipe follows this rule and makes the most aromatic broth, it's perfect to dip little pieces of crunchy baguette in. This is almost the best part of this meal and every time we have mussels on the table, it fills me with excitement. So, I chose a combination of sweet blood orange, fennel, fresh ginger and turmeric which literally melts in your mouth, it's a colourful explosion of fresh flavours. Look at the bright yellow, the vibrant orange and refreshing green, translate that into taste and you'll have an idea of what happened at our lunch table!
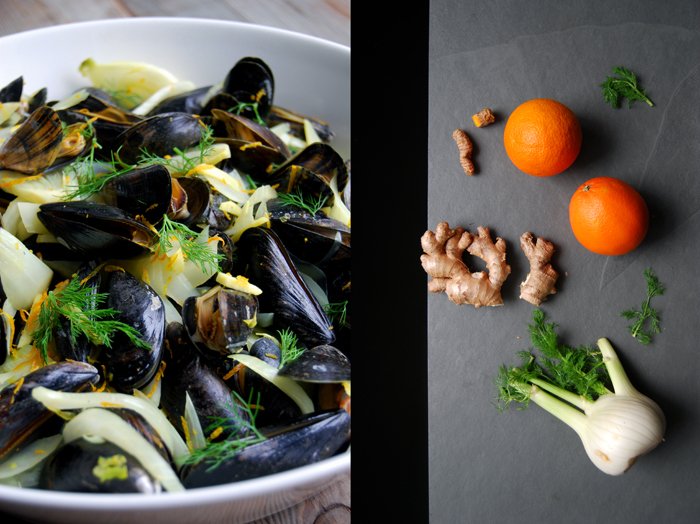
For the cooking broth, I mixed the citrus fruit's juice with some white wine and grated a little zest which created a wonderful aroma. Roots were my next addition, strips and slices of warming ginger and luckily, I can get fresh turmeric at the moment. The deep orange root is a fragrant concentrate, it's so unique you can't compare it to anything else, not even the powder. When I peel the thin skin off it turns my fingers into a golden yellow, it had the same effect on the broth and looked stunning. I couldn't help it, this buoyant dish just put a smile on my face!
Some more mussel inspiration:


Blood Orange Mussels with Fennel, Ginger and Turmeric
For 2-3 people you need
fresh mussels 1 kg / 2 pounds
white wine 200ml / 1/2 pint
freshly squeezed blood orange juice 50ml / 1 3/4 ounces
blood orange zest 1 tablespoon
small fennel bulb, quartered and thinly sliced, 1 plus the fresh green, chopped, for the topping
fresh ginger, cut into small strips, a thumb sized piece
fresh turmeric, sliced, 1 thumbnail sized piece
bay leaf 1
salt 1/2 teaspoon
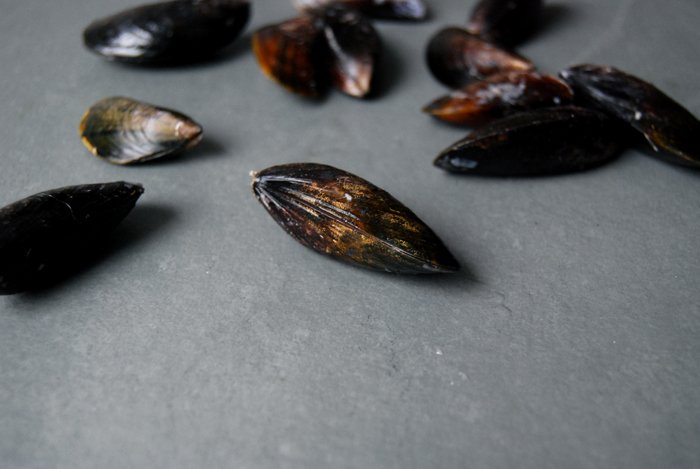
Rinse and scrub the mussels under cold water and cut off the beard, discard any broken mussels.
In a large pot, bring the wine and juice with the zest, fennel, ginger, turmeric, bay leaf and salt to the boil. Add the mussels to the hot broth, close with a lid and cook on lowest heat for 5 minutes or until the shells open (shake the pot once or twice while cooking or gently mix with a slotted ladle). Discard any mussels that don’t open! Sprinkle the mussels with the fresh fennel green and serve immediately, preferably with baguette and a glass of chilled white wine.

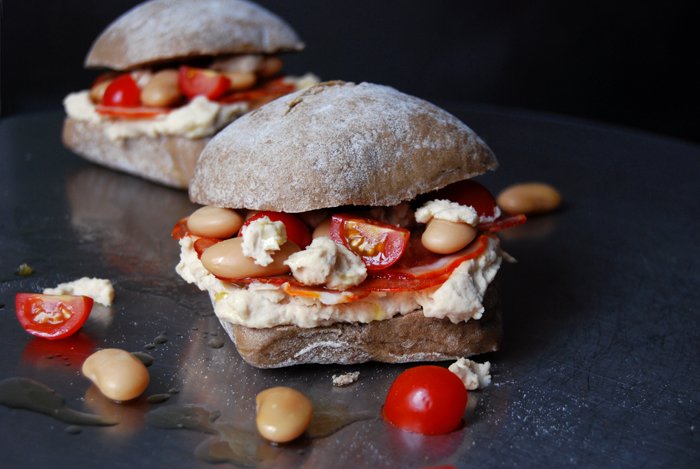
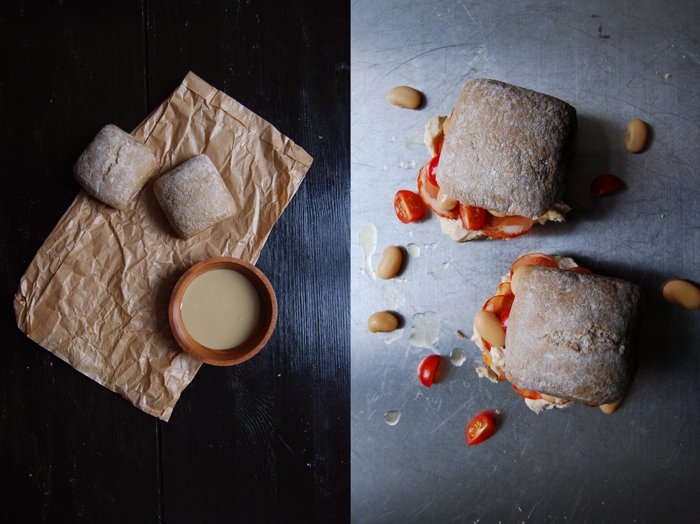
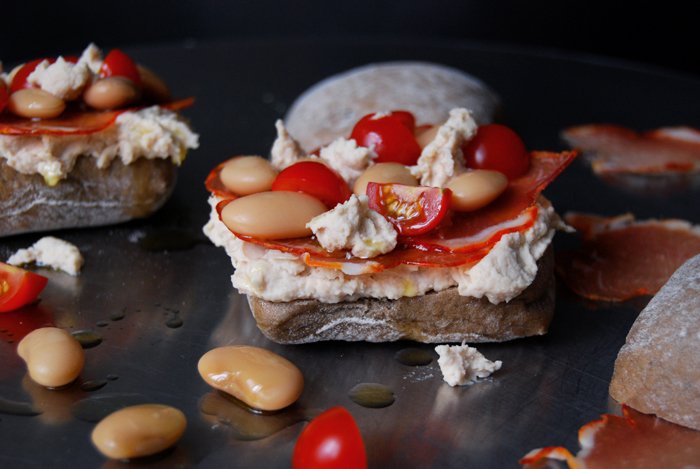
White Bean Hummus and Lomo Prosciutto Sandwich
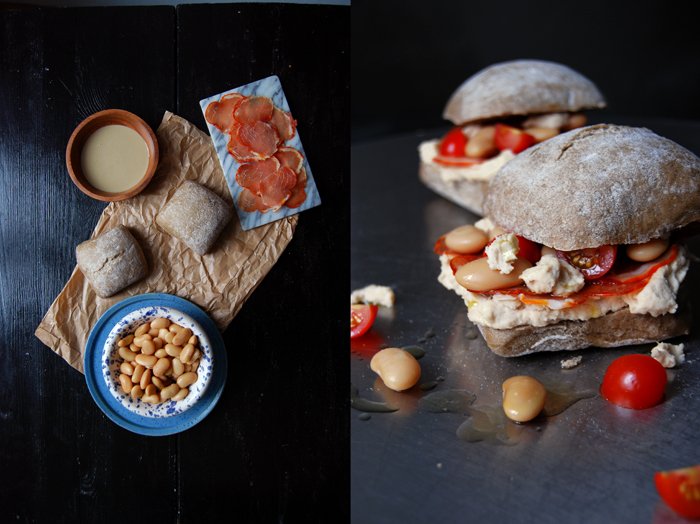
I'm sorry that the blog wasn't reachable this morning, my web provider had some technical issues. It's fixed now and the food is back!My first hummus sandwich was a luscious recipe which our Godchild's father passed on to me. Last year Guy introduced me to the amazing Sabih, a popular snack from Israel where he grew up. It combines velvety hummus, grilled aubergine and hard boiled eggs packed between two slices of juicy bread. It's the kind of sandwich which makes you lick your fingers afterwards as you don't want to miss out on the tiniest crumb. Shockingly enough, it's been a year since I wrote about it and it's time to play around with some hummus variations. It can't just be chickpeas, big white beans puréed with tahini paste, fresh garlic and lemon juice create an equally delicious dip, maybe a bit softer so you have to go easy on the tahini as it can easily be too overpowering.
Although I had decided to go for white bean hummus for my new Sandwich Wednesday creation I wasn't sure about the further additions until my aunt Ursula asked me if I would be interested in some of her party leftovers. She's a gourmet, so I never refuse whatever she brings to my kitchen! She came with a plate of the finest Serrano and Lomo (meaning pork loin in Spanish) prosciutto, both of extraordinary quality. I chose the Lomo for the sandwiches it had the perfect balance of an expressive character without dominating the other ingredients. The Spanish delicacy merged perfectly with the white bean flavour, I just added some cherry tomatoes for a bit of freshness, another one of my aunt's culinary gifts.
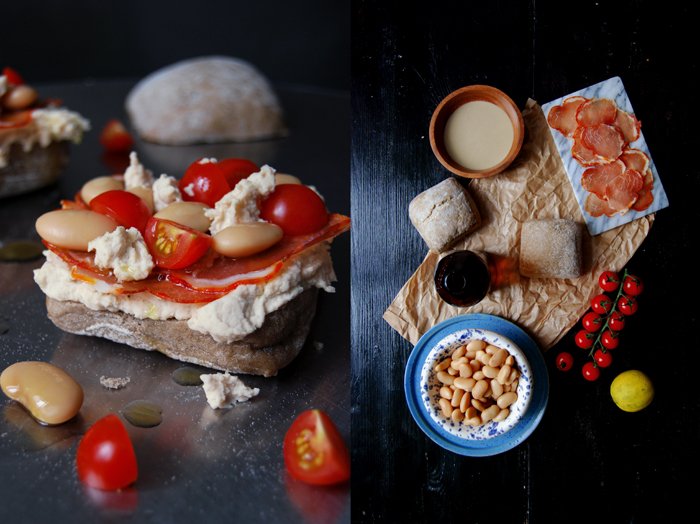
White Bean Hummus and Lomo Prosciutto Sandwich
For 3 sandwiches you need
rustic buns, cut in half, 3
Lomo prosciutto (or San Daniele) 15 small or 6 large thin slices
ripe cherry tomatoes, quartered, 6
butter beans, canned, rinsed and drained, 250g / 9 ounces
tahini paste 1-2 tablespoons
garlic, crushed, 1 clove
freshly squeezed lemon juice 2 tablespoons
water 1 tablespoon
salt
olive oil
Purée 200g (3.5 ounces) of the beans with the tahini, garlic, lemon juice, water and salt in a blender. Season to taste, add more water if the mixture is too dry.
Spread the bean hummus voluptuously on the bottom half of each bun and arrange the prosciutto, the remaining beans and tomatoes on top. Sprinkle with a little olive oil, close the bun and enjoy!


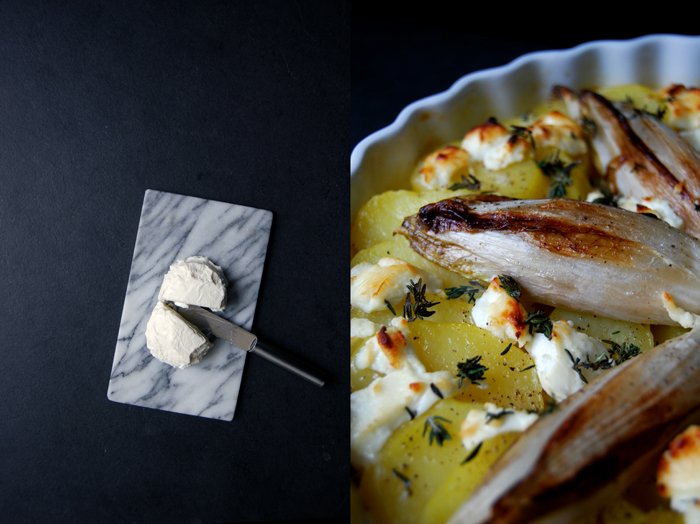
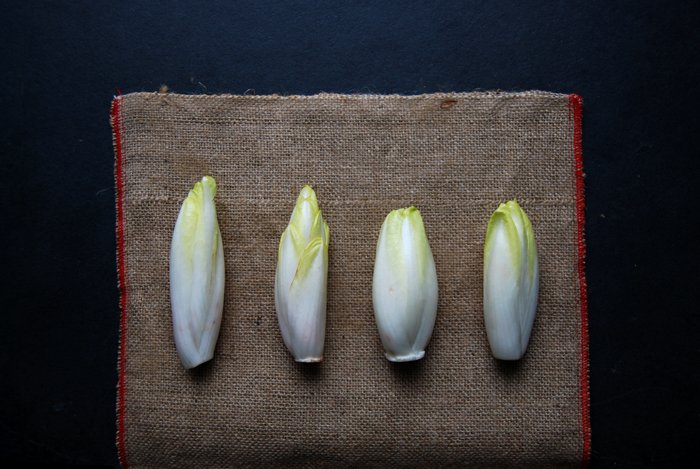
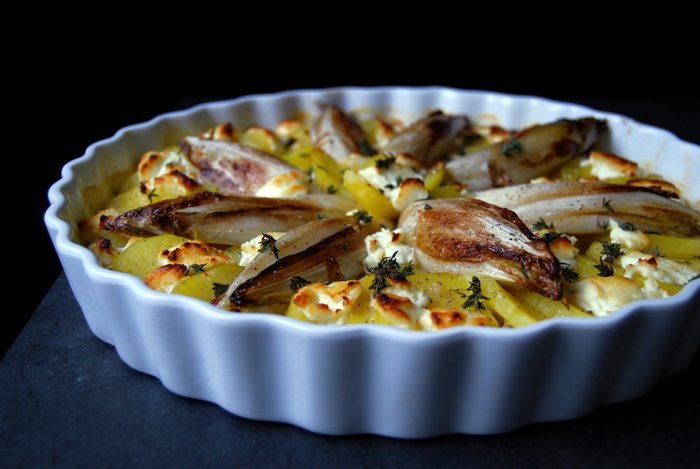
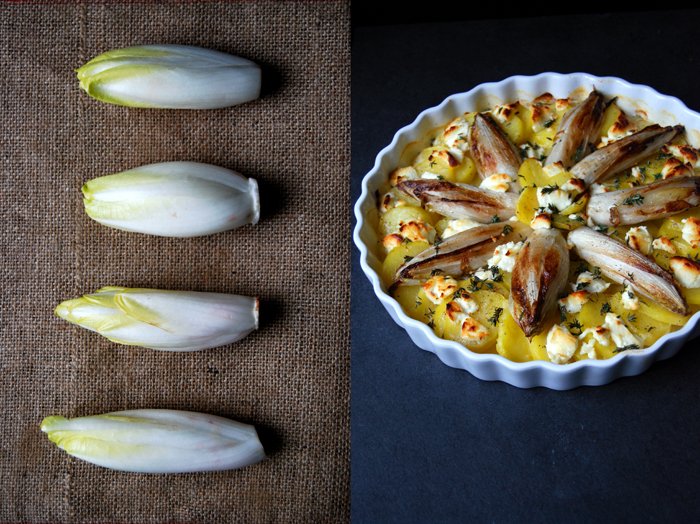
Potato and Endive Gratin with Chèvre and Thyme
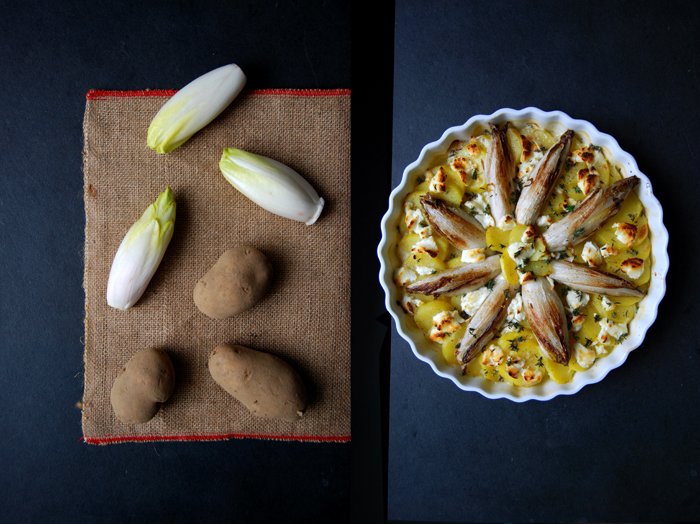
A gratin has the same effect on me as pizza or lasagna, I just want to cuddle up on the sofa and get cosy. This dish spreads such a beautiful aroma of baked cheese and herbs through my flat, it instantly relaxes me. Sometimes I just sit in front of the glass oven door, enjoying the scene of bubbling cream and cheese that turns from an unspectacular pale white to a landscape of golden brown peaks. They look like tiny volcanos with dark tips ready to burst. It's just a gratin but when you look at it long enough it carries you away!
I don't remember how many different potato gratin recipes I have tried out in my kitchen, there were so many. I shared the ones with dried porcini, black pudding, apples or parsnips and today there will be a new addition to the selection: Potato and endive gratin with chèvre and thyme! The combination is great, quite strong with sweet, bitter, milky and woody flavours. I wanted a quick dish, so I boiled the potatoes and sautéed the endives before I baked them with cream and milk in the oven. You could easily come up with some variations and use raclette or blue cheese instead of the chèvre, or add some slices of pears or apples, mix in some chopped rosemary or whatever comes to mind to suit your cosy dinner.
Potato and Endive Gratin with Chèvre and Thyme
For 3-4 people you need
potatoes, boiled, peeled and sliced, 700g / 1.5 pounds
Belgian endives, cut in half, 4
heavy cream 100ml / 3.5 ounces
milk 60ml / 2 ounces
freshly grated nutmeg
salt 1 teaspoon
pepper
chèvre 125g / 4.5 ounces
thyme, the leaves of a small bunch
olive oil
butter 2 teaspoons
Set the oven to 200°C / 390°F and butter a round 28cm / 11" gratin form or baking dish.
In a pan, heat a splash of olive oil and butter and sauté the endives for 2 minutes on each side on medium-high. Season with salt and pepper.
Whisk the cream and milk and season with salt, pepper and nutmeg. Arrange the potatoes and endives in the buttered dish and pour the cream and milk mixture over the vegetables. Sprinkle with chèvre and thyme and bake for 18 minutes. Turn the oven down to 160°C / 320°F and bake for another 5 minutes or until golden brown. Let the gratin cool for a few minutes before serving and season with pepper to taste.