meet in your kitchen | Sami Tamimi's Kofta b'siniyah with Tahini Sauce
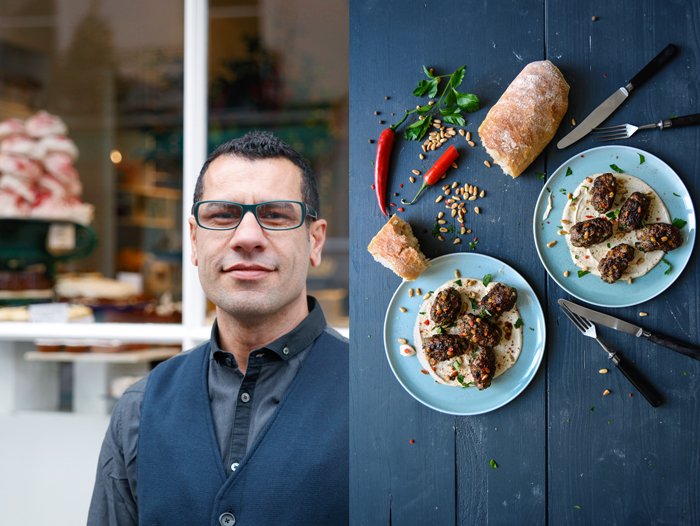
If you love cooking and cookbooks, you've probably come across Sami Tamimi's name, either on the cover of Ottolenghi: The Cookbook or Jerusalem - both award-winning bestsellers. But who is the man who co-wrote these beautiful recipe collections and started some of the most talked about restaurants on the London food scene together with his friend from Israel? While the whole world seeks fame and attention, what drives a man to stay in the background and concentrate on what he loves the most: to cook and create recipes? The more I got to know about Sami, the more I understood his decision to be the chef in the kitchen and not the star in the spotlight.
Growing up in the Old City of East Jerusalem and feeling the restrictions of life in a traditional Muslim family, he left home at the age of seventeen and headed to Tel Aviv. The ambitious young man worked hard and became a chef at one of the country's best restaurants. But Sami was hungry, he wanted to learn and evolve even more: London was next and with it the beginning of a beautiful story of friendship, great food, and success. A story of two men, whose ideas, dreams, and creativity are inseparably woven into each other.
Sami and Yotam first met at Baker & Spice in London, where Sami had developed a food concept quite similar to the one we know from the Ottolenghi restaurants in Islington, Belgravia, Notting Hill, and Spitalfields. Lusciously filled platters of Middle Eastern and Mediterranean dishes, so pleasing to the eyes that one can't help but stop at the first glance. You might not be hungry, but after a quick look through the large windows you'll fall for the tempting displays - they seem to call your name.
Yotam must have felt the same when he passed the restaurant back in 1999. He hopped off his scooter and started talking to Sami. They got along well straight away, so he joined him in the kitchen, and became responsible for the pastry. What happened next is one of the many reasons I love life: a simple idea became reality through hard work and dedication. They decided to open their own place and put their individual skills together to make it happen. The rest is history. In its honesty, Sami's view of the story touches me: “It was Yotam’s vision and his dream. The work was his. The stake was his. I didn’t have money to invest. He risked everything he had. A few years later, I became a partner, but regardless of the cookbooks we do, regardless of our friendship, I’m still working for Yotam. He’s my boss”. But as much as his friend was the visionary, in the end it was also Sami's creative concept for food, which became what we know as Ottolenghi today. These two men, aware of their individual strengths, put it all together and turned it into something greater.
Having cooked and baked with Jerusalem, enjoying it every time I pull it off my shelf, it felt even more exciting to choose one of the recipes from the book together with Sami to share with you. We didn't manage to meet in London, but cooking his kofta here in Berlin, working on the interview with him, and learning so much about and from this inspiring man, made me feel once more that the kitchen is often the best place to get to know someone.
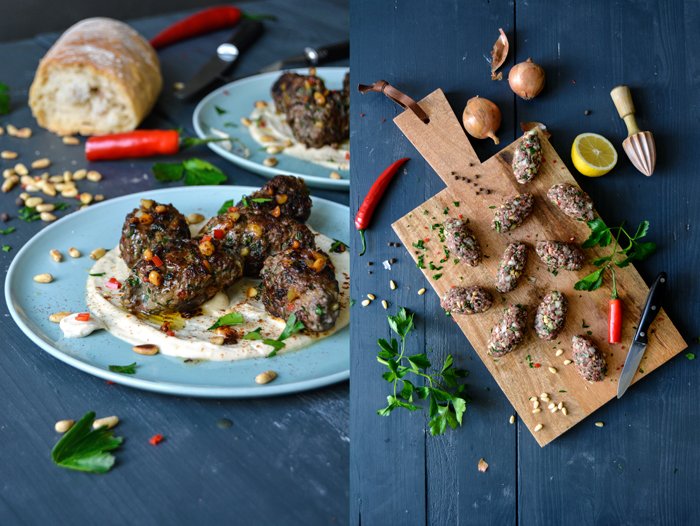
I made Sami's kofta and I loved it. It was nothing less than heavenly: the little oval meatballs are juicy, packed with nutty pine, parsley, spicy garlic and chilli. Sami lays them on a tahini-lemon sauce, a smooth and creamy contrast to the fragrant meat. It's one of those dishes that make you wish you had made twice as much.
Here's a great article by Jane Kramer about Yotam and Sami in The New Yorker, which I can recommend if you need a little inspiration for life.
Sami Tamimi's Kofta b'siniyah
Recipe from Jerusalem by Yotam Ottolenghi and Sami Tamimi.
For these kofta, buy your meat freshly minced by your butcher, if you can. The lamb should be shoulder and the beef a good non-stewing cut. If you get the meat from a supermarket or another grocer, cook it through, just to be on the safe side. Finish the dish with butter only if you are serving it straight away and consuming it all at once. Otherwise, leave it out as it sets quickly, which isn't very nice. Serve with pita (I used ciabatta).
Serves 6 / makes 18 kofta
For serving
light tahini paste 150g / 5 ounces
freshly squeezed lemon juice 3 tablespoons
water 120ml / 1/2 cup
medium garlic clove, crushed, 1
sunflower oil 2 tablespoons
unsalted butter or ghee 30g / 2 tablespoons (optional)
sweet paprika, to garnish
fine sea salt
For the kofta
minced lamb 400g / 14 ounces
minced veal or beef 400g /14 ounces
onion, finely chopped, 1 (about 150g / 5 ounces)
large garlic cloves, crushed, 2
toasted pine nuts, roughly chopped, 50g / 2 ounces, plus extra whole ones to garnish
flat-leaf parsley leaves, finely chopped, 30g / 1 ounce, plus extra to garnish
large medium-hot red chilli, deseeded and finely chopped, 1
ground cinnamon 1 1/2 teaspoons
ground allspice 1 1/2 teaspoons
grated nutmeg 3/4 teaspoon
ground black pepper 1 1/2 teaspoons
fine sea salt 1 1/2 teaspoons
If the tahini-lemon sauce starts to curdle, slowly add more water and continue whisking or pulsing it in a blender until smooth.
Put all the kofta ingredients in a bowl and use your hands to mix everything together. Now shape into long, torpedo-like fingers, roughly 8cm / 3" long. Press the mix to compress it and ensure the kofta is tight and keeps its shape. Arrange on a plate and chill until you are ready to cook them, for up to 1 day.
Preheat the oven to 220°C / 425°F. In a medium bowl, whisk together the tahini paste, lemon juice, water, garlic, and 1/4 teaspoon of salt. You can also use a blender or food processor. The sauce should be a bit runnier than honey; add 1-2 tablespoons of water if needed.
Heat the sunflower oil in a large pan and sear the kofta, in batches, over high heat. Sear on all sides until golden brown, for about 6 minutes. At this point they should be medium-rare. Transfer the kofta to a baking dish and cook in the oven for 2-4 minutes (medium or well done). I cooked mine for 8 minutes in the pan and skipped the oven. I spread the tahini sauce on plates and laid the kofta on top, then I continued with the garnish.
Spoon the tahini sauce around the kofta, so it covers the base of the baking dish. Place in the oven for 1-2 minutes to warm up the sauce.
Meanwhile, if you're using the butter, melt it in a small saucepan and allow it to brown a little, taking care that it doesn't burn. Spoon the butter over the kofta as soon as they come out of the oven. I skipped the butter and used the frying juices from the pan instead. Scatter with pine nuts and parsley and finally sprinkle some paprika on top. Serve immediately.
What made you leave Israel and move to London?
I’d been cooking for many years in Israel. After a good time at Lilith, one of the top restaurants in the country, I was beginning to reach my full potential. I knew if I wanted to keep learning and growing I’d need to look further afield. I’d visited London a few times and fallen in love with it so it was the obvious place to go. The political situation was also getting worse by then and the levels of stress were getting higher. I wanted a change from that.
You say you're more into savoury than sweet baking, what do you like about the process of creating savoury recipes? Why do you prefer it to sweets?
I find I have more creative freedom with savoury cooking. Baking and sweet cooking in general is often quite a science: everything needs to be measured for the result to work out. What goes into savoury cooking can change much more, depending on the day and the mood and what you have to hand. I love that freedom. Also, I can’t stand all the flour that gets everywhere! I like my kitchen clean and tidy.
You lived in Tel Aviv for 12 years, a city known for its vibrant food scene, what makes it so special? What do you miss the most about the food in Israel?
I haven’t lived in Tel Aviv for 17 years so the food scene has changed a lot. I guess what makes it vibrant is people’s passion for the food and people often basing their social life around food. There are a lot of young people who travel the world from Tel Aviv and then return with all sorts of knowledge about different cuisines: that makes it a really creative place.
Do you find creative inspiration in the British cuisine? Do you have a favourite British dish?
We have some wonderful products and raw ingredients here, which are a constant inspiration. There are also a few local chefs who I get a lot of inspiration from: Simon Hopkinson and Nigel Slater, to name just two. I’ve lived in the UK for many years now so I have come to love some of the classic British dishes: Apple or pear and rhubarb crumble, beef wellington and so on.
Is it harder or easier to work with a close friend (Yotam Ottolenghi)? How did your friendship change through the experience of writing books and running restaurants together?
Yotam and I started to work together long before Ottolenghi was born. Combining friendship and business is not always a good thing but we’ve been doing it for many years now and have perfected the way of working together without it effecting our friendship. We see each other a lot and are constantly checking in with each other but our day-to-day jobs are very different. Yotam is based in the test kitchen and I am based in the restaurants so our roles are pretty separate from each other.
You've co-written Ottolenghi: The Cookbook andJerusalem, what is your favourite part of the process of writing a cookbook?
For Jerusalem, cooking at home, alone, in my kitchen and then sharing childhood memories and stories sparked from the food was my favourite part. The Ottolenghi: The Cookbook was harder for us: It’s the first child thing, you are making it up as you go along so it took longer to work out what we were doing! Jerusalem was easier technically but harder emotionally.
What advice can you give young chefs?
Being a chef is hard work: the stress levels are high, the hours are long and you don’t get to sit down or sleep much! Before you spend a lot of time and money going to cookery school, people should always do a stint in a commercial kitchen to see whether the job is for them. There is so much more to the job than just making food look pretty! You need to start with passion and love and then add some hard graft and dedication. And then you can start making the food look pretty!
You write poetry in Arabic and you paint, does this bring you relaxation or inspiration?Writing poetry, painting, photography, cooking, it’s all part of the same process, for me: a way of expressing myself, saying something about the world we are living in.
Do you like to cook at home?
Cooking at home is what keeps me in love with food. I cook at home every evening, even after a long day working with food.
Who is your biggest inspiration in the kitchen?
My mother. She was an amazing cook.
Was food, cooking, and eating a big topic in your family while growing up?
Yes, it was. The kitchen was the heart of the house and my family. When we were having breakfast we’d be discussing what to have for lunch. Chats at lunch were about what we were having for supper. Food was always on the go, being prepared or cooked.
What was the first dish you cooked on your own, what is your first cooking memory?
I cooked all the time, from a very young age: I’d be making it up if I said I could remember my first dish!
What are your favourite places to buy and enjoy food in London?
I tend to go to small Middle Eastern shops in west London for my food grocery because the fruit and vegetables come from sunny places and therefore they taste much better, plus I can find all the ingredients for Palestinian cooking.
If you could choose one person to cook a meal for you, who and what would it be?
My mother. Anything she will cook will be delicious.
You're going to have ten friends over for a spontaneous dinner, what will be on the table?
Many dishes to share and lots of food: if it was a Palestinian spread they’d be Maqluba, okra in tomato sauce, Bamieh Bil Zeit and Mujaddara, lentils and rice with lots of fried onions, to mention just three dishes.
What was your childhood's culinary favourite and what is it now?
I love Palestinian food and still do. I also love Japanese, Mexican, Thai and Nordic food.
Do you prefer to cook on your own or together with others?
When I'm at work then of course with others and it's much more fun. But when I’m cooking at home, I like to be alone, with music.
Which meals do you prefer, improvised or planned?
Some days I'll wake up with a dish in mind and then I'll make it but most times I just go to the shops and decide then, according to what I find and what's in season.
Which meal would you never cook again?
I have recently made Turkish Su Böreği or as some call it, water borek. I'll never attempt to do it again. It was so hard and complicated. The end result is delicious but honestly, I can live happily with myself knowing that I've cooked it once in my lifetime and I'll only be ever eating it in Turkey.
Thank you Sami!
Mozzarella di Bufala and Olive Tapenade Sandwich with Preserved Lemon
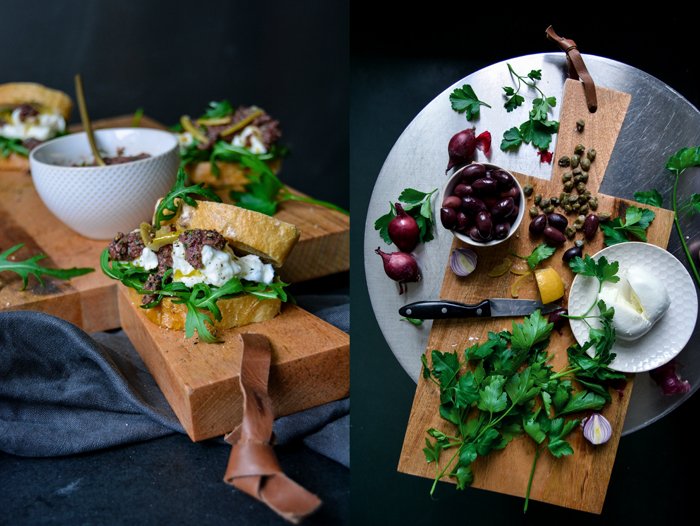
The best sandwiches are often the ones that are thrown together in just a few minutes. You grab whatever your fridge offers without overloading the whole composition and straining your taste buds. Just a few contrasting flavours and textures, the bread has to be fresh - soft and juicy to soak up the filling - and you're done.
Cheese is made for sandwiches and mozzarella is always a good choice, the creamier mozzarella di bufala or burrata are even better. A dark tapenade made of black olives, capers, and anchovy adds depth, refined with a handful of fresh parsley. This lies on a bed of arugula, the spicy leaves go so well with preserved lemons, which I use for the salty-sour topping. You can find them in big supermarkets but I recommend preserving your own. Tucked in a jar with lots of coarse sea salt for a month, the citrus fruit slowly becomes soft and ready to add some tangy bite to meat and vegetable dishes - or sandwiches.
I developed this sandwich recipe for the West Elm blog, where you can also find this recipe and the wooden chopping board you see in the pictures - it's just the right size for a loaf of bread and some cheese for late evening cravings on the sofa. The linen napkin and stoneware bowl and plate are also from their shop. This post was sponsored by West Elm to make my kitchen a little prettier!
Mozzarella di Bufala and Olive Tapenade Sandwich with Preserved Lemon
You can use leftover tapenade for spaghetti.
Makes 4 small sandwiches
For the olive tapenade
pitted black olives, preferably Kalamata, 100g / 3 1/2 ounces
flat-leaf parsley leaves 10g / 1 small handful
small red onion, chopped, 1/2
capers, preferably preserved in salt, rinsed and dried, 1 tablespoon
anchovy filet, rinsed, 1 (optional)olive oil 6 tablespoons
freshly squeezed lemon juice 1 tablespoon
Dijon mustard 1 teaspoon
ground pepper
For the sandwiches
ciabatta, 8 small slices
fresh rucola, 1 handful
mozzarella di bufala, torn into small pieces, 125g / 4 1/2 ounces
preserved lemon, thinly sliced, 1/4
black peppercorns, crushed in a mortar
For the tapenade, purée the olives, parsley, onion, capers, anchovy (optional), olive oil, lemon juice, mustard, and pepper in a blender or food processor until smooth. Season with additional mustard, lemon juice, and pepper to taste.
Divide the rucola and mozzarella between 4 slices of bread and sprinkle with the tapenade, preserved lemon, and crushed pepper.
Beetroot and Skordalia - a velvety Greek Garlic Potato Dip
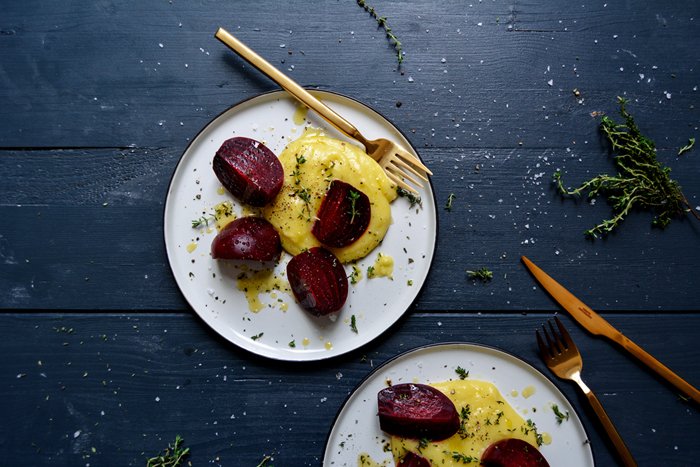
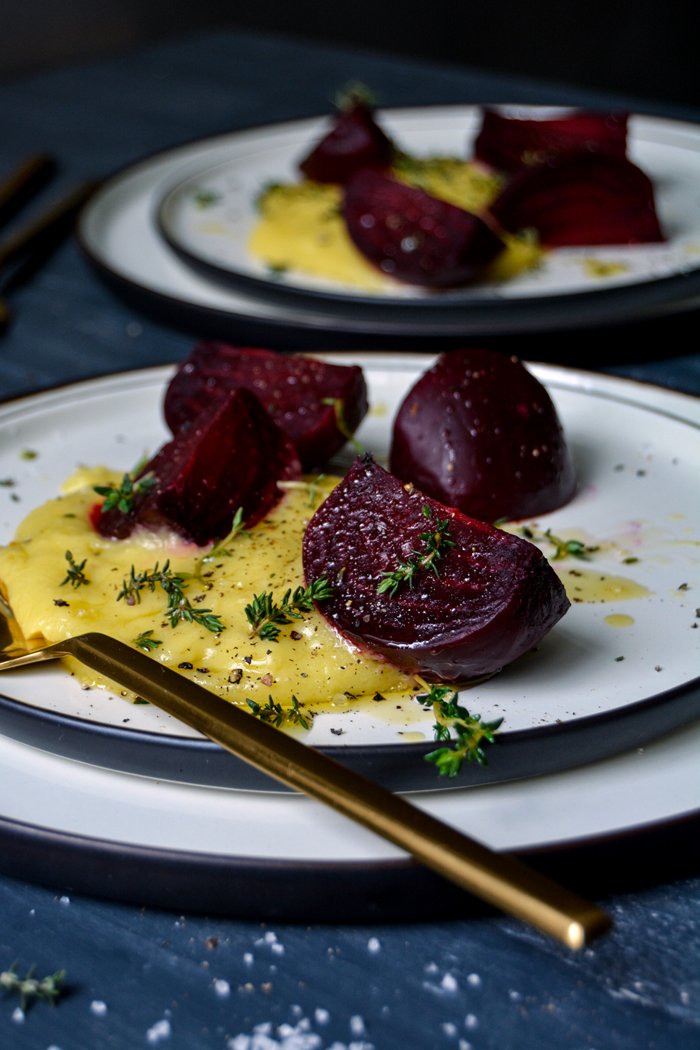
If you feel like garlicky mayonnaise but you're pushed away by its oily heaviness, cook some garlic and potatoes, then throw them in a blender, and you'll end up with skordalia. This popular Greek dip has a similar smooth texture if you pulse it - it becomes thick, sticky, and starchy. The added olive oil adds a Mediterranean touch and taste to it and makes it feel like velvet. If you use a potato masher, which is more common, it will be more chunky, like mashed potatoes, so it really depends on what kind of dip you're after. I was in a mayonnaise kind of mood so the blender was my tool of choice.
Skordalia is a new discovery for me and I don't know how I never heard of it or tasted it before. I love Greek food, I've been to Greece, and I ate my way through countless Greek restaurants, but for whatever reason, I never had it on my plate until now. So I'm keeping up and made an extra large batch of it. To balance the sweetness of the potatoes and garlic, I brought in some earthy flavours: Beetroots cooked in their skins along with a bay leaf. Peeled and still warm, I cut the purple roots into wedges, and served them with generous (!) amounts of my creamy dip. Delicious!
Beetroot and Skordalia - a Greek Garlic Potato Dip
Serves 2
For the beets
medium sized beetroots, unpeeled, 2
bay leaves 2
fine sea salt
For the skordalia
peeled potatoes, diced, about 240g / 8 1/2 ounces
large garlic cloves, unpeeled, 6
olive oil 4 tablespoons
fine sea salt
For the topping
fresh thyme leaves, about 2 tablespoons
flaky sea salt
black peppercorns, crushed in a mortar
Cook the beetroot along with the bay leaves in plenty of salted water on medium heat for about 40-50 minutes or until tender. Check the roots with a metal skewer, they should almost feel soft. Rinse under cold water and let them cool for a few minutes before you peel off their skins. Cut each beetroot into 4 wedges.
In a medium pot, bring the potatoes in plenty of salted water to the boil and cook for 10 minutes. Add the garlic and cook for another 5 minutes or until the potatoes are soft. Drain and quickly rinse with cold water. Peel the garlic and add, along with the potatoes, to a blender or food processor. Add the olive oil and a little salt and pulse until smooth. Season with salt to taste. Divide the beetroot wedges and skordalia between plates and sprinkle with thyme, flaky sea salt and crushed pepper. Enjoy cold or warm.
Sicilian Blood Orange, Olive, and Red Onion Salad
The past mornings have been rather cloudy and grey and to make it even worse, they pulled my beloved wild vine off the wall opposite my kitchen window, which I used to call my vertical garden - the poor thing damaged the bricks. My little garden is gone. So the mood hasn't been very uplifting. And as I sat at the table in my kitchen, chewing over a new exciting meet in your kitchen features that I've been working on over the past few days and that I'm eager to share with you, I had to decide to postpone it. The feature was supposed to be up on the blog this week, but unfortunately, my guest from afar - Australia - is opening his second restaurant and so busy that we couldn't finish the interview yet. I felt a bit sad, or rather frustrated, because I adore his work and I'm so curious to read his answers and to get to know him a bit better. In these moments, I can be like a little child, impatient and not willing to accept reality - in this case: having to wait.
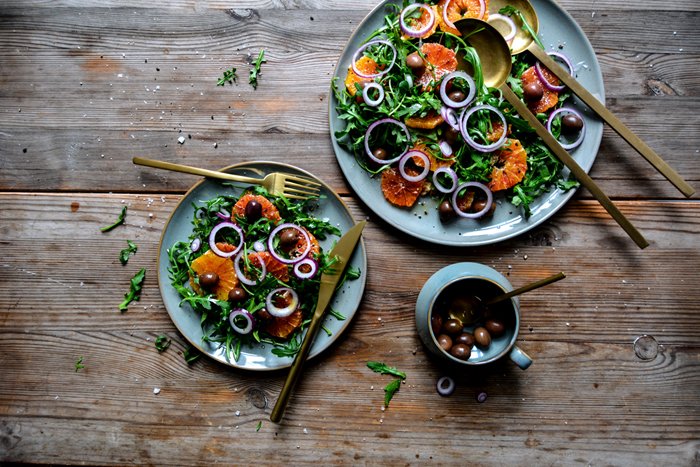
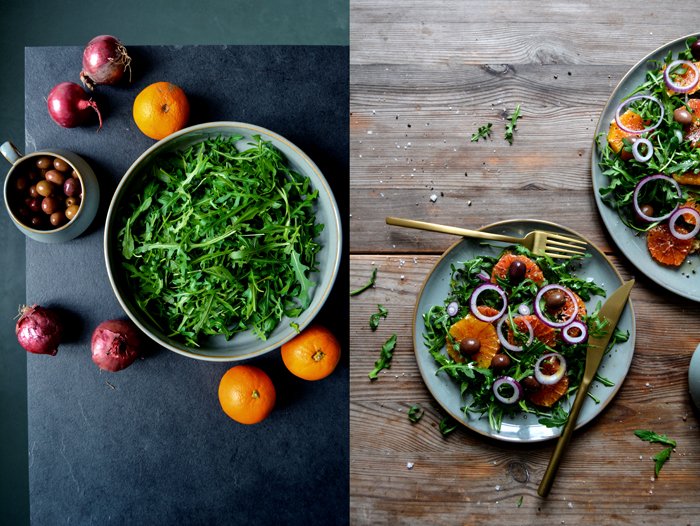
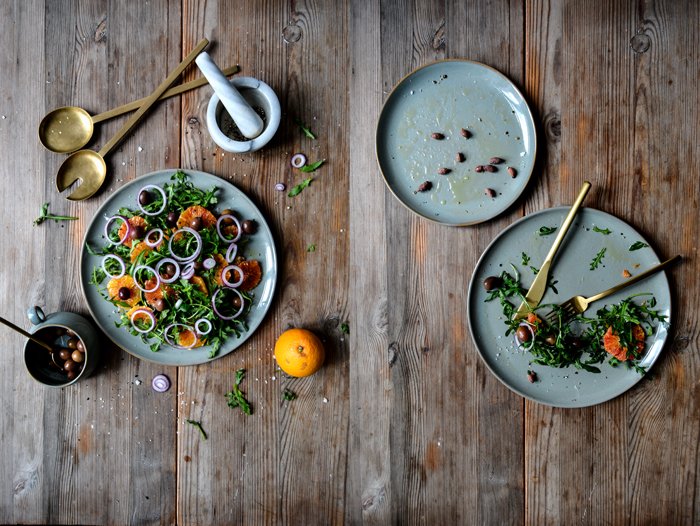
Food is the best cure for disappointment, at least in my case, so I looked around my kitchen to see what I could use to throw together for a quick and uplifting lunch. As I spotted a bunch of ripe blood oranges, I remembered a Sicilian salad made with the sweet citrus fruits, olives, and red onions. I added some rucola, olive oil, flaky sea salt, and crushed peppercorns and enjoyed the colourful plate in front of me just as much as the fresh taste of this delicious composition. Needless to say, my mood was much better after the first bite. The sweetness of the oranges merges perfectly with the spicy rucola and onions and the dark and oily depth of the olives. And it's put together in just a few minutes - it's a keeper!
Blood Orange, Olive, and Red Onion Salad with Rucola
Serves 2-4
fresh rucola leaves, 2 handfuls
small blood oranges, peeled (outer skin and white pith), cut into rounds, 4
small red onion, cut into slim rings, 1-2
black olives with pit 12-16
olive oil
flaky sea salt
black peppercorns, crushed in a mortar
Divide the rucola between plates. Lay the blood oranges, onion, and olives on top. Drizzle with some olive oil and season with flaky sea salt and crushed pepper to taste. Serve immediately, preferably with soft ciabatta.
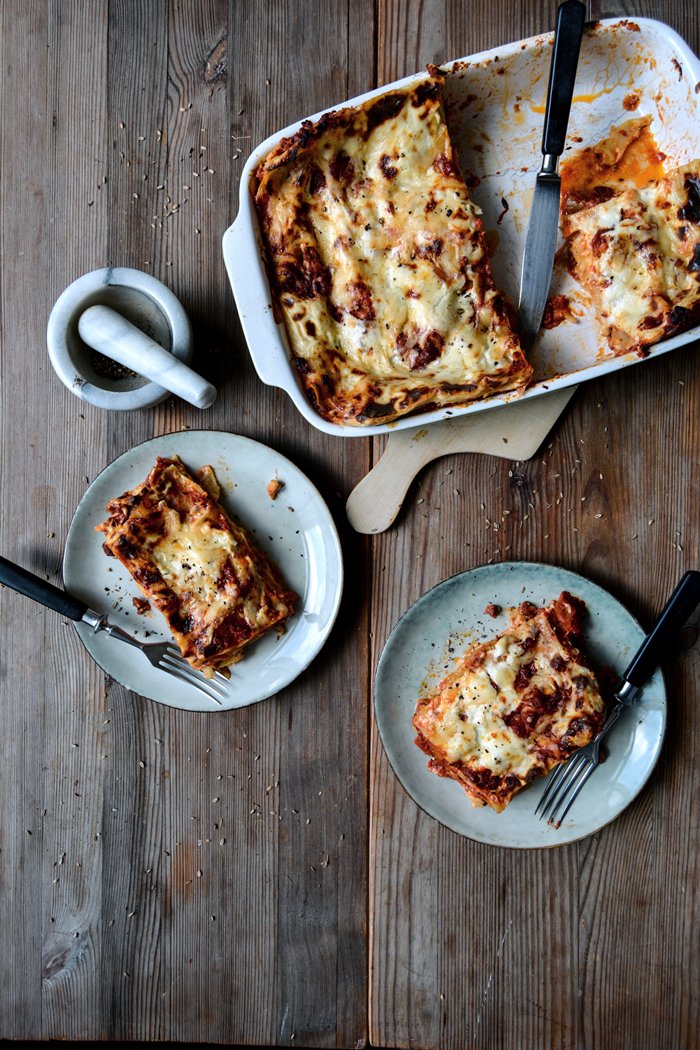
Fennel Tomato Lasagna with Crunchy Bacon
A couple days ago, I went to a meeting that finished much earlier than expected. I stepped out into the street on that cold and grey morning and decided to squeeze in a quick coffee. Just a creamy cappuccino, a flaky chocolate croissant, and a peaceful moment to myself. I went to my favorite Italian deli for a bit of dolce vita - sipping a fantastic coffee while listening to the patron chatting with his customers in Italian, accompanied by a medley of Italian operas. A toddler giggled, two dogs observed the busy scene. The shelves around me presented a tempting selection of chiantis, pasta, polenta, capers, and bottarga. The counter right in front of me filled with various prosciuttos, salami, ciabatta sandwiches, and homemade pasta treats. And right next to it, bowls of every antipasti one can possibly think of. Just the thought of it makes me hungry again.
This is the kind of scene that makes you want to go straight to your kitchen, open a bottle of wine, and start cooking. Italian of course. The weather doesn't leave the slightest doubt that spring isn't near yet, so a hearty lasagna is the best thing to have on your plate. Mine is filled with lots of juicy tomatoes, roasted fennel seeds, and fennel bulb thinly sliced and sautéed, plus crunchy bacon bites, dried chili peppers, a bit of Parmesan, and a creamy béchamel sauce. At first, I wanted to combine the fennel with a meaty bolognese but then I remembered a pasta dish that I shared on the blog almost two years ago and that changed my mind. You could leave out the bacon, but I recommend leaving it in: the fennel seeds roast in the meat's salty juices and merge with the tinned tomatoes - and become a heavenly sauce. Layered with pasta sheets and the crisp fennel bulb, it's just what I want on a cold day in February.
Fennel Tomato Lasagna with Crunchy Bacon
Serves 4 to 6
For the béchamel sauce
milk 700 ml / 3 cups
a pinch of nutmeg, preferably freshly grated
fine sea salt
ground pepper
unsalted butter 30g / 2 tablespoons
plain flour 30g / 4 tablespoons
large bay leaf 1
For the lasagna
butter, for the baking dish
olive oil
cored fennel bulb, thinly sliced lengthwise, 340g / 12 ounces
fine sea salt
black peppercorns, crushed in a mortar
thick-cut bacon, cut into very small cubes, 200g / 7 ounces
fennel seeds 2 tablespoons
garlic, crushed, 3 cloves
small dried chili peppers, 2
peeled whole tinned tomatoes, chopped, 1.2kg / 2 2/3 pounds
no-boil lasagna noodles, about 250g / 9 ounces
freshly grated Parmesan 100g / 3 1/2 ounces
For the béchamel sauce, combine the milk, nutmeg, and pinches of salt and pepper in a medium saucepan and bring to a boil. Immediately take the pan off the heat and set aside.
To make the roux for the béchamel, melt the butter in a clean medium saucepan over medium-high heat and as soon as it’s sizzling hot, whisk in the flour. Slowly pour the hot milk mixture into the roux and whisk until smooth. Add the bay leaf and simmer on low, whisking occasionally, for 2 to 3 minutes or until the texture starts to thicken. Remove and discard the bay leaf. Season to taste with nutmeg, salt, and pepper then cover, and set aside.
Preheat the oven to 180°C / 350°F (conventional setting) and butter a 26 x 20 cm / 10 x 8" baking dish (or a dish of roughly this size).
In a large, heavy pan, heat a generous splash of olive oil over medium-high heat and sauté the fennel slices in batches for about 1 minute per side or until golden and al dente. Spread out the fennel slices next to each other in the pan so that they cook evenly. Season with salt and pepper and transfer to a plate.
Put the pan back on the heat and cook the bacon over medium-high heat for about 7-10 minutes or until golden brown and crunchy. Add a little oil if necessary and stir once in a while. Scrape the bacon to the sides of the pan, add a little olive oil (if the pan is too dry) and the fennel seeds, garlic, and chili. Turn the heat down to medium and cook for 2 minutes, mind that the seeds don't turn too dark. Add the tomatoes, season with salt and pepper, and, stirring occasionally, cook for about 10 minutes over medium-high heat or until thickened. Season with salt and pepper to taste. Take the pan off the heat and set aside 3 tablespoons of the sauce (for the final layer of the lasagna).
Arrange a layer of pasta on the bottom of the buttered baking dish and spread with 1/3 of the tomato-bacon sauce and sprinkle with 1/4 of the béchamel. Top with 1/3 of the sautéed fennel and 1/4 of the Parmesan. Repeat to make 3 more layers, top the last layer with pasta. Sprinkle with the reserved 3 tablespoons of the tomato-bacon sauce and the remaining béchamel and Parmesan. Bake for 35-45 minutes (depending on the lasagna package instructions) or until the pasta is al dente. To brown the cheese a little, you can switch on the broiler for the last 1 to 2 minutes. Let the lasagna sit for 5 to 10 minutes before serving and sprinkle with some crushed peppercorns. Enjoy!
Potato and Apple Stuffed Cabbage Rolls with Walnut Butter and Gruyère
Here we are again: I've reached that critical time of the year - as always in February - when it's still all about cabbage and roots at the market, but I start dreaming of juicy tomatoes and cucumbers, sweet berries and peaches, and seafood dinners at the sea - my mind, impatient and hungry, is already settled in summer.
Luckily, February is quite a short month, then we have March, which at least offers ramps towards its end. In April I can feel the sun getting warmer, the sky becomes brighter, and the produce on my counter tops slowly starts to look more colorful. But for now, I must wait and enjoy what I've got - a beautiful crisp head of cabbage.
I blanched the large outer cabbage leaves and stuffed them with boiled potatoes, sour apple, fresh thyme, and a few spoonfuls of mascarpone, instead of sour cream, to bind the mixture. My personal highlight was the topping of crunchy walnut butter and freshly grated Gruyère. Any aromatic hard cheese would work here, but there's something about this combination of the roasted nuts and this slightly sweet Swiss cheese that fits perfectly to these little wintery cabbage packages.
Potato and Apple Stuffed Cabbage Rolls with Walnut Butter and Gruyère
For the cabbage rolls
large white or green cabbage leaves 8
peeled potatoes, boiled and chopped, about 250g / 9 ounces
small apple, peeled, cored and chopped, 1
fresh thyme leaves 1 tablespoon
mascarpone (or sour cream or ricotta) 3 tablespoons
organic egg 1
nutmeg, preferably freshly grated
fine sea salt
ground pepper
white wine
For the walnut butter
butter 60g / 1/4 cup
walnuts, roughly chopped, 25g / 1 ounce
For the topping
Gruyère, or any aromatic hard cheese, finely grated, about 2 tablespoons
a few fresh thyme leaves
black peppercorns, crushed in a mortar
For the cabbage leaves, take a large cabbage head and trim the bottom. Carefully peel off 8 large outer leaves. If they tear a little, it's fine. You'll only need 4-5 blanched leaves, blanch the remaining leaves to cover torn patches in the leaves that you use for the rolls.
Preheat the oven to 200°C / 400°F.
In a large pot, bring salted water to the boil and blanch the cabbage leaves for about 4-6 minutes or until tender. Rinse quickly under cold water, drain and cut out the hard stalk (in a slim triangle-shape).
For the filling, in a large bowl, combine the boiled potatoes, apple, and thyme. Whisk together the mascarpone and egg and season with salt, pepper and nutmeg. Add to the potato-apple mixture, stir to combine, and season with salt and pepper to taste.
Lay 4-5 cabbage leaves flat on the kitchen counter and cover torn parts with soft pieces of the remaining leaves. Put a generous tablespoon of the filling in the middle of each cabbage leaf, fold up the sides and roll it up, starting from the side of the stalk. Don't worry if they don't look perfect, mine didn't either. They can all have their individual shape.
Transfer the cabbage rolls to a baking dish and cover the bottom with a splash of white wine and some water. Bake in the oven for about 30-35 minutes or until golden and firm.
While the cabbage rolls are baking in the oven, prepare the walnut butter: In a small saucepan, melt the butter on high heat. When it's sizzling hot, add the walnuts and turn the heat down to medium. Roast for 10-20 seconds or until golden but not dark. Take the saucepan off the heat.
Divide the cabbage rolls between plates and drizzle with a little butter. Sprinkle with the roasted walnuts, fresh thyme, Gruyère, and crushed pepper.
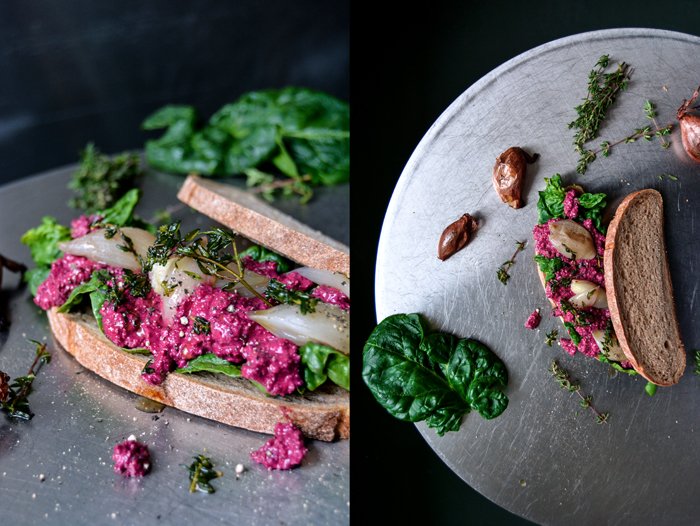
Beet Ricotta and Roast Shallot Sandwich with Spinach and Fried Thyme
Few things frustrate me as much as trying to make vegetable chips and failing completely. The kitchen is in mess, everything is coated in a layer of oil (including myself) and the result is so hopelessly bad that it has to go right into the bin. My parsnip chips from a couple months ago turned out so perfectly that I felt brave enough to think it would be that easy with any kind of roots or greens. But I was wrong. I had thin, crisp beetroot and spinach bites on my mind but a burnt disaster on my plate. It was so frustrating as I already had the perfect sandwich for this composition ready in my head: the chips were supposed to lay gracefully on a bad of sweet, juicy shallots roasted in the oven in their skins. I could already see the bright purple and green screaming in front of the pale onions. But reality was different. There was no bright anything but a black, bitter disaster.
I know I should have done it before, but afterwards I read and learned that beet chips can be cooked in the oven, which should be much easier. At that point my mood had reached such a low point that I decided to go for a different creation. I looked at the two beetroots that were lucky enough to escape the scorching hot oil in the pan and stuffed one of them in a blender along with some fresh ricotta, olive oil, thyme, and lemon juice. You could boil the root first but I actually enjoyed the crunchy raw bites in the dip. Fried thyme was next and a success - the tiny leaves thrown into sizzling olive oil and taken off the heat immediately, were just right - neither dark nor bitter. And all this piled up on a thick leaf of raw spinach. You could make a juicy ciabatta sandwich with it but I was too lazy to go to the bakery so I grabbed my dark spelt potato bread. It added heartiness to the earthy flavours. This is a proper winter sandwich, stuffed with taste and vitamins.
Beet Ricotta and Roast Shallot Sandwich with Spinach and Fried Thyme
Makes 2 large sandwiches
For the roast shallots
medium shallots, in their skins, 8
olive oil 1 tablespoon
For the beet-ricotta dip
peeled beetroot, raw or boiled, roughly chopped, 120g / 4 ounces
fresh ricotta 100g / 3 1/2 ounces
olive oil 3 tablespoons
freshly squeezed lemon juice 1 teaspoon
fresh thyme leaves 1 heaping teaspoon
fine sea salt
ground pepper
For the fried thyme
olive oil 3 tablespoons
fresh thyme 8 small, young sprigs
For the sandwiches
dark bread 4 slices
large mature spinach leaves 4 (or a small handful of baby spinach)
black peppercorns crushed with a mortar
Preheat the oven to 425°F (220°C).
For the roast shallots, in a baking dish, toss the shallots with 1 tablespoon olive oil. Roast for 15 minutes, then turn them over and roast for 15 minutes on the other side. If they feel soft when you push them down gently, they’re done; set aside.
For the beet-ricotta dip, combine the ingredients in a blender or food processor and pulse until smooth. Season to taste with salt, pepper, and thyme. If the dip is too dry, add more olive oil.
For the fried thyme, heat the olive oil in a small saucepan over high heat, add the thyme sprigs. Take off the heat immediately and set aside.
Brush 2 slices of the bread with the thyme oil from the saucepan and cover with spinach leaves. Sprinkle with generous dollops of the beet-ricotta dip. Snip the ends off the roast shallots and squeeze them out of their skins onto the dip. Lay some fried thyme on top and sprinkle with crushed peppercorns. Close the sandwich and enjoy.
Beluga Lentils with Ginger Orange Rutabaga and Rosemary
I once read that the 3rd Monday of January is supposed to be the most depressing day of the year - Blue Monday. I don't know if it's true, luckily it has already passed, and I didn't notice my mood drooping drastically that day. However, I've felt a rising impatience for more light and warmer weather to come back into my life. So much so that I had to book flights to Malta last night. This always makes me feel so much better, no matter how far in the future the departure date lies, just the thought of it puts me in a good mood.
Another way to lift my spirits is food. Cosy food, colourful food, or simply delicious food. This dish combines all of it: nutty Beluga lentils, topped with thin slices of rutabaga, quickly cooked in the pan with lots of ginger, orange zest and juice, and fresh rosemary. The rustic root is as bright as the sunrise over Malta's east coast and its earthy flavour can easily deal with some strong aromas. I was surprised how well it merged with the dark legumes.
Beluga Lentils with Ginger Orange Rutabaga and Rosemary
Serves 3-4
For the lentils
Beluga lentils, or any lentils (no soaking required), 280 g / 10 ounces
small sprig fresh rosemary 1
bay leaf 1
olive oil
balsamic vinegar 1 tablespoon
fine sea salt
ground pepper
For the rutabaga
peeled rutabaga, cut into wedges and very thinly sliced (use a mandoline or cheese slicer), 300g / 10 1/2 ounces
freshly grated ginger 1 tablespoon
freshly grated zest of 1 orange
freshly squeezed orange juice 100ml / 1/3 cup plus 2 tablespoons
fine sea saltground pepper
finely chopped fresh rosemary needles 1-2 tablespoons
black peppercorns, crushed in a mortar
Place the lentils in a saucepan with plenty of (unsalted) water, add the rosemary and bay leaf, and bring to the boil. Simmer for about 20 minutes or until al dente (or follow the package instructions). Remove excess liquid with a ladle if necessary and stir in a generous splash of olive oil and the vinegar. Season to taste with salt, pepper and vinegar.
While the lentils are cooking, prepare the rutabaga: In a large, heavy pan, heat a generous splash of olive oil over medium-high heat. Add the rutabaga and cook for about 5 minutes, stirring occasionally, until golden and al dente. Scrape the rutabaga to the side, add a little more olive oil to the pan along with the ginger, cook for 1 minute, stirring constantly. Add the orange zest (leave a little of the zest for the topping) and juice and season with salt and pepper. Stir in the rosemary or use as a topping once the plates are ready. Cook for another 1-2 minutes until the desired texture is reached.
Divide the lentils between plates and lay the rutabaga on top. Sprinkle with rosemary, orange zest, and crushed peppercorns and drizzle with a little olive oil (optional). Serve immediately.
Turkish Pide with Provençal Olive Tapenade
Anatolia - my new favourite cookbook by Somer Sivrioglu and David Dale - inspired me to create a cultural fusion. Turkey and France meet in my vegetarian version of Somer's Lahmacun - thin pide (Turkish pizza) spread with a thin layer of minced meat and chopped vegetables. The original recipe uses minced lamb and tastes fantastic, but when I enjoyed this crisp treat a couple weeks ago, I decided to try a meat-less variation of it.
Compared to Italian pizza, it's a quick project. The dough is made without yeast and doesn't need to rise, and the ingredients for the tapenade pulsed in a blender don't need much time and attention either. The topping is dark and concentrated, lots of Kalamata olives, parsley, red onion, capers, anchovies, and mustard. It's quite an addictive little snack, the two of us ate all four pide in one go at lunchtime!
Pide with Provençal Olive Tapenade
Serves 2-4
For the dough
plain flour 270g / 2 cups plus 2 tablespoons
salt 1 teaspoon
water, lukewarm, 125ml / 1 cup
For the tapenade
pitted black olives, preferably Kalamata, 200 g / 7 ounces
flat- leaf parsley leaves 20g / 1 large handful, plus more for the topping
medium red onion, chopped, 1/2
capers, preferably preserved in salt, rinsed and dried, 25 g / 2 tablespoons
anchovy fillets, rinsed and dried, 4
olive oil 8 tablespoons, plus more for the topping
freshly squeezed lemon juice 2 tablespoons
Dijon mustard 2 teaspoons
ground pepper
For serving
Fresh red chili pepper, thinly sliced, 1/2
Preheat the oven to the highest setting (at least 260°C / 500°F) and put a baking sheet on the bottom of the oven.
For the dough, combine the flour and salt in a large bowl, add the water, and mix with the dough hooks of an electric mixer for a few minutes until well combined. Transfer the dough to a countertop and continue kneading and punching it down with your hands for 5 minutes until you have a smooth and elastic ball of dough. Divide the dough into 4 balls, place them back in the bowl, cover with a damp tea towel, and leave to rest while you prepare the tapenade.
Purée the ingredients for the tapenade in a blender or food processor until smooth.
On a floured table or countertop, roll out the dough with a rolling pin into four 23-cm / 9-inch rounds and cover with a tea towel. Transfer 1 round to a floured pizza peel (or medium cutting board) and spread evenly with 1/4 of the tapenade (you might need a bit less) and sprinkle with a little chili pepper. Transfer the pide to the hot baking sheet in the oven and bake for 4-5 minutes or until golden brown. Take the pide out of the oven, drizzle with a little olive oil, and sprinkle with a few parsley leaves. Repeat with the remaining pide. Enjoy warm or cold.
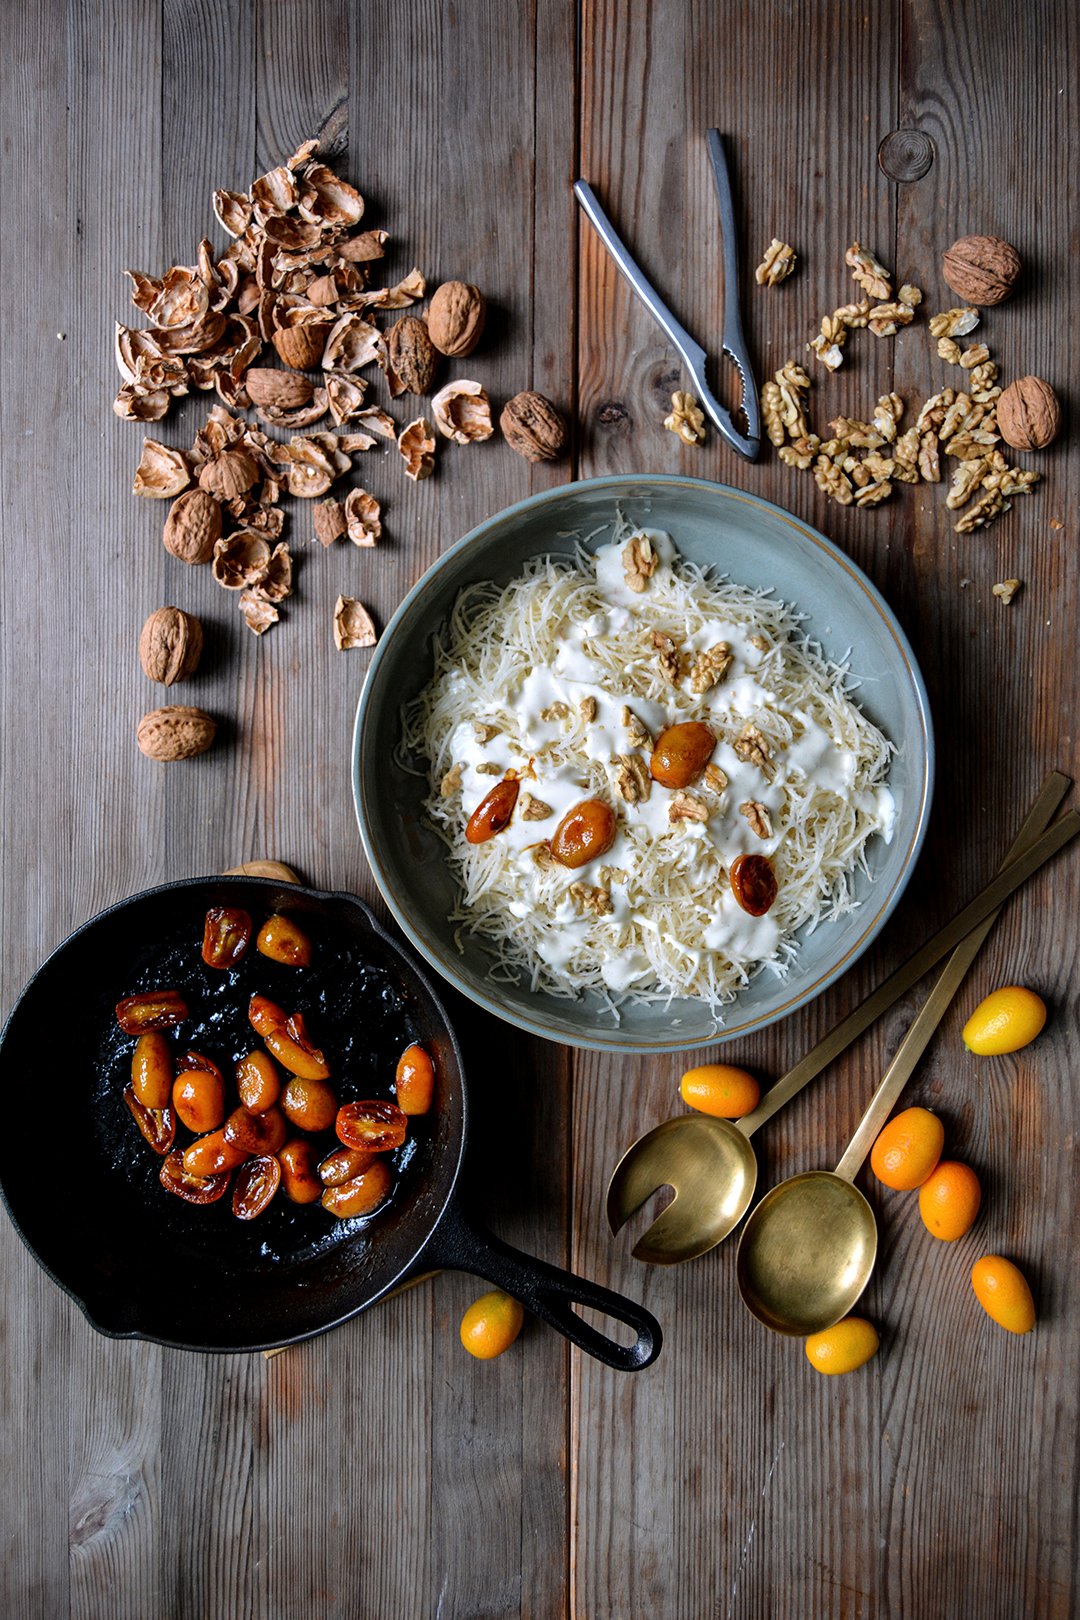
Celeriac Salad with Caramelized Honey Kumquats and Walnuts
Berlin, January 2016:
My little cookbook library got extended by a few amazing recipe collections. Santa was so kind to leave a few gems under the tree: Nigel Slater's new The Kitchen Diaries III, Jerusalem by Yotam Ottolenghi and Sami Tamimi (finally!), Vegetarian India by Madhur Jaffrey, and the fantastic Anatolia by Somer Sivrioglu and David Dale. The latter blew me away! This book is gorgeous, the pictures are mouthwatering and the dishes inspired me as soon as I laid my eyes on the first page. I'll definitely write about it again in the next few weeks, I already tried one of the recipes for a Turkish pizza and it was divine.
Madhur is a new find for me, I haven't had much time to thumb through the pages of her book but what I've seen so far looks divine. Nigel's book is a cooking bible with 250 (!) recipes - and I'm already struggling with the amount of work I have with the 100 recipes in my Eat in My Kitchen book! I love his approach to creating recipes, the way he writes about them and the beautiful photos taken by Jonathan Lovekin who's also been responsible for Nigel's former kitchen diaries, which I'm equally obsessed with. I'm sure I'll spend quite some time with this book in the next few years.
One of Nigel's creations, which is the 248th recipe in the book, struck me right away: a gorgeous celeriac and blood orange salad sprinkled with nigella seeds and capers. I haven't tried it yet - but I will soon - however, it made me think about celeriac salads. I like the addition of citrus, especially my beloved blood orange, but so far they haven't been in sight at the market. Kumquats came to mind, caramelized and softened in sizzling honey, I used these sweet, sour, and bitter bites for my luscious Orange Blossom, Ricotta, Kumquat, and Pistachio Tartine last April. It was quite a beauty. For my salad of grated celeriac, I also added a creamy yet light yoghurt-cardamom dressing, and sprinkled it with walnuts. Some honey drizzled on top to enhance the sweetness and my first winter salad of 2016 was born. Thank you Nigel!
If you're not that fond of kumquats, you can replace them with orange fillets.
Celeriac Salad with Cardamom-Yoghurt, Caramelized Honey Kumquats, and Walnuts
Serves 3-4
For the dressing
yoghurt 200g / 2/3 cup
olive oil 2 tablespoons
freshly squeezed orange juice 1 tablespoon
ground cardamom 1/4 teaspoon
freshly grated orange zest 1/2 teaspoon plus 1 teaspoon for the topping
fine sea salt
ground pepper
For the salad
peeled celeriac, grated, 250g / 9 ounces
freshly squeezed lemon juice 1 tablespoon
liquid honey 1 tablespoon plus 1-2 tablespoons for the topping
freshly squeezed orange juice 4 tablespoons
kumquats, cut in half lengthwise, 12 (or 12 orange fillets)
walnuts, 1 large handful
a few black peppercorns, crushed in a mortar
For the dressing, whisk together all the ingredients until smooth and season to taste with salt, pepper, cardamom and orange juice.
In a large bowl, mix the grated celeriac and lemon juice, using your fingers. Sprinkle with the dressing.
Heat 1 tablespoon of the honey in a small, heavy pan on high heat, add the kumquats and the orange juice and cook for about 2-4 minutes or until soft and caramelized, turn them once or twice and mind that they don't burn. Take the pan off the heat and arrange the kumquats on top of the salad.
Sprinkle the salad with walnuts, crushed pepper, and additional orange zest, and drizzle with honey. Enjoy immediately or let it sit for a few hours. It won't look as pretty anymore but tastes just as good.
Salt Baked Salmon Fillet with Dill, Black Pepper and Juniper
If you're still looking for a scrumptious but effortless main course for New Year's Eve and if you like salmon fillet, this is your recipe. After festive days of rich, meaty treats I prefer to start the new year with a lighter dish, seafood, lots of vegetables, or Asian inspired recipes, preferably easy dishes refined with colourful aromas, spices and herbs. Salmon baked in salt crust came to mind, but not a whole fish - I want to keep it simple - only the fillets, sandwiched with a handful of dill, crushed juniper berries and black pepper. Sealed under a mixture of coarse sea salt, flour, cornstarch, egg white and water, it bakes in the oven soaking up all these wonderful flavours. After 50 minutes it was done, which I checked by following Martha Stewart's tip: Insert a metal skewer, if it's warm to the touch, the fish is ready to leave its crusty shell. You have to use a sharp bread knife to cut open the salty crust, this is the only part of this recipe that demands a bit of work. You could also break it but I wanted to open it like a lid - only for visual reasons. The result is perfectly flaky, firm with a subtle hint of sea salt, it can be a bit overpowering on the edges of the fillet but you can easily scratch this excess salt off. I used fleshy fillets tied together with a cotton string, it was enough for 3-4 people - depending on the amount of dishes you're planning to serve. Two thick center pieces of roughly the same size are perfect, you could also fill them with other herbs or thin lemon or orange slices but I wanted to use the flavours which I use for my traditional gravad lax recipe: fresh dill, spicy pepper and fragrant juniper.
During the holidays, I cleaned the shelves in my kitchen, which were in a rather chaotic state, and to my surprise, I found far more packages of the Cini's sea salt than I had expected. They didn't last very long, I needed 1 kg / 2 1/4 pounds to cover my salmon. The Cini's salt comes from the Mediterranean Sea, from Gozo, where the family harvests the white crystals straight from the rocks. It tastes fantastic, it's obviously salty but not in a harsh way, it has a distinct flavour, which you can recognize in the cooked fish. I recommend using high-quality salt for this recipe, although you will discard the crust, it effects the final result tremendously.
A very exciting year has almost come to an end. I look forward to 2016 and I hope it will be more peaceful and united than the year before. My kitchen will be as busy as ever and I can't wait to share more recipes with you, here on the blog and in my first eat in my kitchen book, which will be published in September.
I wish you a wonderful start to the New Year, don't get intimidated by too many resolutions, just enjoy your life!
Meike xx
Salt Baked Salmon Fillet with Dill, Black Pepper and Juniper
Serves 3-4 (for more people you can use bigger fillets and leave them in the oven a little longer)
high-quality coarse sea salt 1 kg / 2 1/4 pounds
plain flour 100 g / 3 /4 cup
cornstarch 30 g / 1/4 cup
organic egg whites 2
water, cold, 75 ml / 1/3 cup
salmon fillet, 2 center pieces with skin (about 680 g / 1 1/2 pounds in total)
juniper berries, coarsely crushed in a mortar, 8
black peppercorns, crushed in a mortar, to taste
fresh dill, 1 small bunch plus 1 tablespoon chopped fresh dill, for the topping
Preheat the oven to 200°C / 400°F (conventional setting). Line a baking dish with parchment paper.
For the salt crust, combine the coarse sea salt, flour, cornstarch, egg whites, and water in a large bowl until combined, use your fingers or a spoon.
Spread a little of the salt mixture on the lined baking dish, lay 1 salmon fillet - skin side down - on top of the salt. Rub a little crushed pepper and half the juniper into the pink side of the salmon, then cover with the dill. Rub the second salmon fillet with pepper and the remaining juniper and lay it on top of the dill - skin side up. Tie the fillets together with a cotton string (see picture below), then cover the salmon with the remaining salt mixture until it's completely covered (see 2nd picture), push the salt mixture together gently. Bake in the oven for about 50 minutes or until a metal skewer, poked through the crust into the thickest part of the salmon, is warm to the touch when you pull it out of the salmon.
Let the crust cool for 1-2 minutes, then cut it open with a sharp bread knife. Cut the string open, divide the fish fillets in 3-4 portions, and serve immediately. Sprinkle with freshly chopped dill on the plates (optional).
Chickpea Potato Soup with Rucola Pesto, Lemon and Fried Chickpeas
A couple days ago, we left Berlin to visit the gardens of Sanssouci Palace a few miles outside Berlin. The palace used to be the Prussian king, Frederick the Great's summer residence, built in the 18th century. The building itself is beautiful but the terraced garden is stunning. I love being there in summer, when it's all lush, green and in bloom but there's a certain melancholic mood woven into the misty air on a cold, grey day that fits this time of the year perfectly. It's pure silence, no leaves left on the trees, the marble sculptures high up on their pedestals looking down on us, wrapped in jackets and scarves on our way to another one of the park's winter attractions, a Christmas market and its warming mulled wine.
When we got home I felt so frozen that I promised myself I'd make a rich soup the next day. I cooked canned chickpeas and potatoes in broth, puréed it into a velvety, smooth soup and sprinkled it with fresh rucola pesto, lemon zest and fried chickpeas. It's a great winter soup, thick and refreshing, and just right before tomorrow's feasting begins.
I wish you a wonderful and peaceful Christmas with your loved ones. Enjoy the moments of love, joy and good food! xx
Chickpea Potato Soup with Rucola Pesto, Lemon and Fried Chickpeas
You won't need all the pesto for the soup but I don't like making pesto in small batches. We used the remaining pesto to spread on toasted dark bread, which we enjoyed with the soup.
Serves 2-4
For the soup
olive oil
medium onion, chopped, 1
garlic, crushed, 2 large cloves
potatoes, peeled, cut into cubes, 250g / 9 ounces
canned chickpeas, rinsed and drained, 250g / 9 ounces, reserve 4 tablespoons for the topping
vegetable broth 900ml / 3 3/4 cups
bay leaf 1
salt
ground pepper
nutmeg, preferably freshly grated
ground cumin 1/8 teaspoon
For the pesto
rucola (arugula) leaves 60g / 2 ounces
Parmesan 25g / 1 ounce
pine nuts 25g / 1 ounce
olive oil 75 ml / 1/3 cup
salt 1/8 teaspoon
For the topping
freshly squeezed lemon juice
olive oil
lemon zest
black peppercorns, crushed in a mortar
For the soup, heat a splash of olive oil in a large pot and sauté the onion on medium-heat for a few minutes until golden and soft. Add the garlic and cook for 1 minute. Add the potatoes and chickpeas, stir and cook for 1 minute. Pour in the broth, add the bay leaf, and season with a little salt and pepper. Lower the heat and simmer, uncovered, for 20-25 minutes or until the potatoes are soft.
While the soup is cooking, purée the ingredients for the rucola pesto in a blender or food processor. Season to taste and set aside.
For the fried chickpeas, heat a splash of olive oil in a small, heavy pan on high heat. Add the reserved chickpeas, close with a lid immediately (the chickpeas will pop) and fry for 1 minute or until golden. Take the pan off the heat.
When the potatoes are soft, discard the bay leaf and purée the soup in a blender, food processor or with an immersion blender until smooth. Season with salt, pepper, nutmeg and cumin to taste, bring to the boil, and simmer for 1 minute, stirring constantly. Divide the soup between bowls, drizzle with a little lemon juice and olive oil and sprinkle with rucola pesto, lemon zest, crushed pepper and the fried chickpeas.
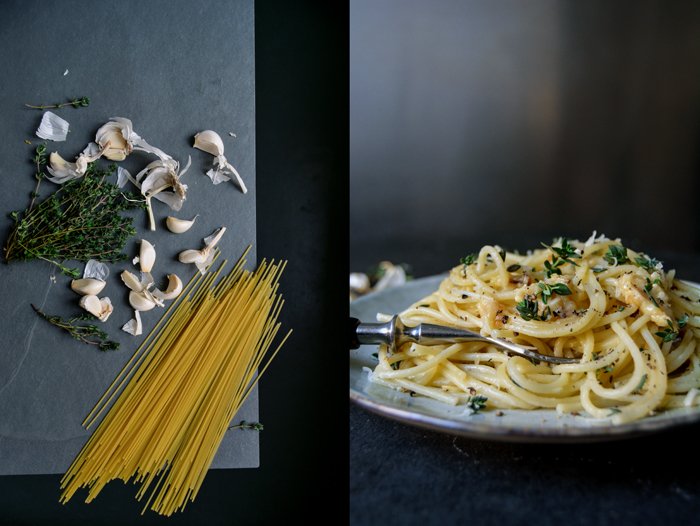
Roasted Garlic Butter Spaghetti with Thyme
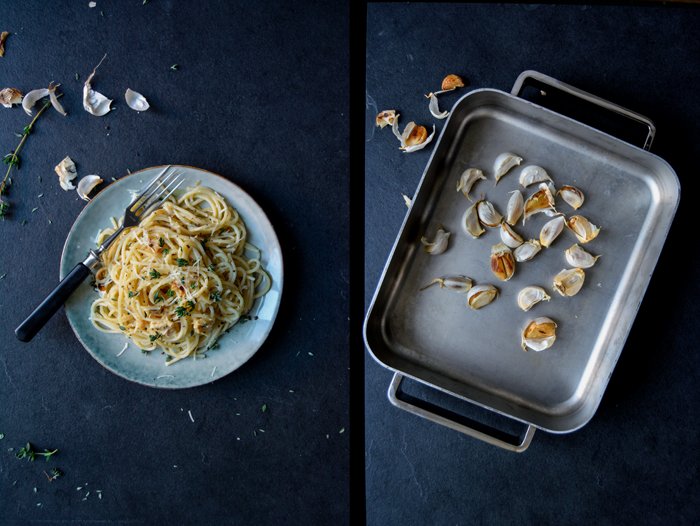
The amount of garlic in this velvety, buttery pasta recipe sounds intimidating but if you let go of the idea of harsh, raw garlic and think of smooth, almost perfumed, oven-roasted cloves instead, it makes a lot of sense.
I used 22 large cloves, cooked in their skins in a hot oven. This kind of roasting turns them into a sweet, almost caramelized paste, so soft that you can mash them with a fork. I only mixed them with a bit of butter and salt and my pasta dish was almost done. Just young pecorino melted on top of the spaghetti - Parmesan would have been too strong and salty - and a few fresh thyme leaves and crushed peppercorns to balance out the sweetness.
It's a simple dish but there's something very sensuous and satisfying about it at the same time. If I weren't such a traditionalist, I could even consider exchanging my annual Christmas duck with this plate of pasta. A bottle of extravagant Bordeaux - bought without looking at the price, seeing that the dish itself wouldn't cost much - and my relaxed Christmas Eve would be sorted. However, I can't live without my slow roasted bird on the 24th December - which is Christmas in Germany. It was just a thought.
Roast Garlic Butter Spaghetti with Thyme
Serves 2
garlic 22 large cloves (in their skin)
spaghetti 200g / 7 ounces
butter, soft, about 30g / 2 tablespoons
flaky sea salt
young pecorino, freshly grated, about 2-3 tablespoons
fresh thyme leaves, about 2 tablespoons
black peppercorns, crushed in a mortar
Preheat the oven to 220°C / 425°F (conventional setting).
Spread the garlic in a large baking dish and roast in the oven for about 25 minutes or until soft. Turn the cloves occasionally and mind that they don't burn. Let them cool for a few minutes, peel them out of their skins and transfer them to a blender or food processor.
Cook the pasta in a large pot in plenty of salted water until al dente.
Add the butter and a little salt to the garlic in the blender and purée until smooth. Season with salt to taste.
Mix the warm spaghetti with the garlic butter and divide between plates. Sprinkle with pecorino, thyme, and pepper. Season with salt to taste and enjoy!
Sweet Potato, Bacon and Poached Egg Sandwich
At the moment I'm living, literally, next to a tree - our absolutely beautiful Christmas tree. It's perfect this year. Lush and green, the branches thick and densely packed with needles, the straight tip rising close to the high ceiling of our living room. I'm in love with this tree. I decorated it straight after it entered our flat Saturday evening and we clinked mugs full of hot mulled wine to celebrate its arrival immediately. I moved my working space to the dining table, which is right opposite this beauty, and I have problems keeping my eyes on the screen of my laptop. In December, I feel like a distracted little child, all this glitter and sparkling, Christmas ornaments and cookie boxes - how are you supposed to keep your mind focused on anything else?
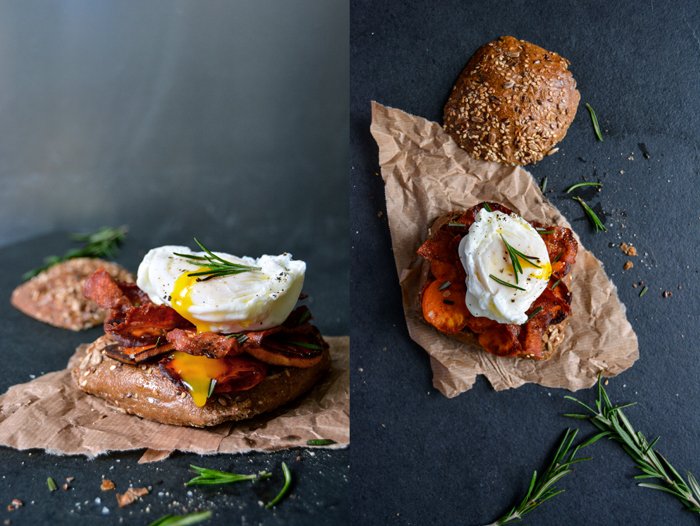
However, there was something that caught my attention: a wintery sandwich lusciously stuffed with fried sweet potatoes - not as crisp as normal potatoes but they make up for it with sweetness and flavour - salty bacon, poached egg and a little chopped rosemary made it complete. The composition is so hearty that I went for a dark bun sprinkled with linseed, sunflower and sesame seeds. It's a keeper.
Sweet Potato, Bacon and Poached Egg Sandwich
Makes 2 sandwiches
olive oil
sweet potato, peeled and thinly sliced (less than 1/2cm / 1/4"-thick), about 200g / 7 ounces
fine sea salt
pepper, crushed in a mortar
bacon 3 slices
organic eggs 2
whole wheat buns, cut in half, 2
fresh rosemary needles, chopped, a small handful
In a large, heavy pan, heat a splash of olive oil and fry the raw sweet potato slices on medium-high heat for a few minutes on both sides until golden brown and soft. Season with salt and pepper to taste.
Heat a little olive oil in a heavy pan and cook the bacon on medium-high heat for a few minutes until golden brown and crisp, set the pan with the bacon aside.
For the poached eggs, bring a medium saucepan of salted water to a boil and reduce the heat to a low simmer. Crack 1 egg into a small bowl. Hold a large spoon just over the surface of the simmering water and gently pour the egg onto the spoon. Lower the spoon into the water and hold for 3 minutes—use a second spoon to put the egg back into place if it slips. Lift up the spoon, let the excess water drip off, and carefully place the egg on a plate—you may have to gently scoop it off the spoon. Poach the remaining egg the same way, adjusting the heat as needed to maintain a low simmer. It’s best to poach 1 egg at a time, but you can cook 2 at once. Once the first egg cooks on the spoon for 1 1/2 minutes, let it float in the water— mind that it doesn’t stick to the bottom of the pan—and poach the second egg on a spoon. Take both eggs out once they’ve cooked for 3 minutes each.
Brush the bottom bun with the frying juices from the bacon, spread a few sweet potato slices on it and lay half the bacon on top. Finish it off with a poached egg, chopped rosemary and crushed pepper. Season with salt to taste (if necessary) and enjoy.
Kidney Bean, Cumin, and Beef Polpette with Torta al Testo
I decided to fly to London for one day to meet a girl for a kitchen feature whose work I've been following for quite a while: Claire Ptak of the acclaimed Violet bakery. But then I started thinking about all the other inspiring people I know who also live there, so I felt tempted to meet a few more people for even more meet in your kitchen features. In the end, I met 1 baker from California, 2 kitchen chefs at the Brown's Hotel, 1 Vogue journalist, 2 bloggers, a friend from the fashion industry plus my publisher's team in London - all in 3 days. Now I'm back home, a little tired, but with fantastic, new kitchen features in my pocket and I can't wait to share them with you over the next few weeks.
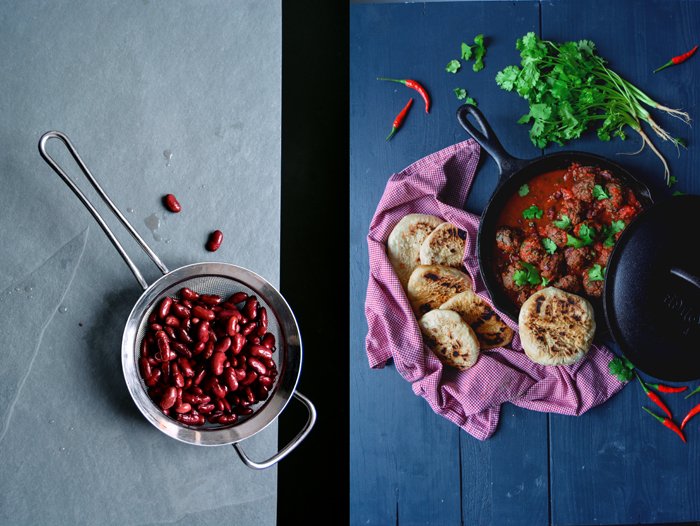
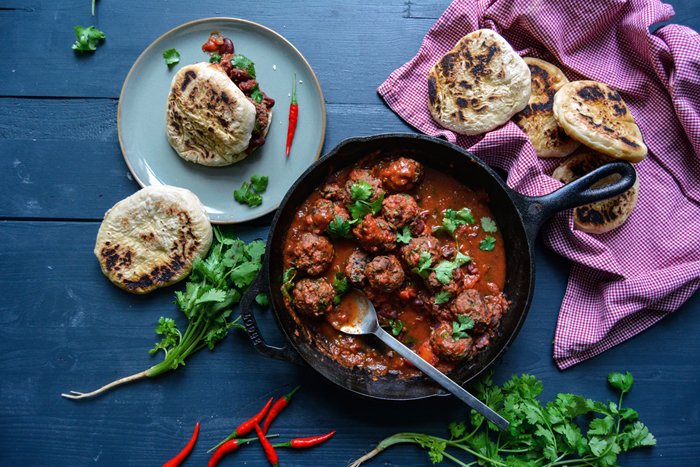
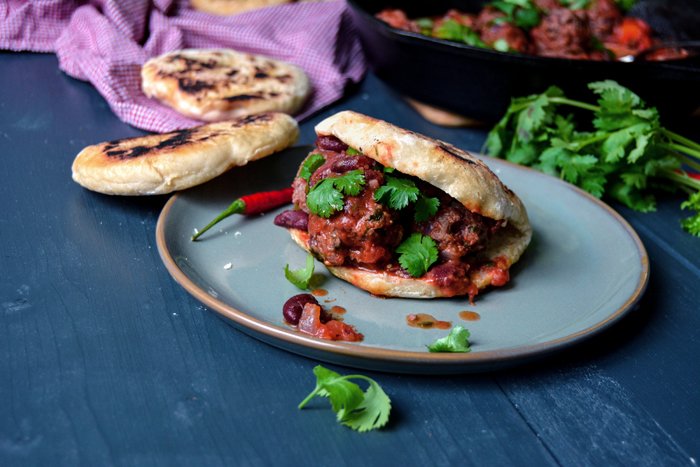
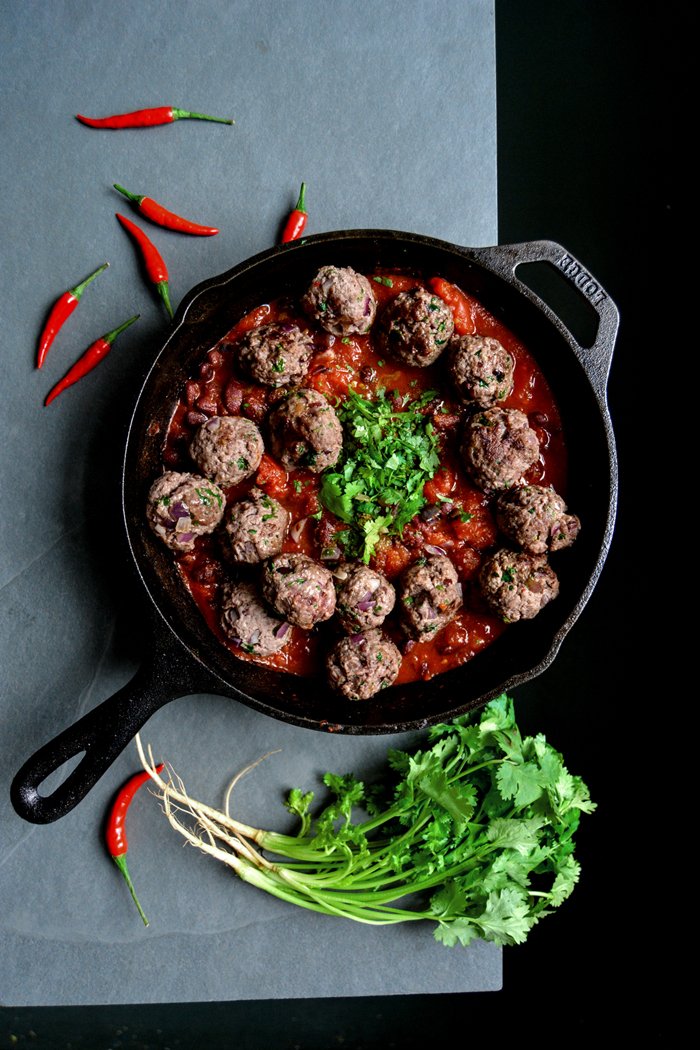
There was a lot to organize before my departure to make my tight schedule work, so I couldn't spend much time on cooking, which my boyfriend happily used to take over our kitchen for a few days. One of his delicious and experimental creations was cumin polpette in a fruity tomato sauce. He used mashed kidney beans for the beef mixture, instead of the usual breadcrumbs and eggs, and kept some of the purple beans whole for the sauce. The texture of the floury legumes is perfect to loosen up the minced meat, the result is simply delicious. It was so good that we had it twice in a week, the second time with torta al testo on the side, Umbrian flatbread cooked in a cast iron pan, to stuff with the juicy cumin bean polpette and the aromatic red sauce.
Kidney Bean, Cumin, and Beef Polpette with Torta al Testo
You can find my torta al testo recipe here or you can serve the polpette with any other flatbread or ciabatta. If you want to make your own torta al testo, mind that the yeast dough has to rise twice. Once it's well risen, the bread only needs to cook for about 3 minutes in a hot pan.
Serves 2
minced beef 400g / 14 ounces
kidney beans (tinned), rinsed and drained, 250g / 9 ounces
medium red onion, finely chopped, 1
garlic, crushed, 2 large cloves
medium fresh red chili, cut into tiny cubes, 1
fresh coriander leaves 2 large handfuls
ground cumin
fine sea salt
ground pepper
olive oil
tomatoes (tinned), 400g / 14 ounces
pinch of sugar
Using your hands or the dough hooks of an electric mixer, mix the minced meat with a handful of the beans (squeezed until mushy), 3/4 of the onion, garlic, 1/4 of the chili, a large handful of coriander leaves (not chopped), 1 teaspoon cumin, 1 1/4 teaspoons of salt and a generous amount of ground pepper in a large bowl until well combined. Wet your hands and form 4cm / 1 1/2" meatballs, transfer the polpette to a plate.
Chop a small handful of the remaining coriander leaves and set a few whole leaves for the topping aside.
Heat a generous splash of olive oil in a large, heavy pan and cook the polpette with the remaining onions on medium-high heat for a few minutes until just light brown on all sides. Take out the meatballs and add the remaining beans (whole) to the hot pan, cook for 1 minute on high heat, stirring constantly. Add the tomatoes, chopped coriander leaves, 1/4 teaspoon of cumin, sugar, salt, pepper and 1/4 of the chili. Chop the tomatoes finely and transfer the polpette back to the pan. Stir gently, close with a lid and simmer for about 3 minutes on medium-low heat.
Season the sauce to taste and sprinkle with the remaining coriander leaves and chili. Serve the meatballs with torta al testo (or flatbread) on the side or inside the bread.
Spicy Harissa Lentils with Lemon Tahini and Sweet Onions
A friend of ours gave us a large bottle of tahini which he brought back to Berlin from his latest trip to Israel. Guy knows how much we love this oily sesame paste and it wasn't the first time that he brought some for us from one of his trips to the Middle East. This time, he announced solemnly that this Blue Dove Tahina is the best tahini ever. Unfortunately, I can't read anything that's written on it, apart from Quality Since 1921, the rest is in Arabic and Hebrew, but Guy told me that it's not actually from Israel but from Palestine. If only people could forget about borders as easily as food does when it travels.
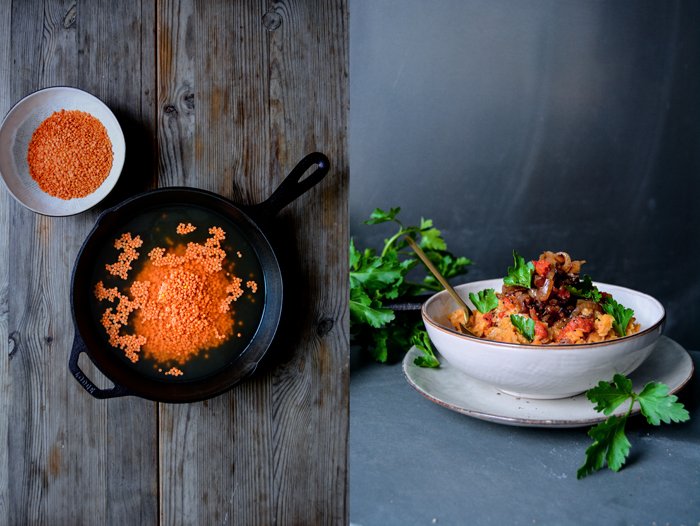
So, our special Tahina deserved some special recipes. Hummus came first, enjoyed only with some soft chunks of a white loaf of bread dipped into the velvety creaminess. We sprinkled a few pieces of the bread with the pure tahini paste and agreed that it's so good that it doesn't really need any addition, pure on bread - that's perfection! However I couldn't stop myself from coming up with another delicious way of making use of it: I whisked together a thick, oily sauce made of tahini, garlic roasted in olive oil and lemon juice - it's divine. Then, I cooked red lentils in my homemade vegetable broth and mixed it with spicy harissa, I drizzled the tahini sauce all over it and finished it off with onions, cooked until they were juicy, golden brown and almost as sweet as candy.
This recipe has been featured by Food52!
Spicy Harissa Lentils with Tahini and Sweet Onions
Serves 2
For the lentils
red lentils 200g / 7 ounces
vegetable broth (unsalted) 1/2l / 2 cups plus 1 tablespoon
harissa
fine sea salt
ground pepper
olive oil 1 tablespoon
For the topping
olive oil
onions, cut in half and thinly sliced, 2
a pinch of sugar
black peppercorns, crushed in a mortar
fresh parsley leaves 12
For the tahini sauce
olive oil 3 tablespoons
garlic, cut into tiny cubes, 2 large cloves
tahini 1 1/2 tablespoons
freshly squeezed lemon juice 1-2 teaspoons
a pinch of fine sea salt
In a large heavy pan, bring the lentils and broth to a boil and simmer on medium heat for about 8 minutes or until the lentils are al dente. Stir in 1 teaspoon of harissa and 1 tablespoon of olive oil, season with salt and pepper.
While the lentils are cooking, heat a splash of olive oil in a heavy pan and cook the onions on medium heat for a few minutes until golden brown and soft, stir in a pinch of sugar.
For the tahini sauce, heat the olive oil and garlic in a small saucepan and cook on medium heat for about 1 minute or until the garlic is golden but not dark. Take the saucepan off the heat and pour the garlic oil into a bowl. Whisk in the tahini, 1 teaspoon of lemon juice and salt, season to taste.
Divide the lentils between plates, sprinkle with the tahini sauce, a little more harissa (optional), crushed pepper and parsley. Enjoy!
Saffron & Mussel Tomato Soup
It's getting colder here in Berlin, all of the trees in front of our windows are finally naked, their last colourful leaves swept away in a single stormy night. Before the winds came, the light in our living room was golden and warm, filtered through autumn's pretty yellow linden leaves. Now that they're gone, the light is much harder. All of a sudden, the city seems a bit more harsh, which made me long for a cozy soup.
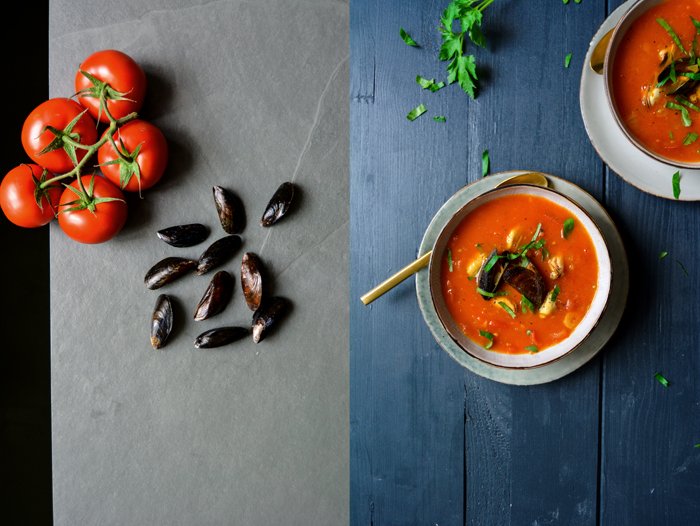
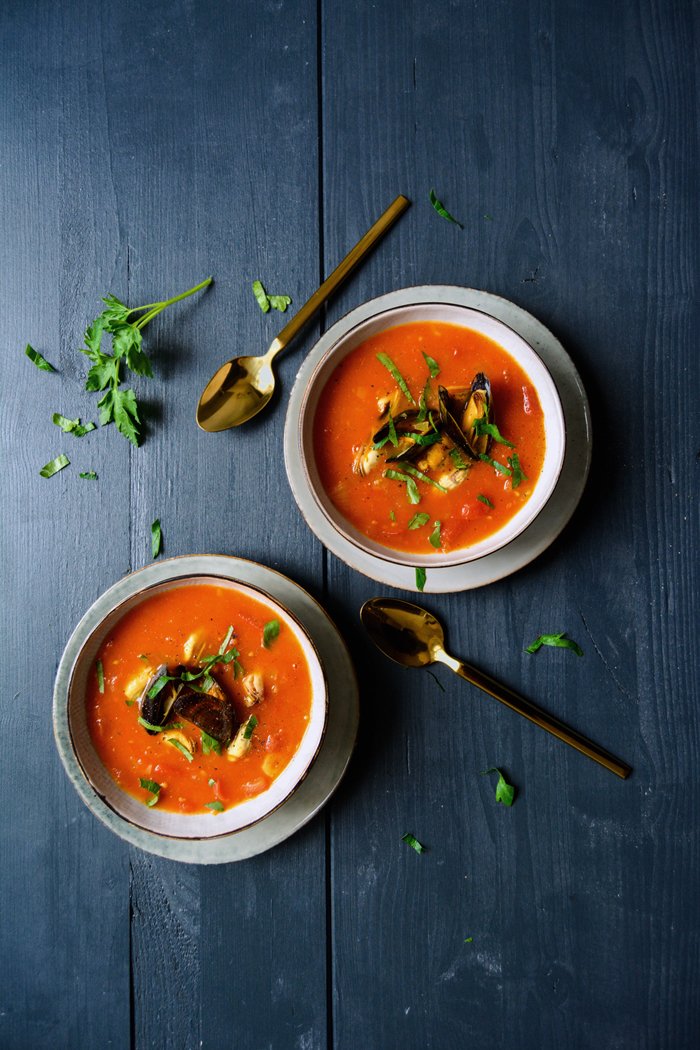
Seafood has been on my mind for weeks, sweet mussels from the North Sea, adding their fine taste to a thick, fruity tomato soup refined with aromatic saffron. It warms the body and caresses the soul, what else could you want on a cold and misty November day? This dish may seem elaborate but that's not at all the case, it's a quick one. The fruit's red juices only cook for a bit longer than 10 minutes and the mussels sink into a fragrant broth of white wine and spices for just 5 minutes. I use the wine, infused with a soft hint of the sea and the noble taste of saffron, to stir into my glowing soup. It's supposed to serve 3-4, which I still believe is quite realistic, but we loved it so much that we almost emptied the large pot of soup in one go at lunchtime. We were hungry.
Saffron and Mussel Tomato Soup
Serves 3-4
For the mussels
mussels in shells 1 kg / 2 1/4 pounds
olive oil
medium onion, finely chopped, 1
garlic, thinly sliced, 2
large cloves
white wine 200ml / 3/4 cup plus 2 tablespoons
bay leaves 2
saffron threads 1/8 teaspoon / 1g
sea salt 1/2 teaspoon
ground pepper
For the tomato soup
olive oil
tomatoes, finely chopped, 1 kg / 2 1/4 pounds
garlic, thinly sliced, 1 big clove
broth, used to cook the mussels, 400ml / 1 2/3 cups
a pinch of sugar
sea salt
ground pepper
For the topping
fresh parsley, roughly chopped, 4 heaping teaspoons
Rinse and scrub the mussels under cold water and cut off the beard, discard any broken mussels.
For the mussels, heat a splash of olive oil in a large pot and cook the onion and garlic on medium heat for a few minutes or until golden and soft. Add the wine, bay leaves, saffron, salt and pepper, stir and bring to the boil. Turn the heat down to low, gently add the mussels to the pot, shake the pot or stir with a slotted ladle and close with a lid. Cook for 5 minutes or until the shells open, shake the pot once or twice while cooking. Take the mussels out with a slotted ladle, discard any mussels that don’t open. Measure 400ml of the mussel broth, together with the onions and the bay leaves, and set aside. Peel the mussels out of their shells, leave about 6-8 inside the shells for the topping of the soup (optional). Set the mussels aside.
Heat a splash of olive oil in a large pot, add the tomatoes and garlic and cook for 4 minutes on medium-high heat (open), stir once in a while. Add the mussel broth with the onions and bay leaves, sugar, salt and pepper and cook for about 7 minutes (open) or until the tomatoes are soft and the soup is thick. Season to taste and, if necessary, chop the tomatoes with a knife if they are too chunky, or purée the soup in a food processor. Stir in the mussel meat, divide the soup between bowls, sprinkle with fresh parsley and pepper and garnish with the mussels in their shells.
Pumpkin Crespelle with Ricotta and Sage
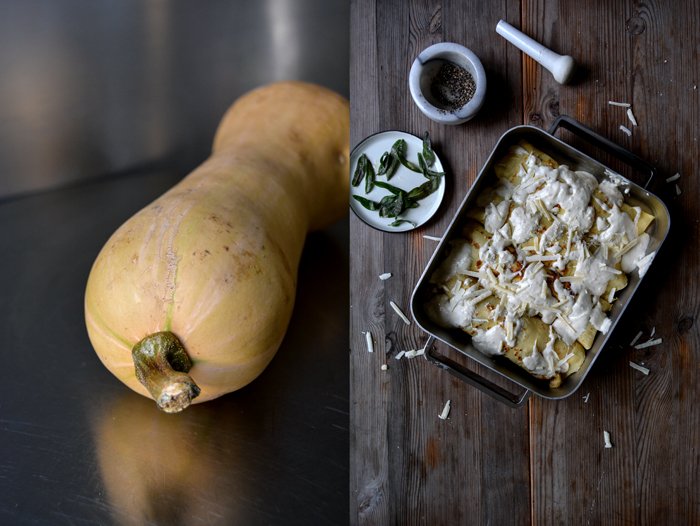
Around Halloween, my boyfriend feels the call of his American roots and carves scary faces in pumpkins. Being a good girlfriend I know my duties, so I went out into the world - or rather my local shop around the corner - to find only the finest examples for him. I brought quite a pretty collection back home and let him do his work but I ended up with far more squash in my kitchen than we needed. We had a vast selection, a few Hokkaidos in different shapes and sizes and butternut, which isn't really helpful due to its shape but I forgot in my enthusiasm. So it was obvious, pumpkin had to be on the menu!
Thin, golden Italian crespelle have been on my mind for weeks but my inspiration was missing, I had no idea what to fill them with. Halloween's squash became my muse and here it is: roasted pumpkin cubes paired with a little ricotta, the obligatory creamy Béchamel sauce, Parmesan and crisp, fried sage leaves. It looked and tasted so good that my sister Nina, who's in Berlin at the moment for a quick visit, almost bit my laptop screen when she saw the pictures. We ate it all, so unfortunately, there was nothing left for her.
Pumpkin Crespelle with Ricotta and Sage
Makes 4 crespelle
For the filling
mixed pumpkin (squash), cut into 1 1/2cm / 1/2" cubes, 550g / 1 1/4 pounds (like Hokkaido (with skin), or peeled butternut and musquée de provence)
olive oil
flaky sea salt
butter 2 tablespoons
fresh, large sage leaves 30
fresh ricotta 4 heaping tablespoons
Parmesan, grated, 70g / 2 1/2 ounces
black peppercorns, crushed in a mortar
For the Béchamel sauce
milk 600ml / 2 1/2 cups
bay leaf 1
a pinch of nutmeg, freshly grated
fine sea salt
ground pepper
butter 30g / 2 tablespoons
plain flour 30g / 4 tablespoons
For the crespelle
milk 160ml / 2/3 cups
organic eggs 2
plain flour 130g / 1 cup
fine sea salt 1/4 teaspoon
butter, to cook the crespelle
Preheat the oven to 200°C / 390°F (conventional oven) and line a baking dish with baking paper.
Spread the pumpkin in the lined baking dish, coat with 2 tablespoons of olive oil, sprinkle with flaky sea salt and cook in the oven for about 25 minutes or until soft. Take the pumpkin out of the oven and set aside, keep the oven set to 200°C / 390°F.
For the Béchamel sauce, bring the milk with the bay leaf, nutmeg, salt and pepper to the boil, take it off the heat once boiled. In a saucepan, melt the butter and whisk in the flour, let it cook on medium heat for 1 minute. Take off the heat and slowly add the hot milk, whisk until smooth and cook for about 3 minutes on lowest heat until it’s thick and creamy. Discard the bay leaf, season to taste and set the pan aside.
Mix the ingredients for the crespelle with an electric mixer until well combined and let the dough rest for about 5-10 minutes. Heat a little butter in a large, heavy or non-stick pan and cook 4 large, very thin crespelle on medium heat until golden on both sides.
Heat 2 tablespoons of butter in a saucepan on high heat and roast the sage leaves for a few seconds in the sizzling butter until golden and crisp but not dark.
Lay each crespelle flat on a plate, spread with 1/4 of the pumpkin and sprinkle each of them with 2 1/2 tablespoons of Béchamel sauce, 1 heaped tablespoon of ricotta, 3 sage leaves, some Parmesan and crushed pepper. Roll into a tight wrap and place them next to each other in a baking dish. Pour the remaining sauce on top and sprinkle with Parmesan. Bake for 12 minutes or until golden brown, switch on the grill (broiler) for the last 1-2 minutes.
A juicy Lamb, Pomegranate and Pistachio Halloween Sandwich
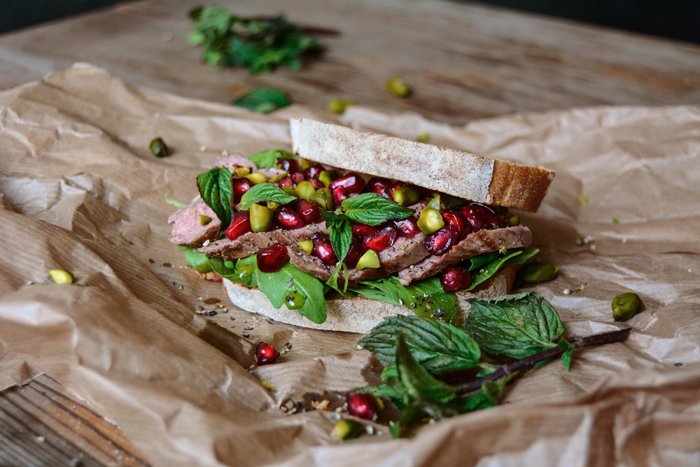
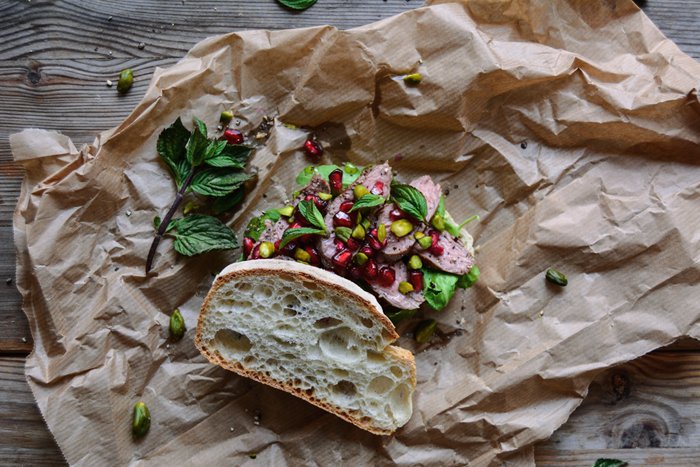
This has been the longest sandwich break ever since I started my Sandwich Wednesdays almost 2 years ago - and I missed them badly. There's something deeply satisfying about creating a sandwich, taking the pictures of this luscious dish - and especially - eating it! It's back again and although it was supposed to be a Halloween sandwich I must admit that it didn't really work out. I expected my creation to look a bit messier, wildly dripping with red (pomegranate) juices, but it turned into a pretty sandwich beauty instead. Never mind.
Anyway, the flavours count more than the looks and they are more than promising in this recipe. A bit more than a year ago I shared my juicy lamb sandwich with preserved lemons and capers with you, it was a much loved and often featured sandwich that called for a new interpretation. Seared lamb fillet only needs a little salt and pepper to become the most tempting piece of meat you can possibly have on your plate, so there's no need to change the preparation. But this time the composition went into a different direction. Sour and salty gave way for sweet, sour and nutty. The fine taste of the fillets goes unbelievably well with the tangy, deep red juices of the pomegranate and unsalted pistachios. The topping of mint leaves should be handled with care. The herb can easily be too overpowering and I don't recommend using the whole leaves as you can see in the pictures but slice them thinly instead. Apart from this rule, you only have to stuff the composition between two slices of thick, juicy ciabatta - or even better, potato bread - and enjoy!
Lamb, Pomegranate and Pistachio Sandwich with Mint
If you don't feel like a sandwich enjoy the creation without bread, just juicy lamb fillets sprinkled with pomegranate, pistachios and crushed pepper.
Makes 4 sandwiches
olive oil
lamb fillets 250g / 9 ounces
fine sea salt
black peppercorns, crushed in a mortar
juicy, white bread 8 thick slices
fresh rocket leaves, a small handful
pomegranate seeds about 4 heaping teaspoons
unsalted pistachios, chopped, about 4 heaping teaspoons
mint leaves, thinly sliced, 8
Heat a splash of olive oil in a heavy pan and sear the lamb for 1 1/2-2 minutes on each side (not longer!), the meat should be pink and slightly undone in the middle. Season the fillets lightly with salt and pepper and wrap them in aluminum foil. Set them aside for a few minutes before you slice them thinly.
Brush the inside of the slices of bread with the juices from the pan and a little olive oil. Spread some rocket leaves on each slice of bread, lay a few slices of lamb on top and sprinkle with pomegranate seeds, pistachios, a little mint and crushed pepper. Close the sandwich and enjoy!
Herbed Polenta with Parsnip Chips and Maple Butter - and a feast!
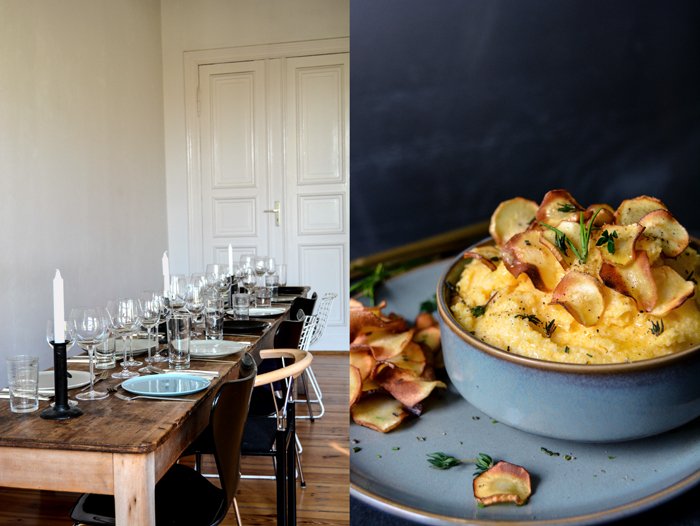
The past few weeks have been an emotional roller coaster. I finished my English book and happily gave in all the recipes, text and pictures 3 days before my official deadline - something that had never happened before according to Holly, my editor, and it impressed her and the Prestel team in New York quite a bit. I just wanted to have everything off my desk at one point - and celebrate. And that's what we did!
Holly came to visit us in Berlin for a few days and all we did was talk and eat (and work on the cover for my book). We showed her around the city as it was her first time here and I planned a special dinner for her with some of the people at the table who have strongly influenced me during my eat in my kitchen blog and book experience. Not all of them could make it, but to see how many came and how some of them tried to make it possible truly touched me. Molly from My Name Is Yeh wanted to come from North Dakota just for this dinner, she even checked out the flights - this is crazy! - but she had to be in the States the day before and after. Thank you girl!!
Malin from The Bread Exchange came with her handsome baby boy Lode - in the early days of my blog we made sandwiches together with her bread and now we even share the same publisher (for her German book that will come out in the Spring of 2016). Marta from What Should I Eat For Breakfast Today? - my great inspiration for photography and positivity in life (this lady has the most beautiful smile!) and one of the first meet in your kitchen guests - was here to celebrate with us. And she took the pictures of us at the table, which I love because usually I'm the one taking pictures so I'm never in them. They truly show what a happy night we had, thank you Marta! Cynthia Barcomi - the founder of my favourite Berlin Deli - already had her cake for our dinner in the oven but sadly had to cancel at the last minute. Luckily, we didn't have to worry about having enough sweets on the table anyway. My apple cinnamon crumble was delicious and looked rather rustic next to Laura's elegant raw chocolate avocado cake. The Berlin Tausendsuend baker impressed all of us with her composition and took us right to chocolate heaven.
It was an amazing night with amazing people that I'll never forget. And a nice coincident gave us another reason to cling the glasses - in the same week of my deadline, my boyfriend finished the EP he produced for a fantastic artist from Australia. Josh The Cat happened to spend a lot of time at our apartment in the past few months for the production and became one of my book's first testers. He loved my recipes as much as I love his music and we shared far more than just food and songs this year, he and his girlfriend, the gorgeous artist Phia, became close friends of ours and we're more than sad that they'll soon leave us to go back to Australia. But I'm sure we'll hear more about their music soon!
A dinner becomes special through the people and conversations at the table, it's delicious through the right food - we enjoyed some of my book's recipes which I can't share with you yet - and it's a feast when you have good wine in the glasses. I have to send a big thank you to a man from the South and fantastic wine maker who made it possible for us to enjoy amazing wine on that special night. Martin took over the Weingut Robert Bauer - which is now called Martin Albrecht Weingut - more than 10 years ago, a wine maker who's filled my mother and step father's wine cellar since I was a child. You could certainly call it our family wine. With a family tradition of more than 400 years of producing wine, Martin comes from the right background to continue Mr. Bauer's philosophy of creating only the best wines - ohne Restzucker (without residual sugar). This is wine of the highest quality, which you can smell and taste with the first sip. We enjoyed an excellent Gelber Muskateller (Muscat) with an autumny, fruity soup and an outstanding 2012 Herbstnebel (Syrah, Cabernet-Sauvignon and Nebbiolo) with hearty lamb. I love this wine! We were over the moon with our treat from the Württemberg area. If you're looking for a wine, handpicked in old vineyards, a wine that guarantees to please your taste buds to the fullest and puts a smile on your face, get in touch with Martin through their website, or visit him in Flein (50km / 30 miles from Stuttgart). He also offers the best vinegars I know - his Balsamic Pear vinegar is one of my favourites, you can basically drink it off the spoon. Thank you Martin!
And thank you Holly for giving me a reason to bring all these great people together at our table!
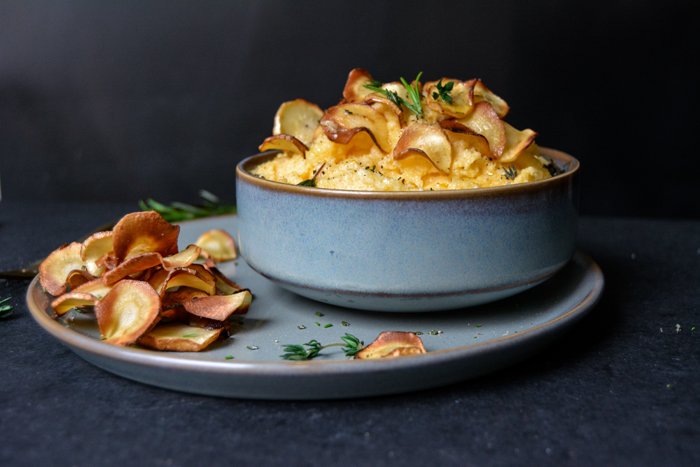
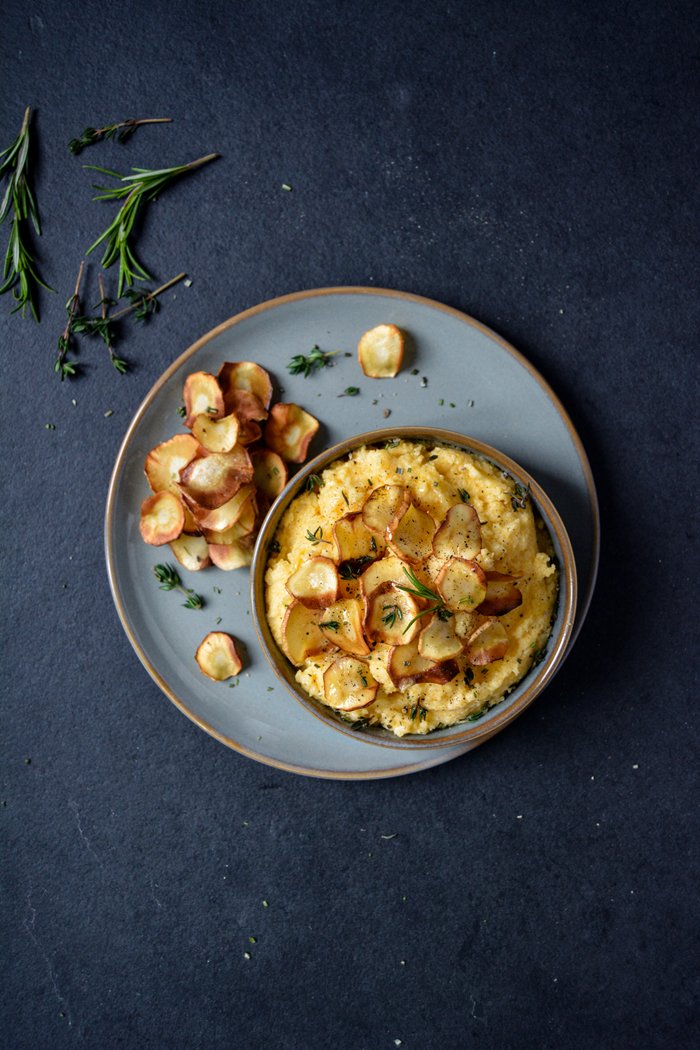
I can't share the recipes with you from that night, we have to be a little more patient until my book comes out, but as we enjoyed a dish that featured scrumptious parsnip I decided to create a dish for you that fits the current mood of autumn and allows the roots to bring out their confident qualities - fluffy herbed polenta topped with crisp parsnip chips and sizzling maple butter.
Thank you to everyone who has been a part of this journey for making all this possible, it makes me a very happy person - and a happy cook!
Herbed Polenta with Parsnip Chips and Maple Butter
Serves 2
For the polenta
polenta 120g / 4 ounces
water 240ml / 1 cup
milk 240ml / 1 cup
salt 1 teaspoon
olive oil 2 tablespoons
For the parsnip chips
parsnip, very thinly sliced, 200g / 7 ounces
vegetable oil
fine sea salt
For the maple butter
butter 2 tablespoons
maple syrup 1/2-1 tablespoon
For the topping
fresh rosemary, finely chopped, 1-2 teaspoons
fresh thyme leaves, finely chopped, 1-2 teaspoons
ground pepper
In a saucepan, heat the water and milk, add the salt and bring to the boil. Take the pan off the heat, add the olive oil and polenta and whisk. Turn the heat down to the lowest setting and put the pan back on. Cook the polenta for 10 minutes, stirring and adding more water once in a while if necessary. When the polenta is thick and creamy, take if off the heat and season with salt to taste.
Heat a generous splash of vegetable oil in a heavy pan, the bottom should be covered. When the oil is hot, add the parsnip, just enough to lay them next to each other. Turn them after a few seconds and take them out immediately once they are golden and crisp but not too dark. Mind that they burn very quickly! Transfer the chips to kitchen paper and season with salt.
Melt the butter in a saucepan, whisk in the maple syrup when it's sizzling and take the pan off the heat.
Scrape the polenta into bowls and sprinkle with maple butter, parsnip chips, pepper and fresh herbs.


