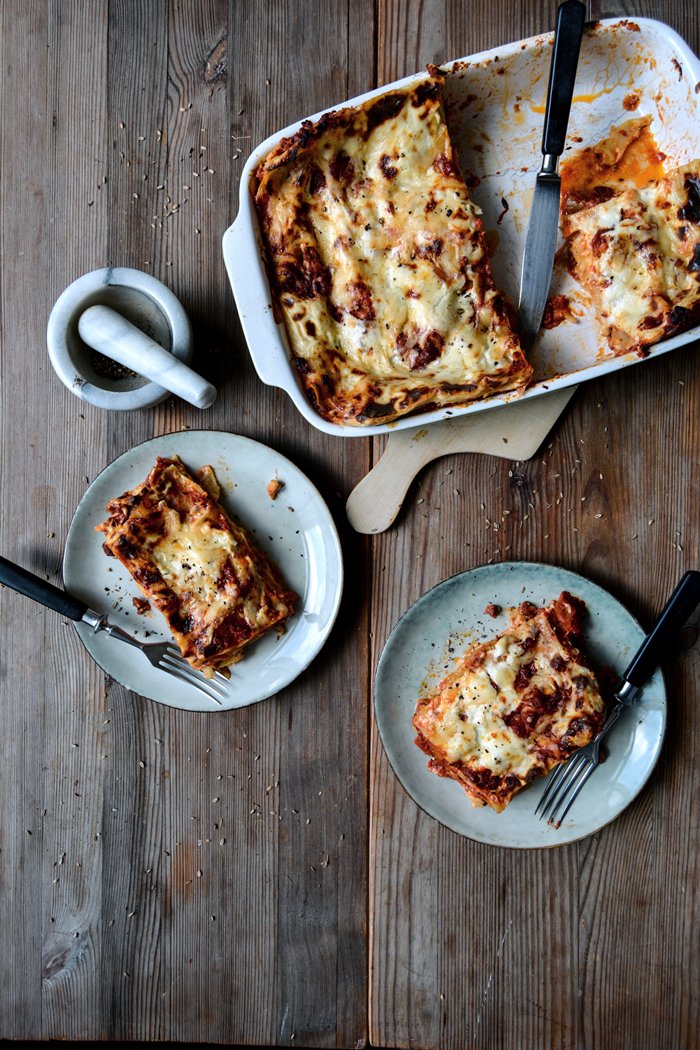
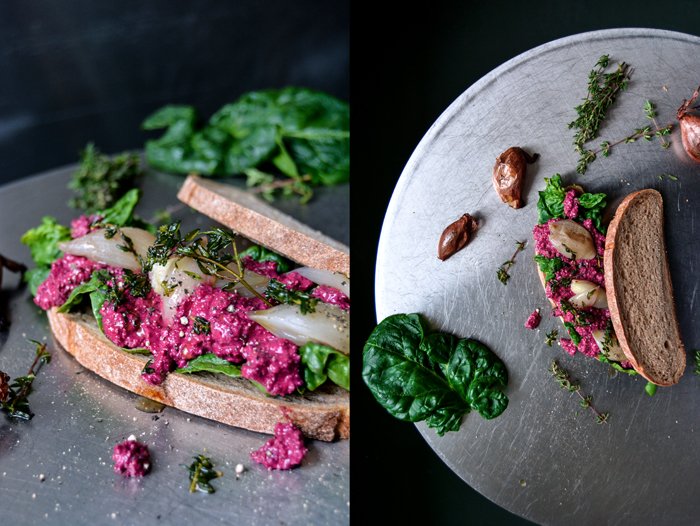
Mediterranean Stuffed Zucchini with Feta, Basil, and Pine Nuts
Soon I'll be eating stuffed vegetables in the kitchens of many Maltese mamas and I know that I'll never want to eat anything else again once I get into the groove. This dish is a cozy classic in Malta's Mediterranean cuisine and I love it for its simplicity just as much as for its pure taste of summer. Ripe zucchini, bell pepper, and eggplant turn into juicy shells full of flavour to wrap scrumptious fillings of cheese, meat, seafood, or even more vegetables. Brunġiel mimli (Maltese for stuffed eggplant) is the most popular of them all - and the richest, stuffed with Bolognese - but there are endless possibilities to turn this recipe into a lighter summer treat.
In mid July we'll be off to spend a few weeks with our family in the South and this will have a huge effect on our daily routine and on our cooking and eating habits. There will be far more fruits and vegetables on the table, they will taste much better than in the North, I will complain less about quality (or not at all), and the results that I stir up in the pots and pans in my Maltese mama's kitchen will give me deep satisfaction. I love to cook in Jenny's kitchen (on gas), with the best produce you can possibly ask for, fresh from my favourite farmer.
There's always a pile of round and long zucchinis in the vegetable drawer, which I either slice up and sauté until al dente or scrape out and stuff - often with ricotta, the island's most popular dairy product. To get into the mood, I came up with a recipe that uses a fragrant composition of dried-tomatoes, pine nuts, basil, and orange zest stirred into feta - instead of ricotta (I'll eat so much of it while I'm in Malta that I should take it easy for now). It looked and tasted like a summer holiday and it was so easy to prepare that I'll make it soon again.
Here's one of my posts from last year, which always makes me want to go straight back to Malta (just in case you're not in the mood for summer yet)!
Mediterranean Stuffed Zucchini with Feta, Basil, and Pine Nuts
Serves 2
sun-dried tomatoes (preserved in salt) 3
pine nuts, toasted until golden, 40g / 1/2 cup
medium zucchini, cut in half lengthwise, soft pulp scraped out, 2
olive oil
fine sea salt
ground pepper
feta 200g / 7 ounces
fresh basil, chopped, about 15g / a large handful, plus a few leaves for the topping
freshly grated orange zest 1 teaspoon
flaky sea salt
Preheat the oven to 200°C / 400°F (conventional setting).
In a small saucepan, bring the sun-dried tomatoes and a little water to the boil and cook for about 3 minutes or until soft. Rinse and pat dry with kitchen paper and chop finely.
Chop half the pine nuts with a large knife or in a food processor.
Spread the zucchini in a large baking dish (cut side up), brush with olive oil, and season with salt and pepper to taste.In a medium bowl, mash the feta with a fork and add the chopped pine nuts, basil, dried-tomatoes, orange zest, and 4 tablespoons of olive oil. Mix and mash until well combined and season with pepper to taste. Divide the feta mixture between the zucchini halves, drizzle with a little olive oil, and sprinkle with the remaining pine nuts and a little flaky sea salt. Cover the bottom of the baking dish with a little water and bake for about 45 minutes or until the zucchini feels soft when you prick it with a metal skewer. Sprinkle with fresh basil and serve.
It makes a great lunch or easy dinner, but you can also serve it at a summer picnic.
Pizza Bianca with Green Asparagus, Salsiccia, and Mozzarella di Bufala
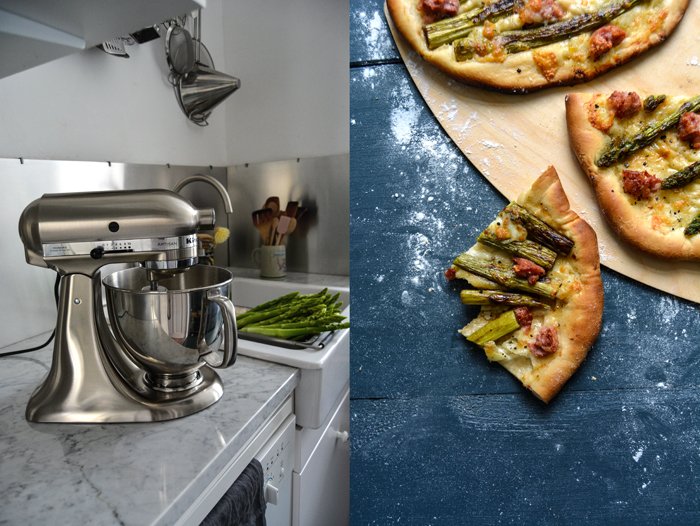
I got my first KitchenAid and I feel like a little girl on Christmas Eve. To call the current mood in my kitchen excitement would be a serious understatement.
After years of seeing - and admiring - these sparkly, polished beauties in the kitchens of my friends and family (my sister has two!), the time had come to get my own. At a certain age, one deserves these special treats. I'm a strong believer that it's good to wait for things in life, it strengthens your character and makes you deeply appreciate what you have. But 20 years of waiting was more than enough, that's how long it took me to finally see this powerful stand mixer on my marble counter tops.
In various phases of my life, I always had my favourite KitchenAid colour. In my young twenties, I loved the creamy white surface, followed by a fascination for the 50s and its soft pastels. Light blue, mint, or pink, I would have taken any of them. Then I got into puristic minimalism and only a black mixer would have made it into my kitchen. In my thirties, I fell for light yellow, but now, all of a sudden, I had to make a decision and decide which colour I would finally get and see for the rest of my life. It wasn't easy and it took a few visits to various appliance shops. In the end, I had to weigh the advantages and disadvantages of cream, yellow, black, copper (which looks really hot), and brushed stainless steel. This process brought back lots of memories of the different eras of my life connected to each colour. After a couple weeks, my decision was made: brushed stainless steel is the winner! When the large package arrived I couldn't wait to see my object of desire on my counter tops - I was almost hysterical, which is excusable in my eyes, it's been 20 years after all. So here it is and it looks amazing. The mixer's metallic surface fits perfectly to my white marble and brushed aluminium wall panels. I'm totally in love and can't stop looking at it.
Testing its functionality was the next step, I had never used a KitchenAid before. My unbreakable hand mixer, a gift from my mother when I moved into my first flat two decades ago, has been a loyal partner during all my kitchen adventures. I was a little nervous and decided to start with two easy recipes - Sunday morning pancakes and Sunday evening pizza. This allowed me to get used to the three different attachments. My hand mixer only has two, but my new beauty offers a whisk, a paddle, and a hook - I needed a conference call with my sister to figure out when to use what.
Before I switched on the power, I had to call my boyfriend for this special moment. And this was our maiden voyage: I - rather the mixer - started beating the egg whites with such calm, persistence, and firm perfection that I thought I'd never touch my hand mixer ever again (sorry hand mixer). My next project - pizza dough - gave me the same satisfaction. The yeast dough was well mixed, smooth, and ready to be kneaded with my hands for a few minutes, which I always do to turn it into a soft and silky ball. I thought I'd use the time while the dough was getting mixed in the machine to prepare the toppings, however, I couldn't help but sit next to it with a glass of rosé wine in my hand and watch it work with elated enthusiasm.
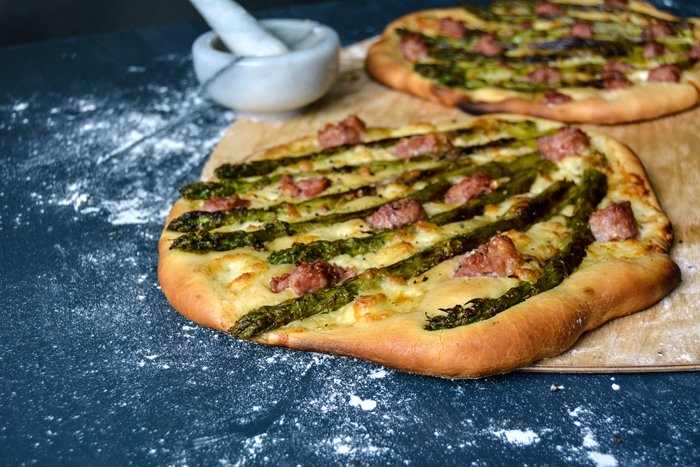
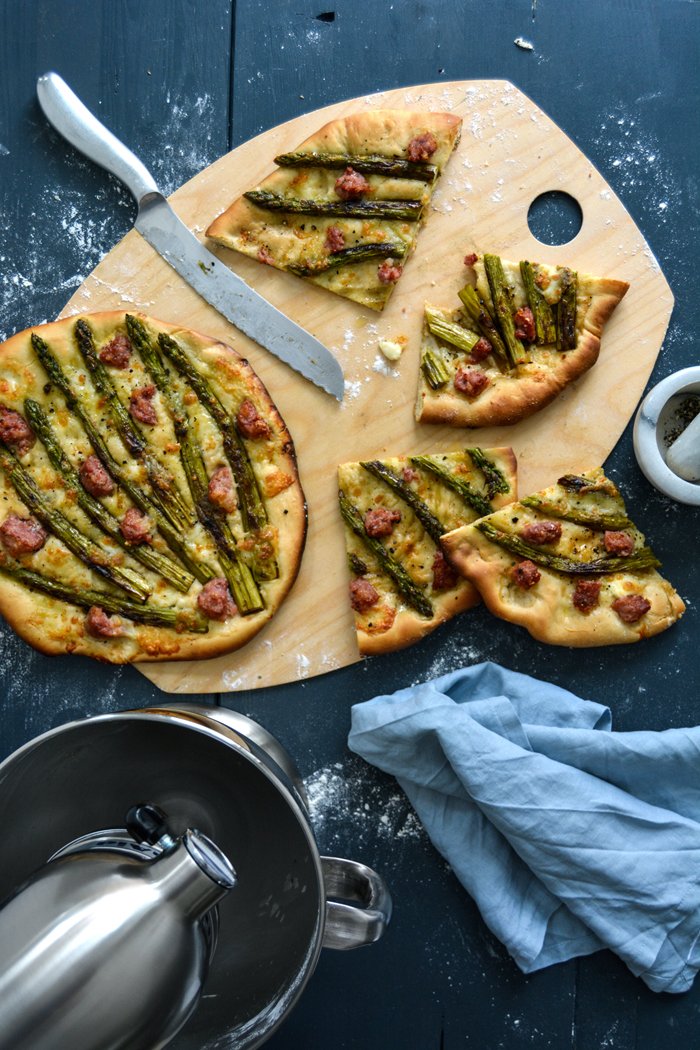
Our first KitchenAid pizza was such a great success that I made another one only three days later, but this time it was an oily pizza bianca topped with green asparagus, Italian salsiccia, and mozzarella di bufala. On our latest Saturday leisure trip, we went to the food market at Markthalle Neun in Kreuzberg in Berlin and enjoyed a luscious piece of very oily pizza bianca at Sironi. The baker, Mr. Sironi, went for a topping of broccoli, sausage, and mozzarella. It was very minimal and very good and a reminder that it's time for a white pizza in my kitchen. I find it lighter and quicker to prepare and it tastes just as good when it's cold, which makes it perfect for summer picnics or easy dinners on the balcony or in the garden. I'm really impressed by the simple combination of greens, mozzarella, and sausage. Asparagus is in season at the moment, but feel free to replace it with broccoli, leek, zucchini or whatever veg comes to your mind. You could also add a little garlic oil, which I don't find necessary. But we're talking about pizza, so everybody should just follow their personal preferences. Enjoy!
Click here for more pizza inspiration.
Thank you KitchenAid for helping me make my little kitchen dream come true!
Pizza Bianca with Green Asparagus, Salsiccia, and Mozzarella di Bufala
I start to prepare the dough 2 hours before I bake the pizza to give it enough time to rise and I bake it on a hot baking sheet, which has a similar effect to a pizza stone.
Makes 2 pizzas
For the dough
plain flour 350g / 2 2/3 cups
fast-acting yeast 1 (7g / 1/4 ounce) envelope
fine sea salt 1 teaspoon
water, lukewarm, 180ml / 3/4 cup
olive oil 6 tablespoons
For the topping
olive oil
green asparagus, trimmed, 14 young stalks
flaky sea salt
black peppercorns, crushed in a mortar
large Italian salsiccia sausage (or any other coarse sausage), skin removed and cut into chunks, 1
mozzarella di bufala, torn into chunks, 125 g / 4 1/5 ounces
For the dough, combine the flour, yeast, and salt in the bowl of a stand mixer fitted with the dough hook. Add the lukewarm water and olive oil and knead on medium-high speed for a few minutes until well combined. If the dough is too sticky, add more flour. Transfer the dough to a table or countertop and continue kneading and punching it down with your hands for about 4 minutes until you have a smooth and elastic ball of dough. Place the dough back in the mixer bowl, cover with a tea towel, and let rise in a warm place, or preferably in a 35°C / 100°F warm oven, for about 60 minutes or until doubled in size.
While the dough is rising, prepare the topping: Heat a generous splash of olive oil in a large, heavy pan and sauté the asparagus, turning occasionally, on medium-high heat for about 7 minutes. Season with flaky sea salt and crushed pepper to taste and set aside.
When the dough has doubled in size, punch it down, take it out of the bowl, and divide into 2 parts. On a well-floured work surface or pizza peel, stretch or roll each piece of dough into a 28cm / 11" disc. Cover with a tea towel and let rise for about 30 minutes or until puffy.
Place a baking sheet (or pizza stone) on the bottom of the oven and preheat the oven to the highest temperature, 260°C / 500°F or higher.
Once the baking sheet is hot, carefully take it out of the oven, flip it over, and place it on a trivet or other heat-safe surface. Arrange 1 of the risen dough discs on the baking sheet and spread half the asparagus, salsiccia, and mozzarella di bufala on top. Push the asparagus gently into the dough. Sprinkle with 1 tablespoon of olive oil, a little flaky sea salt, and crushed pepper and bake on the bottom of the oven for about 10 minutes or until the crust is golden brown and crisp and the mozzarella is golden. Repeat to make the second pizza and serve hot or cold.
Crispy Pan-Roasted Coriander Potatoes with Chèvre and Lemon Thyme
Golden roasted potatoes eaten straight out of the pan are an unbeatable culinary delight. Spice it up with crushed coriander seeds, mild fresh chèvre, and aromatic lemon thyme and you'll have an easy summer lunch (or dinner) that won't disappoint you. It's a rustic side for barbecued sausage, steak or ribs, you could even serve it as a cold or warm salad. But don't forget to cook the potatoes a few hours, or preferably a day, in advance. To create crispy potatoes, they have to be cold and dry from the start.
I often enjoyed pan roasted potatoes with my mother when I visited her for a one-night sleep over while I still went to university. We would open a nice bottle of red wine, fry some onions and Tyrolean prosciutto, and mix in the crispiest potatoes. These were the perfect girls' nights, just us, chatting and cooking, and enjoying the simple treats of life, which my mother mastered to perfection!
If you're looking for more inspiration for roast potatoes, here are a few scrumptious recipes:
Crispy Pan-Roasted Coriander Potatoes with Chèvre and Lemon Thyme
Serves 2-3
olive oil
waxy potatoes, peeled, boiled, and rinsed, about 700g / 1 1/2 pounds
flaky sea salt
black peppercorns, crushed in a mortar
quality coriander seeds (preferably organic), lightly crushed in a mortar, 2 tablespoons
fresh chèvre, crumbled, 100-150g / 3 1/2-5 ounces
fresh lemon thyme leaves (or regular thyme and a little lemon zest) 2-3 tablespoons
Let the potatoes cool and dry on a wire rack for at least 1 hour or a day and cut them into thick slices. In a large, heavy pan, heat a generous splash of olive oil and roast the potatoes on medium-high for a few minutes on each side until golden brown. Cook them in batches and turn them one by one with a fork. Season with flaky sea salt and crushed pepper to taste and transfer to a plate. Cover them with a lid to keep them warm.
Heat a splash of olive oil in the pan used to roast the potatoes and cook the coriander seeds on medium heat for 1 minute (they shouldn’t get dark). Add the roasted potato slices to the pan, mix gently with the coriander, and sprinkle with crumbled chèvre and the lemon thyme. Season with salt and pepper to taste and enjoy warm.
Pasta with Sun-Dried Tomato and Pistachio Pesto and a new Saturday ritual
We started a new ritual and that's to spend our Saturdays without any electronic devices, preferably in the countryside. It's just the two of us, no duties, meetings, parties or anything, we just go with the flow and see where our mood takes us. I can't even say which part of this ritual I enjoy more, the fact that we leave the city for a few hours or that I have 24 hours without emails, Instagram or any other social network activities. I love it.
Last Saturday we spontaneously decided to take the bus to the west of Berlin to have a cup of espresso in my aunt Ursula's kitchen. She and my uncle Uwe make the best coffee in town and whenever I announce our visit, I can be sure to find a few pieces of cake on their table - they know me well. The espresso tasted so good that I had to have 2 doppio, which made me a bit hyperactive and ready for the next adventure. We wanted to visit Berlin's best farmers market at Karl-August-Platz, but we got "stuck" on Kantstraße, a street famous for its Asian restaurants. We stopped at a restaurant that I've been wanting to test for years, but unfortunately, it didn't meet my expectations. We ordered 6 dishes and none of them really struck me. The problem with hyped food places in the city is that you expect something outstandingly amazing if so many people talk about it. So if it's just average, it's disappointing. Our dessert was ice cream from the supermarket, which I don't do very often, but it never lets me down and it's a reminder of lots of good childhood memories. Stuffed and happy we walked to a small lake and fell asleep in the warming sunlight. The whole scene felt a bit Roman: Two happy people after a lavish meal taking a nap on a blanket in the grass.
Revitalized, we drove back home, planning our dinner of white asparagus, fresh from the fields in Beelitz. It wouldn't be a proper Saturday if our plans didn't change with our mood. We stopped by at our favourite local wine shop to buy a bottle of rosé for our meal, but the little bistro tables looked so inviting that we couldn't resist sitting down for a glass of German Weissburgunder, some lemon olives, and an asparagus quiche. We got chatty and silly and stayed until 11pm, needless to say, we didn't stop after the first glass.
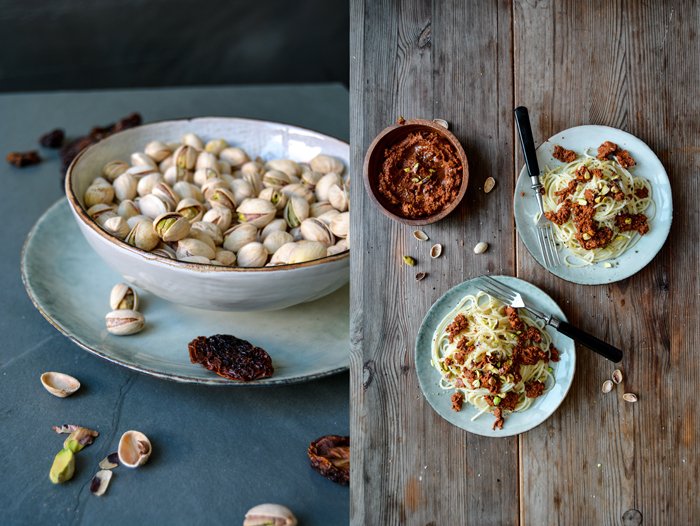
We haven't made any plans for next weekend yet, but at one point there will be this pasta dish on the table again, which I came up with last week and got hooked on. It's a quick pesto made of sun-dried tomatoes and pistachios, the combination is divine, and it's even better when it's stirred into warm spaghetti. It also works very well as a thick spread on rustic white bread, the perfect nibble along with a glass of chilled German white wine. There's one thing that our Saturdays have in common, there's often a bottle of good wine involved - la dolce vita for a day!
Here's my recipe for another sun-dried tomato pesto, with rosemary and thyme.
Pasta with Dried-Tomato and Pistachio Pesto
Serves 2
For the spaghetti
dried spaghetti, about 200g / 7 ounces
flaky sea salt, for the topping
black peppercorns, crushed in a mortar, for the topping
For the pesto
sun-dried tomatoes, preserved in salt, 50g / 1 3/4 ounces
salted shelled pistachios 60g / 2 ounces, plus a few chopped pistachios for the topping
olive oil 60ml / 1/4 cup
garlic, crushed, 1 large clove
In a large pot, cook the spaghetti in boiling salted water until al dente.
In a small saucepan, cook the sun-dried tomatoes in a little boiling water for about 3-4 minutes or until soft. Reserve the water and rinse the tomatoes under cold water. Pat them dry with paper towels.
In a food processor or blender, purée the dried tomatoes along with 4 tablespoons of their cooking water, the pistachios, olive oil, and the garlic until smooth. Add more of the cooking water and olive oil if the pesto is too dry.
Divide the pasta between 2 plates and stir in some of the pesto. Sprinkle with chopped pistachios and season with flaky sea salt and crushed pepper to taste.
You can use any leftover pesto as a spread on bread.
Strawberry, Chickpea, and Raw Asparagus Salad with Basil and Pink Peppercorns
Whenever I buy a new appliance for my kitchen, a bigger wardrobe for our bedroom, or a more powerful driller for the tool box, I always ask myself how I managed before the new purchase entered our home. I'm totally fine with having to deal with limited space or less satisfying equipment in the house, but give me the comfort of improvement and I'm hooked for life.
This is exactly how I felt when I got my new fridge last December. It's only the third fridge I have ever owned and although I can't really complain about its predecessor - it did a decent job for more than 15 years - it drove me crazy at times. Mainly because the space it offered and the food I tried to put inside it did not match at all. I love fresh food, I buy a lot of fruit and vegetables every week at the farmers' market, and all kinds of cheese, olives, capers, prosciutto ... and wine of course. There are only two people to feed but our food needs space. Thinking back, I don't know how I managed to store all the greens in my old fridge while I was working on my book a year ago, I have no idea. It worked, but now it's different, now I actually enjoy my fridge. A few days ago I came into my kitchen with lots of bags and baskets full of rhubarb, berries, asparagus and other spring produce and everything fit. I looked at this silver beauty and couldn't help but say "I love my fridge!". When Samsung offered me their Chef Collection for my kitchen, I was over the moon and I still feel the same. When you love food and cooking you truly appreciate having the right equipment.
So when I took a look at all the vibrant colours in my fridge, I came up with a salad that looks and tastes as bright and fresh as this season. I cut raw green asparagus very thinly and mixed it with a handful of arugula and canned chickpeas. A few fresh strawberries on top and a light vinaigrette made with orange juice drizzled all over and it was almost done: Some pink peppercorns added subtle spice and their distinct aroma. It was a very satisfying spring creation.
Strawberry, Chickpea, and Raw Asparagus Salad with Basil and Pink Peppercorns
Serves 2
For the dressing
olive oil 3 tablespoons
freshly squeezed orange juice 2 tablespoons
white balsamic vinegar 1 tablespoon
fine sea salt
ground pepper
For the salad
young green asparagus, trimmed, 4 stalks
arugula leaves, 1 large handful
drained canned chickpeas, 2 handfuls
fresh strawberries, cut into quarters, 6
a few fresh basil leaves
a few pink peppercorns
For the dressing, in a small bowl, whisk the olive oil, orange juice, and vinegar and season with salt and pepper to taste.
Cut off the heads of the asparagus and cut them in half lengthwise. Using a mandoline, a cheese slicer, or a sharp knife, cut the asparagus stalks into long, very thin slices.
In a large bowl, arrange the arugula, asparagus, chickpeas, and strawberries in layers and drizzle with the dressing. Sprinkle with pink peppercorns and basil and serve immediately.
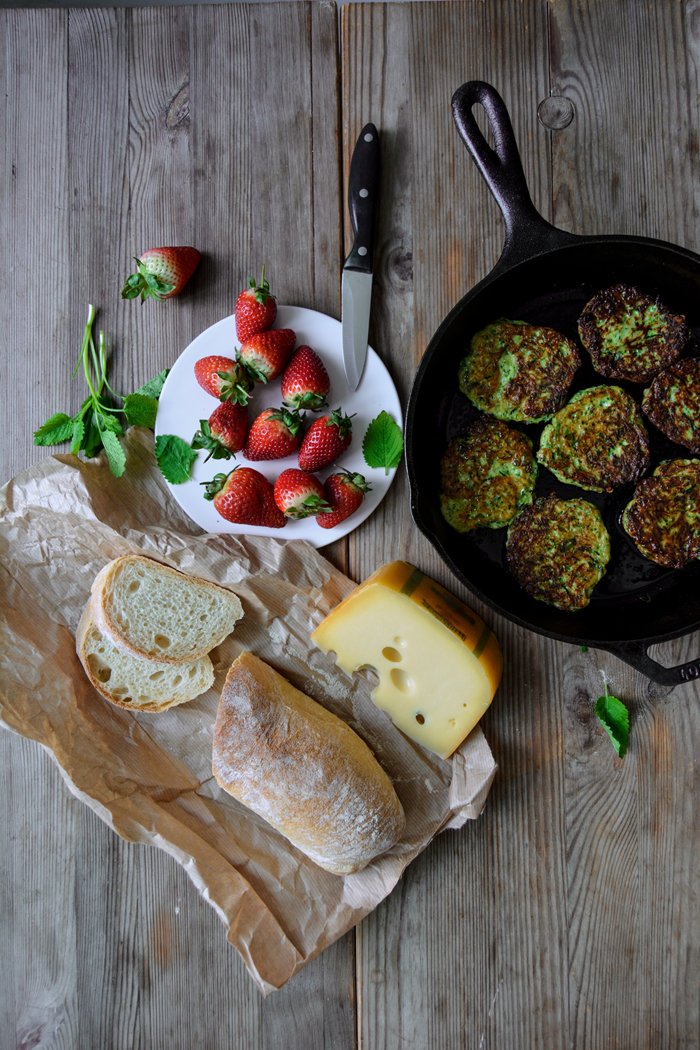
Zucchini Cheese Fritter Sandwich with Strawberries and Lemon Balm
A lusciously filled sandwich will always excite me. It only needs the right combination of flavours and textures to lift this comfort treat to new heights. Playing with contrast is a good way to start: soft and crunchy, fresh and creamy, sweet and salty - there are endless possibilities to create a little firework between two slices of bread.
If you follow the seasons, you can find inspiration in the pantry during the colder months of the year or while strolling through the farmers's market to see what nature offers as soon as it gets warmer. And that's what I did. Although I can find zucchini all year round, it's only at the peak of spring that squash is finally packed with sweetness again. Mine comes straight from the fields in Italy and it has all the qualities it needs to become golden fried fritters. Mix in some cheese and lemon balm and you have a fragrant little snack on your plate. My cheese of choice is Leerdammer, which worked so wonderfully well in my Grilled Persimmon, Ham, and Cheese Sandwich. It's not too overpowering next to the zucchini yet adds its particular subtle sweetness. Bringing in lemon balm makes it fresh and citrusy. And don't be distracted by the strawberries graciously arranged on top, it may seem a bit brave but their sweet-sour fruitiness makes the composition complete.
This sandwich is just right for a decadent breakfast, a springy lunch, or a cozy dinner enjoyed on the sofa. And it works just as well without the bread: arrange the warm zucchini cheese fritters on plates along with fresh strawberries, sprinkle with lemon balm, and scatter some grated cheese and pink peppercorns all over this colourful feast.
This post is sponsored by Leerdammer.
Zucchini Cheese Fritter Sandwich with Strawberries and Lemon Balm
Makes 3 sandwiches
For the zucchini cheese fritters
zucchini, grated, 450g / 1 pound
fine sea salt
spring onions, the green only, thinly sliced, 2 (about 2 tablespoons)
mild hard cheese, freshly grated, 30g / 1 ounce
organic egg, lightly beaten, 1
fresh lemon balm, finely chopped, 1 tablespoon
a generous amount of ground pepper
plain flour 40g / 1/3 cup
olive oil, to cook the fritters
For serving
fresh ciabatta, about 6 slices
rucola 1 handful
Leerdammer cheese, thinly sliced, about 6 slices
ripe strawberries, hulled and cut in half lengthwise, 6
pink peppercorns
fresh lemon balm, about 9 leaves
For the zucchini cheese fritters, in a large bowl, combine the grated zucchini and 1 teaspoon of salt. Rub the salt into the squash and let it sit for 10 minutes. Drain the zucchini and squeeze it in your hands. Spread the zucchini on a kitchen towel, cover with a second towel, and squeeze out any remaining liquid.
In a large bowl, combine the zucchini, spring onion, grated cheese, egg, chopped lemon balm, pepper, and 1/4 teaspoon of salt. Add the flour in batches and mix with your hands or a large spoon until well combined.
In a large, heavy pan, heat a generous splash of olive oil over medium-high heat. Working in batches, add 2 tablespoons of the zucchini mixture for each fritter to the pan; give the fritter a round shape and flatten it lightly. Cook for 2-3 minutes or until golden brown, flip the fritters over, and turn down the heat to medium. Cook for another 2-3 minutes or until golden brown. Transfer the fritters to paper towels and cover with a lid while cooking the remaining fritters, add more oil if necessary. This makes about 6-7 zucchini fritters.
For the sandwiches, spread a little rucola on 3 slices of bread. Cover each slice with 2 slices of cheese and 2 warm fritters and finish it off with 4 strawberry halves. Sprinkle with pink peppercorns and a few lemon balm leaves and close with a slice of bread. Squeeze the sandwich - gently - and enjoy.
Potatoes with Cinnamon Hummus, Basil, and Prawns
When I have a bowl of hummus in front of me, I grab the biggest spoon I can find and enjoy this creamy, nutty deliciousness with inexplicable enthusiasm. I don't know where this fascination comes from, I only discovered this Middle Eastern dip relatively late in my kitchen, but I'm obsessed with it.
Most of the time I'm not even very experimental, I just stick to my basic recipe, but sometimes my mood calls for a little change. I either replace the chickpeas with white beans, stir in some fresh or dried herbs, or I try less pleasant combinations that I never ever want to taste again (like my avocado hummus - disastrous!). There must be something in the tahini - the rich, oily sesame sauce that's used for hummus - its nutritional value, that my body is almost addicted to. I can eat the thick, pure sauce by the spoon, straight out of the jar. It's strange.
One of my latest experiments led to a very simple yet absolutely scrumptious result: a generous amount of ground cinnamon and a pinch of ground cumin. The spices enhance the dip's sweetness and give it a warm and earthy touch. You don't actually taste them, they merge with the other ingredients and create a new flavour, which makes me want to eat even more of it. To accomplish the sweet side of the hummus, I added sliced boiled potatoes (warm or cold, both work), fresh basil, and a few prawns. It felt like summer on a plate and reminded me of a similar Mediterranean meal we had in Malta last year.
Potatoes with Cinnamon Hummus, Basil, and Prawns
Serves 4
For the hummus
drained and rinsed canned chickpeas, 240g / 8 ounces
tahini 150g / 5 ounces
water 120ml / 1/2 cup
freshly squeezed lemon juice 4 tablespoons
garlic, crushed, 1 large clove
ground cinnamon 1/4 teaspoon
ground cumin 1/8 teaspoon
fine sea salt about 1 teaspoon
For serving
olive oil
prawns, the heads cut off, 8-12
boiled potatoes (warm or cold) 8-12
flaky sea salt
black peppercorns, crushed in a mortar
fresh basil leaves, a small handful
For the hummus, purée the ingredients in a blender and season with cinnamon, cumin, and salt to taste.
In a large pan, heat a splash of olive oil over high heat and sear the prawns for 1-2 minutes per side or until cooked through.
Arrange the sliced potatoes on 1 large platter or on 4 small plates, drizzle generously with the hummus and additional olive oil, and season to taste with flaky sea salt, crushed pepper, cumin and cinnamon. Place the prawns on top, sprinkle with basil and enjoy immediately.
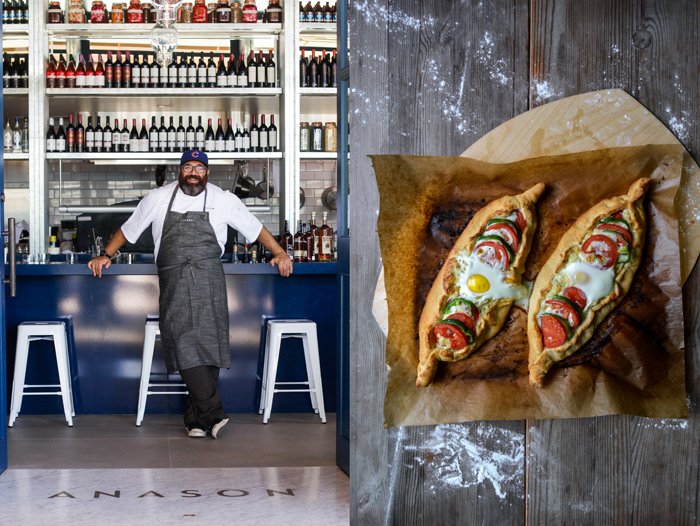
meet in your kitchen | Somer Sivrioglu's 'Anatolia', Sydney, and Cheese and Egg Pizza
Some books make you fall in love with its captivating pages from the moment you lay your hands on it. Anatolia, by Somer Sivrioglu and David Dale, is one of them. This outstandingly beautiful cookbook is rich in pictures, stories, and recipes. It takes you to another world of flavours, ingredients, and unknown combinations and it makes you want to go straight to your kitchen to bring this exciting new discovery right into your home - or at least a bite of it.
The first recipe I tried from this book, was pide, thin Turkish pizza. Somer makes it with an aromatic minced lamb topping, which is divine, however, when I gave it a second go, I sneaked in a dark Provençal olive tapenade, and shared it on eat in my kitchen. Somer liked my version so much that he shared it on Facebook, we started chatting, and here's the result: Our cross-continental Berlin-Sydney meet in your kitchen feature!
My guest grew up in Turkey, in Istanbul, where he lived with his family until he was 25. But one day, the young man decided to explore life on the other side of the world and moved to Sydney. His dream came true and he started an impressive career in food that led to two fantastic restaurants and an award-winning cookbook. Somer runs the popular Efendy that opened in 2007, featuring contemporary Turkish cuisine in the Balmain district. Anason - his second 'baby' - was next, which only just opened its doors to the public world, but it's already one of Sydney's new culinary hot spots.
This man is busy and I don't know how he managed to write a cookbook on top of his packed schedule as a chef, but he did, and the result takes the globe by storm: Anatolia: Adventures in Turkish Cooking won the prestigious international IACP award (former winners are luminaries such as Thomas Keller, Claudia Roden and Julia Child). I'm sure it will keep its place in the front row of my book shelf for quite a while. Somer is a passionate chef, he loves food, and this shines through in every project that he pulls onto his table. Congratulations!
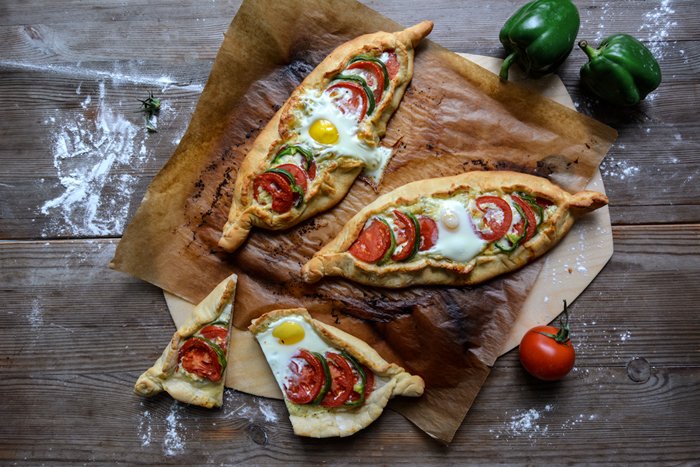
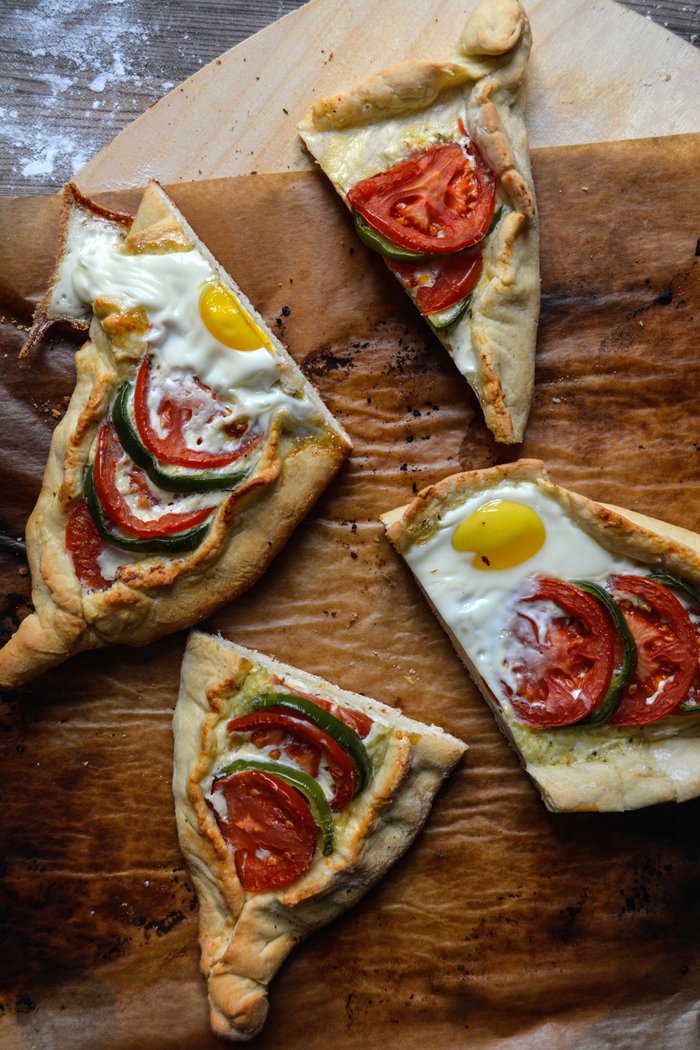
My weak spot for Turkish pizza made me go for another pide recipe from Somer's book, which I share with you today: slim pide filled with an aromatic cheese mixture of 4 different cheeses, green pepper, tomato, and a baked egg. This dish calls for a relaxed dinner on the balcony or in the garden, with a glass of chilled crisp white or rosé wine and a fresh salad on the side. May only the temperatures rise and summer begin!
Pide with Four Cheeses
Serves 4
For the dough
dry yeast 1 tablespoon
water, lukewarm, 50 - 100ml / 3 1/2 tablespoons - 1/3 cup plus 1 tablespoon
granulated sugar 1 teaspoon
plain flour 300g / 2 1/3 cups
strong flour 150g / 1 cup plus 2 tablespoons
whole milk, lukewarm, 50ml / 3 1/2 tablespoons
salt 1 teaspoon
For the cheese filling
4 cheese-mixture, grated or crumbled, 100 - 140g / 3 1/2 - 5 ounces (depending on how rich you'd like your pide), such as feta, aged ricotta, blue cheese, and mozzarella or provolone
egg 1
chopped fresh oregano 2 teaspoons (or about 1/2 - 1 teaspoon dried oregano)
For the topping
large tomatoes, thinly sliced, 2
large green pepper, cut in half, cored, seeded, and thinly sliced, 2
eggs 4
vegetable oil 2 tablespoons (I used olive oil)
Dissolve the yeast in 50ml / 3 1/2 tablespoons of the water. Stir in the sugar and set aside for 5 minutes. It should start to form bubbles.
Sift the flours into a large bowl, make a well in the middle, and pour in the yeast mixture and the milk. Knead the dough for 10 minutes, or until it reaches earlobe softness. Add more of the water if necessary (I used all of the water). Cover the bowl with a damp tea towel and let it rest and rise for 30 minutes.
Add the salt to the dough and knead for 3 minutes. Place the dough on a floured work surface and form it into a cylinder, then cut it into 4 equal pieces. Cover and let rest for another 10 minutes.
Meanwhile, preheat the oven to 200°C / 400°F. If you have a pizza stone or tile, place it in the oven. Or leave a baking sheet in the oven so it will preheat.
Combine the crumbled cheeses in a large bowl. Add the egg and fold and mix until combined; stir in the oregano.
On a floured working surface, stretch the pieces of dough into ovals, about 30 x 20cm / 12 x 8" and 5mm / 1/4" thick; or use a rolling pin.
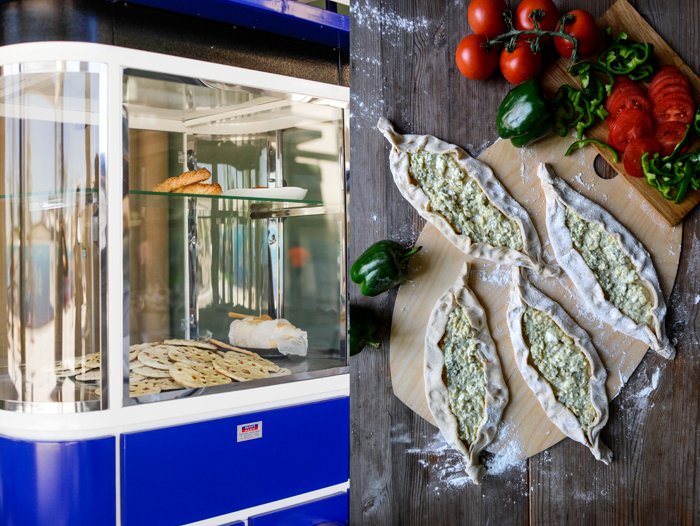
Transfer the 4 pides to 2 pieces of parchment paper. Spoon a strip of the cheese mixture in the middle of each oval, leaving a 5cm / 2" rim all around the edges. Fold over the 2 longer sides so they touch the filling but don't cover it. Join the folded edges at the top and bottom to make a boat shape. Press each into a point and twist to close tightly. Arrange 6 slices of tomato and 4 slices of pepper on each pide and break an egg into the middle. If you don't want the egg to be cooked through, bake the pides without the egg for 7 minutes, then add the egg, and bake for another 7 minutes or until golden brown.
Brush the tops of the dough with oil.
If you're using a baking sheet preheated in the oven, take it out of the oven and pull 1 parchment paper with 2 pides over onto the hot baking sheet; or transfer 2 pides with the parchment paper onto the hot pizza stone or tile in the oven. Bake for about 15 minutes or until golden brown. Enjoy warm.
Growing up in Istanbul, Turkey, in the 1970s and 1980s, during a time of severe political unrest, how would you describe your life as a child and teenager? What are your memories of those days?
I was born and raised in Kadikoy, Istanbul, one of the last multicultural suburbs of Istanbul, where the few of the last descendants of Greek, Armenian and other non-muslim population lived after the rise of nationalist policies drove them out of the city they lived in for many generations. Although the 1970s were chaotic, we felt safe on the streets as the community values were very strong back then, everyone knew and looked after each other.
Why did you leave Turkey in your twenties and move to Sydney?
I came to study for my MBA degree and to live in another country to find my own voice.
What does having your own restaurants – Efendy and Anason – mean to you, is it a dream come true?
My restaurant, Efendy, and the amazing team gave me the chance to represent Turkish food in a country where it was only known as kebaps and Turkish bread before we opened.
Your mother worked as a restaurant consultant, do both of you share a similar philosophy when it comes to food, cooking, and running a restaurant? Does she give you advice and do you listen?
She ran a number of restaurants /meze bars and I learned a lot from working with her, as to sharing the same philosophy fundamentally, yes, but I challenge myself to progress and she is a bit more conservative. I think we are both challenging each other in that aspect. She gives me advice, typically I would ignore, or pretend to ignore, but do it later on anyway (laughing).
Who is your biggest inspiration in the kitchen?
My grandma, Akife, was my childhood influence, as she was one of the first modern females to complete a home economics degree and she took cooking classes as part of it. She was a great example of how to create excellence from scarcity.
How did the Turkish cuisine influence your perspective as a chef? How do you develop new recipes?
Turkish food is all about seasonality, abundance and variety. As a chef, it made me think about using the right produce at the right season and applying various drying, pickling, and preserving techniques to my cooking. I used to create the recipes and get my chefs to cook them at Efendy, but now I ask them to create recipes that means something to them, from their heritage, and I learn and coach them to fine tune them to put in our seasonal menus at Efendy and Anason.
How long did you work on your cookbook Anatolia? Can you describe the creative process of this wonderful book, which you wrote together with David Dale?
Three years from concept to print. As a first time book author, I was lucky enough to work with one of the best food journalists, David Dale, and he coached me thorough the whole process. We have been to Turkey twice together visiting cities all over the country, talking to masters of craft and adapting the recipes to Australian and European readers where they can cook with common ingredients that can be found at any farmers' market.
What is your favourite Turkish and your favourite Australian dish?
Turkish: Kalkan - Black-Sea turbot. Australian: Mud crabs cooked over the BBQ.
What do you miss about Istanbul?
I am lucky enough to go back every year. Eating seasonal fish and drinking raki on the Bosphorus with family and friends is one thing I yearn for and do every time I am back. In fact, I am in Istanbul at the moment.
What was the first dish you cooked on your own, what is your first cooking memory?
I remember helping my grandma buttering the layers of her lamb borek, she had the scariest looking electrical round oven where all the cables and elements were exposed.
What are your favourite places to buy and enjoy food in Sydney?
My favourite shopping spot was at Growers Market at Pyrmont, unfortunately they closed, so currently it’s Eveleigh Markets every Saturday. Favourite cafés: Le Cafeier in Balmain and Edition Coffee pop-up at Barangaroo, both located next to my restaurants and keep me going all day and night.So many restaurants to mention but I love the next-gen Turkish restaurants in Sydney like Pazar Food Collective, Stanbuli and Sefa Kitchen.
If you could choose one person to cook a meal for you, who and what would it be?
I would love my babaanne (paternal grandmother) to cook something from her Albanian heritage, as we lost her when I was very young and never learned that part of my culinary culture.
You're going to have ten friends over for a spontaneous dinner, what will be on the table?
It won’t be on the table but the spring lamb on a spit would be next to the table and complemented with some mezes and seasonal salad accompanied by raki or a few nice bottles of Öküzgözü (Turkish red wine variety).
What was your childhood's culinary favourite and what is it now?
I loved my anneanne’s karniyarik and borek, nowadays, I love having a simple grilled fish or a nice steak on a charcoal BBQ.
Do you prefer to cook on your own or together with others?
Of course cooking with others, I don’t like cooking by myself or eating by myself.
Which meals do you prefer, improvised or planned?
Improvised, as it has an element of surprise and spontaneity.
Which meal would you never cook again?
Bombe Alaska (Baked Alaska). Many years ago, when I was working in banquets at a hotel, I made it for a wedding of 1000 people not knowing how it is made. Lesson learnt.
Thank you Somer!
Green Minestrone with Lime-Arugula Meatballs
Sometimes I am asked by a reader to come up with a certain recipe. Quite often it's a dish connected to a childhood memory of theirs, a food experience saved many years ago, and now they're hoping to find this specific flavour again. But it's a tricky thing, it's almost impossible to relive something as an adult and expect the same satisfaction that we felt back then when we were young.
I used to love Dutch coconut sheets for breakfast, which is as weird as it sounds. This is compressed dessicated coconut, pressed into thin sheets and, to make it even more appealing, they were either pink or pale white. I was obsessed with them. After a culinary break from this delicacy, I tried them again years later and I was so disappointed. But there's another Dutch classic, which still lives up to my memories, and I enjoy it with the biggest passion whenever I pull it out of my oven: sticky honey cake.
At the end of this winter, I got asked to share a traditional German hot chocolate recipe, which my reader, who lives in the US, connects with the time he spent in Germany as a child. Somehow, I never felt in the mood for it, and my hot chocolate is also a rather simple creation made of milk, unsweetened cocoa powder, and ground cinnamon and cardamom, which is not a traditional German take on this drink. I'm sorry, I'll try to write about it next winter.
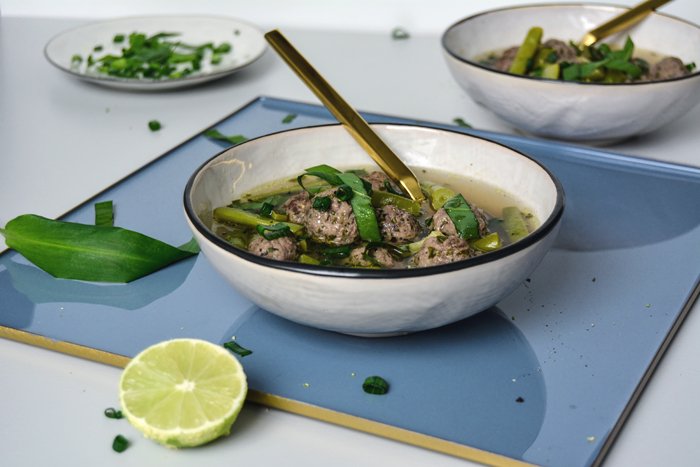
But last week, someone dropped a comment on Instagram, telling me that I haven't made a soup in a long time - and this person was right! She lives in Asia and asked for a soup that she can have with her morning rice. I don't think that someone who lives in Asia, needs a German girl to tell her how to make a fragrant broth with ginger, spices, and lemon grass, so I thought about something that I could share from my background. Our summers spent in Malta made me fall for minestrone, and when I cook this warming soup with just green vegetables - like fresh beans, peas, and zucchini - it tastes like spring. To turn it into a full lunch, I add tiny meatballs refined with lots of chopped arugula and lemon zest. The strong aroma of the citrus fruit reminds me of the Mediterranean but at the same time, it adds the same lemony freshness that you know from a clear broth made with ginger. Enjoy!
Green Minestrone with Lime-Arugula Meatballs
Serves 2-4
For the meatballs
ground beef 400g / 14 ounces
fresh arugula leaves, finely chopped (with a knife or in a blender), 1 large handful / 50g
zest of 1 lime (1 heaping teaspoon)
garlic, crushed, 2 cloves
fine sea salt 1 teaspoon
a generous amount ground pepper
For the soup
olive oil
garlic, cut in half, 1 clove
green vegetables (a mix of trimmed green beans, peas, and zucchini), beans and peas cut into bite size pieces, about 350g / 12 ounces
vegetable broth, hot, 1l / 4 1/4 cups
freshly squeezed lime juice 1 tablespoon
bay leaf 1
fine sea salt
ground pepper
For the topping
ramp leaves, thinly sliced, 2 and / or spring onion, thinly sliced, 1
For the meatballs, in a large bowl, combine the ground beef, chopped arugula, lime zest, garlic, salt, and pepper and mix until well combined. Wet your hands and form the mixture into tiny meatballs.
For the soup, in a large saucepan, heat a splash of olive oil over medium heat. Add the garlic and cook, stirring, for about 1 minute. Add the vegetables, stir, and cook for 1 minute. Add the broth, lime juice, and bay leaf, season with salt and pepper to taste, and bring to the boil. Add the meatballs and bring to the boil again. Reduce the heat to medium, cover with a lid, and simmer for 4 minutes. Split 1 meatball to check if it's done. Season the soup with salt, pepper, and additional lime juice to taste.
Serve the soup in deep bowls, sprinkled with ramps and / or spring onion, and enjoy warm.
Spring Timpana - Maltese Pasta Pie with Asparagus, Peas, and Leeks
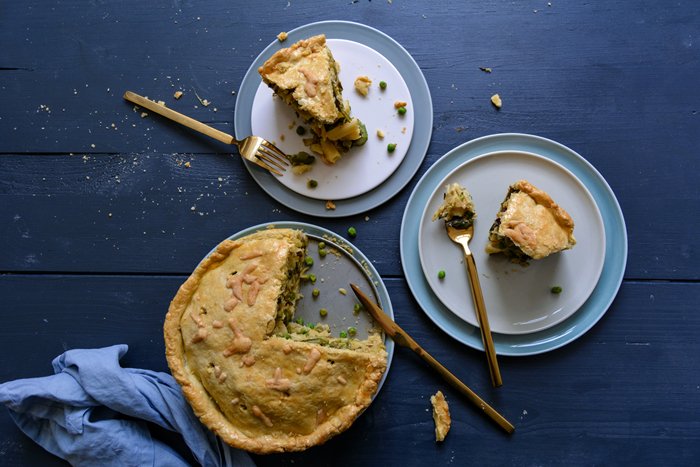
Yesterday's excitement called for lots of carbs - and a glass of wine! It was a day packed with too many emotions to handle. After sharing the cover of my book and the Amazon pre-order links here on the blog, I felt overwhelmed by all the sweet emails and messages I got from all over the world. I needed good, solid, rustic food for dinner to calm me down. I made a dish that is so packed with carbs that it actually feels a little weird, but it's also packed with flavour and comfort, so it makes sense. I baked a springy Maltese pasta pie, also known as Timpana. I introduced you to this Maltese street food classic a few months ago and the response to the recipe was crazy.
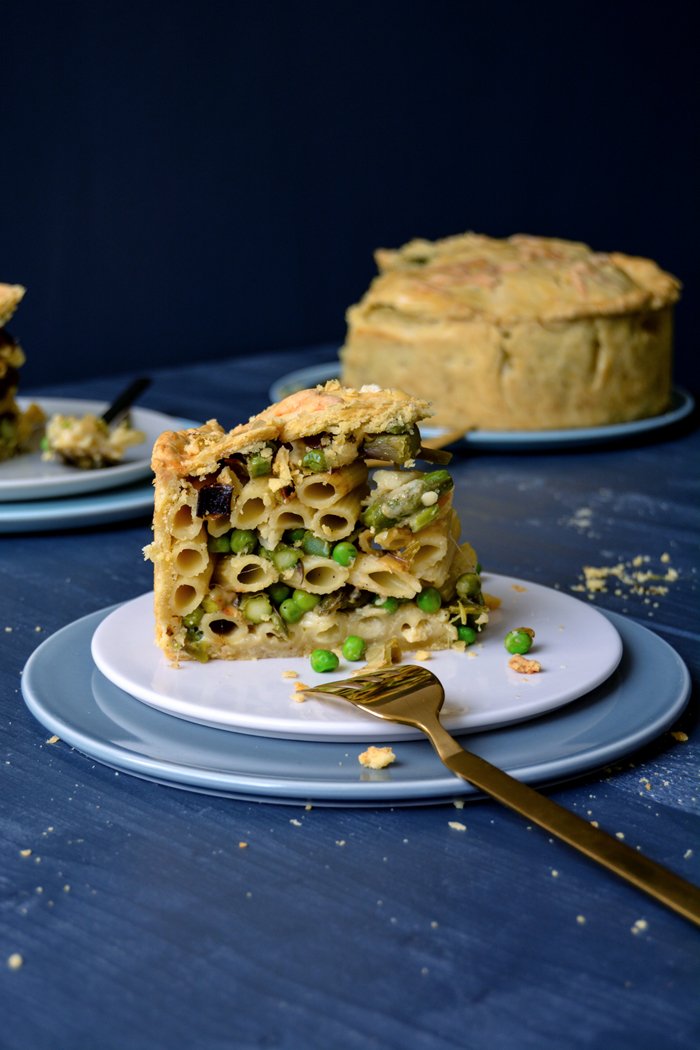
Timpana is basically short pasta stuffed into a buttery pastry shell. Usually, it's enriched with Bolognese, which is nice but it can get a little boring if you've eaten it for years, so last time I made it I went for a meat-free Mediterranean filling of zucchini, eggplant, tomato, and basil. It was so good that I thought I'd never need another filling ever again. But then spring came around the corner with all its pretty greens. Wouldn't it be nice to see green asparagus, sweet peas, and leek inside this pie beauty? I didn't have to think about it twice. I went to the grocery store, put all the vegetables in my bicycle's basket, and once home, I turned on the oven.
It's still a little weird for me to look at this combination of penne and shortcrust in a rational way but maybe this dish shouldn't be overanalyzed. It simply feels and tastes good, and after the first bite, my mind and emotions were at ease again: I felt so happy and thankful to have the eat in my kitchen blog and book in my life, both of them connect me with so many people all over the world and bring so many fantastic experiences into my life.
Spring Timpana - Maltese Pasta Pie with Asparagus, Peas, and Leeks
You'll need a 20 1/2cm / 8″ springform pan.
Serves 4-6
For the filling
penne pasta 250g / 9 ounces
green asparagus, trimmed, about 500g / 1 pound
peas, fresh or frozen, 200g / 7 ounces
olive oil
leek, thinly sliced, 200g / 7 ounces
Dijon mustard
3 teaspoons
fine sea salt 1 teaspoon
ground pepper
organic egg 1
Parmesan, freshly grated, 80g / 3 ounces for the filling plus 1 tablespoon for the topping (or 100g / 3 1/2 ounces for the filling if you prefer a richer pie)
For the pastry
plain flour 300g / 2 1/3 cups
fine sea salt 1 teaspoon
butter, cold, 150g / 2/3 cup
organic egg yolks 2
water, cold, 2 tablespoons
For the glaze
organic egg yolk 1
milk 1 tablespoon
a pinch of fine sea salt
For the filling, cook the penne in salted water until al dente, they should have bite. Let the pasta cool completely.
In a large pot, bring salted water to the boil and cook the asparagus for about 3 minutes or until al dente. Reserve 120ml / 1/2 cup of the cooking water. Drain the asparagus and rinse quickly with cold water. Let the asparagus cool completely, then cut into pieces as long as the penne.
In a small saucepan, cook the peas in boiling salted water for 1 minute. Drain and rinse with cold water; set aside.
In a large, heavy pan, heat a splash of olive oil over medium-high heat and cook the leek for about 10 minutes, stirring once in a while, or until golden and soft; let it cool completely.
Preheat the oven to 200°C / 400°F (conventional setting).
For the pastry, combine the flour and salt in a large bowl. Cut the butter with a knife into the flour until there are just little pieces of butter left. Continue with your fingers and rub the butter into the flour until combined. Add the egg yolks and water and continue mixing with the dough hooks of an electric mixer until you have a crumbly mixture. Form 2 discs, dividing the dough roughly 2:1, wrap in cling film, and put in the freezer for 10 minutes.
For the filling, in a large bowl, combine the pasta, the reserved asparagus cooking water, mustard, salt, and a generous amount of ground pepper. Season to taste with salt, pepper, and mustard, then stir in the egg and mix until well combined. To fill the pie, the filling should be completely cool.
For the glaze, in a small bowl, whisk together the egg yolk, milk and salt .
Take the dough out of the freezer and roll out both discs between cling film, the large disc, for the bottom and sides of the springform pan, should be about 32cm / 12 1/2″, and the smaller disc should be big enough to cover the pie.
Line the bottom and sides of the springform pan with the large pastry disc. Spread 1/3 of the pasta mixture on top of the pastry, sprinkle with 1/3 of the Parmesan, 1/3 of the vegetables (asparagus, peas, and leek) and season with salt and pepper to taste. Continue making 2 more layers. Pour any remaining liquid from the pasta mixture over the filling. Close with the pastry lid and gently push the rim with your fingers to seal the pie. Using a toothpick, prick a few holes into the top of the pie. Brush the top with the egg glaze and sprinkle with the remaining 1 tablespoon of cheese.
Bake the pie for 15 minutes, then turn the heat down to 175°C / 350°F and bake for another 50 minutes or until the pie is golden and the pastry is baked through. Let the pie cool for at least 15 minutes before you cut it into pieces.
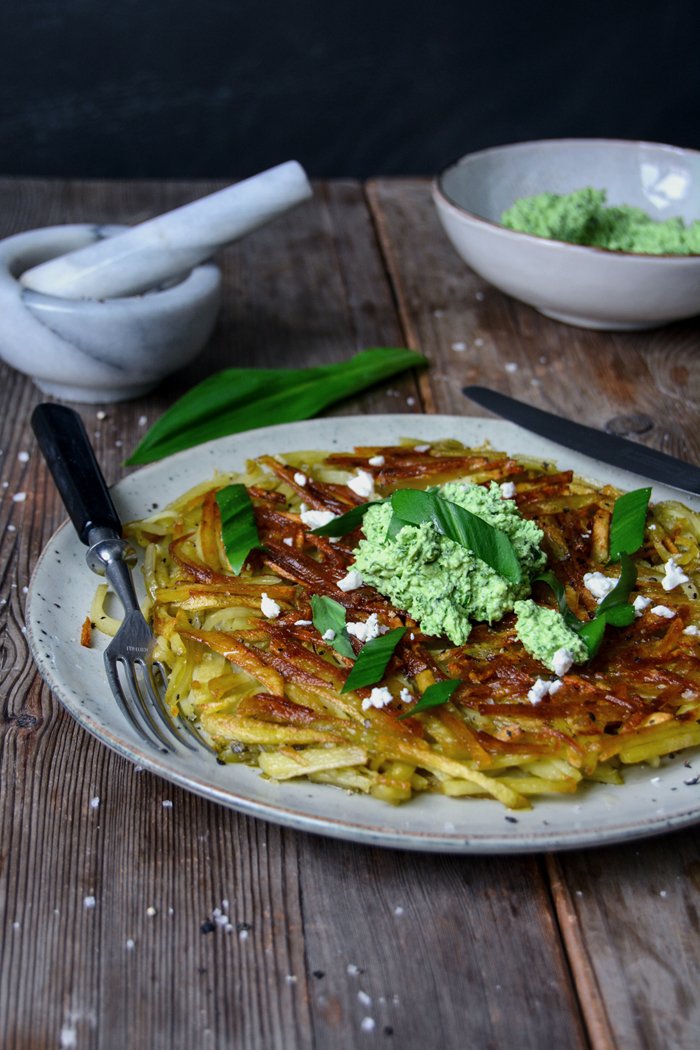
Swiss Potato Roesti with Ramp Feta Dip
It's back! Before I even saw it, I could smell it: the oniony, fresh, green aroma of ramp.
I can't say what excited me more last weekend, Berlin's summery temperatures that brought city life back into the parks, cafés, and restaurants, or my beloved ramps. Large bunches of the springy leaves tucked into little buckets waited for me at the market and I couldn't stop myself - I already used more than a dozen of them. Mainly for pesto, as it tastes so unbelievably good and my boyfriend is convinced that it calms his pollen allergy. Soups are next, seafood, burgers, sandwiches, ramp's season is short but my inspiration to use it is unlimited.
Another one of my spring classics is roesti (or Röschti). It's a rustic Swiss dish made of grated raw and preferably young potatoes fried in a heavy pan like crisp latkes, there's no flour or egg, only salt and pepper for seasoning. Last year, I shared a recipe with you that added lemon zest and rosemary, which made it feel quite summery. This time I go for a rich dip: feta whipped with lots of chopped ramp leaves and a squeeze of lemon juice. The spicy green melts into the cheese's saltiness, it's divine. I made a large batch of the dip as it's also fantastic in combination with juicy ciabatta or crusty dark bread.
Swiss Potato Roesti with Ramp Feta Dip
Serves 2 for lunch
peeled waxy potatoes, cut into small match sticks, 400g / 14 ounces
flaky sea salt
black peppercorns, crushed in a mortar
olive oil
For the feta dip
feta 150g / 5 ounces
fresh ramp leaves 30g / 1 ounce
olive oil 3 tablespoons
freshly squeezed lemon juice 1 tablespoon
ground pepper
For the dip, in a food processor or blender, pulse the feta, ramp leaves, olive oil, and lemon juice until smooth. Season with ground pepper to taste.
Heat 5 tablespoons of olive oil in a 22cm / 9″ cast iron pan on high heat, add the potatoes, quickly spread them evenly, and push them down with a spatula. Turn the heat down to medium / medium-high and cook for about 5 minutes, mind that the potatoes don’t burn. Using a spatula, loosen the roesti from the sides of the pan and lift it gently from the bottom, but don't flip it over yet, it should be golden and light brown at the bottom. To turn the roesti, cover the pan with a large lid and flip the pan over, carefully but quickly. You should end up with the roesti on the lid. Put the pan back on the heat, add 1 tablespoon of oil and let the roesti slide off the lid into the pan. Cook for 5 minutes or until golden brown and crisp on the bottom side. Loosen the roesti from the sides and the bottom of the pan and slide it onto a large plate (if you prefer, flip it over onto the lid first). Season with flaky sea salt and crushed pepper to taste and serve with a generous dollop of the feta dip. You can eat the roesti romantically from 1 plate or cut it in half and serve it on 2 plates.
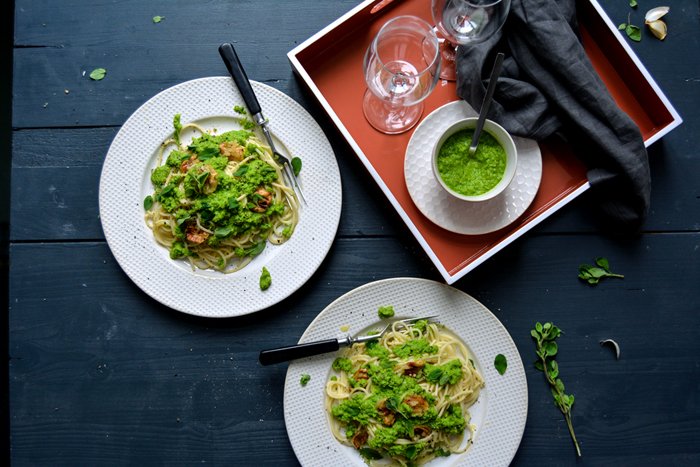
Spaghetti with Pea Pesto, Roast Garlic, and Fresh Marjoram
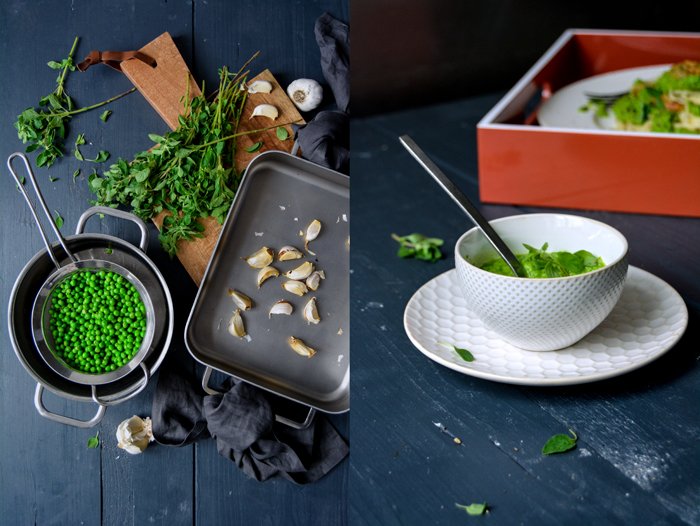
So now that spring has officially begun, the leaves on the tree in front of my living room window should start sprouting in fresh crisp greens, the birds should sing all day, and the rosé wine should fill the glasses to welcome the new season. But - apart from the pink wine - there isn't the slightest sign of bright sunshine and rising temperatures in the city. It makes no sense to despair, so I use the kitchen to create the atmosphere I'm after instead. The wine is chilled, the spaghetti's cooked, and a bright green pesto of sweet peas (frozen, I must admit), and fresh marjoram puts me in the right mood. I also roast whole cloves of garlic in their skins in the oven to turn them into a sweet paste. The golden cloves are mashed with a fork and mixed into the pasta - this dish looks like spring, tastes like spring, and makes me forget about grey skies, leafless trees, and my constant lack of sunshine.
This is the last of three recipes I created for Westelm. You can find all three recipes including my Mozzarella, Tapenade, and Preserved Lemon Sandwich and Pumpkin Quiche with Taleggio and Sage on their blog. This post was sponsored by Westelm to make my kitchen a little prettier!
Spaghetti with Pea Pesto, Roast Garlic, and Fresh Marjoram
Serves 2
For the pesto
peas (fresh or frozen) 200g / 7 ounces
fresh marjoram leaves 2 teaspoons, plus 2 tablespoons marjoram leaves for the topping
water used to cook the peas 3 tablespoons
freshly squeezed lemon juice 2 teaspoons
olive oil 3 tablespoons
fine sea saltg
round pepper
large garlic cloves, unpeeled, 12-16
spaghetti 200g / 7 ounces
black peppercorns, crushed in a mortar
Preheat the oven to 220°C / 425°F.
For the pea pesto, in a small saucepan, bring salted water to the boil and blanch the peas for 1 minute, reserve about 6 tablespoons of the water. Drain and quickly rinse the peas with cold water. Purée the peas, marjoram, 3 tablespoons of the water used to cook the peas, lemon juice, olive oil, salt, and pepper in a blender or food processor until smooth. If the pesto is too dry, add more of the pea-water. Season with salt and pepper to taste and set aside.
Spread the garlic cloves in a baking dish and roast, turning the garlic occasionally, for about 25 minutes or until the garlic is soft enough to mash with a fork - mind that it doesn't burn. Take the garlic out of the oven, let it cool for a minute, then peel the garlic cloves out of their skins and mash with a fork.
In a large pot, bring plenty of salted water to the boil and cook the spaghetti until al dente, drain, and stir in a splash of olive oil.
Divide the spaghetti between plates, sprinkle generously with the pea pesto, crushed pepper, and fresh marjoram leaves. Lay the mashed garlic on top and serve immediately.
meet in your kitchen | Dario Cammarata's Herb Ravioli, Palermo & Villa Kennedy
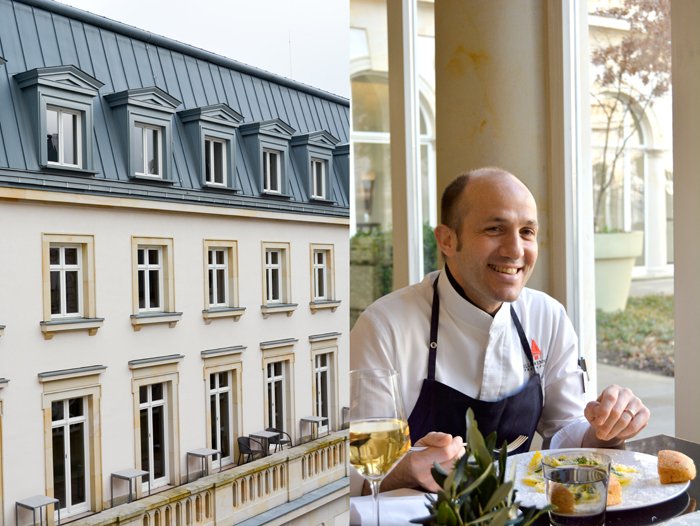
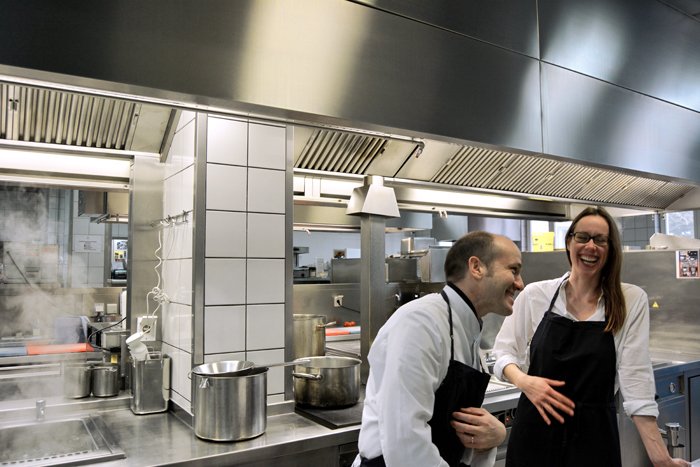
Once in a while one has to enjoy the pleasures of life a bit more excessively, plenty is the right word. I convinced my boyfriend that we deserved a little break from our daily duties, to learn how to make ravioli from a true Palermo man. Luckily, my Sicilian chef, the charming Dario Cammarata, works in the kitchen of Frankurt's most beautiful hotel, the splendid Villa Kennedy, so it wasn't much work to get a 'yes' from my man.
We jumped on a train, crossed the country, and found ourselves in front of the heavy iron gates of an elegant villa. Built in 1901 for a banker family, the house looks impressive but not intimidating. Beige sandstone, zinc gables, turrets, and ornate balustrades made me feel like a princess, at least for 24 hours. I was prepared for excellent service and outstanding food - which we definitely experienced at dinner, breakfast, and lunch - but I didn't expect to feel so welcomed and nicely spoilt, so I asked myself: "Why should I ever leave again?" Be it the three porters Luciano, Mahmood, and Girgis, or the second man from Palermo in the house and maître d'hôtel, Vito Vitale, the way they treated us goes beyond politeness, their friendliness comes straight from the heart. But there were two people who I could have taken straight home with me to Berlin, Yasmin Michel and my favourite Sicilian chef Dario, our two partners in crime for 24 hours to spoil us with amazing wine, the finest champagne, and delicious treats from the kitchen of the Gusto restaurant.
Before we sat down to our Sicilian feast on the evening of our arrival, I had a chat with Dario who left his home island at the age of 18. He wanted to become a chef since first setting foot in a restaurant kitchen in Palermo as a young man of 14. As soon as he finished his training he headed to northern Europe to follow his second passion: traveling. He worked in many great restaurants, amongst them Michelin-starred restaurants in Saint-Tropez, Italy, and Switzerland, and went through the suffering that every ambitious and successful young chef has to go through. Long hours of hard work and not much sleep are the price you have to pay if you work in the world's best culinary hotspots. Dario loved it and only the love to his wife made him settle down. It's already been 10 years since he joined the Villa Kennedy as the Executive Chef and - being a father of three children now - Dario wouldn't change anything. He enjoys cooking at home with his kids, introducing them to the vast knowledge and traditions he learned from his Sicilian Mamma Saveria. Dario praises her cooking and, although he admits that no Sicilian man would ever say his mother isn't talented in the kitchen, Saveria must be a true gem. She's critical - of course - she has very high standards when it comes to food, so much so that she sometimes cooked three different dishes for lunch to please the individual taste of her three sons when they were young. This woman loves her food - and her family. After one of Dario's visits to his Mamma's kitchen earlier this year, he decided to take a few of her recipes up north to introduce the guests of the hotel to the Mamma's Menu:
Anelletti alla Trapanese con Tartara di Gamberoni alla Menta (Anelletti Trapanese pasta with king prawn tatar and mint)
Involtini di Pesce Spada con Insalatina di Finocchi ed Agrumi, Calamaretti (swordfish involtini with fennel and citrus fruit salad and calamaretti)
Trio di Cannoli con Gelato al Pistacchio (cannoli trilogy with pistacchio ice cream)
We enjoyed it in silence, only accompanied by a few Ohh's and Ahh's and a bottle of amazing Sicilian white wine - divine. Grilled polpo with potatoes was next, beautifully hearty Ravioli con Sanguinaccio, Pera E Sedano Rapa (black pudding ravioli with pear and celeriac), and a heavenly buffalo ricotta cheesecake with blueberry sorbet. This dinner left me happy, stuffed, and ready for bed.
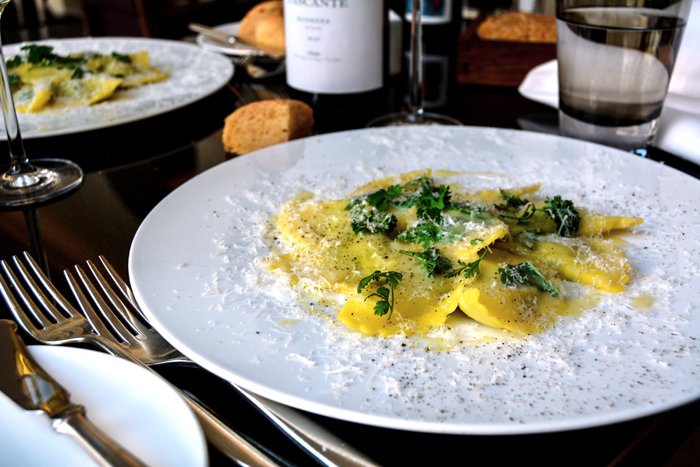
The next day started with an early morning swim in the peaceful spa, followed by lots of laughter and excitement in the kitchen - and even more fantastic food. I should have skipped breakfast as I had a cooking date with Dario ahead but it looked too tempting so I gave in. Sometimes in life you just have to go with the flow and enjoy what it offers - in this case, plenty of good food. We put on our aprons and I felt ready to learn how a Sicilian man who lives in the cold north makes ravioli. He uses what Mamma taught him to prepare the perfect pasta dough and combines it with one of the most popular classics of his new home: the Frankfurt green sauce, enriched with ricotta to fill the ravioli. The sauce is a traditional recipe from the Frankfurt region, made with seven fresh herbs: parsley, chives, chervil, borage, sorrel, garden cress, and salad burnet. In Germany, you can by them ready packed for this sauce but Dario recommends buying them singly, otherwise you'll end up with lots of (cheaper) parsley and little of the more expensive herbs. If you can't find all of them at your market, just skip one or replace it - I know that true Frankfurt green sauce defenders wouldn't agree with me but we're talking about cooking and not science. Dario says that a bit of fresh mint or lemon would also fit his ravioli filling to freshen it up. Just be experimental. And if you'd like to see a little video of Dario making ravioli, check out my Snapchat (@eatinmykitchen).
Although we laughed the whole time, we managed to successfully make ravioli and they were the best spring ravioli I ever had in my life - fresh and green, not too heavy and packed with flavour. From now on, Dario is my favourite Sicilian chef. His approach to food, the honesty and restraint in his recipes, the Sicilian way of playing with contrasting aromas, and his focus on only the best quality ingredients often imported from Sicily by himself, impressed me and made my taste buds jump.
Thank you for everything, you wonderful people at Villa Kennedy!
I can also recommend joining the Friday Chef's Table if you happen to be in Frankfurt - it's a gathering around the table in the Gusto kitchen to see and smell how you're food is prepared.
Dario Cammarata's Herb Ricotta Ravioli
Serves 6
For the pasta dough
plain flour 250g / 2 cups
durum wheat semolina 250g / 9 ounces
fine sea salt 1 teaspoon
egg yolks 15
olive oil 3 tablespoons
For the filling
fresh ricotta 250g / 9 ounces
a mix of 7 herbs: borage, chervil, garden cress, parsley, pimpinella (salad burnet), sorrel, chives, the leaves finely chopped, 1 large bunch
fresh basil leaves, finely chopped, 1 small handful
fresh mint leaves, finely chopped, 6, or a little lemon zest (optional)
Parmesan, freshly grated, 150g / 5 ounces
fine sea salt
ground pepper
For the topping
butter, melted, about 6 tablespoons
Parmesan, freshly grated, about 6 tablespoons
fresh herbs, leaves only, 1 handful
ground pepper
For the pasta dough, in a large bowl, combine the flour, semolina, and salt. Add the egg yolks and olive oil and mix for a few minutes until smooth and well combined, using your hands or the dough hooks of an electric mixer. Form a ball, wrap in cling film, and let it sit for 20 minutes.
For the filling, in a large bowl, add the ricotta and whisk in the chopped herbs and Parmesan until well combined. Season with salt and pepper to taste.
Using a pasta machine or rolling pin, roll the dough very thinly, you should be able to see your hand through the dough.
In a large pot, bring salted water to the boil.
To give the ravioli half moon-shapes, cut out circles using a 9cm / 3 1/2" cookie cutter. Put a spoonful of the filling in the middle of each circle and, using your finger, spread a little water all along the pasta rim. Fold half of the ravioli over to end up with a half moon-shape, push the rim well with your fingers to seal the filling inside.
Turn the water down to simmering and cook the ravioli for about 2-3 minutes or until al dente.Divide the ravioli between plates, drizzle with melted butter, and sprinkle with Parmesan, fresh herbs, and season with a little ground pepper.
Buon Appetito!
When you left Palermo at the age of 18, did you have a plan in mind, or a dream that you wanted to achieve? Or did you just jump into this big adventure?
I always wanted to become a chef, I already knew that at quite a young age. I didn't have a plan in mind but I had a goal. At the same time, I wanted to travel the world and I was after a job that would allow me to combine my two passions. It was a mix of planning and adventure, so when I finished school in Sicily at the age of 19, I packed my bags and left - off to Sirmione at Lake Garda. This was the beginning of my great dream and from then on it continued.
What did it mean to you to work in Michelin-starred restaurants in Italy, France, and Switzerland as a young man? What fascinated you about the work in these kitchens?
It meant a lot to me and it still does. I was particularly fascinated by these countries. I admire Italy and France's long kitchen traditions. So many amazing dishes and excellent chefs originated from these two cuisines. Switzerland, to me, stands for decades of tradition in the hotel business. They have outstanding houses with great restaurants.The amount of people working in Michelin-starred restaurants impressed me tremendously. At Badrutt's Palace, in Saint-Tropez, our kitchen team was made up of 61 people - it's unbelievable. I'm very proud of having worked there, and I wouldn't want to miss the experience, but it was never a must for me to work at these restaurants. It was far more important for me to learn about different countries and cultures and their traditions. Cooking connects us, to me it's easiest to understand various nations and habits through their cuisines.
What was the most important lesson you learned as a young chef?
Little things often have the greatest effects. Both positive and negative. This is what my boss in Saint-Tropez used to tell me and it became the cooking mantra of my life. It's the guideline I pass on to my team now.
You grew up with the Sicilian cuisine cooked by your Mamma Saveria, how did your home island's culinary traditions influence your style of cooking and your approach to food?
A lot! I wouldn't be the Dario I am today without the influences of my Sicilian home - and especially my Mamma. In particular when it comes to my cooking. At the age of 2 or 3, I already joined my Mamma in the kitchen. I didn't necessarily help her, but I tasted everything, and that's what I remember clearly. Already then, I was fascinated by the preparation of food and watching and learning at such a young age definitely affected my style of cooking, my outlook on produce, and the way I work with food.
If you had to point out the main differences between cooking and living in Italy and Germany, what would they be? What do you like about German cooking?
Italians live and eat differently to Germans. Italians "take their time for life", and food is a great part of it. To enjoy life is so important in the life of an Italian. Eating together is a feast, a celebration, no matter what we eat, what day of the week it is, or if we had a good or bad day. We savour the time together to the last second.Germans are more influenced by the experiences they had during the day - Italians aren't really like this. Eating together, being together, that's most important. What I like about German cooking, is that people start to go back to their roots. Regional produce, traditional recipes, and cultural gems are being re-discovered, that's great. This has always been important in Italian and French cuisine, so it's fantastic that more and more German chefs and cooks follow this trend.
Where do you find inspiration for new recipes?
Preferably directly at the farmers' market. Seasonal fresh produce inspires me, many of my ideas come up right there. I like the combination of tradition and new takes on recipes, this adds new qualities to a dish. And I love running, it allows my mind and creativity to be free, it relaxes me but at the same time it sparks lots of new ideas that I want to try in the kitchen immediately.
What do you miss the most about Sicily?
The sea! And the smell of the Zagara (orange blossom) flower. I really miss it. When I see the sea and I have this smell in my nose, I know that I'm home. And, of course, I miss my Mamma's cooking! That's why I imported her to Germany (see the Villa Kennedy Mamma's Menu in my introduction).
Who is your biggest inspiration in the kitchen?
My Mamma! Like I said, she inspired me at a very young age and from her, I learned about all the traditional Sicilian recipes, which I'm very grateful for. Another inspiration for my career was the chef Ludovic Laurenty, my boss at Château de Pray (in the Loire Valley). He taught me the importance of staying calm - he used to be the calmest person ever. I learned a lot from him and I still think a lot of him, like all the other chefs I've worked with - you take a piece of each of them with you.
What was the first dish you cooked on your own, what is your first cooking memory?
Involtini di melanzane (eggplant rolls), I was 15 and I cooked them for a good friend of mine. Typically Sicilian, it's an easy dish and still one of my favourites. You should try it!
What are your favourite places to buy and enjoy food in Palermo and in Frankfurt?
In Sicily, I like to go to Bisso Bistrot in Palermo. It's a cosy, friendly, and original Sicilian restaurant. In Frankfurt, I regularly go to the Kleinmarkthalle (a farmers' market hall), here you can buy and eat food at the same time. First, I choose the fresh produce I need and then I enjoy a glass of wine and some antipasti. In Wiesbaden, where I live, I like to go to Gusto E. A former colleague of mine runs this pretty little restaurant, I always get a warm welcome and scrumptious food.
If you could choose one person to cook a meal for you, who and what would it be?
The Sicilian director Giuseppe Tornatore. His movies open my heart - not just because he's Sicilian (laughing). He seems to be a great guy and I love his way of making movies, he carries a lot of Sicily out into the world, that always impressed me. I would make cannoli with him. It's typical for our home island and I'd love to go to the farmer together with Giuseppe to buy ricotta, or we'd make our own. Maybe he would even put this scene into one of his next movies.
You're going to have ten friends over for a spontaneous dinner, what will be on the table?
Parmigiana - I love this vegetable-Parmesan-casserole dish. It's the taste of Sicily. Pasta is next, I would see what fits to the season. If my friends came over in the spring, I'd make orecchiette with fava beans, fresh tomatoes, prawns, pine seeds, and basil. Fish as main, two oven-roasted sea bass with lots of herbs and lemon, and tiramisu or a tart with fresh raspberries as dessert.
What was your childhood's culinary favourite and what is it now?
My Mamma'sParmigiana. It's always been my favourite and it still is. Whenever I go to Siciliy, I can be sure to find it on my Mamma's table - she knows me too well.
Do you prefer to cook on your own or together with others?
I never cook alone. Cooking connects us and it's far more fun to do it together with others. Even if someone just watches. I love to cook together with my wife and my three kids. Cooking on my own is boring.
Which meals do you prefer, improvised or planned?
I prefer to improvise. It bores me to plan every single detail. When you improvise, you can change and adjust and create something new. That keeps it interesting.
Which meal would you never cook again?
That's not easy... 4 years ago, we had the final for a national cooking competition at the Villa Kennedy. Private cooks presented their own creations and I helped them with a little advice here and there, but I wasn't allowed to change much. I see myself as quite open-minded, but one of the finalists made salmon with celery cream and mascarpone, I never ever want to eat this again. The recipe lost the competition by the way.
Thank you Dario!
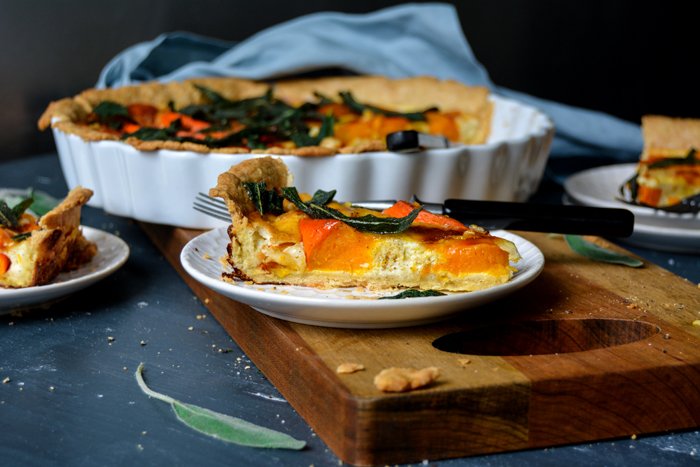
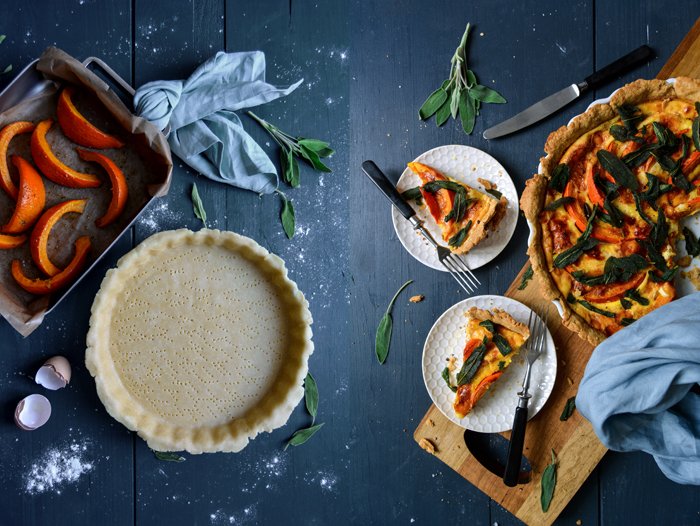
Pumpkin Quiche with Taleggio and Crisp Sage
A quiche was one of the first savoury recipes that I made on my own and actually enjoyed. Learning to cook takes time but once you succeed, you get hooked on it. Whenever friends and family asked me to chip in with a dish for a birthday party, I used to make my quiche and felt more than happy about the applause I got for it. In the beginning, I used a more basic filling of leeks, tomatoes, and thyme, but then I got experimental: be it my Italian fennel tart, the combination of artichokes, olives, and Gruyère, spinach and gorgonzola, or green beans and ramps - I love them all. There are boundless possibilities to follow the seasons and your mood. However, its greatest quality is the buttery, flaky, utterly tempting pastry base. It's light and crisp and tastes so good that it wouldn't even need any topping.
One of the best ways to enjoy a quiche, is at a picnic on a lazy summer's day, but the warmer season is still far away, so I choose a filling that fits the cold and moody weather of March and goes well for a Sunday brunch with friends. I go for pumpkin, Taleggio, and crispy sage leaves fried in butter. It's pure comfort food. Usually, I like my quiche recipes warm or cold, I have no preference, but this recipe here is best when it's still warm. The soft cheese spreads its aroma and sinks into the sweet squash and woody-earthy sage. It's happy-making food.
I developed this quiche recipe for the West Elm blog, where you can also find this recipe and the long (!) wooden chopping board, the linen napkin, and stoneware plates. This post was sponsored by West Elm to make my kitchen a little prettier!
Pumpkin Taleggio Quiche with Crisp Sage
Makes a 30cm / 12″ quiche
For the filling
seeded pumpkin, peeled butternut squash or Hokkaido with skin, 600g / 1 1/3 pounds
olive oil 1 tablespoon
flaky sea salt
ground pepper
organic eggs 3
heavy cream 125ml / 1/2 cup
sour cream 175g / 3/4 cup
fine sea salt 1 teaspoon
nutmeg, preferably freshly grated, a generous amount
Taleggio (or another aromatic semi-soft cheese), diced, 150g / 5 ounces
butter 3 tablespoons
large fresh sage leaves 50
black peppercorns, crushed in a mortar
For the pastry
plain flour 260g / 2 cups
salt 1 teaspoon
butter, cold 130g / 4 1/2 ounces
organic egg 1
Preheat the oven to 200°C / 400°F (conventional setting). Line a large baking dish with parchment paper.
Cut the pumpkin into 5cm / 2" wedges and place them in the lined baking dish. Drizzle with the olive oil, use your hands to toss and coat the squash in the oil. Sprinkle with flaky sea salt and pepper and roast for 15 minutes. Turn the squash wedges over and continue roasting for about 15 minutes or until golden brown and soft when pricked with a fork. Cut the wedges in half lengthwise and set aside.
For the pastry, combine the flour and salt in a large bowl. Add the butter and use a knife to cut it into the flour until there are just small pieces left. Quickly rub the butter into the flour with your fingers until combined. Add the egg and mix with the dough hooks of an electric mixer until crumbly. Form the dough into a thick disc, wrap it in plastic wrap, and freeze for 12 minutes.
Place the dough between 2 sheets of plastic wrap and use a rolling pin to roll out into a disc, large enough to line the bottom and sides of a 30 cm / 12" quiche dish. Fit the dough into the quiche dish, pushing it into the dish, especially along the edges. Let the dough hang over the rim a little or cut it off with a knife. Use a fork to prick the dough all over. Bake for 15 minutes or until golden. If the dough bubbles up, push it down with a fork.
Take the baking dish out of the oven and set the temperature down to 180°C / 350°F.
For the filling, whisk the eggs, heavy cream, sour cream, salt, pepper and nutmeg.
Arrange the pumpkin in a circle on top of the pre-baked pastry and sprinkle with the taleggio. Pour the egg-cream mixture over the squash and bake for about 55 minutes or until golden brown, the top should be firm.
While the quiche is in the oven, cook the sage: Lay a kitchen paper on a large plate. Heat the butter in a large, heavy pan on medium-high heat. When the butter is sizzling, spread the sage in the pan and roast for about 20 seconds or until golden, turning the leaves gently once or twice. Mind that they don't become dark. Take the pan off the heat and immediately transfer the sage leaves to the plate lined with kitchen paper.
When the quiche is done, let it cool for 10-15 minutes, then cover with the sage leaves and sprinkle with crushed pepper, serve warm.
meet in your kitchen | Sami Tamimi's Kofta b'siniyah with Tahini Sauce
If you love cooking and cookbooks, you've probably come across Sami Tamimi's name, either on the cover of Ottolenghi: The Cookbook or Jerusalem - both award-winning bestsellers. But who is the man who co-wrote these beautiful recipe collections and started some of the most talked about restaurants on the London food scene together with his friend from Israel? While the whole world seeks fame and attention, what drives a man to stay in the background and concentrate on what he loves the most: to cook and create recipes? The more I got to know about Sami, the more I understood his decision to be the chef in the kitchen and not the star in the spotlight.
Growing up in the Old City of East Jerusalem and feeling the restrictions of life in a traditional Muslim family, he left home at the age of seventeen and headed to Tel Aviv. The ambitious young man worked hard and became a chef at one of the country's best restaurants. But Sami was hungry, he wanted to learn and evolve even more: London was next and with it the beginning of a beautiful story of friendship, great food, and success. A story of two men, whose ideas, dreams, and creativity are inseparably woven into each other.
Sami and Yotam first met at Baker & Spice in London, where Sami had developed a food concept quite similar to the one we know from the Ottolenghi restaurants in Islington, Belgravia, Notting Hill, and Spitalfields. Lusciously filled platters of Middle Eastern and Mediterranean dishes, so pleasing to the eyes that one can't help but stop at the first glance. You might not be hungry, but after a quick look through the large windows you'll fall for the tempting displays - they seem to call your name.
Yotam must have felt the same when he passed the restaurant back in 1999. He hopped off his scooter and started talking to Sami. They got along well straight away, so he joined him in the kitchen, and became responsible for the pastry. What happened next is one of the many reasons I love life: a simple idea became reality through hard work and dedication. They decided to open their own place and put their individual skills together to make it happen. The rest is history. In its honesty, Sami's view of the story touches me: “It was Yotam’s vision and his dream. The work was his. The stake was his. I didn’t have money to invest. He risked everything he had. A few years later, I became a partner, but regardless of the cookbooks we do, regardless of our friendship, I’m still working for Yotam. He’s my boss”. But as much as his friend was the visionary, in the end it was also Sami's creative concept for food, which became what we know as Ottolenghi today. These two men, aware of their individual strengths, put it all together and turned it into something greater.
Having cooked and baked with Jerusalem, enjoying it every time I pull it off my shelf, it felt even more exciting to choose one of the recipes from the book together with Sami to share with you. We didn't manage to meet in London, but cooking his kofta here in Berlin, working on the interview with him, and learning so much about and from this inspiring man, made me feel once more that the kitchen is often the best place to get to know someone.
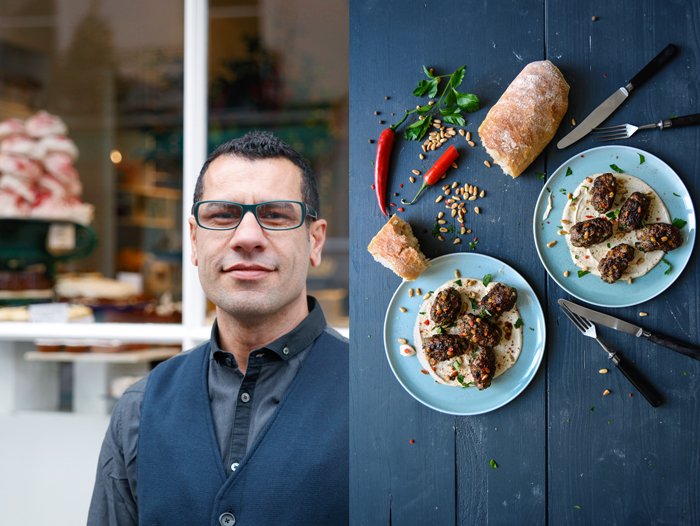
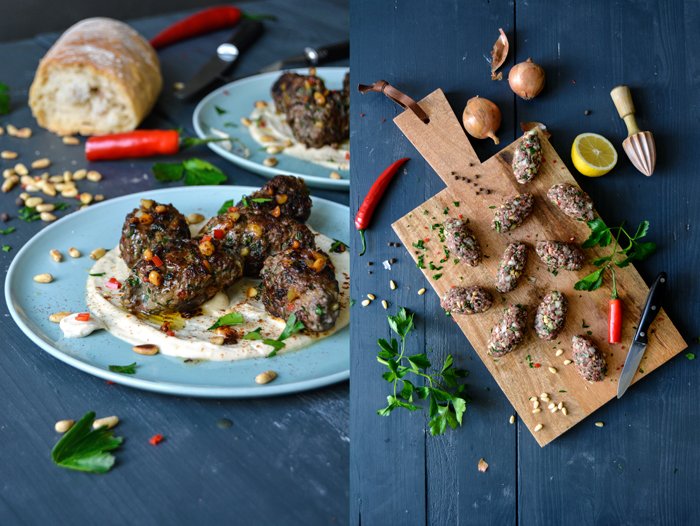
I made Sami's kofta and I loved it. It was nothing less than heavenly: the little oval meatballs are juicy, packed with nutty pine, parsley, spicy garlic and chilli. Sami lays them on a tahini-lemon sauce, a smooth and creamy contrast to the fragrant meat. It's one of those dishes that make you wish you had made twice as much.
Here's a great article by Jane Kramer about Yotam and Sami in The New Yorker, which I can recommend if you need a little inspiration for life.
Sami Tamimi's Kofta b'siniyah
Recipe from Jerusalem by Yotam Ottolenghi and Sami Tamimi.
For these kofta, buy your meat freshly minced by your butcher, if you can. The lamb should be shoulder and the beef a good non-stewing cut. If you get the meat from a supermarket or another grocer, cook it through, just to be on the safe side. Finish the dish with butter only if you are serving it straight away and consuming it all at once. Otherwise, leave it out as it sets quickly, which isn't very nice. Serve with pita (I used ciabatta).
Serves 6 / makes 18 kofta
For serving
light tahini paste 150g / 5 ounces
freshly squeezed lemon juice 3 tablespoons
water 120ml / 1/2 cup
medium garlic clove, crushed, 1
sunflower oil 2 tablespoons
unsalted butter or ghee 30g / 2 tablespoons (optional)
sweet paprika, to garnish
fine sea salt
For the kofta
minced lamb 400g / 14 ounces
minced veal or beef 400g /14 ounces
onion, finely chopped, 1 (about 150g / 5 ounces)
large garlic cloves, crushed, 2
toasted pine nuts, roughly chopped, 50g / 2 ounces, plus extra whole ones to garnish
flat-leaf parsley leaves, finely chopped, 30g / 1 ounce, plus extra to garnish
large medium-hot red chilli, deseeded and finely chopped, 1
ground cinnamon 1 1/2 teaspoons
ground allspice 1 1/2 teaspoons
grated nutmeg 3/4 teaspoon
ground black pepper 1 1/2 teaspoons
fine sea salt 1 1/2 teaspoons
If the tahini-lemon sauce starts to curdle, slowly add more water and continue whisking or pulsing it in a blender until smooth.
Put all the kofta ingredients in a bowl and use your hands to mix everything together. Now shape into long, torpedo-like fingers, roughly 8cm / 3" long. Press the mix to compress it and ensure the kofta is tight and keeps its shape. Arrange on a plate and chill until you are ready to cook them, for up to 1 day.
Preheat the oven to 220°C / 425°F. In a medium bowl, whisk together the tahini paste, lemon juice, water, garlic, and 1/4 teaspoon of salt. You can also use a blender or food processor. The sauce should be a bit runnier than honey; add 1-2 tablespoons of water if needed.
Heat the sunflower oil in a large pan and sear the kofta, in batches, over high heat. Sear on all sides until golden brown, for about 6 minutes. At this point they should be medium-rare. Transfer the kofta to a baking dish and cook in the oven for 2-4 minutes (medium or well done). I cooked mine for 8 minutes in the pan and skipped the oven. I spread the tahini sauce on plates and laid the kofta on top, then I continued with the garnish.
Spoon the tahini sauce around the kofta, so it covers the base of the baking dish. Place in the oven for 1-2 minutes to warm up the sauce.
Meanwhile, if you're using the butter, melt it in a small saucepan and allow it to brown a little, taking care that it doesn't burn. Spoon the butter over the kofta as soon as they come out of the oven. I skipped the butter and used the frying juices from the pan instead. Scatter with pine nuts and parsley and finally sprinkle some paprika on top. Serve immediately.
What made you leave Israel and move to London?
I’d been cooking for many years in Israel. After a good time at Lilith, one of the top restaurants in the country, I was beginning to reach my full potential. I knew if I wanted to keep learning and growing I’d need to look further afield. I’d visited London a few times and fallen in love with it so it was the obvious place to go. The political situation was also getting worse by then and the levels of stress were getting higher. I wanted a change from that.
You say you're more into savoury than sweet baking, what do you like about the process of creating savoury recipes? Why do you prefer it to sweets?
I find I have more creative freedom with savoury cooking. Baking and sweet cooking in general is often quite a science: everything needs to be measured for the result to work out. What goes into savoury cooking can change much more, depending on the day and the mood and what you have to hand. I love that freedom. Also, I can’t stand all the flour that gets everywhere! I like my kitchen clean and tidy.
You lived in Tel Aviv for 12 years, a city known for its vibrant food scene, what makes it so special? What do you miss the most about the food in Israel?
I haven’t lived in Tel Aviv for 17 years so the food scene has changed a lot. I guess what makes it vibrant is people’s passion for the food and people often basing their social life around food. There are a lot of young people who travel the world from Tel Aviv and then return with all sorts of knowledge about different cuisines: that makes it a really creative place.
Do you find creative inspiration in the British cuisine? Do you have a favourite British dish?
We have some wonderful products and raw ingredients here, which are a constant inspiration. There are also a few local chefs who I get a lot of inspiration from: Simon Hopkinson and Nigel Slater, to name just two. I’ve lived in the UK for many years now so I have come to love some of the classic British dishes: Apple or pear and rhubarb crumble, beef wellington and so on.
Is it harder or easier to work with a close friend (Yotam Ottolenghi)? How did your friendship change through the experience of writing books and running restaurants together?
Yotam and I started to work together long before Ottolenghi was born. Combining friendship and business is not always a good thing but we’ve been doing it for many years now and have perfected the way of working together without it effecting our friendship. We see each other a lot and are constantly checking in with each other but our day-to-day jobs are very different. Yotam is based in the test kitchen and I am based in the restaurants so our roles are pretty separate from each other.
You've co-written Ottolenghi: The Cookbook andJerusalem, what is your favourite part of the process of writing a cookbook?
For Jerusalem, cooking at home, alone, in my kitchen and then sharing childhood memories and stories sparked from the food was my favourite part. The Ottolenghi: The Cookbook was harder for us: It’s the first child thing, you are making it up as you go along so it took longer to work out what we were doing! Jerusalem was easier technically but harder emotionally.
What advice can you give young chefs?
Being a chef is hard work: the stress levels are high, the hours are long and you don’t get to sit down or sleep much! Before you spend a lot of time and money going to cookery school, people should always do a stint in a commercial kitchen to see whether the job is for them. There is so much more to the job than just making food look pretty! You need to start with passion and love and then add some hard graft and dedication. And then you can start making the food look pretty!
You write poetry in Arabic and you paint, does this bring you relaxation or inspiration?Writing poetry, painting, photography, cooking, it’s all part of the same process, for me: a way of expressing myself, saying something about the world we are living in.
Do you like to cook at home?
Cooking at home is what keeps me in love with food. I cook at home every evening, even after a long day working with food.
Who is your biggest inspiration in the kitchen?
My mother. She was an amazing cook.
Was food, cooking, and eating a big topic in your family while growing up?
Yes, it was. The kitchen was the heart of the house and my family. When we were having breakfast we’d be discussing what to have for lunch. Chats at lunch were about what we were having for supper. Food was always on the go, being prepared or cooked.
What was the first dish you cooked on your own, what is your first cooking memory?
I cooked all the time, from a very young age: I’d be making it up if I said I could remember my first dish!
What are your favourite places to buy and enjoy food in London?
I tend to go to small Middle Eastern shops in west London for my food grocery because the fruit and vegetables come from sunny places and therefore they taste much better, plus I can find all the ingredients for Palestinian cooking.
If you could choose one person to cook a meal for you, who and what would it be?
My mother. Anything she will cook will be delicious.
You're going to have ten friends over for a spontaneous dinner, what will be on the table?
Many dishes to share and lots of food: if it was a Palestinian spread they’d be Maqluba, okra in tomato sauce, Bamieh Bil Zeit and Mujaddara, lentils and rice with lots of fried onions, to mention just three dishes.
What was your childhood's culinary favourite and what is it now?
I love Palestinian food and still do. I also love Japanese, Mexican, Thai and Nordic food.
Do you prefer to cook on your own or together with others?
When I'm at work then of course with others and it's much more fun. But when I’m cooking at home, I like to be alone, with music.
Which meals do you prefer, improvised or planned?
Some days I'll wake up with a dish in mind and then I'll make it but most times I just go to the shops and decide then, according to what I find and what's in season.
Which meal would you never cook again?
I have recently made Turkish Su Böreği or as some call it, water borek. I'll never attempt to do it again. It was so hard and complicated. The end result is delicious but honestly, I can live happily with myself knowing that I've cooked it once in my lifetime and I'll only be ever eating it in Turkey.
Thank you Sami!
Beetroot and Skordalia - a velvety Greek Garlic Potato Dip
If you feel like garlicky mayonnaise but you're pushed away by its oily heaviness, cook some garlic and potatoes, then throw them in a blender, and you'll end up with skordalia. This popular Greek dip has a similar smooth texture if you pulse it - it becomes thick, sticky, and starchy. The added olive oil adds a Mediterranean touch and taste to it and makes it feel like velvet. If you use a potato masher, which is more common, it will be more chunky, like mashed potatoes, so it really depends on what kind of dip you're after. I was in a mayonnaise kind of mood so the blender was my tool of choice.
Skordalia is a new discovery for me and I don't know how I never heard of it or tasted it before. I love Greek food, I've been to Greece, and I ate my way through countless Greek restaurants, but for whatever reason, I never had it on my plate until now. So I'm keeping up and made an extra large batch of it. To balance the sweetness of the potatoes and garlic, I brought in some earthy flavours: Beetroots cooked in their skins along with a bay leaf. Peeled and still warm, I cut the purple roots into wedges, and served them with generous (!) amounts of my creamy dip. Delicious!
Beetroot and Skordalia - a Greek Garlic Potato Dip
Serves 2
For the beets
medium sized beetroots, unpeeled, 2
bay leaves 2
fine sea salt
For the skordalia
peeled potatoes, diced, about 240g / 8 1/2 ounces
large garlic cloves, unpeeled, 6
olive oil 4 tablespoons
fine sea salt
For the topping
fresh thyme leaves, about 2 tablespoons
flaky sea salt
black peppercorns, crushed in a mortar
Cook the beetroot along with the bay leaves in plenty of salted water on medium heat for about 40-50 minutes or until tender. Check the roots with a metal skewer, they should almost feel soft. Rinse under cold water and let them cool for a few minutes before you peel off their skins. Cut each beetroot into 4 wedges.
In a medium pot, bring the potatoes in plenty of salted water to the boil and cook for 10 minutes. Add the garlic and cook for another 5 minutes or until the potatoes are soft. Drain and quickly rinse with cold water. Peel the garlic and add, along with the potatoes, to a blender or food processor. Add the olive oil and a little salt and pulse until smooth. Season with salt to taste. Divide the beetroot wedges and skordalia between plates and sprinkle with thyme, flaky sea salt and crushed pepper. Enjoy cold or warm.
Fennel Tomato Lasagna with Crunchy Bacon
A couple days ago, I went to a meeting that finished much earlier than expected. I stepped out into the street on that cold and grey morning and decided to squeeze in a quick coffee. Just a creamy cappuccino, a flaky chocolate croissant, and a peaceful moment to myself. I went to my favorite Italian deli for a bit of dolce vita - sipping a fantastic coffee while listening to the patron chatting with his customers in Italian, accompanied by a medley of Italian operas. A toddler giggled, two dogs observed the busy scene. The shelves around me presented a tempting selection of chiantis, pasta, polenta, capers, and bottarga. The counter right in front of me filled with various prosciuttos, salami, ciabatta sandwiches, and homemade pasta treats. And right next to it, bowls of every antipasti one can possibly think of. Just the thought of it makes me hungry again.
This is the kind of scene that makes you want to go straight to your kitchen, open a bottle of wine, and start cooking. Italian of course. The weather doesn't leave the slightest doubt that spring isn't near yet, so a hearty lasagna is the best thing to have on your plate. Mine is filled with lots of juicy tomatoes, roasted fennel seeds, and fennel bulb thinly sliced and sautéed, plus crunchy bacon bites, dried chili peppers, a bit of Parmesan, and a creamy béchamel sauce. At first, I wanted to combine the fennel with a meaty bolognese but then I remembered a pasta dish that I shared on the blog almost two years ago and that changed my mind. You could leave out the bacon, but I recommend leaving it in: the fennel seeds roast in the meat's salty juices and merge with the tinned tomatoes - and become a heavenly sauce. Layered with pasta sheets and the crisp fennel bulb, it's just what I want on a cold day in February.
Fennel Tomato Lasagna with Crunchy Bacon
Serves 4 to 6
For the béchamel sauce
milk 700 ml / 3 cups
a pinch of nutmeg, preferably freshly grated
fine sea salt
ground pepper
unsalted butter 30g / 2 tablespoons
plain flour 30g / 4 tablespoons
large bay leaf 1
For the lasagna
butter, for the baking dish
olive oil
cored fennel bulb, thinly sliced lengthwise, 340g / 12 ounces
fine sea salt
black peppercorns, crushed in a mortar
thick-cut bacon, cut into very small cubes, 200g / 7 ounces
fennel seeds 2 tablespoons
garlic, crushed, 3 cloves
small dried chili peppers, 2
peeled whole tinned tomatoes, chopped, 1.2kg / 2 2/3 pounds
no-boil lasagna noodles, about 250g / 9 ounces
freshly grated Parmesan 100g / 3 1/2 ounces
For the béchamel sauce, combine the milk, nutmeg, and pinches of salt and pepper in a medium saucepan and bring to a boil. Immediately take the pan off the heat and set aside.
To make the roux for the béchamel, melt the butter in a clean medium saucepan over medium-high heat and as soon as it’s sizzling hot, whisk in the flour. Slowly pour the hot milk mixture into the roux and whisk until smooth. Add the bay leaf and simmer on low, whisking occasionally, for 2 to 3 minutes or until the texture starts to thicken. Remove and discard the bay leaf. Season to taste with nutmeg, salt, and pepper then cover, and set aside.
Preheat the oven to 180°C / 350°F (conventional setting) and butter a 26 x 20 cm / 10 x 8" baking dish (or a dish of roughly this size).
In a large, heavy pan, heat a generous splash of olive oil over medium-high heat and sauté the fennel slices in batches for about 1 minute per side or until golden and al dente. Spread out the fennel slices next to each other in the pan so that they cook evenly. Season with salt and pepper and transfer to a plate.
Put the pan back on the heat and cook the bacon over medium-high heat for about 7-10 minutes or until golden brown and crunchy. Add a little oil if necessary and stir once in a while. Scrape the bacon to the sides of the pan, add a little olive oil (if the pan is too dry) and the fennel seeds, garlic, and chili. Turn the heat down to medium and cook for 2 minutes, mind that the seeds don't turn too dark. Add the tomatoes, season with salt and pepper, and, stirring occasionally, cook for about 10 minutes over medium-high heat or until thickened. Season with salt and pepper to taste. Take the pan off the heat and set aside 3 tablespoons of the sauce (for the final layer of the lasagna).
Arrange a layer of pasta on the bottom of the buttered baking dish and spread with 1/3 of the tomato-bacon sauce and sprinkle with 1/4 of the béchamel. Top with 1/3 of the sautéed fennel and 1/4 of the Parmesan. Repeat to make 3 more layers, top the last layer with pasta. Sprinkle with the reserved 3 tablespoons of the tomato-bacon sauce and the remaining béchamel and Parmesan. Bake for 35-45 minutes (depending on the lasagna package instructions) or until the pasta is al dente. To brown the cheese a little, you can switch on the broiler for the last 1 to 2 minutes. Let the lasagna sit for 5 to 10 minutes before serving and sprinkle with some crushed peppercorns. Enjoy!
Potato and Apple Stuffed Cabbage Rolls with Walnut Butter and Gruyère
Here we are again: I've reached that critical time of the year - as always in February - when it's still all about cabbage and roots at the market, but I start dreaming of juicy tomatoes and cucumbers, sweet berries and peaches, and seafood dinners at the sea - my mind, impatient and hungry, is already settled in summer.
Luckily, February is quite a short month, then we have March, which at least offers ramps towards its end. In April I can feel the sun getting warmer, the sky becomes brighter, and the produce on my counter tops slowly starts to look more colorful. But for now, I must wait and enjoy what I've got - a beautiful crisp head of cabbage.
I blanched the large outer cabbage leaves and stuffed them with boiled potatoes, sour apple, fresh thyme, and a few spoonfuls of mascarpone, instead of sour cream, to bind the mixture. My personal highlight was the topping of crunchy walnut butter and freshly grated Gruyère. Any aromatic hard cheese would work here, but there's something about this combination of the roasted nuts and this slightly sweet Swiss cheese that fits perfectly to these little wintery cabbage packages.
Potato and Apple Stuffed Cabbage Rolls with Walnut Butter and Gruyère
For the cabbage rolls
large white or green cabbage leaves 8
peeled potatoes, boiled and chopped, about 250g / 9 ounces
small apple, peeled, cored and chopped, 1
fresh thyme leaves 1 tablespoon
mascarpone (or sour cream or ricotta) 3 tablespoons
organic egg 1
nutmeg, preferably freshly grated
fine sea salt
ground pepper
white wine
For the walnut butter
butter 60g / 1/4 cup
walnuts, roughly chopped, 25g / 1 ounce
For the topping
Gruyère, or any aromatic hard cheese, finely grated, about 2 tablespoons
a few fresh thyme leaves
black peppercorns, crushed in a mortar
For the cabbage leaves, take a large cabbage head and trim the bottom. Carefully peel off 8 large outer leaves. If they tear a little, it's fine. You'll only need 4-5 blanched leaves, blanch the remaining leaves to cover torn patches in the leaves that you use for the rolls.
Preheat the oven to 200°C / 400°F.
In a large pot, bring salted water to the boil and blanch the cabbage leaves for about 4-6 minutes or until tender. Rinse quickly under cold water, drain and cut out the hard stalk (in a slim triangle-shape).
For the filling, in a large bowl, combine the boiled potatoes, apple, and thyme. Whisk together the mascarpone and egg and season with salt, pepper and nutmeg. Add to the potato-apple mixture, stir to combine, and season with salt and pepper to taste.
Lay 4-5 cabbage leaves flat on the kitchen counter and cover torn parts with soft pieces of the remaining leaves. Put a generous tablespoon of the filling in the middle of each cabbage leaf, fold up the sides and roll it up, starting from the side of the stalk. Don't worry if they don't look perfect, mine didn't either. They can all have their individual shape.
Transfer the cabbage rolls to a baking dish and cover the bottom with a splash of white wine and some water. Bake in the oven for about 30-35 minutes or until golden and firm.
While the cabbage rolls are baking in the oven, prepare the walnut butter: In a small saucepan, melt the butter on high heat. When it's sizzling hot, add the walnuts and turn the heat down to medium. Roast for 10-20 seconds or until golden but not dark. Take the saucepan off the heat.
Divide the cabbage rolls between plates and drizzle with a little butter. Sprinkle with the roasted walnuts, fresh thyme, Gruyère, and crushed pepper.
Beet Ricotta and Roast Shallot Sandwich with Spinach and Fried Thyme
Few things frustrate me as much as trying to make vegetable chips and failing completely. The kitchen is in mess, everything is coated in a layer of oil (including myself) and the result is so hopelessly bad that it has to go right into the bin. My parsnip chips from a couple months ago turned out so perfectly that I felt brave enough to think it would be that easy with any kind of roots or greens. But I was wrong. I had thin, crisp beetroot and spinach bites on my mind but a burnt disaster on my plate. It was so frustrating as I already had the perfect sandwich for this composition ready in my head: the chips were supposed to lay gracefully on a bad of sweet, juicy shallots roasted in the oven in their skins. I could already see the bright purple and green screaming in front of the pale onions. But reality was different. There was no bright anything but a black, bitter disaster.
I know I should have done it before, but afterwards I read and learned that beet chips can be cooked in the oven, which should be much easier. At that point my mood had reached such a low point that I decided to go for a different creation. I looked at the two beetroots that were lucky enough to escape the scorching hot oil in the pan and stuffed one of them in a blender along with some fresh ricotta, olive oil, thyme, and lemon juice. You could boil the root first but I actually enjoyed the crunchy raw bites in the dip. Fried thyme was next and a success - the tiny leaves thrown into sizzling olive oil and taken off the heat immediately, were just right - neither dark nor bitter. And all this piled up on a thick leaf of raw spinach. You could make a juicy ciabatta sandwich with it but I was too lazy to go to the bakery so I grabbed my dark spelt potato bread. It added heartiness to the earthy flavours. This is a proper winter sandwich, stuffed with taste and vitamins.
Beet Ricotta and Roast Shallot Sandwich with Spinach and Fried Thyme
Makes 2 large sandwiches
For the roast shallots
medium shallots, in their skins, 8
olive oil 1 tablespoon
For the beet-ricotta dip
peeled beetroot, raw or boiled, roughly chopped, 120g / 4 ounces
fresh ricotta 100g / 3 1/2 ounces
olive oil 3 tablespoons
freshly squeezed lemon juice 1 teaspoon
fresh thyme leaves 1 heaping teaspoon
fine sea salt
ground pepper
For the fried thyme
olive oil 3 tablespoons
fresh thyme 8 small, young sprigs
For the sandwiches
dark bread 4 slices
large mature spinach leaves 4 (or a small handful of baby spinach)
black peppercorns crushed with a mortar
Preheat the oven to 425°F (220°C).
For the roast shallots, in a baking dish, toss the shallots with 1 tablespoon olive oil. Roast for 15 minutes, then turn them over and roast for 15 minutes on the other side. If they feel soft when you push them down gently, they’re done; set aside.
For the beet-ricotta dip, combine the ingredients in a blender or food processor and pulse until smooth. Season to taste with salt, pepper, and thyme. If the dip is too dry, add more olive oil.
For the fried thyme, heat the olive oil in a small saucepan over high heat, add the thyme sprigs. Take off the heat immediately and set aside.
Brush 2 slices of the bread with the thyme oil from the saucepan and cover with spinach leaves. Sprinkle with generous dollops of the beet-ricotta dip. Snip the ends off the roast shallots and squeeze them out of their skins onto the dip. Lay some fried thyme on top and sprinkle with crushed peppercorns. Close the sandwich and enjoy.
Beluga Lentils with Ginger Orange Rutabaga and Rosemary
I once read that the 3rd Monday of January is supposed to be the most depressing day of the year - Blue Monday. I don't know if it's true, luckily it has already passed, and I didn't notice my mood drooping drastically that day. However, I've felt a rising impatience for more light and warmer weather to come back into my life. So much so that I had to book flights to Malta last night. This always makes me feel so much better, no matter how far in the future the departure date lies, just the thought of it puts me in a good mood.
Another way to lift my spirits is food. Cosy food, colourful food, or simply delicious food. This dish combines all of it: nutty Beluga lentils, topped with thin slices of rutabaga, quickly cooked in the pan with lots of ginger, orange zest and juice, and fresh rosemary. The rustic root is as bright as the sunrise over Malta's east coast and its earthy flavour can easily deal with some strong aromas. I was surprised how well it merged with the dark legumes.
Beluga Lentils with Ginger Orange Rutabaga and Rosemary
Serves 3-4
For the lentils
Beluga lentils, or any lentils (no soaking required), 280 g / 10 ounces
small sprig fresh rosemary 1
bay leaf 1
olive oil
balsamic vinegar 1 tablespoon
fine sea salt
ground pepper
For the rutabaga
peeled rutabaga, cut into wedges and very thinly sliced (use a mandoline or cheese slicer), 300g / 10 1/2 ounces
freshly grated ginger 1 tablespoon
freshly grated zest of 1 orange
freshly squeezed orange juice 100ml / 1/3 cup plus 2 tablespoons
fine sea saltground pepper
finely chopped fresh rosemary needles 1-2 tablespoons
black peppercorns, crushed in a mortar
Place the lentils in a saucepan with plenty of (unsalted) water, add the rosemary and bay leaf, and bring to the boil. Simmer for about 20 minutes or until al dente (or follow the package instructions). Remove excess liquid with a ladle if necessary and stir in a generous splash of olive oil and the vinegar. Season to taste with salt, pepper and vinegar.
While the lentils are cooking, prepare the rutabaga: In a large, heavy pan, heat a generous splash of olive oil over medium-high heat. Add the rutabaga and cook for about 5 minutes, stirring occasionally, until golden and al dente. Scrape the rutabaga to the side, add a little more olive oil to the pan along with the ginger, cook for 1 minute, stirring constantly. Add the orange zest (leave a little of the zest for the topping) and juice and season with salt and pepper. Stir in the rosemary or use as a topping once the plates are ready. Cook for another 1-2 minutes until the desired texture is reached.
Divide the lentils between plates and lay the rutabaga on top. Sprinkle with rosemary, orange zest, and crushed peppercorns and drizzle with a little olive oil (optional). Serve immediately.


