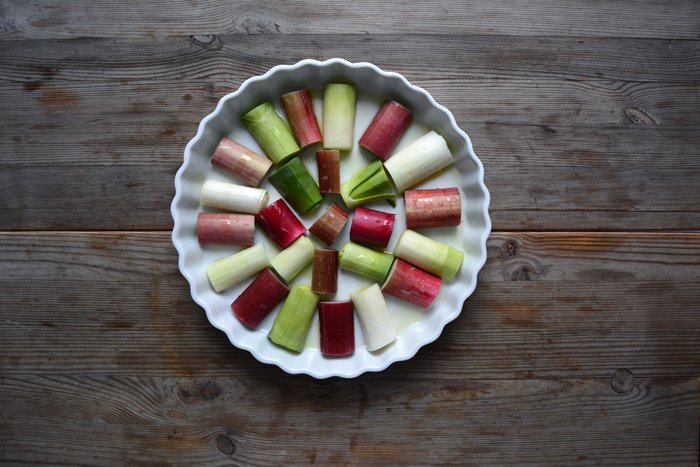
Rhubarb and Leek Gratin with Rosemary
For weeks I have been thinking about combining leek and rhubarb in a gratin, the sourness of the fruity stalk and the onion's distinct spiciness seemed like a special match. Weeks and many other recipes have past, but I finally found the time to sit down and think about the right composition to make this duo work.
At first, I started off with a pinch of cardamom, this spice adds a nice warming touch, but something was still missing. I took a quick look at my herb garden in front of my bedroom window, that's the place where I keep all my little pots at the moment. The plants spread a mesmerizing smell in the afternoon sun and filled the air with the nicest aroma of rosemary, thyme, sage, oregano, marjoram, tarragon, chervil and lovage. I started to pick some thyme leaves but realised it would be too strong for my gratin, rosemary and its woody taste was the missing link in my composition, it made it complete!
Rhubarb and Leek Gratin with Rosemary
For 2 as a snack or 4 as a side dish you need
leek, cut in half lengthwise and cut into 6cm / 2 1/2" pieces, 250g / 1/2 pound
rhubarb, cut in half lengthwise and cut into 6cm / 2 1/2" pieces, 250g / 1/2 pound
olive oil
a pinch of ground cardamom
flaky sea salt
black peppercorns, crushed in a mortar
granulated sugar
fresh rosemary needles, chopped, for the topping
Set the oven to 200°C / 390°F (top / bottom heat) and oil the bottom of a baking dish.
Arrange the leek and rhubarb in circles in the baking dish and coat with 2 tablespoons of olive oil. Sprinkle with salt, pepper, cardamom and a little sugar. Bake in the oven for 20-25 minutes or until golden and soft. Sprinkle with fresh rosemary and season to taste.
Blueberry Lemon Swiss Roll
My mother doesn't have a sweet tooth at all, we are complete opposites when it comes to cakes and dessert. I have no problem scarfing down a quarter of a cake on my own, and she's happy with a slice so thin that I wouldn't even bother cutting it. We look very much alike, we share the same birthday month and we both love to make a daily feast out of our lives, but our sweet preferences couldn't be further apart.
So when she visited us last week, there weren't many sweet treats on our culinary schedule but when I put my blueberry lemon swiss roll on the table, she impressed me. I was prepared to cut impossibly thin slices for her but, to my surprise, she got hooked on the roll. Usually, I'm the one who takes the last piece of a cake, my reputation is well known in my family when it comes to sweets, my appetite is insatiable. You can offer me the most extensive meal but even if I have to struggle towards the end, there's always space for a well sized dessert. But this time, the last piece wasn't for me, my mother asked for it and I don't think I'll ever forget this moment.
I must admit that my swiss roll was tempting on many levels, the spongy cake is absolutely heavenly, light, fluffy but structured, refined with lots of lemon zest. The blueberries added a juicy crunchiness but the cream filling was the actual star that made the whole composition complete. I whipped the cream with a little sugar and cardamom which creates an addictive deliciousness in combination with the lemony roll. The three of us loved it so much that this huge roll didn't even last 24 hours!
Here's the link to my strawberry swiss roll!
Blueberry Lemon Swiss Roll
For a 30cm / 12" roll you need
organic eggs 4
granulated sugar 70g / 1/3 cup plus 2 tablespoons for the whipped cream and 2-4 tablespoons for sprinkling
a pinch of salt
lemon zest 1 teaspoon
plain flour 70g / 1/2 cup
cornstarch 30g / 1/4 cup
blueberries 250g / 1/2 pound (keep 6 berries as decoration)
whipping cream 220g / 1 cup
ground cardamom 1/2 teaspoon
icing sugar to dust the roll
Set the oven to 220°C / 425°F (top / bottom heat) and line a baking sheet (minimum 30 x 30cm / 12 x 12″) with parchment paper.
Whisk the egg whites with a pinch of salt for a few seconds before you add half the sugar, continue beating until stiff.
Mix the egg yolks, lemon zest and the remaining sugar with an electric mixer until thick and creamy. Fold the egg white into the egg yolks with a wooden spoon. Sieve and combine the flour and cornstarch and fold gently into the egg mixture. Spread the dough on the lined baking sheet (30 x 30cm / 12 x 12″) and bake in the middle of the oven for 6 minutes or until golden and spongy.
Sprinkle a kitchen towel with 2-4 tablespoons of sugar and flip the warm sponge onto the towel. Peel off the parchment paper and carefully roll the sponge with the towel. Leave it rolled up until cool. You can see the picture in my strawberry roll post (link above).
Whip the cream, cardamom and 2 tablespoons of sugar until thick and creamy and adjust sugar and spice to taste.
Unwind the sponge roll carefully and lay it onto a working surface. Spread the whipped cream on the cake, leave a rim of 2cm / 3/4". Cover with blueberries and roll it up again, slowly and gently, mind not to squeeze the cream out from the sides. Dust with icing sugar and decorate with the berries and a little lemon zest. Serve immediately or keep in the fridge before serving.
A Mediterranean Sandwich with Zucchini, Pesto and Olives
The past few days have been a pleasant break from my daily duties, my mother came to visit! I decided to take some time off for the long walks through the city which both of us love so much. We started with a beautiful place called Clärchen's Ballhaus which opened more than 100 years ago, in 1913. It's a restaurant/ dancehall where people still meet for Sunday tea dance. When we entered the room the sound of Samba, Waltzes and Tangos filled the air and the faces of the dancing couples seemed lost in nostalgic escape, it felt like a different world!
There's also a gorgeous mirrored ball room on the first floor which has quite a morbid charm, it doesn't sparkle with its original glory anymore. The room was heavily damaged in the war and it was used to store coal until 2005. The mirrors are dull and broken, the decorations and chandeliers on the ceiling can't hide the strains of the past years. It's a forgotten place, a remnant of Berlin's party days from a century ago. When we left the building and its faded light we stepped right into the bright afternoon, we felt like kids who found an abandoned house.
Our next stop was the Museum Island, a group of beautiful and renowned museums on a little island in the Spree river. One of my favourite Berlin buildings is the Bode-Museum, when I first visited it many years ago I instantly fell in love with it and with the little bridge that leads to its entrance. The round building is a classic beauty, majestic but not intimidating. It keeps a stunning collection of marble sculptures in a light-flooded room, the folds and faces cut into the white rock almost seem alive. Our walk ended in front of this museum, at a bar outside on the river bank. We sat down in deck chairs, enjoyed Prosecco with Aperol and witnessed another one of Berlin's tea dance scenes. On an open stage, couples danced Tango under the blue sky, forgetting everything and everybody around them. People stopped to watch them and I'll never forget the beauty of this moment!
So much outdoor activity meant little time for the kitchen, we focussed on salads, snacks and sandwiches. We took it easy this time, no extensive cooking sessions. Usually, when my mother visits, we spend lots of time together in my kitchen but I needed a little break. Yesterday, we had a big family dinner at a restaurant with crayfish and asparagus and today, there'll be oysters on our culinary schedule. In between, we fit in this little sandwich beauty, pure Mediterranean deliciousness stuffed in a juicy focaccia bun. I sautéed very thinly sliced zucchini and piled them up with ripe tomatoes, basil pesto and green olives. It tastes like summer!
A Mediterranean Sandwich with Zucchini, Pesto and Olives
For 2 sandwiches you need
focaccia buns, cut in half, 2
medium zucchini, cut into long, very thin slices, about 200g / 7oz( this is best done with a cheese or vegetable slicer)
olive oil
salt
ripe cherry tomatoes, cut in half, 6
green olives, cut in half, 6
black peppercorns, crushed in a mortar
For the pesto
fresh basil leaves 20g / 3/4oz plus a few small leaves for the topping
fresh mint leaves 2
pine nuts 1 tablespoon
Parmesan, freshly grated, 2 tablespoons plus 1 teaspoon for the topping
olive oil 50ml / 1/4 cup
salt
Mix the ingredients for the pesto in a blender and season to taste.
In a large heavy pan, heat a splash of olive oil and sauté the sliced zucchini in batches, spread the slices out next to each other. Cook them on medium-high for 1 minute, turn and season them with salt and pepper and cook for about 30 seconds on the other side until soft and golden but not dark. Take them out of the pan and keep them on a plate. Continue cooking the remaining zucchini slices, always adding a little splash of olive oil between batches.
Lay the zucchini on the bottom half of each bun and spread the tomatoes and olives on top. Sprinkle with pesto, coarsely crushed pepper and basil leaves. Close the bun and enjoy!
A Salad of Rucola, Plum and Pear with Orange Blossom Water
Here's another one of the kitchen leftover mash-ups I mentioned yesterday: There were 3 bunches of rucola (rocket) on the window sill, Italian plums which started to look a bit sad and ripe pears, ready to be eaten just before they get soft and mushy. I tossed everything together in a bowl and mixed it with my new favourite summer salad dressing: olive oil whisked with freshly squeezed orange juice and a little orange blossom water. It's fantastic, the citrus' fruitiness merges wonderfully with the orange blossom's flowery aroma and the warm olive oil.
Citrus and olive oil is a delicious combination. One of my favourite recipes on eat in my kitchen features this glorious treat, it's a very simple yet absolutely delicious Sicilian salad. The first time I ate it was at a farm in Noto where we stayed a few years ago. The lady of the house would make it for us for breakfast. She used the ripest oranges from the farm, cut them into fillets and sprinkled them with a little olive oil and dried oregano. It was a heavenly and eye-opening experience for me. I had never really thought of this combination before, mixing fruit with olive oil was quite new for me at that point and this morning treat influenced many of my recipes over the years. It taught me to be open minded and experimental, to combine various flavours, to mix what seems far away in taste but trust that it will lead to a satisfying result (which it often does).
However, the combination of fruit and olive oil needs a strong partner, either a herb or spicy rucola leaves as I chose. You could replace the plums and pears with any other sweet fruit you have at hand in your kitchen: strawberries, nectarines, figs or oranges. As long as they have honey sweet juices to add to the salad, they will be a good choice!
A Salad of Rucola, Plum and Pear with Orange Blossom Water
For a quick lunch for 2 you need
rucola (arugula) leaves, 2 handful
pear, quartered, cored and sliced, 1 (or an equal amount of another sweet fruit)
large plum, cut in half and sliced, 1 (or an equal amount of another sweet fruit)
For the dressing
olive oil 3 tablespoons
freshly squeezed orange juice 2 tablespoons
quality orange blossom water (preferably organic) 1-2 teaspoons, to taste
salt and pepper
Arrange the rucola and fruit in a bowl. Whisk the ingredients for the dressing, season to taste and sprinkle over the salad, serve immediately.
Rhubarb Cardamom Clafoutis
In the past few weeks, my kitchen (and sometimes even the living room and balcony) has looked like a farmer's market. I use every corner, kitchen counter, shelf and cupboard to store piles of fruit and vegetables. Tomatoes, squash and beans sit next to colourful cabbages, lettuce, the whole range of citrus fruits and more pots of herbs than I've ever had in my kitchen before. Plums, strawberries, pears and apples share space with all sorts of roots and greens. Since I started working on my first cookbook, my kitchen became a beautiful mess, completely stuffed and almost bursting. My fridge is always so full that I have problems fitting in the butter tin and milk after breakfast.
If there are no book recipes on my schedule, I only need to look around me and I can pick all the fruit and veg I could possibly ask for. There's everything at hand, whatever my taste desires. Be it spring, summer, autumn or winter, the four seasons are present in my kitchen through all the produce, which also means that there is always something that needs to be used as I don't want to waste anything. I ended up with too many eggs, too much milk and too much rhubarb, this called for a clafoutis! I refined the golden French pan dish with cardamom, you could also add cinnamon but cardamom is my favourite baking spice at the moment. The result was very fluffy, I was impressed how much it rose this time! You never really know what this dessert is going to do when you take it out of the oven. The pleasure didn't last very long, a clafoutis can gracefully rise like a soufflé and then deflate within seconds. But it tasted fantastic, warm and fragrant, slightly sweet and sour, just right for a late Sunday breakfast with your mama - Happy Mother's Day to all the great mamas in the world!
You can find the recipe for my apricot clafoutis here!
Rhubarb Cardamom Clafoutis
For a 23cm /9″ heavy, ovenproof pan or baking dish you need
rhubarb, cut into 3cm / 1 1/4" pieces, 300g / 10 1/2oz
ground cardamom
plain flour 80g / 3 ounces
granulated sugar 4 tablespoons plus 2 tablespoons for the rhubarb
a pinch of salt
butter, melted, 30g / 1 ounce plus 2 tablespoons for the rhubarb
large eggs 4
milk 200ml / 7 ounces
freshly squeezed orange juice 3 tablespoons
Melt 2 tablespoons of butter with 2 tablespoons of sugar and 1/2 teaspoon of cardamom in a heavy pan, add the rhubarb and cook for about 3 minutes or until it softens but still holds its shape, stir once in a while. Set the pan aside.
Set the oven to 180°C / 355°F (top / bottom heat) and generously butter a 23cm /9″ heavy, ovenproof pan or baking dish.
Combine the flour, 4 tablespoons of sugar and a pinch of salt. Whisk 1 teaspoon of cardamom into the warm melted butter and mix with the eggs, milk and orange juice then pour into the dry mixture and mix with an electric mixer until well combined.
Spread the rhubarb in the buttered pan and pour the batter on top. Bake for about 50 minutes or until the clafoutis is golden and set. Sprinkle the warm clafoutis with sugar and ground cardamom to taste and enjoy immediately.
Roasted Spring Onion, Parma Prosciutto and Taleggio Sandwich
I rediscovered an old cheese love: Taleggio! Although I used to enjoy this Italian dairy product from the Val Taleggio in the Lombardy quite often in the past, it hasn't been in my kitchen for a few months, but now it's back - preferably melted! A culinary phone call with my mother (our regular recipe exchange) brought it back to my mind. I went to the supermarket right the next morning to stock up on this slightly creamy cheese and started thinking about all the recipes I would use it for.
A new sandwich creation was first on my list, the milky cheese melting its soft yet distinct aroma onto Parma prosciutto and sweet-roasted spring onions. The result was juicy and hearty without being overpowering. Taleggio isn't as harsh as one of my other sandwich-cheese-obsessions, the dominant raclette, its flavour is more subtle, almost fruity. It develops a little slower in the mouth but the impact is impressive nonetheless. I loved the look of this sandwich, I loved its taste and I had to have two of them!
Roasted Spring Onion, Parma Prosciutto and Taleggio Sandwich
For 3 sandwiches you need
rustic buns, cut in half, 3
small spring onions, cut in half lengthwise, 6
olive oil 1 tablespoon
sea salt
black peppercorns, crushed in a mortar
Parma prosciutto 6 slices
Tallegio cheese, sliced, 60g / 2oz
Set the oven to 220°C / 430°F (top / bottom heat).
In a baking dish, mix the spring onions with the olive oil, salt and pepper. Roast in the oven until golden brown, mind that they don't burn (about 20 minutes). Turn them after 10 minutes.
Lay the 2 slices of Parma prosciutto on the bottom side of each bun, cover with cheese and swirl the spring onions on top. Put under the grill for a few minutes until the Taleggio starts to melt. Sprinkle with pepper and close the bun. Enjoy!
Asparagus with Crisp Balsamic Bacon
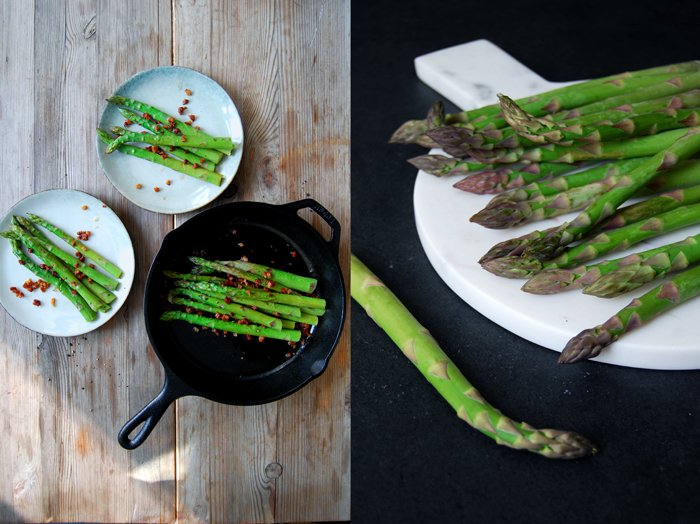
All you need are 6 ingredients: green asparagus, bacon, balsamic vinegar, olive oil, salt and pepper! This is one of the easiest asparagus recipes we've had on our table this spring and I'm sure I'll cook it a few more times during this season. Its comforting heartiness combined with the vegetable's crunchy freshness is all I need when I sit at the kitchen table after a long day of work.
The preparation takes around 10 minutes which is also quite convenient. Green asparagus only needs a few minutes until it's cooked al dente and the bacon bites fried to salty crispiness don't take much longer. I deglazed the meat with a little white Balsamico vinegar which brings out its sweet side and fits so well with the green stalks. It's such an easy spring comfort dish!
Asparagus with Crisp Balsamic Bacon
For 2 people you need
green asparagus, the bottom part cut off, 500g / 1 pound
bacon, cut into tiny cubes, 80g / 3oz
olive oil
white balsamic vinegar 25 ml / 2 tablespoons
salt and pepper
Blanch the asparagus in salted water for 3-4 minutes or until al dente, drain and rinse with cold water for a second to keep its fresh colour.
Heat a splash of olive oil in a pan and fry the bacon for a few minutes on medium heat until golden brown and crisp. Deglaze with the vinegar, add the asparagus, stir gently and season with salt and pepper to taste, serve warm.
Frances Bissell's Lavender & White Chocolate Caramel Cake
This is advanced lavender baking! When I shared my Lavender Gâteau Breton recipe with you a couple weeks ago, I mentioned Frances Bissell's fantastic baking book, The Floral Baker. The renowned British cookbook author inspired me to give the aromatic blue flowers a try in my kitchen and to add them to my own baking. I started off with the preparation of a jar full of lavender sugar about a month ago, the floral sweetness needs some time to develop its exhilarating qualities. For my buttery French cake, the Gâteau Breton, I sieved the sugar and used the florets just for the topping. I wanted to take it easy at first, to get used to this new flavour and to avoid straining my taste buds without even getting started properly.
So now I felt ready to take the next step, the advanced level of floral baking. I got in touch with Stephen from Serif Books to see if I could share one of the floral master's recipes on eat in my kitchen. We got along very well and I found out that Frances lives in England and Gozo and also includes traditional Maltese recipes in her cooking. I really hope to meet her there one day for a meet in your kitchen feature on the blog!
After reading her book I felt quite torn between a few recipes but in the end I went for Frances' Lavender and White Chocolate Caramel Cake. It sounded so decadent and rich that I had to give it a try. The creation is based on her mother's recipe for toffee cake and it has been in her family since the early 1960s. It's like Millionaire's shortbread, just with white chocolate. It starts off with a thin shortcrust base infused with the beautiful aroma of lavender, topped with toffee cream and a final layer of crunchy white chocolate. The creation looks a bit old fashioned which I love, it's the right treat for high tea with the ladies, when you bring out the nice porcelain and get dressed up. I didn't use my bone China at my table but another gem I found recently, the beautiful plates and bowls (and my beloved new measuring spoons!) by Ferm Living in Denmark. It's a clean, grey stoneware collection inspired by Bauhaus classics. My friend Anne, the photographer I mentioned last Sunday, told me about their stunning designs, she knows that I'm always on the lookout for nice tableware. Luckily, we have a similar taste, which is quite minimal, and we're both picky, so I found the perfect design scout for me!
Lavender & White Chocolate Caramel Cake
Recipe by Frances Bissell
Mind that you prepare the lavender sugar a few days (or even weeks) in advance, 10 parts sugar and 1 part organic lavender flowers (L. augustifolia, Hidcote).
For a 20cm / 8" cake tin, about 4cm / 1 1/2" deep, you need
For the shortbread
plain flour 115g / 4oz
lavender sugar 25g / 1oz (I used mainly the sugar and 1 teaspoon of the flowers)
butter, cold, 50g / 2oz
For the topping
Golden Syrup 2 tablespoons
condensed milk 395g / 14oz
quality white chocolate 200g / 7oz
a drop of culinary lavender essence (I left this out and sprinkled the cake with lavender flowers instead)
Set the oven to 190°C / 375°F (fan assisted oven) and lightly butter the cake tin (or line the tin with parchment paper).
For the shortbread, mix the flour, lavender sugar and butter with the hooks of your mixer. Press the dough into the tin and bake for 12-15 minutes. Remove the tin from the oven and leave the shortbread in it.
For the toffee, pour the Golden Syrup and the condensed milk into a saucepan, stir together over moderate heat until well-mixed, then boil precisely 7 minutes, stirring all the time.
Spread the mixture over the shortbread and allow it to cool. Melt the chocolate in a bowl over hot water, mix in the essence if you would like to use it and spread over the cooled toffee, marking into small triangles, squares or fingers, as appropriate, before the chocolate has set. Sprinkle with lavender flowers. Cut when cold.
Orange Blossom Ricotta and Honey Kumquat Tartine with Pistachios
A handful of little kumquats have been lying on the window sill for days challenging my kitchen creativity. They were the meager leftovers from my bean and pea salad and I didn't really feel too inspired to use them. Although I really like these concentrated citrus fruits in combination with vegetables and dairy products, I'm not too fond of eating them on their own, so I had to come up with an idea which would fit their biting tanginess.
I thought of Malta, one of my biggest inspirations and answer to all sorts of open questions in my life. We just booked our flights for this summer, so it's been on mind since I clicked the confirmation button on the booking page. All that Mediterranean food, our family, friends, snorkeling, the sun and blue sky above my head every day, just the thought of it makes me so happy! And we'll have a very special guest over for a few days this summer which makes me even happier (and more excited if that's even possible): Holly, my editor, will visit us from New York to learn more about the country and culture that I praise and write about so much. I'm as excited as a child to show her around, to introduce her to my perfect spots for snorkeling and food, our favourite beach bar for a glass of Ricard in the sunset, my Maltese mama's and grannie's kitchens in Msida. I want to walk though the old streets of Valletta and Mdina with her and show her where to enjoy the best pastizzi, qassatat and Spaghetti Rizzi (sea urchin pasta), so much that was once new to me many years ago and opened the door to a mentality that's so different to mine yet filled my life with so much fun and love!
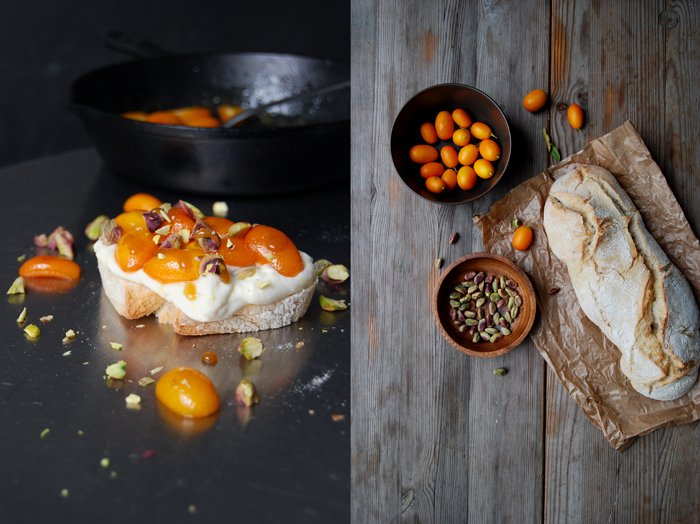
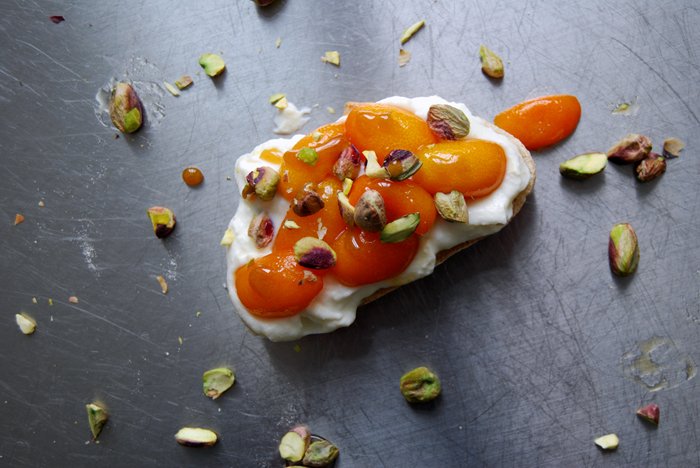
When I think of Malta, ricotta comes to mind, honey and orange blossom water, I just had to add my kumquats and a few pistachios (unsalted!) and all of the sudden I could see a new sandwich creation before my eyes. I whisked the dairy product with some honey, orange juice and blossom water and spread this sweet dip voluptuously on a slice of fluffy ciabatta bread. The citrus fruit came next, I caramelized the kumquats in honey to soften and sweeten their skin which made them a little sticky and juicy. The crunchy pistachios finished it off and gave this Mediterranean combination an oriental touch. It was as bright as the sunset in Malta and tasted wonderfully sweet and sour!
Orange Blossom Ricotta and Honey Kumquat Tartine with Pistachios
For 4 small tartines you need
ciabatta bread, 4 slices
fresh ricotta 250g / 9oz
quality orange blossom water (preferably organic) 1 teaspoon
liquid honey 1-2 teaspoons plus 3 heaping teaspoons for the kumquats
freshly squeezed orange juice 2 tablespoons plus 2 tablespoons for the kumquats
kumquats, cut in half (lengthwise), 12
pistachios peeled and unsalted, roughly chopped, a small handful
Whisk the ricotta with orange blossom water, 1-2 teaspoons of honey and 2 tablespoons of orange juice, season to taste.
Heat 3 heaping teaspoons of honey in a heavy pan, add the kumquats and 2 tablespoons of orange juice and cook for about 2 minutes on high temperature or until the citrus fruits start to soften.
Spread the ricotta dip on the bread, lay the kumquats on top and sprinkle with the juices from the pan and the pistachios. Enjoy!
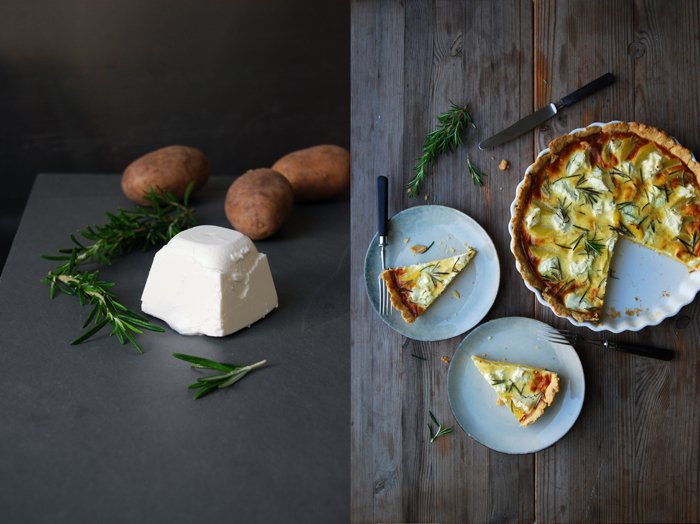
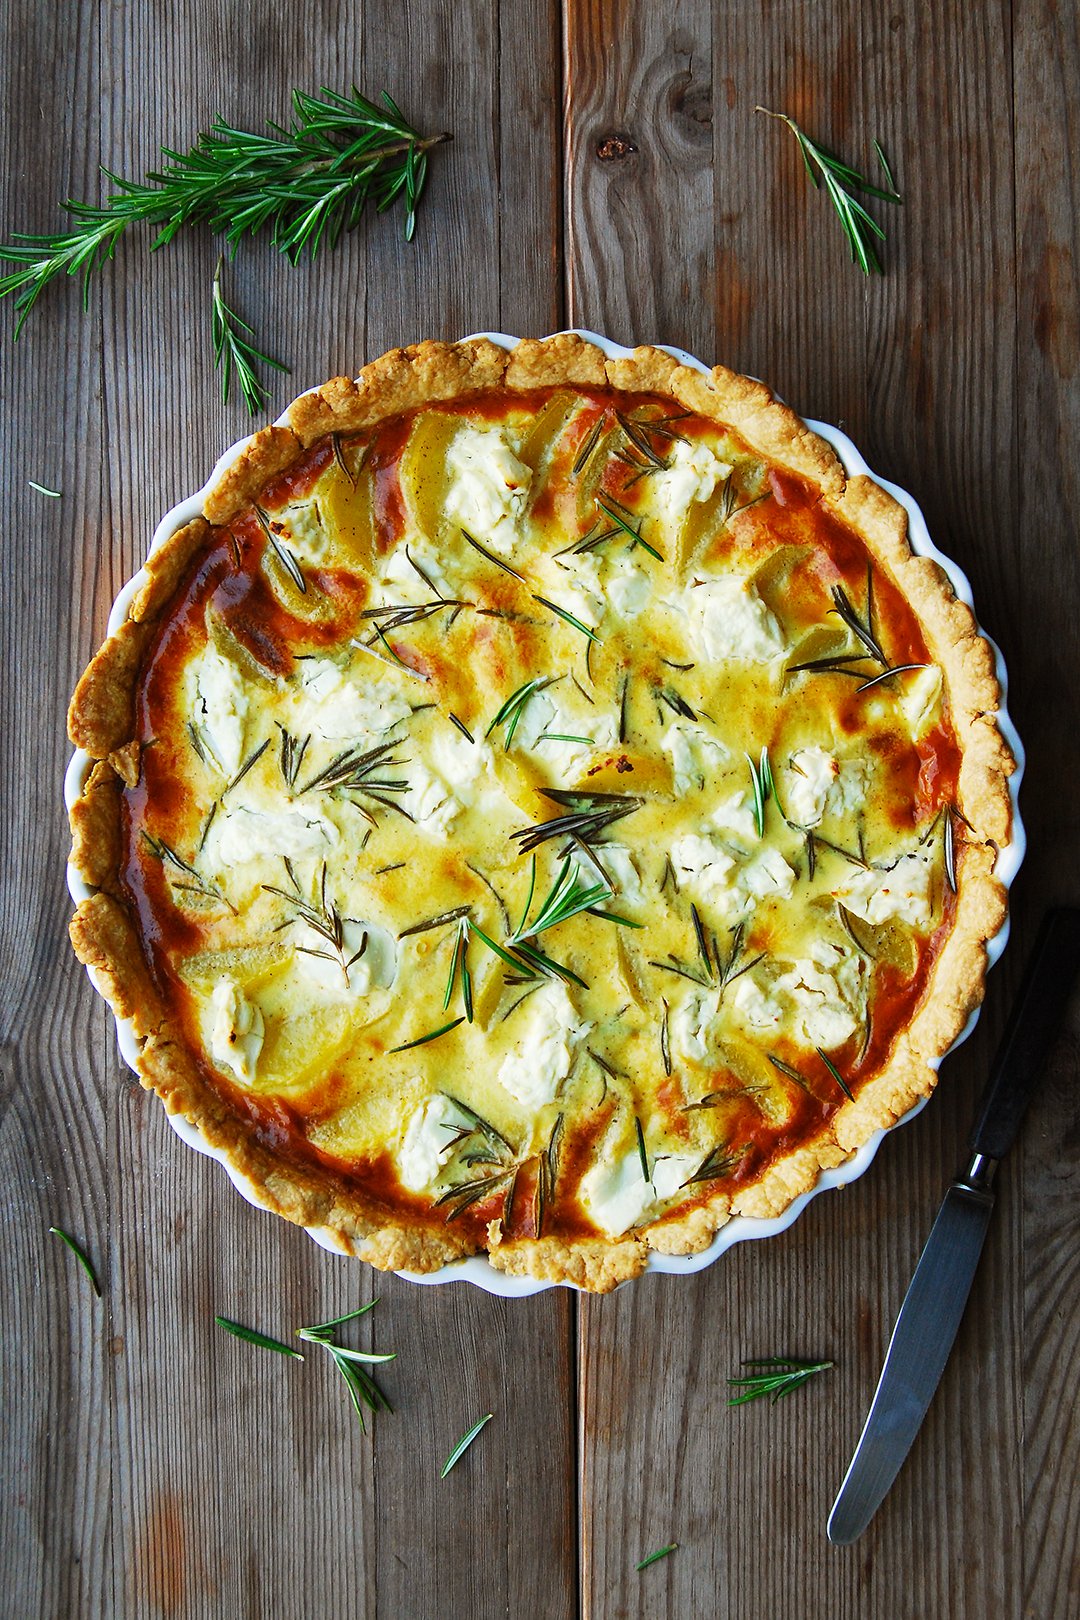
Potato, Chèvre and Rosemary Tart
Quite a few of the recipes that I have collected over time have become my culinary buddies, friends to celebrate good times just as much as giving me comfort when it gets tough. A savory tart, the wonderful French quiche, is definitely one of them. It's as easy and comforting as pizza and I can adapt the topping to my mood and the seasons, which I do with creative passion.
There's something about the buttery pastry base of a tart that gives me great satisfaction. An Italian pizza is a loud feast, preferably enjoyed in the company of friends. The base can be thin and crisp or oily and fluffy like a focaccia - the Italian oven classic is comfort food at its best, always. A quiche however, is more intimate, it's quite a sensual dish. The pastry needs to be thin (at least for my taste), crumbly and flaky. It's delicate, fragile, which makes it perfect for a romantic date or a picnic in the countryside. Add a glass of velvety red wine and you will have a lot of fun.
There are quite a few quiche recipes on the blog and I can't stop adding more: there's one with tomatoes and mozzarella, beans and ramp, with leek, one with fennel … Click here for the entire eat in my kitchen quiche collection. Today's recipe feels like a trip to the Provence, at the peak of summer. The potatoes give it a hearty touch - almost like a German quiche - yet the milky chèvre and woody rosemary make it light and take it right back to the Mediterranean.
Potato, Chèvre and Rosemary Tart
For a 30cm / 12″ tart pan or baking dish you need
For the short crust base
plain flour 260g / 2 cups
fine sea salt 1 teaspoon
butter, cold, 130g / 1/2 cup plus 1 tablespoon
large egg 1
Combine the flour and salt. Add the butter and cut it with a knife into the flour until there are just little pieces of butter left. Continue with your fingers and work the butter into the flour until combined (there shouldn’t be any lumps of butter left). Add the egg and continue mixing with the hooks of your mixer until you have a crumbly mixture. Form a disc, wrap in plastic wrap and put in the freezer for 10 minutes.
Set the oven to 200°C / 400°F (conventional setting).
Roll out the dough between plastic wrap then fit the dough into a 30cm / 12” quiche dish, pushing it into the dish. Prick the dough all over with a fork and bake for 15 minutes or until golden. If the dough bubbles up, push it down with a fork. Take the quiche dish out of the oven and reduce the temperature to 180°C / 350°F.
For the filling
large eggs 4
sour cream or crème fraîche 175g / 3/4 cup
heavy cream 120ml / 1/2 cup
fine sea salt 1 teaspoon
ground pepper
nutmeg, freshly grated, a generous amount
potatoes, boiled, peeled and sliced, 500g / 18 ounces
soft chèvre, broken into chunks, 110g / 4 ounces
fresh rosemary needles, a small handful
For the filling, whisk together the eggs, sour cream, heavy cream, salt, pepper and nutmeg.
Arrange the potatoes on top of the pre-baked pastry and season with a little salt, pepper and nutmeg. Sprinkle with the chèvre and rosemary then pour the egg mixture into the pastry base. Bake for 50 to 55 minutes or until golden, the top should be firm and the pastry crispy. Let it cool for a few minutes before serving.
Strawberry Ricotta Muffins
The past 10 days have been packed with excitement - too much for me at times. It started off with an urgent change to a new camera and laptop and I wasn't too happy about this at first. I'm not a very technical person, I prefer sticking to a set up once it's up and running rather than getting used to all sorts of technical novelties every couple years. I'm a bit lazy in that respect, but my forthcoming cookbook pushed me out of my comfort zone and called for new equipment. After 2 days of confusion and desperation, a long talk with my wonderful and patient photographer friend Anne Deppe, I felt ready for a new technical era in my life!
So once all these issues were solved, I could finally get started with the first recipes for my book. It felt a bit intimidating in the beginning when I took the pictures. I thought "wow, this will be printed one day, I'll be able to hold these photos in my hands next year". No more digital flexibility, this is the unchangeable analog world, I'll have to make final decisions together with my editor Holly which will be irreversible at one point and printed onto paper! I stopped for a few minutes, put the camera aside and took my time to process everything that happened in the past month. I looked at the camera and the sandwich on the table right in front of me and made a decision: this is going to be fun, exactly like my blog!
Eat in my kitchen has always been about my love for food and my enjoyment in the kitchen, I've enjoyed every second of this journey and I'll keep it this way. So when this mental hurdle was overcome, the recipe craziness began: I cooked and baked 17 new dishes in the past 5 days, luckily I had family in the house, visiting me in Berlin. Everyone was more than happy to test the recipes and I was glad to hear their feedback. It was a very satisfying experience for both sides and there are hopefully many more to come in the next few weeks and months while I'm cooking and baking for the book.
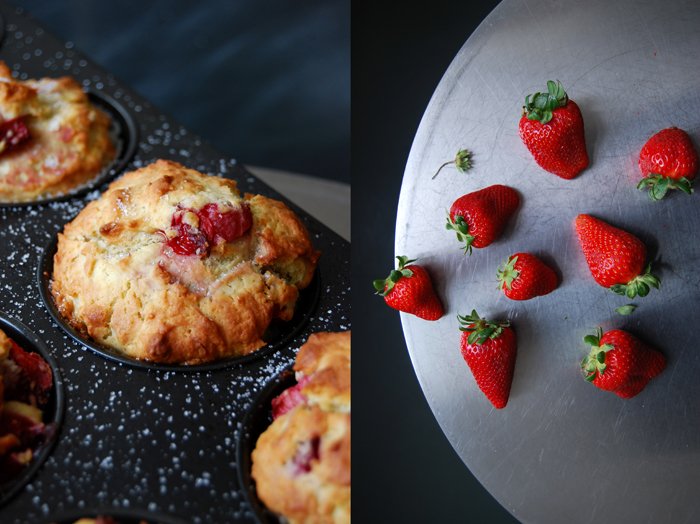
When I met my friend Anna to talk about my technical issues, I decided to make a bunch of muffins with relaxing and caressing qualities. I needed some soul food for my stressed mind. I threw in my first strawberries of the year and their subtle sweetness matched wonderfully to the smooth dough which I refined with ricotta, olive oil and orange juice. They came out as being perfect spring breakfast muffins, light and fruity - and they relaxed me!
Strawberry Ricotta Muffins
For a muffin tray with 12 molds you need
plain flour 320g / 11 1/4oz
granulated sugar 100g / 3 1/2oz plus 1-2 teaspoons for the topping
baking powder 3 leveled teaspoons
baking soda 1/2 teaspoon
salt 1/4 teaspoon
organic eggs 2
ricotta 250g / 9oz
olive oil 100ml / 3 1/2fl oz
freshly squeezed orange juice 30ml / 1fl oz
strawberries, cut into chunks, 200g / 7 ounces
Set your oven to 190°C / 375°F (fan-assisted oven) and put paper baking cups into the 12 molds of the muffin tray.
In a large bowl, combine the flour, sugar, baking powder, baking soda and salt. Take out 1 heaped tablespoon of the flour-sugar mixture and mix quickly with the strawberries. In a second bowl, mix the eggs, ricotta, olive oil and orange juice until light and fluffy and pour into the bowl with the dry mixture. Stir with a wooden spoon until you have a lumpy dough (with a bit of flour left here and there) and gently fold in the chopped strawberries. Keep in mind, the more you mix it the more it will lose its light texture.
Fill the muffin tray with the dough and bake for about 18 minutes or until golden. Take 1 muffin out of the tray and check with your finger if the bottom is baked through (the strawberries will make it very juicy). Sprinkle the muffins with a little sugar and let them cool on a wire rack for a few minutes before you put them on your breakfast table.
Camembert, Dark Grape and Candied Rosemary Sandwich
Sometimes cheese can be quite challenging, especially its fragrance. This can be a bit of a hurdle despite its delicious qualities, an obstacle to get over to be able to finally enjoy this treat. There is a simple camembert lying in my fridge at the moment which I like to buy once in a while, it's nothing special, it's neither organic nor from a small farmer in the French countryside, but I love it. It's honest, creamy and very, very aromatic, and unfortunately, it stinks so much that it takes days to get the smell out of our fridge again. I can take a lot when it comes to cheese, my nose has seen and smelt the whole range of the world of cheese. One of the prettiest cheese shops I've been to was in Paris, dedicated to the wonders of dairy milk, the display and fragrance in this room was impressive! But the odor of my little camembert in the fridge tops everything, it's borderline. I always ask myself twice if I really want to put myself, the fridge and my close environment through this attack on the nose.
A sandwich came to mind, and obviously, my little French dairy friend asks for strong partners, red wine of course, but also fruits, herbs, spices or chutney. Although it's not the right time for grapes yet, I couldn't resist buying the crisp dark South African fruits I spotted at the market. Their plump juiciness manages to balance out the sharpest cheese. So I wanted more of that sweetness, candied rosemary needles, sticky and crunchy, to get the camembert under control. It worked!
This sandwich puts you right in the scene of a summery picnic in the French countryside, a blanket spread on a green meadow next to a wide river, a bottle of wine, maybe a crisp bean and ramp quiche and a bowl of spinach, strawberry and goat cheese salad. This is the picture I remember when I think of one of my weekend trips to Alsace many years ago, I just close my eyes, take a bite of my camembert sandwich and I'm right there!
Camembert, Dark Grape and Candied Rosemary Sandwich
For 2 large sandwiches you need
crunchy white buns (or fresh baguette), cut in half, 2
ripe camembert, cut into slices, 200g / 7 ounces
dark seedless grapes, cut in half, a small handful
rosemary needles 2 tablespoons
granulated sugar 2 tablespoons
water 2 tablespoons
Divide the cheese between the 2 buns and lay the grapes on top.
In a small pan, heat the sugar and water on high temperature. When it turns golden add the rosemary, stir quickly and caramelize for a few seconds, mind that it doesn't burn. Transfer the candied herb immediately onto the sandwich. Use 2 forks, you have to do this while the syrup is still liquid, it becomes sticky and hard very quick. If you can't get the rosemary out, put the pan back on the heat.
Enjoy!
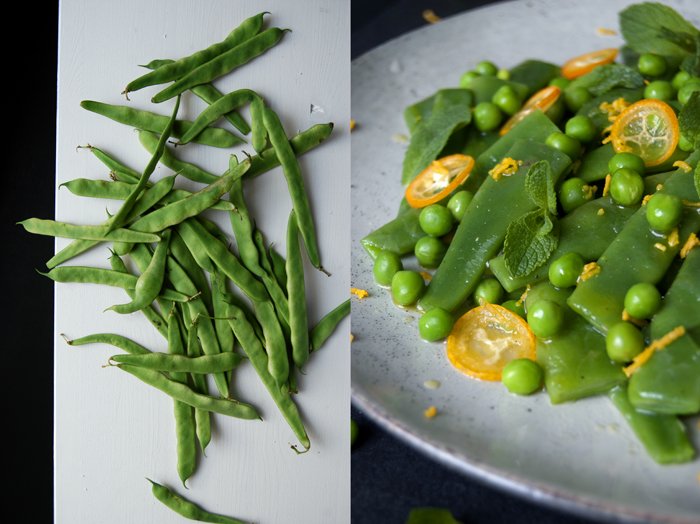
Green Bean, Pea and Kumquat Salad with Turmeric and Mint
Nature is blossoming all around me! Crisp young leaves sprinkle the branches of the Linden trees in front of our house with their fresh green, thousands of yellow, pink and white flowers take over the city, visually and with their fragrance. It feels so refreshing and wakes up all my senses!
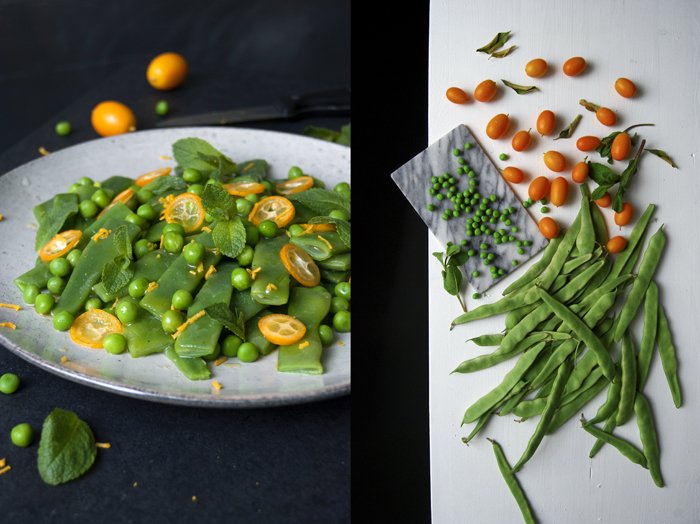
So many colours bursting around me inspire my culinary activities, I need crisp greens, beans, peas and mint, and a little orange, sweet and sour kumquats and fresh turmeric root for a light vinaigrette. You could also enjoy this composition as a warm side dish, with a splash of olive oil instead. I wanted to take my time, to prepare one ingredient after the other without hassling about keeping everything warm. I chose to slow down my pace, the kitchen windows wide open and the birds seemed as excited about this outburst of spring as I am. It was a cold salad in the end, enjoyed with a relaxed mind and a couple slices of fresh ciabatta.
Green Bean, Pea and Kumquat Salad with Turmeric and Mint
For 2 as a lunch or 4 as a side dish you need
flat green beans, the ends cut off, 380g / 13 1/2oz
peas, fresh or frozen, 150g / 5 1/4oz
kumquats, rinsed and scrubbed, thinly sliced, 4
fresh mint leaves, a small handful
For the dressing
olive oil 3 tablespoons
freshly squeezed orange juice 3 tablespoons
freshly grated turmeric root (or ginger), a pinch, to taste
salt and pepper
In a large pot, bring salted water to the boil and blanch the beans for 3 minutes or until al dente. Take them out with a slotted ladle and rinse them under cold water for a second (to keep the fresh colour). Blanch the peas in the same pot for 1 minute, take them out and rinse them for a second with cold water.
Whisk the ingredients for the dressing and season to taste. Arrange the beans and peas on a large plate, sprinkle with the dressing, the slices of kumquat, mint leaves and a little more grated turmeric root.
Lavender Gâteau Breton
This little Gâteau Breton looks so simple and innocent but there's a rich and buttery depth behind its golden crust that can easily compete with any lavish layer cake. I admire the sweet French cuisine for mastering the art of getting the most out of a piece of butter, a few eggs and some sugar and flour. This is minimalism brought to perfection in baking.
I chose this Brittany butter cake as it seemed the right recipe to try out my new homemade lavender sugar. A spongy shortbread, that's how I would describe it, sprinkled with the most fragrant purple sugar, it sounded so good and it tasted even better. Frances Bissell, the woman behind the wonderful baking book The Floral Baker, is a genius mind responsible for many wonderful sweet and savoury creations refined with lavender, jasmine, rose petals, orange flower water, wild garlic or saffron. Her recipe collection is a journey through nature's opulence, I felt so inspired by the way she introduces new flavours and offers fresh combinations that I had never heard of or thought about. I already decided that her Saffron and Rosewater Biscuits, Lavender and Tomato Tart and the Lavender White Chocolate Caramel Cake will soon make an appearance on my kitchen table!
My first practical approach to her book was the preparation of lavender sugar. Frances suggests 10 parts sugar and 1 part lavender flowers (L. augustifolia, Hidcote), I trust this experienced baker so I decided to fill a huge jar up to the brim. My new pantry project satisfied me instantly, every couple days, I took it off the shelf to shake my flowery treasure and imagined all the recipes it would refine in future. Pure relaxation in a jar!
After a few weeks the time had come to give it a go and I think I couldn't have had a better start to my flower project. I didn't mix the sugar in in the dough, I just sprinkled the purple flowers and sugar on top of my warm Gâteau Breton and it instantly spread its beautiful aroma. It looked stunning, it took a French baking classic to another level and my boyfriend, who isn't usually too fond of lavender, couldn't get enough of it (like me)!
I'm with Diana Henry on The Floral Baker: 'So thrilled with this by the wonderful Frances Bissell'! Thrilled and inspired, that's the best a cookbook can do!
Lavender Gateau Breton
Mind that you prepare the lavender sugar a few days (or even weeks) in advance, 10 parts sugar and 1 part organic lavender flowers (L. augustifolia, Hidcote), you'll only need a couple teaspoons for this cake.
For a 25cm / 10" tart pan you need
plain flour 200g / 7oz
baking powder 3/4 teaspoon
a pinch of salt
butter, soft, 150g / 5 1/4oz
organic egg yolks 3 plus 1 egg
granulated sugar 125g / 4 1/2oz
For the glaze
organic egg yolk 1
water 1 tablespoon
For the topping
lavender sugar 1-2 teaspoons, to taste
Set the oven to 170°C / 340°F (fan-assisted oven) and butter the tart pan.
Combine the flour, baking powder and salt in a small bowl. In a large bowl, whisk the egg yolks, the egg and sugar until light and fluffy. Add the butter and mix with the hooks of your mixer, add the flour and continue mixing until combined. Scrape the dough into the tart pan (it will be sticky) and even out the surface a little. Whisk the egg yolk and water for the glaze and brush the top of the dough. Scratch a diamond pattern into the surface (as you can see in the pictures), mind that you scratch deep enough, otherwise the pattern will melt away while baking. Sprinkle with a teaspoon of lavender sugar (without the flowers) and bake for 25-28 minutes or until golden. Sprinkle the warm cake with a little more lavender sugar (this time with the flowers as well).
Thyme and Lemon Ricotta stuffed Pork Roll
This scrumptious pork roll combines the hearty qualities of a juicy roast topped with crunchy crackling and the fresh spring feeling of ricotta, lemon zest, parmesan and thyme. If you liked my Bavarian Beer Roast for those cosy dinners at winter time, this is a great alternative for the warmer season, for a summery Sunday lunch under the bright blue sky and blossoming trees. It's the perfect recipe to feast with your friends, the table filled with plates of crisp asparagus tomato salad, loaves of homemade bread and pink glasses of chilled rosé wine - and the roast right in the middle!
You could use butterflied pork loin from a fully grown pig for this dish but I went for suckling pig. Its fine flavour and tender texture is exactly what you need if you want to roll up the loin with a light Mediterranean stuffing, no distractions, just the fine aromas merged with the meat.
Suckling pig is a traditional German dish, you can often see it at village feasts in the countryside, a whole pig roast on a spit over the open grill. The scene can be a bit intimidating, it's an archaic ritual - meat and fire. To me, it's part of our nature and as I decided to include meat in my diet, I also decided to confront myself with various cooking methods, even the ones that aren't as pleasing for the eyes as a schnitzel covered in breadcrumbs.
Thyme and Lemon Ricotta stuffed Pork Roll
For 6 people you need
suckling pork loin, boneless, butterflied, 1,2kg / 2 3/4 pounds
ricotta 225g / 8 ounces
freshly squeezed lemon juice 1 tablespoon
lemon zest 1 heaping tablespoon
Parmesan 1 heaping tablespoon
fresh thyme leaves, 1 heaping tablespoon
black peppercorns, crushed in a mortar, 1 teaspoon
fine sea salt 1 teaspoon
coarse sea salt, to sprinkle the roll
cotton string for the roll
Set the oven to 240°C / 465°F (I used the Rotitherm setting).
Whisk the ricotta, lemon juice, zest, parmesan, thyme, pepper and salt. Lay the meat out flat on the kitchen top and spread with the ricotta-spice mix, leave a 2 cm / 3/4" rim all the way round. Roll up the meat tightly without squeezing out the filling and tie with a cotton string every 3cm / 1". Sprinkle the skin generously with sea salt (push it into the skin a little), place the roll in a roasting dish and roast in the oven for 10 minutes. Turn down the heat to 175°C / 350°F and roast for 35 minutes. Turn on the grill until the skin starts to crackle. Take the meat out of the oven, wrap in aluminium foil and let it rest for 10 minutes before serving. Serve with asparagus tomato salad or a light potato salad.
The meat also tastes great cold, cut into thin slices, on a sandwich!
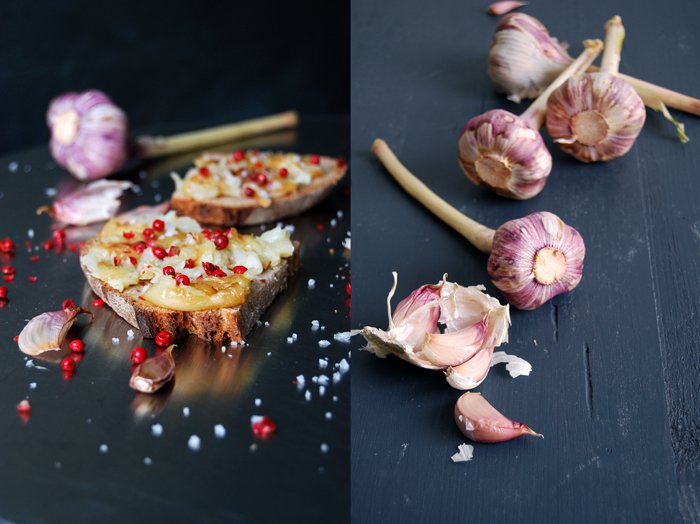
Roast Garlic and Pink Peppercorn Tartine
This is one of the quickest and most addictive lunch snacks you can imagine - and it's healthy! With just one bite I had 3 cloves of roasted garlic in my mouth, enjoying its smooth texture and aromatic taste refined with pretty pink peppercorns and my flaky sea salt from Gozo. I roasted lots of fleshy cloves from a young garlic bulb in the oven, you'll need about 15 for 2 small tartines. They cooked in their skin for about 15 minutes before I mashed them with a fork onto the bread, smooth, slightly sweet and concentrated in flavour. I shared a similar sandwich with you, exactly a year ago, the same procedure but with grilled Gruyère cheese on top. It was good too, a bit more hearty and rich.
I could really eat garlic by the bulb (roasted, not raw!). I love its sweet spiciness, its bold taste. You could also purée the grilled and peeled cloves with a little salt and use it as a thin spread on bread. It's so good for our bodies, known to be one of the oldest traditional remedies in the European and Asian culture. No additional medicine, you just have to eat well to feel good!
Roast Garlic and Pink Peppercorn Tartine
For 2 small tartines you need
rustic dark bread 2 small slices
large cloves of garlic, in their skin, about 14
pink peppercorns, lightly crushed in a mortar, for the topping
flaky sea salt, to taste
Set the oven to 210°C / 410°F (fan-assisted oven).
Roast the garlic in their skin on a tray in the oven for about 15-18 minutes, or until you can mash the cloves with a fork. Mind that they don't get dark and hard! Peel and mash them with a fork on the bread, sprinkle with a little sea salt and pink peppercorns. Enjoy warm!
Froga tat-Tarja - Maltese Pasta Frittata with spicy Green Pesto
A few weeks ago, my boyfriend told my about this Maltese classic from his childhood days: Froga tat-Tarja, a golden pan fried pasta omelette. This is the essence of Southern comfort food, it works all year round, but I mixed in some spicy green pesto which gave it a fresh spring feel. I must admit that my initial plan was to go for basil pesto but my little Mediterranean kitchen plant looked too sad. I can see it trying so hard (and hopelessly) to grow more leaves so I couldn't bring myself to rip it up and leave it naked with only some slim stalks stuck into the soil.
I also had some rucola left and could have easily turned that into an aromatic pesto but you can imagine what happened next, ramp came to mind as always at this time of year and all other green pesto options were kicked out in a split second. It's garlicky spiciness combined with its really short season make it simply irresistible to me. So if you have any green pesto, some eggs and leftover pasta lying around in your kitchen, whisk it together, throw it in a pan like a pancake and fry until golden brown. Wonderfully easy comfort cooking, thanks to the leftovers!
Froga tat-Tarja - Maltese Pasta Frittata with spicy Green Pesto
For 1-2 people you need
leftover spaghetti or capelli di angelo, cold, 120g / 4 1/4oz
organic eggs, beaten, 2
ramp pesto, or any other green pesto, 1 heaping tablespoon plus more for the topping (recipe here)
salt 1/2 teaspoon
black peppercorns, crushed in a mortar, to taste
Parmesan, grated, for the topping
olive oil
Whisk the eggs, salt, pepper and pesto and mix with the pasta. Heat a splash of olive oil in a small pan (21cm / 8") and fry the egg pasta like an omelette until golden brown on both sides. Sprinkle with Parmesan and a little more pesto, season with salt and pepper to taste and serve immediately.
Happy News: The Eat In My Kitchen Cookbook & Espresso Chocolate Biscotti
An exciting email from New York changed my life! Holly La Due from Prestel/ Verlagsgruppe Random House asked me if I'd be interested in writing a cookbook filled with my recipes, stories and photographs. I had to read this email twice before I ran to my boyfriend who was still in bed, it was 7 in the morning, I put the laptop on his chest and made him read the email to me again. I screamed and laughed out loud hysterically!
Holly is the most patient and helpful editor any author could ask for, she has been following eat in my kitchen for a while and I felt pretty soon that we're a very good match. So the past few weeks were filled with lots of excitement and many, long Skype calls across the Atlantic. Discussing how we're going to do this together, talking about our ideas and our vision for the book which will be published in English and in German. Prestel is highly renowned for its publications in art, design and architecture so I don't have to worry about the aesthetic development of my book. With a great publisher behind me, I have the wonderful freedom to fill almost 300 pages with many new recipes, some blog classics and my own photography. After working only digitally on the blog, it feels like a natural transition into the physical world, everything you find on my blog, my style of cooking and baking and my photos, will be merged into the pages of the Eat In My Kitchen cookbook. There will be many more of my salads, soups and vegetable creations, meat and seafood recipes, sandwiches, and there will be lots of baking happening as well. The American Eater brought it to a point a few days ago, "comfort food with a Mediterranean palate". My German upbringing, my mother's cooking in particular, my boyfriend's Maltese/ American family, many summers spent in Malta and Gozo, these are my influences in the kitchen, my never ending source of culinary creativity.
And now I can do what I love so much, I can cook and bake even more, write new recipes and take many, many pictures so that all of us can hold this book in our hands next year. I feel so inspired, I have so many recipes on my mind, there's so much energy and happiness that I can already feel coming from these pages.
It must have been around a year ago that some of you started to ask me about an Eat In My Kitchen book, a physical alternative to my blog's online platform. I had never really thought about it before, although there were enough recipes to fill a couple books, it wasn't on my mind. That changed in the past few months, to get so much support from all of you, so many emails from happy food lovers who enjoy my recipes so much, this experience let this idea ripen in my head, so Prestel asked me at the right time, I'm ready!
Although there are still quite a few months of work ahead of us before the big release day, which will be in the Fall of 2016, I know that we'll need the time to create a book that touches and inspires everybody like the blog already does. Thank you for your ongoing support, thank your for your wonderful words and trust in my work!
The happiest regards from Berlin!
Meike xx
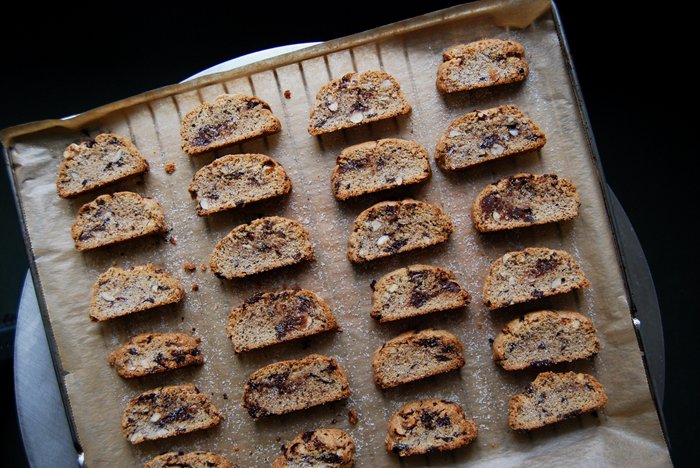
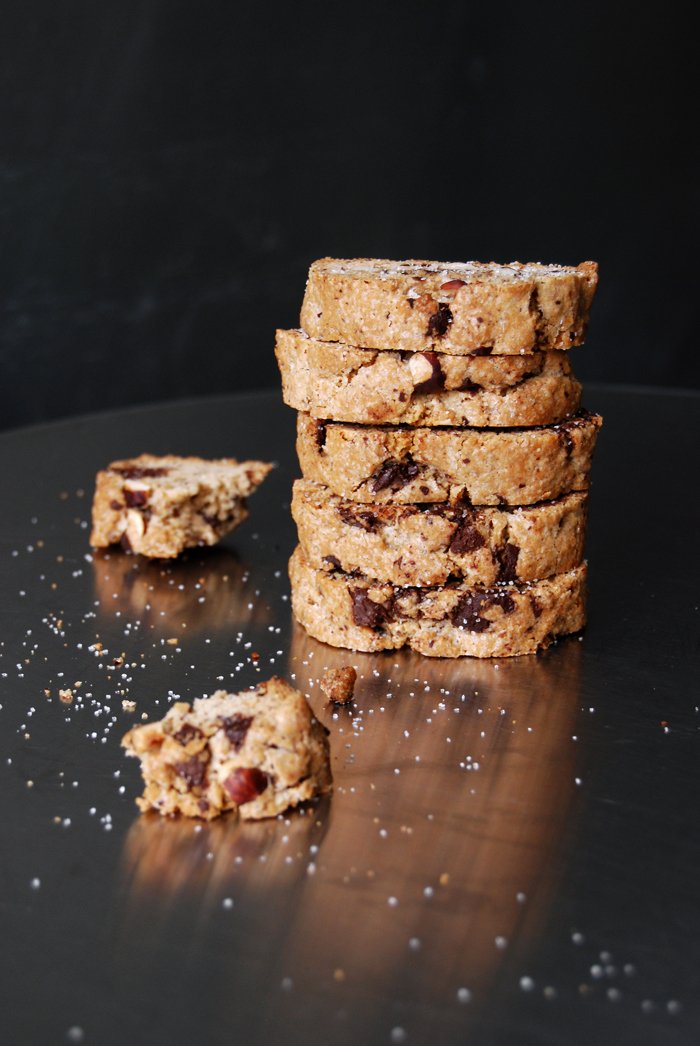
This much excitement asked for a kicking taste experience to feel that I'm actually not dreaming: crunchy biscotti, refined with espresso butter, spices, dark chocolate and hazelnuts. These little treats are so good with a cup of tea or a tiny black espresso, they are definitely for adults who need a moment of intense savouring, bittersweet and full of flavour!
You can read the first announcement of my cookbook on Eater here!
Espresso Butter Chocolate Biscotti
For about 45 biscotti you need
butter, melted, 100g / 3.5oz
instant espresso powder 2 teaspoons
plain flour 400g / 14oz
baking powder 2 teaspoons
granulated sugar 210g / 7 1/2oz
salt 1/4 teaspoon
five-spice powder (fennel seeds, star-anise, cloves, cinnamon, Sichuan pepper) 2 teaspoons
cardamom 1/4 teaspoon
organic eggs 3
bittersweet chocolate, roughly chopped, 120g / 4 1/4oz
hazelnuts, roughly chopped, 50g / 1 3/4oz
Set your oven to 180°C / 355°F (fan-assisted oven) and line a baking sheet with parchment paper.
Whisk the espresso powder into the warm, melted butter and let it cool for a few minutes.
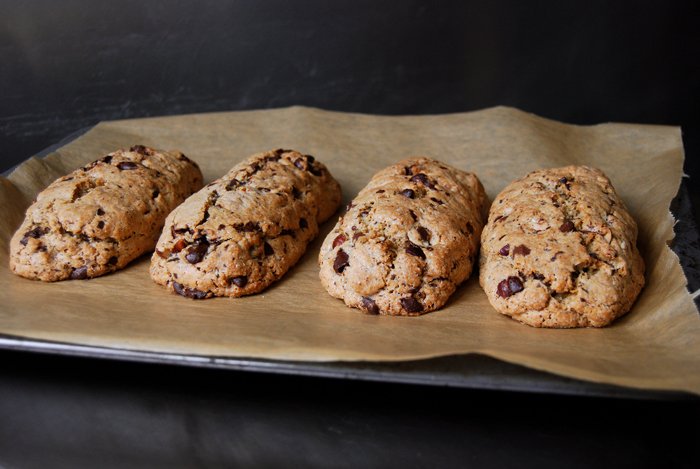
Combine the flour, baking powder, sugar, salt and spices. In a large bowl, whisk the eggs until creamy and mix in the espresso butter. Add the dry mixture and mix with the dough hooks of your mixer until just combined. Stir in the chocolate and nuts, form a ball and divide into four parts. Form each into a long bread shape (around 5cm / 2″ wide) and place on the baking sheet, bake for 25 minutes. Take them out and let them cool for about 20 minutes.
Turn the oven down to 170°C / 340°F.
For the second round, cut each loaf gently into 1 1/2cm / 1/2″ slices and lay the biscotti flat on the baking sheet, sprinkle each one with a little sugar. Bake for 6 minutes, turn them over and sprinkle the other side with sugar. Bake them for another 6 minutes or until golden brown, put them on a wire rack and let them cool. You can keep the biscotti in an airtight container for days.
meet in your kitchen | Hemsley + Hemsley's Raw Avocado Lime Cheesecake
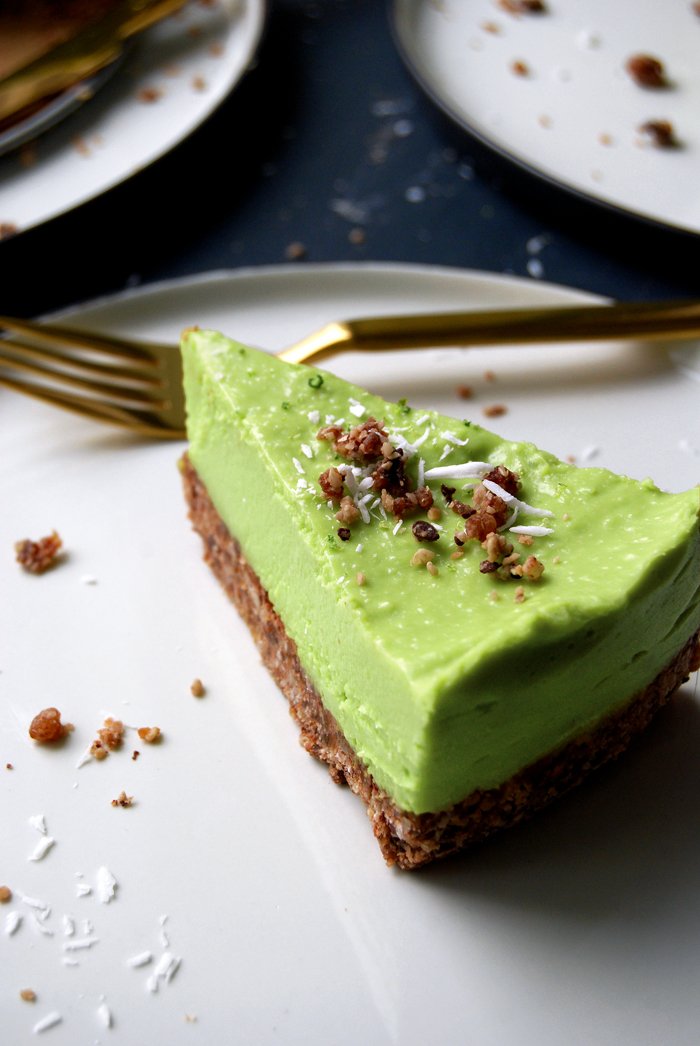
These two ladies are a true force of nature! If you ever have the chance to be in a room together with the charmingly gorgeous Jasmine and Melissa Hemsley, prepare yourself for a wave of energy. I met the two sisters at one of their delicious workshops at The Store Kitchen at Soho House in Berlin and I was equally impressed by their natural beauty and their skills in the kitchen. With infectious smiles and their experienced hands at the chopping block, they prepared one scrumptious treat after the other: smoothies, salads, courgetti with bolognese (the sisters' famous zucchini spaghetti) and a divine raw avocado cheesecake dessert. I sat, listened and savoured!
The Hemsley sisters started their careers in different fields before they took over the food world with their concept of no gluten, no grains and no sugar but with lots of taste and pleasure. While Jasmine worked as a model for over 15 years her younger sister Melissa traveled the world as a fashion consultant. Due to their busy lifestyles both women had a strong interest in a diet that would do their bodies good rather than stressing them even more. Their holistic concept convinced many food lovers, it started off with friends who asked for consultancy and cooking classes before the sister's blog and family business Hemsley + Hemsley was born in 2010. As contributors for Vogue UK and The Guardian, the two recipe developers, cooks and food consultants also became responsible for the catering of several celebrities. Nothing could stop them anymore, their popularity grew rapidly. Their first cookbook, The Art of Eating Well published in fall 2014, is a bestseller packed with lots of inspiring recipes and we chose one of them to share with you: the addictive Avocado Lime Cheesecake, raw, vegan and unbelievably delicious!
The pictures of the Hemsley sisters and the avocado dessert in glasses (served at Soho House Berlin) are by Nick Hopper.
Avocado Lime Cheesecake
Serves 12
For the base
pecans (or sunflower seeds) 125g /4 1/2oz
desiccated coconut 45g / 1 1/2oz
cacao nibs 70g / 2 1/2oz
pitted dates (approx. 32) 185g / 6 1/2oz
coconut oil, melted and at room temperature, 3 tablespoons
For the filling
avocado flesh (from approx. 5 medium-large avocados) 560g / 1 pound 2 1/2oz
lime juice (roughly 8 to 10 limes) 200ml / 7fl oz (I used 100ml / 3 1/2fl oz)
coconut oil, melted and at room temperature, 175ml / 6fl oz
lime zest 1 tsp
honey 190g / 6 3/4oz (I used 100g / 3 1/2oz)
Preheat the oven to 150°C/300°F/gas mark 2.
Place the pecans and desiccated coconut on a baking-tray lined with baking-paper. Place in the oven for seven to eight minutes, until toasted. Transfer the pecans to a food processor and add the rest of the base ingredients. Blend until the mixture is crumbly (don't let it go completely smooth) and holds together when pinched.
Line the base and sides of an 18cm (7") ( mine was 20cm / 8") round cake tin with baking-paper and tip in the base mixture. Press this down firmly and evenly with the back of a spoon, ensuring it is neat and flat where it meets the tin. Transfer the tin to the fridge while you prepare the filling.
Place all of the ingredients for the filling into the food processor and blend until the mixture is completely smooth and silky. Check for taste – add more lime juice, zest or honey according to preference, but it's best to keep this deliciously tangy. Remove the cake tin from the fridge and pour the filling over the base. Cover the tin, using a plate or cling film, and return it to the fridge for a few hours or overnight.
To serve, run a knife between the tin and the cake and carefully push the base up from the bottom. Transfer to a plate and serve immediately.
Before you started your family business Hemsley + Hemsley in 2010, you worked as a model and as a fashion/ brand manager. How did this transition into the food business come about? What moved you to make this step?
Jasmine: Yes, I was working full-time as a model from the age of 19. I was fascinated by the many different ideas surrounding health and nutrition, from paleo to low-fat, juice cleansing and many other ideologies, and began to develop and grow the Hemsley + Hemsley way of eating through research, study and self-practice whilst sharing tips and tricks with friends and family. Mel, who worked as a footwear brand manager and later in marketing and promotion for gastropubs and bars, caught the cooking bug and helped spread the word.
Melissa: We didn’t intentionally ‘launch’ the business - it came about organically. As people reached out to us for help with their digestion and relationship with food, we suddenly found ourselves working as wellness coaches and private chefs. Providing a bespoke service for these clients, we’d clear out their cupboards, fill up their fridges and freezers and show them how to cook our recipes. The results where so positive, they felt better - happier, healthier and more energized. Back then we didn’t have a name, so our clients called us their ‘food fairies’ and from the first week we had a waiting list as everybody recommended us to their friends, families and colleagues.
You seem to complement each others strengths perfectly. What are the advantages of working so closely with your sister? What are your roles, how do you deal with disagreements between the two of you when it comes to your business?
Jasmine: We always said it would be great to have a family business, making the food we all want to eat, food that keeps us happy and energised and be able to share it with everybody. The business has evolved naturally and we now work in areas that we love the most. When it comes to recipes, my sweet tooth means I usually mastermind the puddings and desserts, while Mel is the queen of knock-out curries and one pot dishes. My partner Nick is the third wheel to Hemsley + Hemsley - the man behind the scenes taking all the photos and running the back end of the business.
Melissa: As with all small businesses, you have to roll up your sleeves and get involved. Luckily everyday is different at H+H - cooking, meetings, recipe developments, lots of room for creativity and also plenty of time to work alone and remotely from laptops so we aren’t on each others space the whole time. And when it comes back to just being family we find it remarkably easy to switch off!
Who is your biggest inspiration in the kitchen? What are your culinary roots?
Jasmine: We’ve both always loved good home-cooked food from early on thanks to our Filipina mum being wonderful and inspiring in the kitchen. She would make use of everything we had - definitely where our frugal streak comes from - and each meal was made with great care and attention.
Melissa: Growing up, the more we tuned into how our bodies were really feeling, the more we realised the relationship between food and good health. Being the youngest I lucked out as mum and Jasmine used to do all the cooking and all I had to do was lay the table. As I got older I realised that it was so hard to eat nourishing foods without truly taking charge of it yourself. I realised that if I wanted to eat the same good food I’d have to start putting into practise what I’d absorbed over the years of being around mum, Jaz and all our aunties!
You're big fans of bone broth, how did this start and why does it have such an important role in your food concept?
Bone broth will always be at the heart of our philosophy and intrinsic to everything we do. We love it because it’s a champion all rounder, packed with protein, vitamins, minerals, collagen and keratin - all the building blocks for healthy digestion and glowing skin. Easy to make, frugal and tasty, this ‘liquid gold’ is supremely versatile and a must in anyone's recipe repertoire! Wellness begins from within and good digestion is key - bone broth is an easy to digest source of protein for very little money. At home, we always have broth on the go or a batch in the freezer. You can throw any leftovers in like shredded chicken, roast veggies, yesterday’s salad and swirl through some pesto or miso for a quick soup. We also use it to steam up some quinoa, as the base for sauces, soups, stews and to simply drink it warm from a mug.
How did you develop your holistic food concept, did you work together with food/ health consultants or did you follow your own experiences?
We’ve been developing and growing the Hemsley + Hemsley way of eating for almost ten years through research, study and self-practice. We really tuned in and focused on what made us feel good despite whatever was going on in the media about what you should and shouldn’t be eating. Our philosophy and nutritional ideals take you back to basics with a focus on provenance and digestion. People love our style of cooking and are always intrigued as to how food this tasty could possibly be good for you.
How do you develop new recipes?
We are constantly inspired by our travels when experiencing new cuisines as well as by our readers and client’s who often request Hemsley + Hemsley reworked versions of their favourite foods.
What was the first dish you cooked on your own, what is your first cooking memory?
Jasmine: My mum would make a big soup instead of a Sunday roast, using up all the leftovers from the fridge. I started off cooking one-pot dishes and they are still a Hemsley + Hemsley staple now - a lot of our recipes are simple, quick and frugal dishes which begin with a base of homemade bone broth and can be adapted and added to in order to make use of leftovers.
Melissa: I remember making the perfect creamy scrambled eggs with my mum...lots of butter and a slow-cook.
What are your favourite places to buy and enjoy food in London?
Jasmine: We’ve just discovered Sea Containers (Seamus Mullen) on the Southbank which is stunningly beautiful and the food is incredible with views of the Thames. While we’re over that way, we love Borough Market for fresh produce and The Ginger Pig for delicious, organic meat.
Melissa: For eating out I love Brunswick House in Vauxhall, Elliots in Borough Market, Rochelle’s Canteen in Shoreditch (it’s hidden from the street in a converted school) and Paradise in Kensal Rise (where I used to work).
You shared your Avocado Lime Cheesecake recipe on eat in my kitchen, how did you develop this delicious vegan cheesecake?
People always tell us that our recipes don’t taste healthy and we pride ourselves on coming up with upgraded versions of takeaways, comfort foods and the nostalgia-inducing dishes that our clients, friends, families and followers love best from their childhoods. Keeping texture and flavour in mind, we made clever use of whole foods such as skin-boosting avocado and zesty lime to reinvent this classic and give it the Hemsley + Hemsley stamp of approval. The Avocado Lime Cheesecake is a raw, New York-style cheesecake packed full of goodness. The smooth creamy lime sits atop a nutty, chocolate base with a hint of coconut. It’s tasty, filling and good for you!
If you could choose one person to cook a meal for you, who and what would it be?
Jasmine: Keith Floyd, cooking up a Bouillabaisse in the South of France and enjoying it with plenty of wine in the sunshine. I bet it’d be an afternoon to remember!
Melissa: Rather than have her cook for me, I’d want to cook for the legendary Madhur Jaffrey, probably something like our Chicken Curry and Cauliflower Rice so that she could critique it!
You're going to have ten friends over for a spontaneous dinner, what will be on the table?
Don’t be fooled, these 3 course menus are so easy! And people always tell us they cant believe that it’s healthy food when it tastes that good:
Jasmine: Starter: Baked Chicken Liver Mousse and Carrot and Flax Crackers Main Course: Fish Pie with Celeriac Mash and a side of Garlic Lemon Green Beans Dessert: Instant Berry and Coconut Ice Cream
Melissa: Starter: Cucumber Maki Crab Rolls Main Course: Courgette and Aubergine Curry and a side of Cauliflower Rice Dessert: Pistachio, Fig and Goat’s Cheese Trifle
What was your childhood's culinary favourite and what is it now?
Jasmine: I’ve always had a sweet tooth so it would have to be chocolate brownies. I almost cried the first day I made our Black Bean Brownies and they came out perfectly - fudgy, rich and delicious. They’re now one of our most popular sweet treats from our book The Art of Eating Well; and best of all, they’re free from any processed nasties!
Melissa: Spaghetti Bolognese was one of my favourites growing up and it still is now, except we call it Beef Ragu with Courgetti. Made with the Hemsley Spiralizer, we enjoy the sauce atop a bed of spiralized courgette which we call courgetti and fill the sauce with extra grated carrot and courgette as well as highly nutritious chicken livers if we have any. It’s hearty, warming comfort food that’s perfect with a glass of red wine.
Do you prefer to cook on your own or together with others?
Jasmine: I love to cook with family and friends, it’s always a great way to catch-up and I love seeing how other people do things in the kitchen.
Melissa: I like to have the music on and cook by myself sometimes, as it’s one of the ways I love to unwind, just in the kitchen at home. Saying that, I also love getting together with friends over a glass of wine and have us all chopping away in the kitchen together.
Which meals do you prefer, improvised or planned?
Jasmine: I’m the queen of leftovers so I love getting experimental - it’s a great way to discover new recipes and more often than not you’ll be pleasantly surprised with what you can rustle up.
Melissa: The spontaneous ones that come out of leftovers in the fridge, they’re always the best!
Which meal would you never cook again?
Jasmine: Lactose fermented herring - yes I tried to make fermented fish myself! It’s not something I will be repeating anytime soon, I think I’ll stick to sauerkraut, kimchi and other fermented veg to get my probiotic fix!
Melissa: I can’t think of any one but have definitely recipe tested recipes before that ended up being really complicated so I wouldn’t bother with those again, no matter how tasty. We spend a lot of time experimenting while recipe developing to come up with meals that are simple, delicious and nutritious, so if it’s complicated, it doesn’t make the cut.
Thank you Jasmine and Melissa!
Sardine and Lemon Sandwich with Ramp Pesto and Cherry Tomatoes
A few months ago, my mother went to one of her favourite spots in France, the Belle-Île-en Mer, a picturesque island off the coast of Brittany. It wasn't her first visit, she's been to this tiny rock in the Atlantic Ocean countless times, and whenever I talk to her while she's there, she sounds like she just walked out of a spa. This island must be magic and I've wanted to discover it for myself for ages. I've tasted it though, at least some of it's produce. My mama knows my weak spot for all the culinary delights from this country, solid and liquid, so she gladly treats her ever hungry daughter to her new and old discoveries whenever she comes back. Last time she gave me a few beautiful tins of preserved sardines, the design is a bit old-fashioned, I love that, although it's just a fish tin, it's a pleasure to see it in the pantry. Once she gave me a large can of tinned fish soup from the same island, I liked it so much that it became my container for the kitchen brush and sponge!
The first time I tasted the preserved sardines refined with thin slices of lemon, it must have been early last winter, I got absolutely hooked on this oily treat. I've never been a big fan of preserved fish until that life changing moment, literarily, as since that day, I always eat my weekly Sunday pizza with these sardines, week after week. But today I thought they deserve a little variation. I had to change to another brand as our stock has been used up, it's not as good but still delicious, and I decided that the fish would make a scrumptious appearance on a juicy sandwich with ramp pesto and preserved lemons. It's that time of year again, I can't leave the grocery store without a bunch of ramp, due to their short season but mainly because we're almost addicted to it. So, another ramp pesto, another tin of sardines and a new sandwich, the kind you would eat at the sea, wrapped in paper, your fingers dripping of oil, and the wonderful taste of garlicky green, sour lemon and rich sardines in your mouth, fantastic!
This sandwich has been featured by Food52!
Sardine and Lemon Sandwich with Ramp Pesto and Cherry Tomatoes
For 2 sandwiches you need
rustic white buns, cut in half, 2
quality preserved sardines in olive oil, boned and cut into fillets, 3 fish (about 70g / 2 1/2oz)
preserved lemon, cut into thin slices, 1/8 (alternatively, you could use the roasted lemon peel from this recipe)
cherry tomatoes, quartered, 2
rucola, a small handful
For the pesto (this will be a little more than you'll need but you can eat the pesto with pasta or as a spread on toasted dark bread)
bunch of ramp, the stalks cut off, 1 (around 45g / 1 1/2oz)
Parmesan 25g / 1oz
olive oil 55ml /2fl oz
salt 1/4 teaspoon
Mix the ingredients for the pesto in a blender until smooth and season to taste.
Brush the bottom half of the buns with a little oil from the fish tin (just if it's quality olive oil), cover with rucola and lay 3 single fillets of the sardines on top. Garnish with the tomatoes and sprinkle with pesto and lemon slices.


