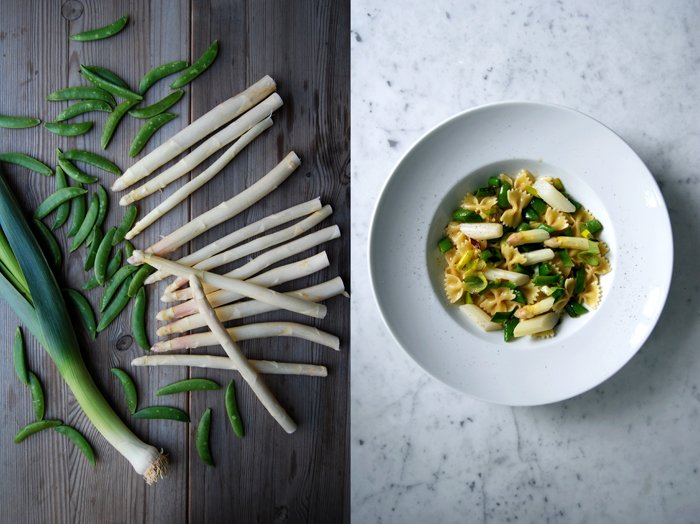
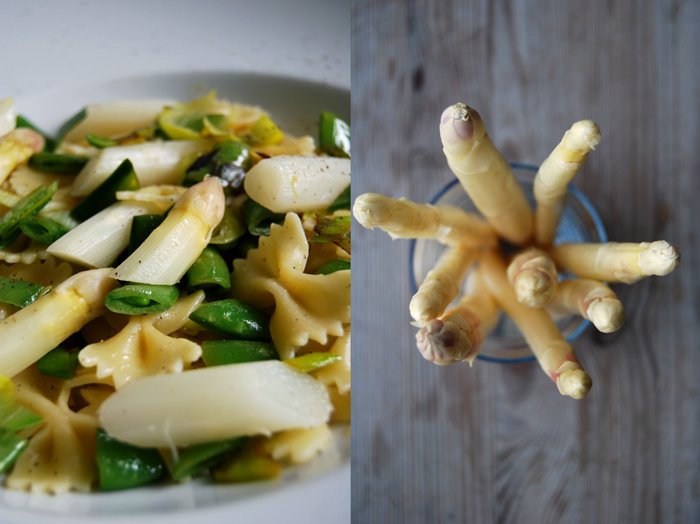
Farfalle with Asparagus, Peas and Leek in Mustard Sauce
This is one of my oldest, most beloved and often cooked spring/ summer recipes. It's been with me for so many years and I still savour it as I did the first time I cooked it. It works both warm as a comfy pasta dinner with a glass of rosé wine, the windows wide open and the flowery smell of June in the air but also as a cold, summery picnic salad, enjoyed outside in the fields under the rustling leaves of a swaying tree.
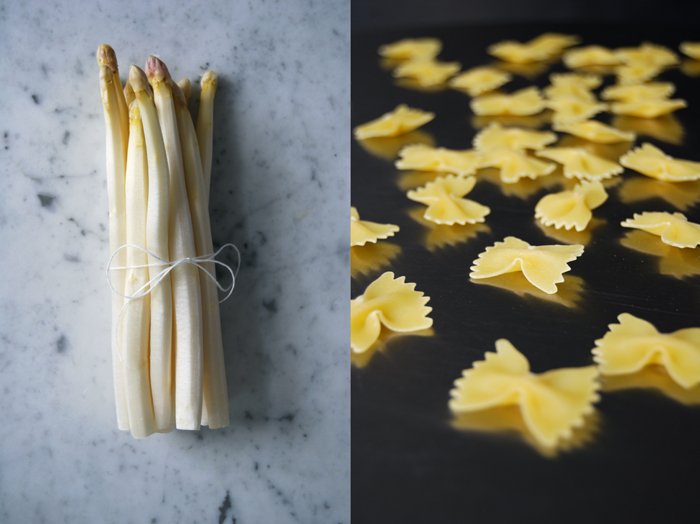
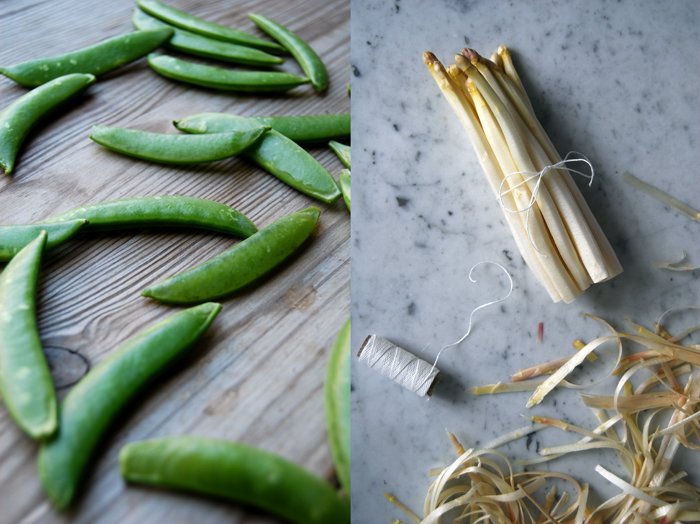
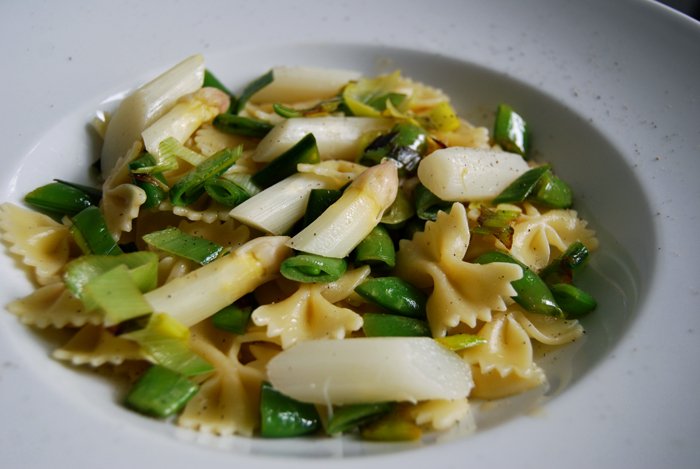
I'm talking about the wonderful combination of the fine flavours of white asparagus together with sweet peas in their crunchy pods, leek and a light sauce made with spicy Dijon mustard. All this on top of a big bowl of pretty Farfalle pasta, little bow-ties of perfect size and shape to catch all these nice vegetables like a shovel!
This meal tastes fresh and light and is absolutely easy to prepare. You just need to cook the asparagus (green or white), sautée the young pea pods and leek (you could also blanch some peas), deglaze them with white wine or vermouth and mix everything together with the cooked pasta, some mustard and cooking liquid, salt and pepper - that's it!
Farfalle with Asparagus, Peas and Leek in Mustard Sauce
For 2 people you need
Farfalle pasta, 200g / 7 ounces
asparagus (white or green), peeled (if necessary), bottoms cut off, 500g / 1 pound
young peas in their pods, cut into bite sized pieces, 150g / 5.5 ounces
leek, cut into slices, 1/2
water used to cook the asparagus 150ml / 5 ounces
Dijon mustard 2 teaspoons plus more to taste
white wine or vermouth for deglazing
salt and pepper
olive oil for frying
Cook the pasta al dente in lots of salted water.
Cook the asparagus al dente in lots of salted water with a pinch of sugar and cut into bite sized pieces.
In a large heavy pan, heat a splash of olive oil and fry the leek for a few minutes until soft and golden, add the pea pods and fry for another 1-2 minutes. Deglaze with a splash of wine, add the pasta, mustard and water used to cook the asparagus. Season with salt and pepper, add the cooked asparagus, mix and serve on big plates.
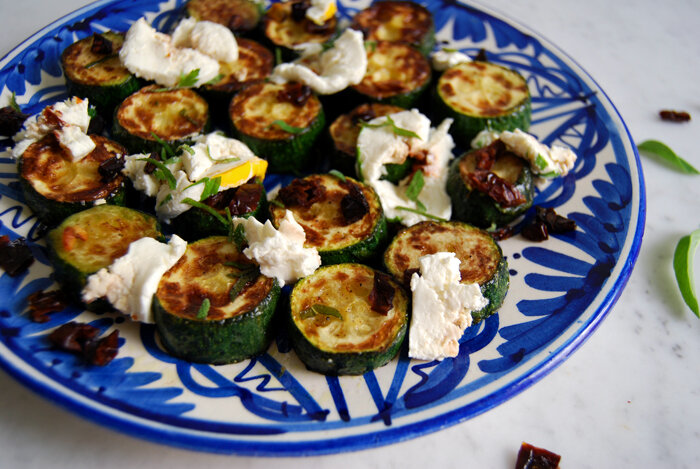
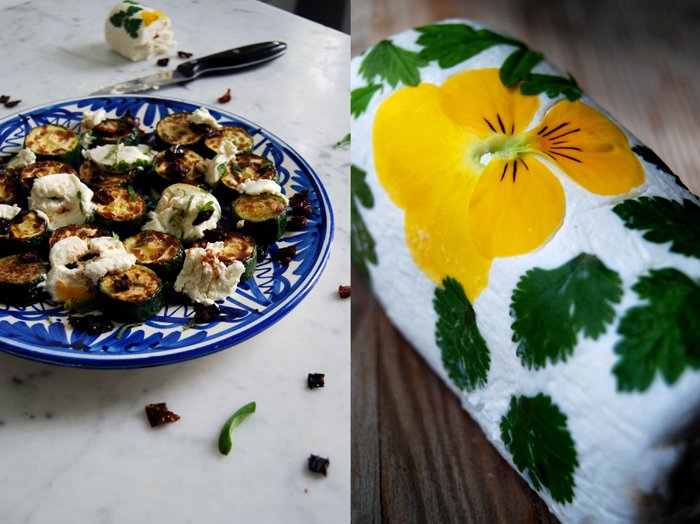
Juicy Zucchini Steaks with Dried Tomatoes, Sage and Chèvre

When I went to the market on Saturday I bought one of my favourite goat cheeses from a tiny stand run by a sweet lady who produces her own cheese. She just uses goat milk for her products and her display offers delicious soft chèvre rolls and creamy cheese balls coated in spices and herbs, with chili, herbes de provence, rosemary and basil. These soft cheeses are her absolute speciality, mild and milky with a soft hint of goat milk.
I planned to buy a plain cheese roll but a beautiful white chèvre covered in parsley leaves and pansy flowers caught my attention. The lady explained to me that it's filled with dried tomatoes, I was currious and forgot about my plain cheese immediately. I tried it, liked it and bought it! My plans for dinner involved golden sautéed zucchini cut into thick round steaks, juicy inside but far away from soft and soggy, topped with fresh goat cheese and sage. My find at the market inspired me to add some dried tomatoes, it was a good choice, the Mediterranean flavours were great together with the mild goat milk!
Zucchini Steaks with Dried Tomatoes, Sage and Chèvre
For 2 people you need
zucchini, cut into 1,5cm / 1/2" steaks, 300g / 10.5 ounces
garlic, thinly sliced, 1 clove
chèvre/ soft goat cheese, thickly sliced, 70g / 2.5 ounces
dried tomatoes, cooked in a little boiling water for 1 min, rinsed, dried and chopped, 1 1/2 -2
sage leaves, thinly sliced, 5
olive oil for frying
salt and pepper
In a large pan, heat a splash of olive oil together with the garlic and fry the zucchini on high-medium temperature for a few minutes until golden brown on each side. Add the cooked dried tomatoes and sage, season with salt and pepper and fry for 1 minute. On a plate, pile the zucchini steaks on top of each other and let them sit for 1 minute, that makes them a bit softer and juicy. Spread them on a big plate and place the chèvre on top of the warm zucchini and sprinkle with the dried tomatoes and sage from the pan.


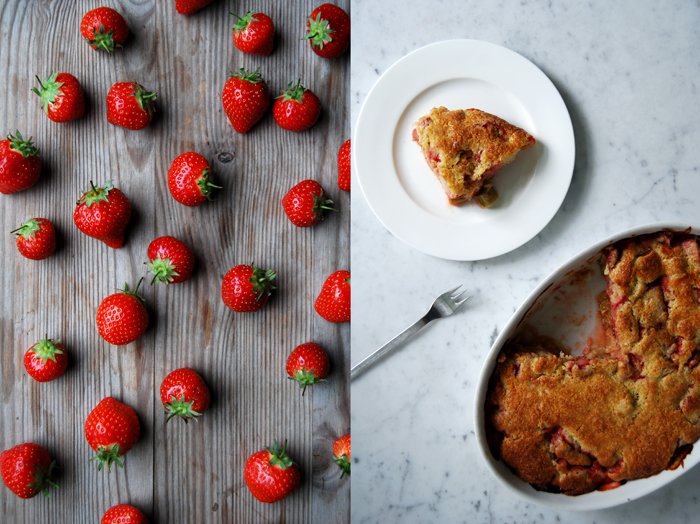
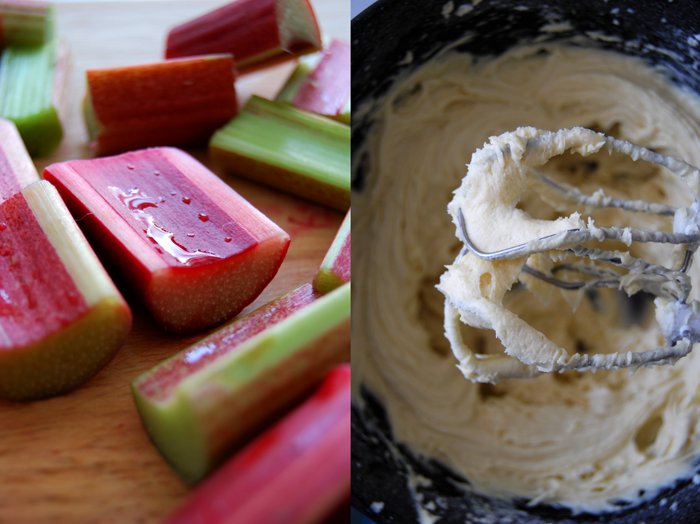
An Upside Down Cake with Rhubarb, Cinnamon and Strawberries

An upside down cake is the easiest and most convenient way to put juicy fruits into a quick cake. They just sit on the bottom, soften slowly in their juices and spread their aroma into the dough baking on top. The pastry can grow spongy with a thin crisp layer and the fruits turn into a thick compote. Juiciness where juiciness belongs! Technically the cake should be flipped upside down when it's done, I just skipped this part. I liked the rustic look of its golden top, like a pie that you scoop out of the pan with a spoon, and to be honest, the bottom doesn't look as pretty!
In the past few weeks I've been using lots of rhubarb in my recipes, I love its fresh, sour taste but its season is quickly coming to an end. No reason to be sad as I'm slowly changing over to what nature offers next, like strawberries! Much sweeter, yet no less versatile in the kitchen. My upside down cake combines the qualities of both fruits, sweet and and sour with a pinch of cinnamon. Not to forget the pastry, it is so good that the cake only lasted a few hours! While I was taking the photos my kitchen was filled with the sweet smell of cinnamon, fruit and fresh pastry, I could barely stop myself from taking the first bite!

Rhubarb and Strawberry Upside Down Cake
For an oval baking dish (around 25cm / 10") you need
plain flour 210g / 7.5 ounces
granulated sugar 150g / 5.5 ounces plus 6 tablespoons for the fruit
baking powder 1 1/2 teaspoons
a pinch of salt
butter, melted, 60g / 2 ounces
organic eggs 2
milk 100ml / 3.5 ounces
a pinch of fresh vanilla
rhubarb, sliced thickly, 650g / 1.5 pounds
strawberries, cut in half, 200g / 7 ounces
ground cinnamon 1 teaspoon
Set the oven to 190°C / 375°F.
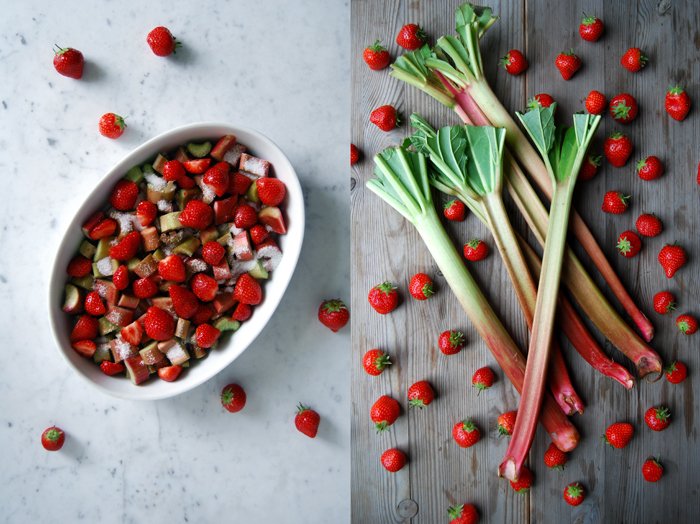
Spread the fruits in a baking dish and sprinkle with 6 tablespoons of sugar mixed with a teaspoon of cinnamon.
Combine the flour, sugar, baking powder and salt. In another bowl, mix the butter, eggs, milk and vanilla with a mixer and fold into the dry mixture, stir with a wooden spoon until you have a lumpy dough. Don't over mix! With a big spoon dollop the dough on top of the fruits and spread gently until roughly covered. Bake in the oven for 45 minutes or until golden brown. Check with a skewer, it should come out clean.

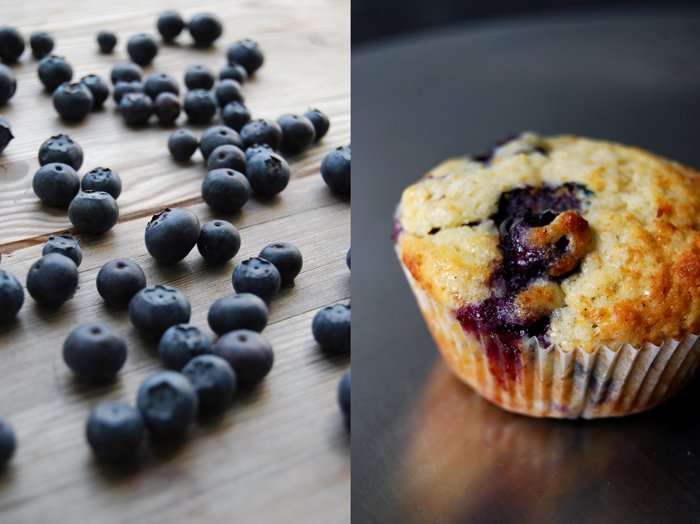
Fruity Blueberry Muffins
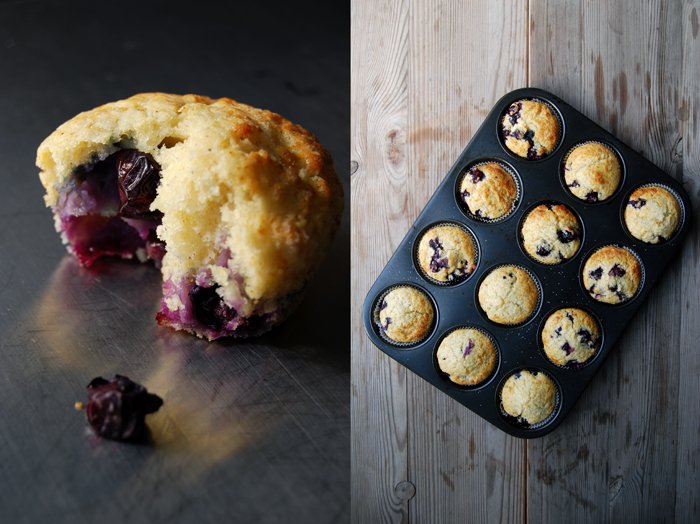
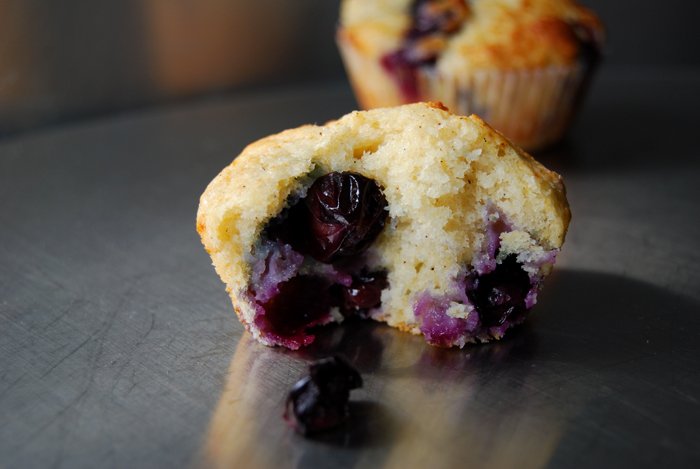
Muffins! Spongy, sugar coated and full of big, juicy blueberries that pop open in your mouth when you take the first bite, that's the perfect muffin to me! After my wintery blood orange marmalade muffin and my drunken Irish Coffee Muffin, the time was ripe for a fresh and fruity weekend muffin. I make the dough with buttermilk which gives them a light and fluffy texture, it's so light that you can empty half a tray without noticing!
You could also replace the blueberries with raspberries or strawberries which are at the peak of their season here at the moment. Peaches are nice too although I think it's still a bit early for them. I've spotted them at the markets already, from Italy mainly, but they don't look ripe and juicy yet, more pale and hard as a rock. I'd rather wait another month or two for a satisfying peach experience.
Frozen fruits work as well but keep in mind that they will soak the dough a bit more as they are a bit soggy when they have been defrosted. The muffins may need a little longer in the oven and won't give you the full berry aroma, so if possible, throw in the fresh ones!
Blueberry Muffins
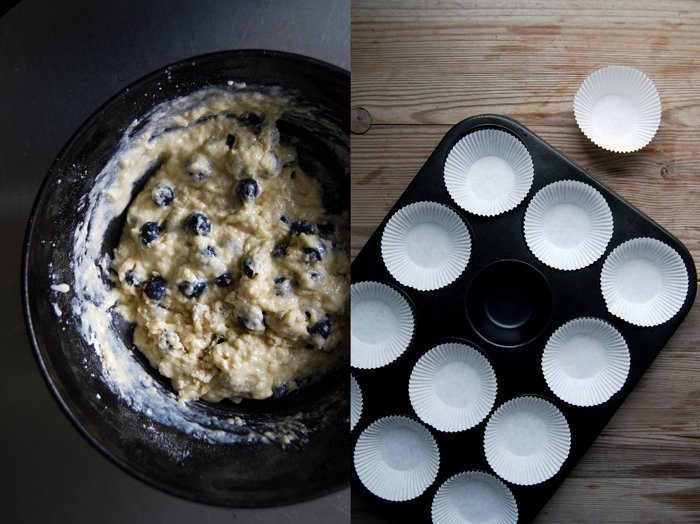
You need a muffin tray with 12 molds and paper baking cups.
plain flour 200g / 7 ounces
granulated sugar 70g / 2.5 ounces plus 1 teaspoon for the topping
baking powder 2 1/2 teaspoons
baking soda 1/2 teaspoon
a pinch of salt
buttermilk 190ml / 6.5 ounces
butter, melted, 90g / 3 ounces
organic egg 1
a pinch of fresh vanilla
blueberries 180g / 6.5 ounces
Set your oven to 200°C / 390°F.
Combine the dry ingredients in a large bowl (except the vanilla). Whisk the melted butter, buttermilk, vanilla and egg in another bowl. Pour the liquid mixture into the dry mixture, stir with a wooden spoon until you have a lumpy dough and gently fold in the blueberries. The more you mix it the more it will lose its light texture so don’t mix it too long.
Fill the muffin tray, sprinkle some sugar on top and bake for 14 minutes or until golden.


Frankfurt Green Sauce - 7 Herbs and Spring Potatoes
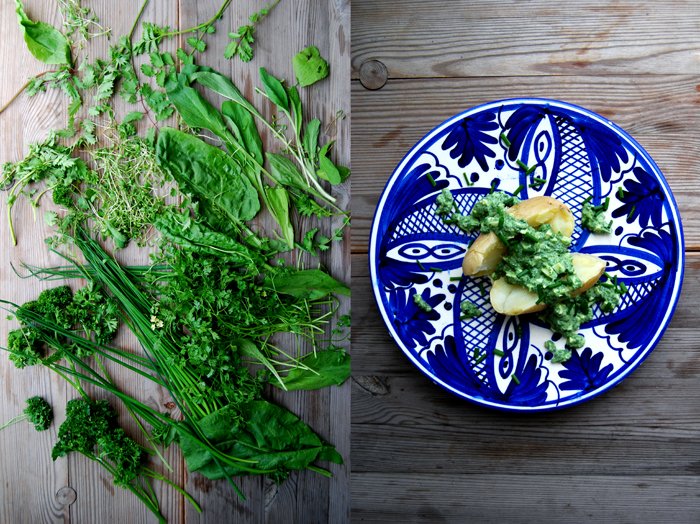
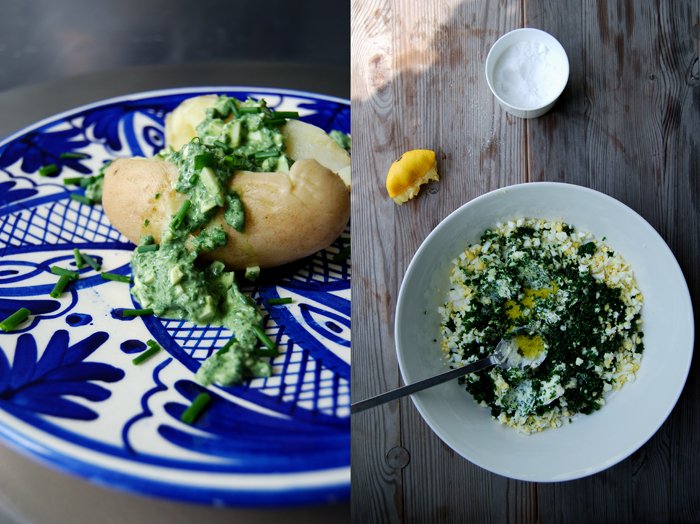
Sorrel, borage, chervil, burnet, parsley, chives and garden cress, these are the 7 herbs which make up the traditional Frankfurt Green Sauce. Similar to the Italian Salsa Verde or the French Sauce Verte, which are also mainly made of herbs, the famous German version is made of greens growing in the Frankfurt area. Legend has it that the origin of the green herbal sauce is in the Orient and it was brought to Europe by the Romans more than 2000 years ago, enough time for each region to create their own, unique recipes. Apart from the right selection of herbs, there isn't "one" recipe for this sauce from Frankfurt. They all vary, some add heavy cream, sour cream, yoghurt or mayonnaise, some are made with onions, garlic or mustard, but most involve a hard boiled egg.
I developed my own recipe a few years ago when I used to live close to the city of the sauce's origin. To me, the sauce needs 2 crumbled hard boiled eggs, sour cream, olive oil, lemon juice, a little heavy cream for some sweetness, white Balsamico vinegar and salt and pepper, but the focus is definitely on the herbs, you need a lot, 200g / 7 ounces in total!
Traditionally the cold sauce is eaten with boiled spring potatoes, some serve it with cold meat but I prefer to keep it simple and light, the sauce is so fragrant and aromatic that the mild potatoes fit just perfectly.

Frankfurt Green Sauce with Spring Potatoes
For 2-3 people you need
medium sized potatoes, boiled and peeled, 4-6
For the sauce
mixed herbs (sorrel, borage, chervil, burnet, parsley, chives and garden cress) 200g / 7 ounces
organic eggs, hardboiled, chopped finely, 2
sour cream 5 tablespoons
olive oil 2 tablespoons
freshly squeezed lemon juice 2 tablespoons
heavy cream 1 tablespoon
white balsamic vinegar 1 tablespoon
salt and pepper
Chop the herbs with a knife finely or mix in a blender. Put the herbs in a big bowl and add the eggs, sour cream, heavy cream, olive oil, lemon juice and vinegar and stir until combined. Season with salt and pepper to taste and serve on top of the potatoes.


Lemon-spiced Chicken Wings with Cumin, Harissa and Mint Yoghurt

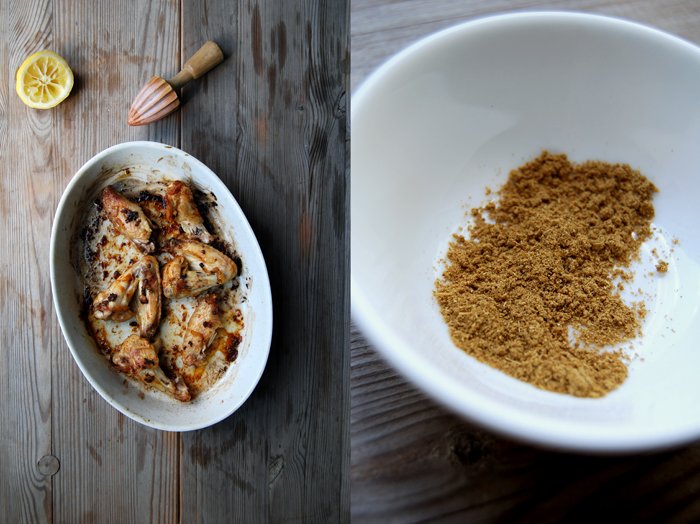
Chicken wings are often underestimated, unfortunately. Their tasty meat is packed in between the bones which keeps it juicy and due to the short roasting time it doesn't dry out. There isn't much meat on the wings which is an advantage to me as I prefer a small portion of meat especially when it's getting closer to summer and the temperatures rise. It's definitely enough for a spicy treat together with some aromatic cumin, harissa, lemon juice and a few slices of my Moroccan preserved lemons (which you could replace with lemon zest).
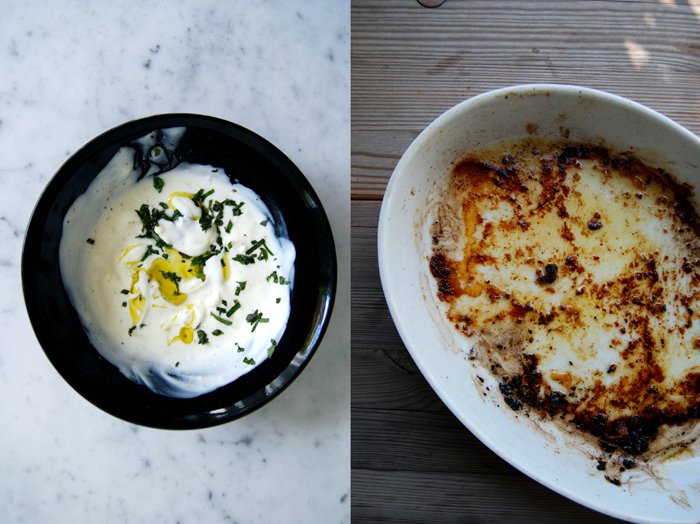
The spices and lemon made a delicious skin, golden and crisp after 20 minutes in the oven and packed with wonderful aromas. I like to eat the wings with my fingers, to feel their sticky juices and dip them in a refreshing sauce of yoghurt, sour cream, lemon and mint.
You could also throw them on the grill which would add some smoky flavours or take them out with you on a summery picnic. It's almost June and my mood calls for an early summer picnic with friends and lots of pots and plates of delicious food, so one dish is already sorted!

Lemon-spiced Chicken Wings with Cumin, Harissa and Mint Yoghurt
For 2 people as a main you need (we had half for lunch)
chicken wings 8
olive oil 4 tablespoons
freshly squeezed lemon juice 2 tablespoons
ground cumin 1 teaspoon
harissa 1 teaspoon
black peppercorns, crushed, 10
preserved lemon, sliced, 1/4 (or lemon zest 1 teaspoon)
coarse sea salt
For the yoghurt dip
yoghurt 4 tablespoons
sour cream 2 tablespoons
freshly squeezed lemon juice to taste
mint leaves, chopped, 10
salt and pepper
Set the oven to 210°C / 410°F top / bottom heat.
Whisk the olive oil with the lemon juice, cumin, harissa and black pepper and stir in the slices of the preserved lemon or the lemon zest. Place the chicken wings in a baking dish or on a baking sheet and coat with the spice oil. Sprinkle with salt and roast for 20 minutes or until golden and crisp.
Mix the yoghurt, sour cream, lemon juice, mint, salt and pepper and whisk until creamy.
We ate this with a simple green salad on the side and some baguette to dip into the juices. The French bread was also great with the yoghurt dip although Naan bread would have been more authentic.


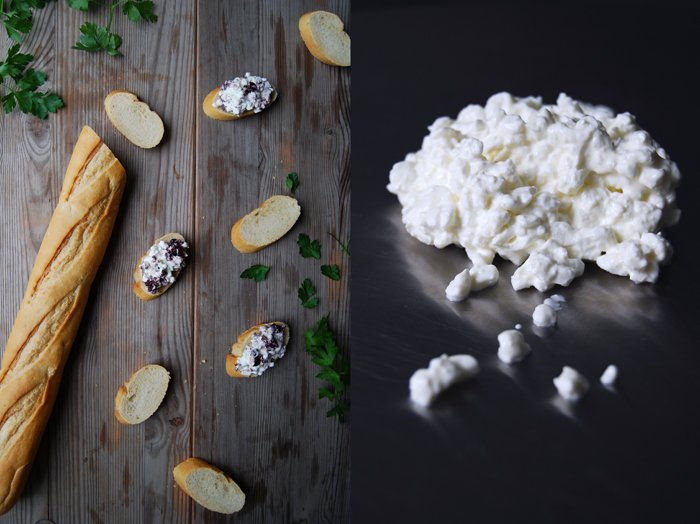
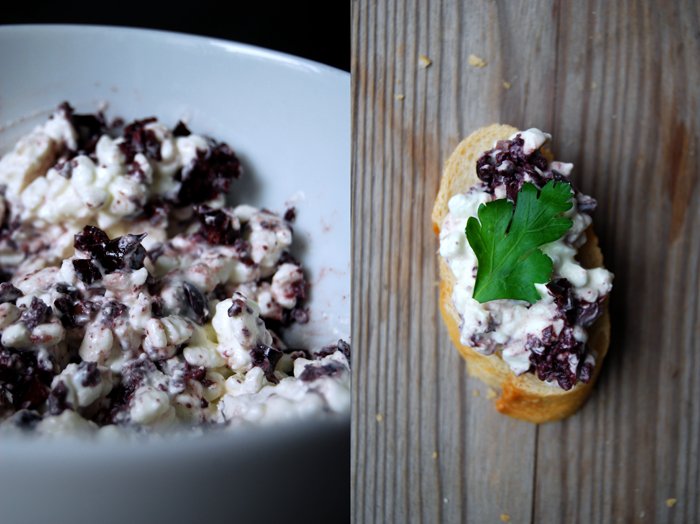
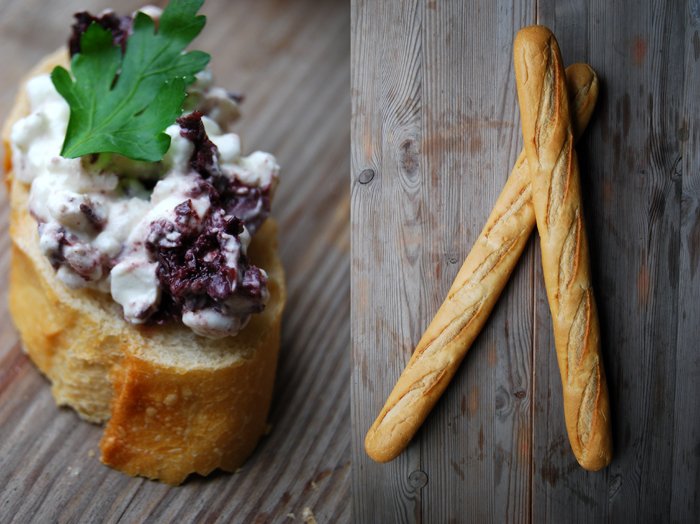
Kalamata Olive and Cottage Cheese Sandwich
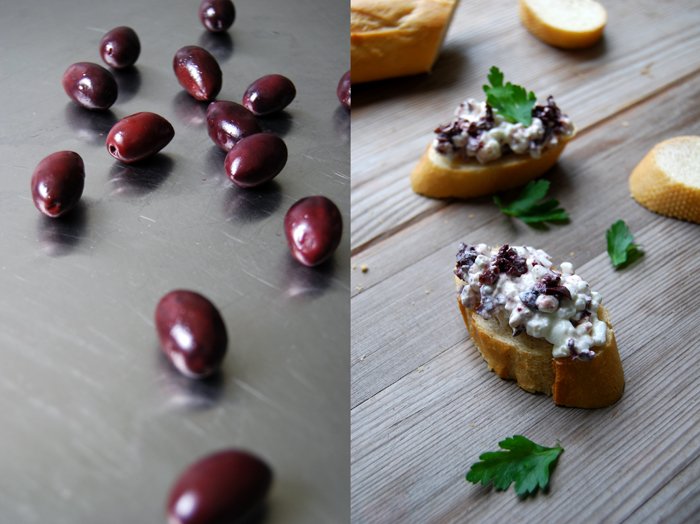
Creamy cottage cheese mixed with dark purple Kalamata olives, garlic, herbs, Balsamico vinegar, that's what I had in mind when I started my sandwich preparations. My plan changed abruptly as soon as I stirred the chopped olives into the crumbly cottage cheese, I stopped turning the spoon before the oily black mixture blended into the creamy white, the contrast looked so beautiful! I tried some of this puristic spread and I was so impressed by its intensity and simplicity that I dropped everything. This combination is too good, Kalamata olives (to me, they are the best black olives in the world!) plus cottage cheese, no distraction, no further addition, just a few slices of fresh baguette and one parsley leaf on top, that's all it needs! This is the quickest and most simple recipe I've made so far for my Sandwich Wednesday and it's already one of my favourite sandwiches!
If you're looking for a quick snack, a picnic treat, an easy dinner or just a nibble with some crackers, pull out some cottage cheese (200g / 7 ounces) and mix briefly with 50g / 2 ounces (or more) of chopped Kalamata olives. You could use other black olives as well but the large Greek fruits from the Peloponnese region have a wonderful aroma, exactly what you need if you mix only two ingredients. I didn't want to over mix it, I only stirred it twice before I spread the cheese on tiny slices of baguette. The green fleshy parsley leaves on top finished it off and added a fresh taste to this composition. I loved it so much that I ate one slice after the other, it was just enough for 2!


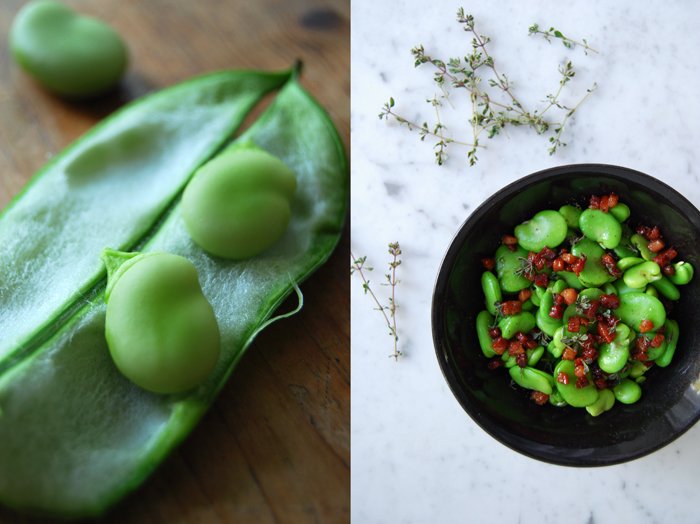
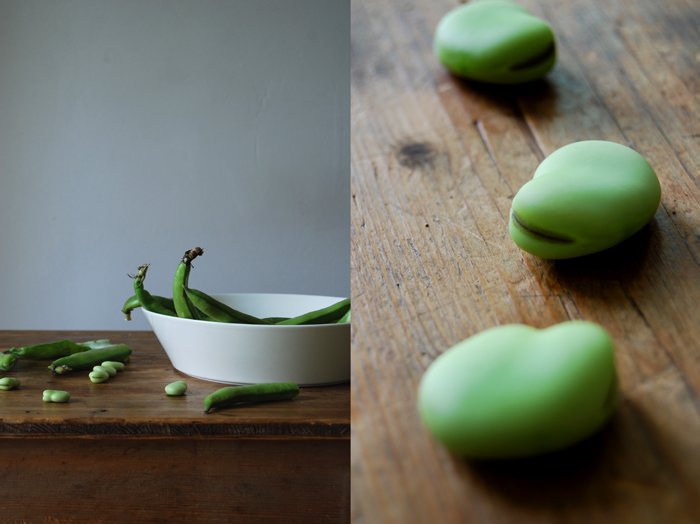
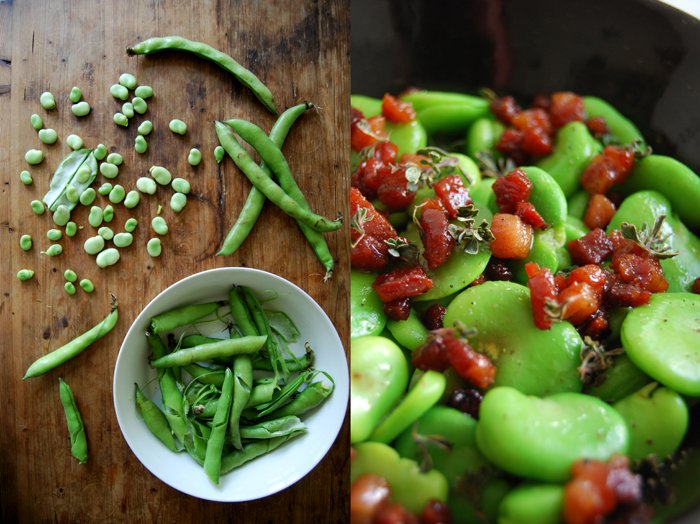
Bean and Bacon Salad with White Balsamico and Lemon Thyme
There is something really satisfying about deglazing tiny, crunchy cubes of bacon with sweet Balsamico vinegar. Be it the white or the dark one, both coming from Modena, this vinegar merges with the oily bacon juices to a thick, sweet and sour syrup. It is very concentrated, a great dressing to glaze hearty and crunchy salads like beans and cabbage. A few spoons enrich the vegetables with the whole range of the vinegar's aroma together with the meat's smoky saltiness.
I like to use this dressing for my traditional Bavarian cabbage salad as it brings out a sweet smoothness in the strong cabbage. Today it refines my fava beans, crunchy and green, cooked in salted water for around 6 minutes until they were al dente and rinsed with cold water. I peeled the beans out of their transparent shells for this salad and added some lemon thyme, salt and pepper.
As always, there is lots of peeling involved when there are fava beans on the table, I had 130g / 4.5 ounces of peeled beans after I started with 700g / 1.5 pounds of the fleshy pods. It was enough for the 2 of us as a side dish. I fried 30g / 1 ounce of bacon cut into tiny cubes in a little olive oil for a few minutes until they were golden brown and crisp before I deglazed it with 25ml / 1 ounces of white Balamico vinegar. I scraped the bits and pieces off the bottom of the pan and poured the syrup and bacon over the beans immediately. It just needed a little salt as the bacon added quite a bit of saltiness to it, some ground black pepper and a few fresh leaves of my lemon thyme on top and the salad was done!

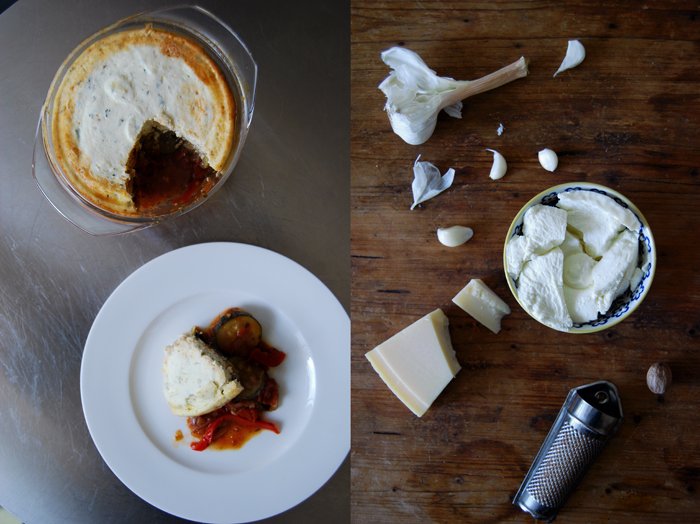
Zucchini, Bell Pepper and Aubergine Moussaka with Lemon Ricotta
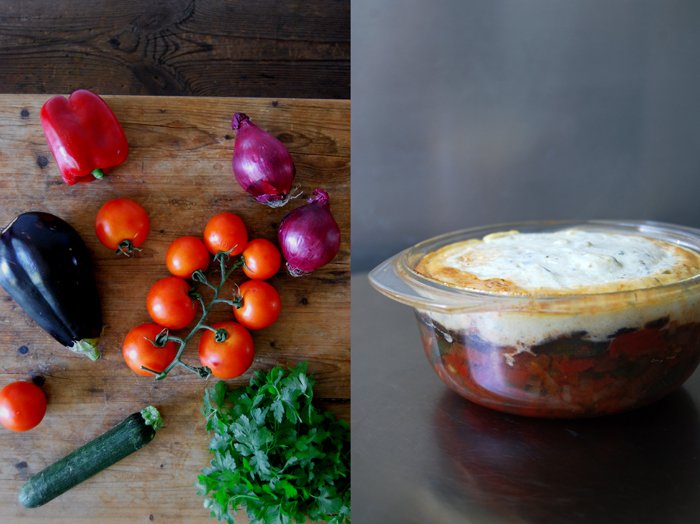
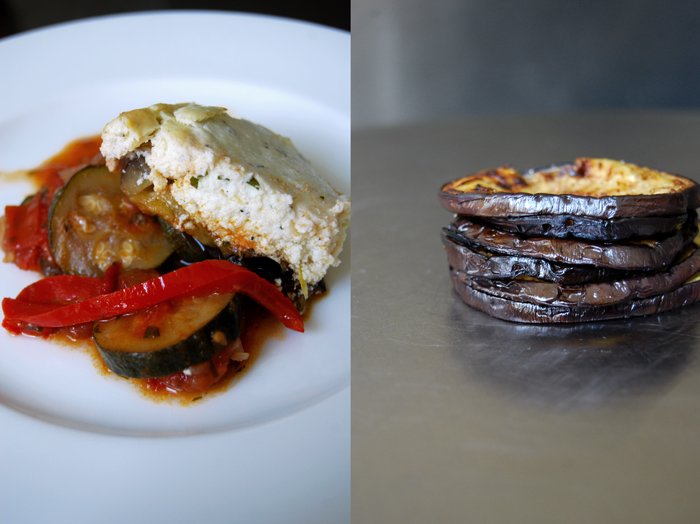
My Moussaka, truth be told, is a fruity ratatouille baked with a fluffy lemon ricotta soufflé on top. The traditional Greek Moussaka is made with a Béchamel sauce which I'm not too fond of. I like this creamy sauce in my lasagna or cannelloni but that's it. The ricotta tastes much lighter, enhanced with lemon zest, nutmeg, parmesan and fresh basil, it gives this dish more of a summer feeling. Contrary to the Greek version, I kept mine vegetarian, there's no minced meat involved, just zucchini, bell pepper, tomatoes, red onions, lots of parsley and a velvety layer of fried aubergine slices in between the vegetables and the cheese. It stops the ricotta from running into the juicy ratatouille.
When I cook a ratatouille I always make a big batch. This moussaka is perfect as a second day dish for ratatouille leftovers. Topped with the ricotta it just has to bake in the oven for half an hour, great if you have friend's over for dinner and not much time for preparations! I baked it in small casserole dishes closed with a lid so that each of us could have our own little pot.
Zucchini, Bell Pepper and Aubergine Moussaka with Lemon Ricotta
I bake the Moussaka in two 12,5cm / 5" casserole dishes with lids, you could use a big one instead but you may have to bake it a bit longer for the ricotta to set.
For 2-3 people you need
small aubergine, sliced into circles, 1
zucchini, sliced into circles, 1
red bell pepper, thinly sliced, 1
big red onion, quartered and thinly sliced, 1
big tomatoes, chopped, 4
garlic, thinly sliced, 3 cloves
parsley, chopped, 2 tablespoons
balsamic vinegar 2 tablespoons plus more to taste
olive oil for frying
salt and black pepper
For the topping
ricotta 260g / 9 ounces
organic eggs 2
Parmesan, grated, 30g / 1 ounce
small basil leaves, chopped, 30
lemon zest 1 teaspoon
lemon juice 1 teaspoon plus more to taste (I also added a little of the liquid of my Moroccan preserved lemons)
nutmeg, ground
salt and pepper
Spread the slices of aubergine on a baking dish and sprinkle with salt on both sides to pull some of its water out. Let it sit for around 15 minutes, rinse the slices and dry between kitchen roll paper. In a large heavy pan, heat a splash of olive oil and fry the aubergine for a few minutes on both sides on medium temperature until golden and soft, add a little more oil if necessary. Season with salt and pepper and set aside.
In a large pot, heat a splash of olive oil and fry the onion for a few minutes until golden and soft. Add the bell pepper and garlic and fry for 2 minutes before you add the zucchini. Fry the vegetables for 2-3 minutes and deglaze with 2 tablespoons of balsamic vinegar. Add the tomatoes, season with salt and pepper and cook for 10 minutes. Add the parsley and season with balsamic vinegar, salt and pepper to taste.For the topping, mix the ricotta, eggs, parmesan, basil, lemon zest and juice and season with nutmeg, salt and pepper to taste.
Set the oven to 200°C / 390°F top/ bottom heat.
Divide the vegetables between the 2 casserole dishes, cover with 3-4 slices of aubergine and spread the ricotta mixture gently on top. Cover with lids and bake for around 35 minutes until the ricotta mixture is set.

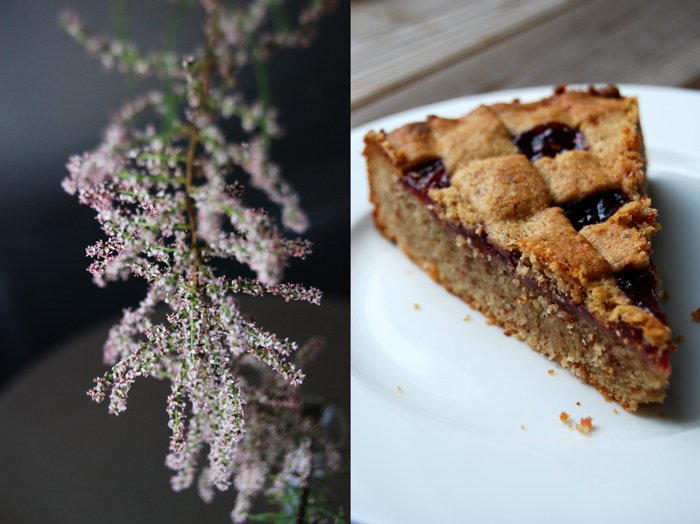
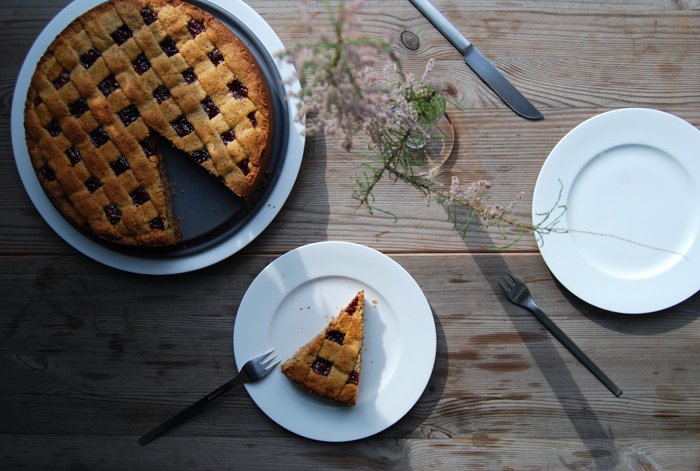
Linzer Torte, a family recipe

Although Linzer Torte has a Christmassy image, nothing I'm too fond of in May, there is a reason why I put this cake in my oven at this time of the year. It was my uncle's birthday a few days ago and he is the biggest fan of this traditional cake I know, he keeps his mother's fabulous recipe for this famous Austrian cake like a big treasure. I'm lucky, he shared it with me which made me feel very honoured but we had a deal, I would bake it for his special day in May.
To me, Linzer Torte is not particularly wintery, it's made of two layers of buttery short pastry sandwiched with raspberry jam. It feels a bit like a dense fruit pie, maybe not as juicy as the layer of jam is quite thin and not a proper filling. It gives the pastry's flavours more space and makes it a bit softer. That's why the cake is best when it sits for a few days, a week is even better. The jam soaks the crumbly base and spreads its fruity aroma.
I recently found out that the recipe for this cake which is named after the city of Linz is supposed to be the oldest known cake recipe in the world, dated 1653. Discovered in the archives of the Admont Abbey, it was found in Countess Anna Margarita Sagramosa's cookbook, a lady who liked to develop, collect and record good recipes as much as I do!

Linzer Torte
For a 25cm / 10" springform pan you need
plain flour 300g / 10.5 ounces
almonds (or hazelnuts), ground 300g / 10.5 ounces
cocoa powder 1 teaspoon
a pinch of salt
a pinch of cloves, ground
a pinch of ground cinnamon
butter, at room temperature, 300g / 10.5 ounces
granulated sugar 250g / 9 ounces
organic egg 1
Kirschwasser (cherry schnaps) 2 tablespoons
raspberry jam, whisked, 6 tablespoons
Set the oven to 170°C / 340°F (fan-assisted oven) and butter the springform pan.
Combine the dry ingredients (except the sugar). Beat the butter with the sugar till fluffy. Add the egg and the Kirschwasser and continue mixing adding the dry mixture.
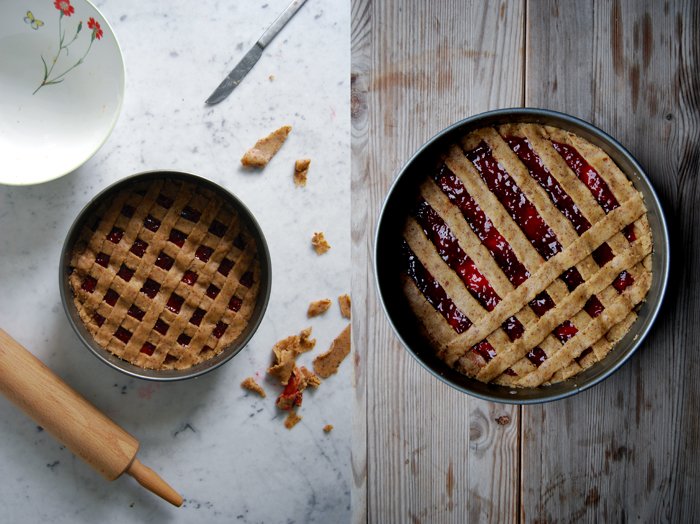
Take 1/5 of the dough and set aside for the decoration and place the rest in the pan, pushing it down evenly. Spread with the jam.
For the decoration, you could put the dough in the freezer for 10 minutes which makes it easier to handle. I left it soft, it worked but it was a bit more fiddly. Roll out the dough between cling film (around 28 x 25 cm / 11 x 10") and cut into 1.5 cm / 1/2" strips. Arrange the stripes in a lattice top (you can make a woven pattern, but I didn't have the patience, I just put them on top of each other).
Bake in the oven for 35 minutes and keep in an airtight container for at least 1 day (3 days to a week would be better) before you serve the cake.

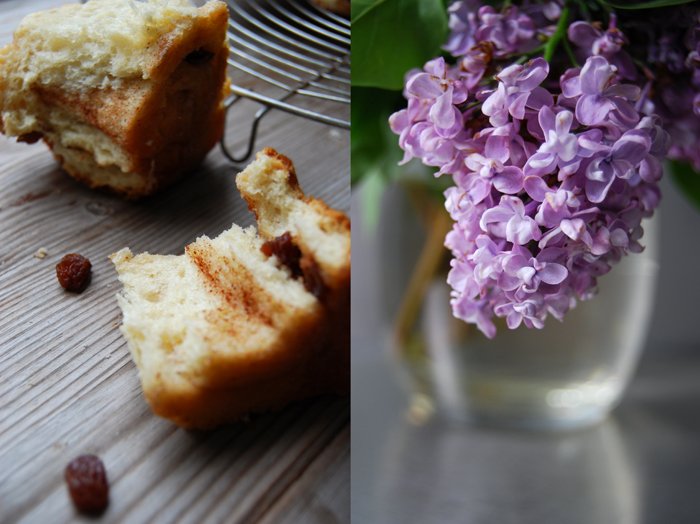
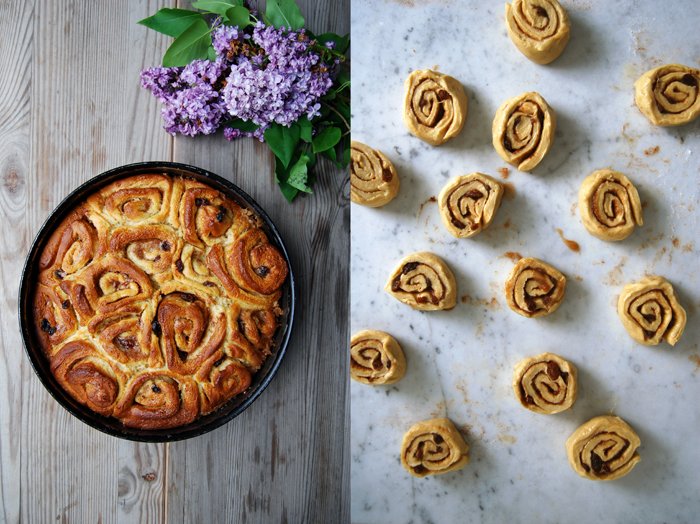
Sticky German Cinnamon Schnecken with Raisins and Maple Syrup

Sunday morning, the cosy smell of espresso bubbling in my espresso maker and fresh, warm buns on the table, there's no better weekend treat! This week, my breakfast buns are German schnecken, sticky pastry snails, filled with cinnamon and raisins, sweet, juicy and buttery. The top is crisp but when you pull the buns apart you can feel their soft inside, it's puffy, infused with cinnamon, slightly soaked with a thick syrup made of butter, sugar and a splash of maple syrup. They taste divine, I love them!
I had planned to bake cardamom buns for days but a package of raisins changed my mind in the last second and brought the cinnamon in. I like this combination so much that I forget about other spices sometimes, but next time it'll be cardamom again!
Cinnamon Schnecken
For 14 Schnecken you need
plain flour 600g / 21 ounces
granulated sugar 75g / 3 ounces
dry yeast 1 package (for 500g / 1 pound of flour)
salt 1 teaspoon
ground cinnamon 1 leveled teaspoon
butter, melted, 100g / 3.5 ounces
milk, lukewarm, 225ml / 7.5 ounces
organic eggs 2
For the syrup
water 50ml / 2 ounces
granulated sugar 120g / 4.5 ounces
maple syrup 1 tablespoon
butter 50g / 2 ounces
For the filling
raisins 60g / 2 ounces
granulated sugar 30g / 1 ounce
ground cinnamon 1 tablespoon
Combine the dry ingredients. Mix the hot melted butter with the cold milk and the 2 eggs, this way the liquid mixture will have the right lukewarm temperature (check with a finger). Mix the dry and the liquid mixture with your dough hooks for 5 minutes until well combined. Continue kneading with your hands for around 5 minutes until you have an elastic dough ball. Put the dough back into the bowl and cover with a tea towel. Let the dough rise in a 35°C / 95°F warm oven for 70 minutes. Make sure that your oven is set to top/ bottom heat and not to fan.
Bring all the ingredients for the syrup to a boil and cook on a medium heat for 3 minutes. Mix the raisins, sugar and cinnamon for the filling.
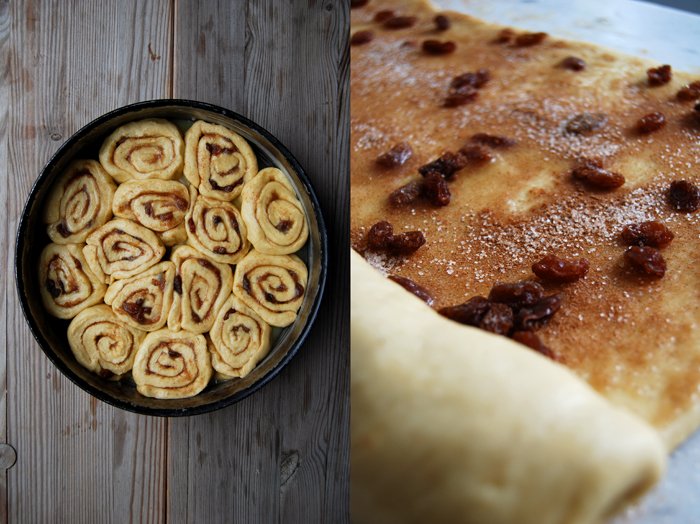
Take the dough out, punch it down and knead for 1 minute. Roll it out on a working surface (roughly 36 x 32cm / 14 x 12.5"), spread with the syrup and sprinkle with the sugared raisins. Roll it up tightly, cut into 14 schnecken and put into a buttered springform pan (around 26cm /10″), arrange them in a circle. Cover with a tea towel and let them rise for 20 minutes in a warm place.
Set your oven to 175°C / 350°F (fan-assisted oven).
Bake for 30 minutes or until golden brown. Let them cool for a few minutes before you take them out of the pan.


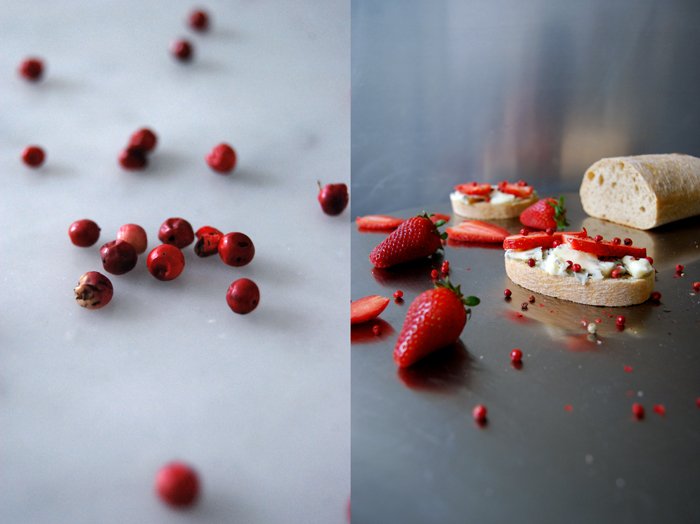
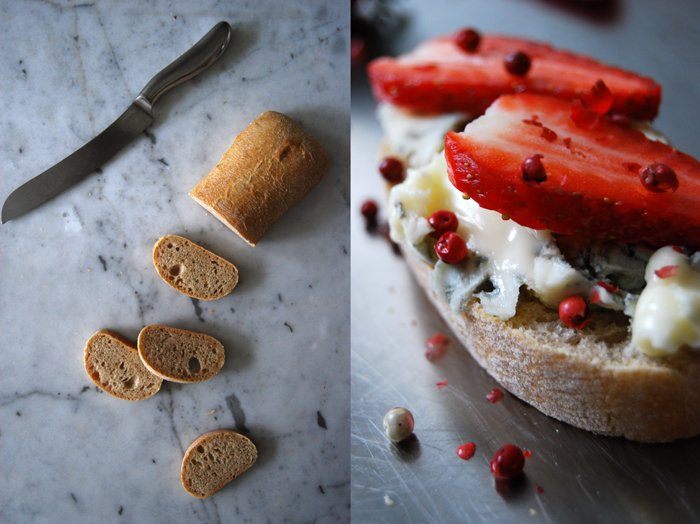
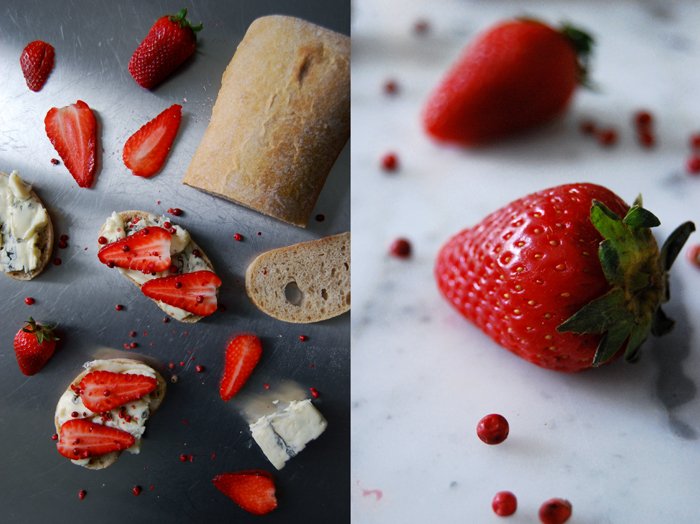
Gorgonzola, Strawberry and Pink Peppercorn Sandwich
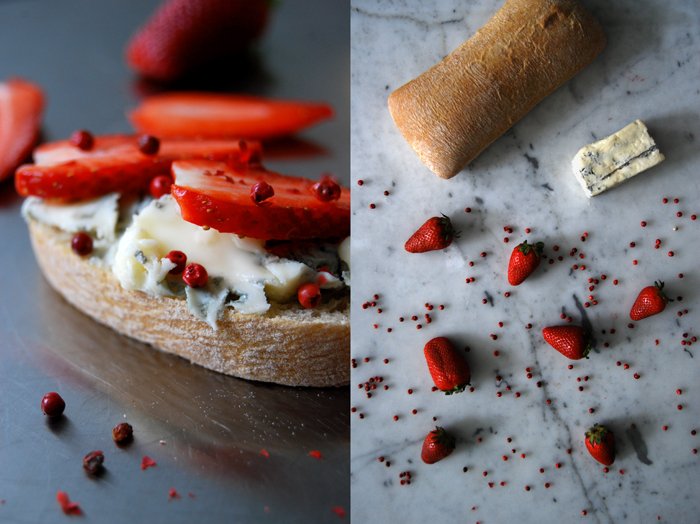
My first strawberries this year find their place on a sandwich together with the creamiest blue cheese of all, Gorgonzola! This cheese gets its name from its place of origin, the commune of Gorgonzola in the province of Milan. It's not as sharp and spicy as Roquefort or Stilton, it's more on the mild side, perfect for when I feel like a soft cheese aroma. That's what my strawberries needed, especially because their season has just begun here and they haven't reached their full spectrum of flavours yet. To bring some spice into this combination I added a few pink peppercorns, also gentle enough for the red fruits.
This sandwich is so sweet and creamy that a fluffy ciabatta bread felt like the right choice. I spread Gorgonzola (about 100g / 3.5 ounces for 2 people) in thick lumps on a few slices of the fresh loaf, I didn't want to spare on the milky creaminess before I covered the sandwiches with a couple slices of strawberries. Sprinkled with the pink peppercorns which are best when softly pressed before they join the red fruits, I felt a bit hesitant to take the first bite, this week's sandwich really is beautiful!

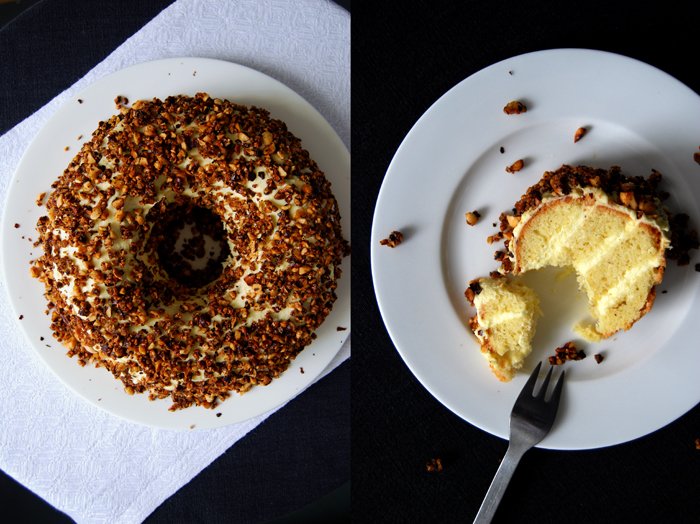
Frankfurter Kranz, a German Buttercream Cake with caramelized Hazelnuts

The Frankfurt Crown Cake, also known as Frankfurter Kranz is the queen of German buttercream cakes and my grandmother was a master at baking it. There was no special occasion, no family Sunday lunch without this opulent cake on the table. If you're on a diet you should avoid it because as all buttercream cakes, it needs lots of eggs, sugar and butter to transform into a delicious layered sponge cake filled and covered with German vanilla buttercream and sprinkled with caramelised hazelnuts. My Granny's lunches used to start with a green salad with a sugared cream dressing followed by the best beef rouladen (beef olive) filled with prosciutto, gherkin and mustard. While everyone else was worried about how one would manage to eat her traditional Frankfurt Crown Cake so soon at tea time, I was already excited and looking forward to eating my beloved buttercream cake.
The outside of the spongy cake, made with lots of vanilla and eggs, soaks a bit of the cream, which is made of vanilla pudding mixed with butter, that's why the cake is best after 2 days. The aromas have to spread, the vanilla and also the buttery caramelized hazelnuts infuse the cake. It's best to keep it in the fridge but it should always be eaten at room temperature. I didn't manage to wait for a couple days, the cake looked so good, I had to eat it as soon as I sprinkled the last hazelnuts on top. It was great but when I ate a piece on the 3rd day, I was reminded why it's good to be patient. The cake was amazing, it had developed its full deep taste and I understood why this cake was my Granny's famous signature cake.
Sometimes life is just about enjoying a piece of cake, no matter how much butter or eggs were needed to make it. Mother's and grandmother's know that!
Happy Mother's Day!

Frankfurt Crown Cake, Frankfurter Kranz
For a 23cm / 9″ bundt pan you need
For the sponge cake
butter, at room temperature, 200g / 7 ounces
granulated sugar 225g / 8 ounces
a pinch of fresh vanilla
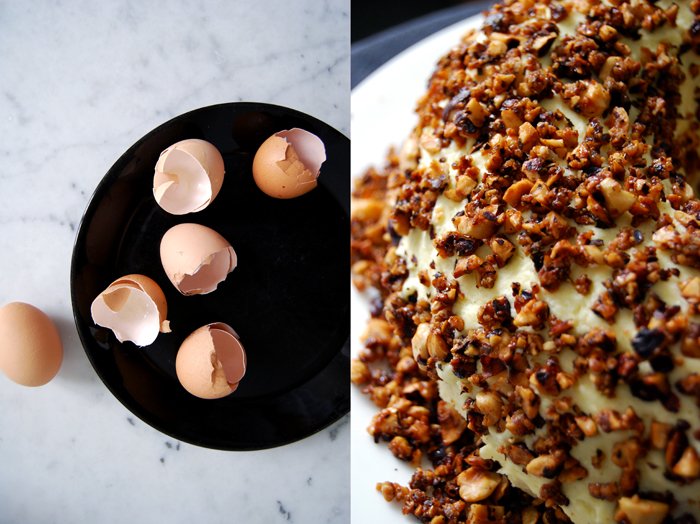
organic eggs 6
plain flour, sieved, 200g / 7 ounces
cornstarch, 100g / 3.5 ounces
baking powder 3 teaspoons
a pinch of salt
dry breadcrumbs to sprinkle the bundt pan
Set the oven to 180°C / 355°F top/ bottom heat. Butter a bundt pan and sprinkle with bread crumbs.
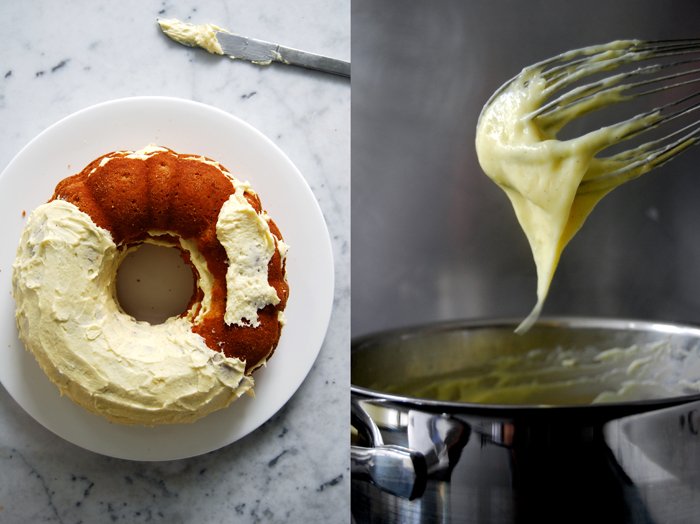
Beat the butter, sugar and vanilla till fluffy, add the eggs, one at a time and continue beating for a few minutes till thick, creamy and light yellow. Combine the dry ingredients and fold gently into the butter egg mixture with a wooden spoon (in batches, combine well in between). Scrape the dough into the bundt pan and bake for 45 minutes or until golden. Check with a skewer, it should come out clean. Let the cake cool for 2-3 minutes before you turn it over onto a wire rack to cool completely. When the cake has cooled off completely, slice it 3 times into 4 layers.
For the buttercream
All ingredients for the buttercream must be at the same temperature (room temperature) to combine well!
butter 250g / 9 ounces
organic egg yolks 4
cornstarch 60g / 2 ounces
granulated sugar 120g / 4.5 ounces
milk 500ml / 17 ounces
a pinch of salt
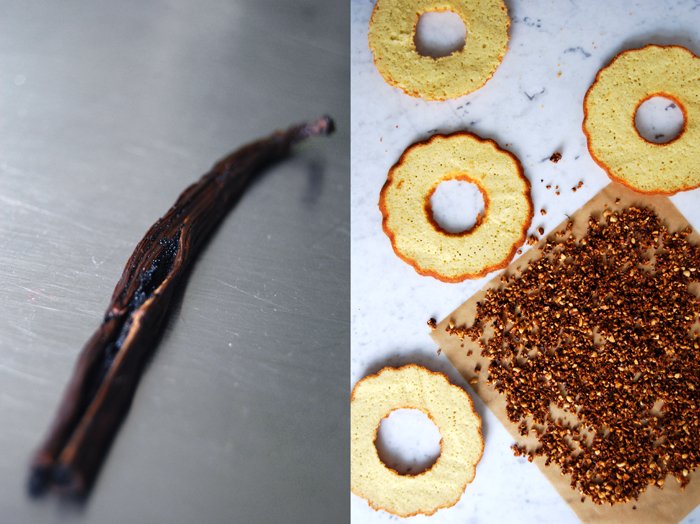
vanilla bean, slit slightly, 1
Beat the butter for 10 minutes till white and fluffy.
Whisk the egg yolks with the cornstarch, sugar, salt and 50ml / 2 ounces of the milk till well combined.
In a sauce pan, bring the remaining milk together with the vanilla bean to a boil. Take the vanilla bean out, scrape the seeds out of the bean into the milk. Add the egg mixture to the hot milk, whisking well. Take the sauce pan off the heat after 1 minute and continue whisking for 2 minutes till stiff. Fill into a bowl and cover the pudding's surface with cling film.
When the vanilla pudding has cooled off completely, press it through a sieve and mix in batches with the beaten butter, first with a spoon and then with your mixer for a few seconds till nice and creamy.
For the caramelized hazelnuts
hazelnuts, finely chopped, 200g / 7 ounces
granulated sugar 100g / 3.5 ounces
butter 35g / 1.5 ounces
In a large heavy pan, heat up the hazelnuts, sugar and butter on high-medium temperature and roast for around 5 minutes till golden brown and caramelized, stirring constantly. Take off the heat and spread on parchment paper.
Assembling the Frankfurter Kranz
Leave around 1/3 of the buttercream to cover the Frankfurter Kranz and spread the remaining cream on the 3 layers of cake. Start with the bottom one, spread with cream, cover with the next layer of cake and continue with the other layers. When the cake is assembled, spread the remaining cream gently all over the cake and sprinkle with the caramelized nuts on all sides, inside and out.
You can eat the cake right away or be patient and keep it in the fridge for 1-2 days before you serve it.

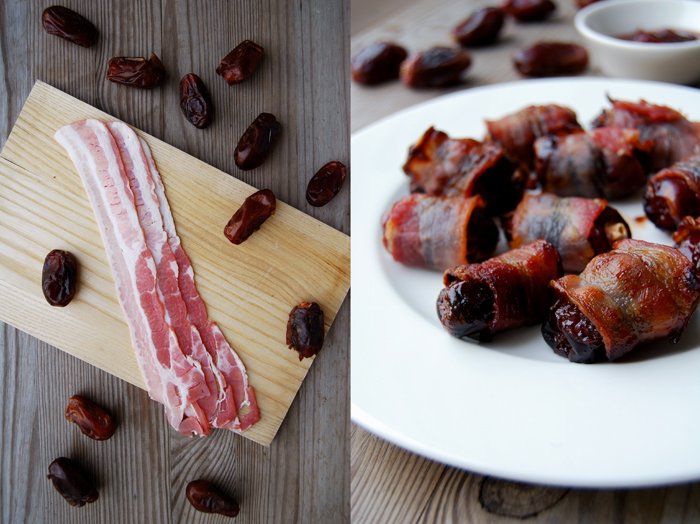
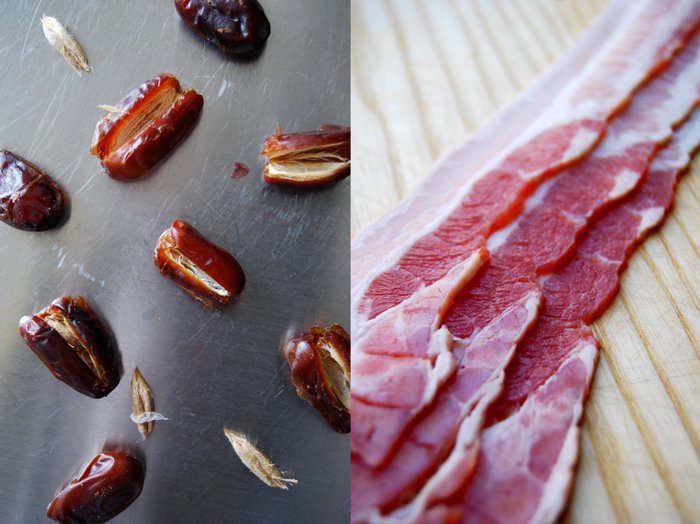
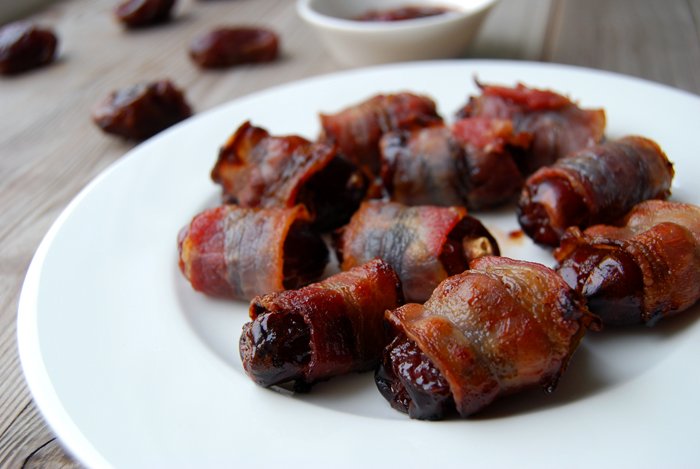
Chutney filled Dates wrapped in crisp Bacon
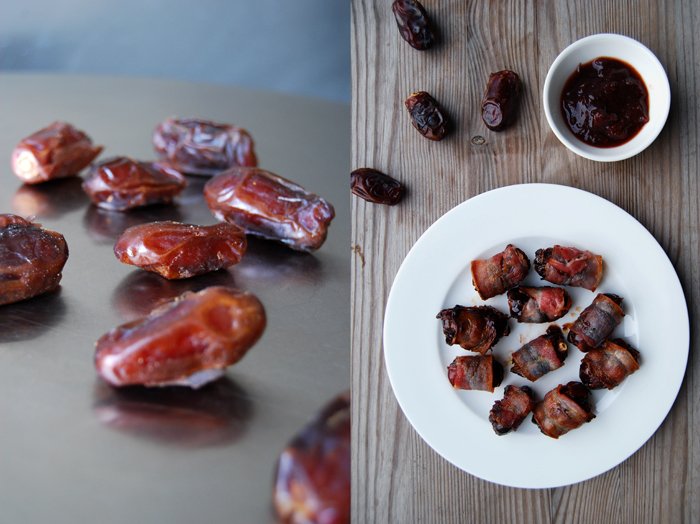
Devils on Horseback, dried fruit wrapped and baked in bacon, are a typical winter dish, but the temperature dropped, it's a bit grey outside and I wanted to try something new with my chutney. It's still a great finger food nibble, even in spring! After I made my rhubarb chutney I thought about new combinations besides the classics with cheese, meat or sandwiches. A package of dried dates caught my attention, I had bought them a couple weeks ago from a Turkish shop I discovered while strolling through the streets. I went inside to check out their meat section as you can get the best lamb from Turkish butchers but I was a bit late and the shop was closing. On my way to the cash point I grabbed a package of dates unsure of what I would use them for and hopped back out onto the busy streets.
The dates finally found their purpose, I filled them with chutney, wrapped them in slices of bacon and baked them in the oven. Sweet and sticky, salty and a bit sour, my chutney filled dates wrapped in crisp bacon! It sounds like an attack on the taste buds but it's actually a very harmonic combination, all the flavours melt together smoothly. My rhubarb chutney hasn't sat yet, I want to give it a couple more weeks, so I used my plum chutney (the same recipe, just with plums).
It's very easy to prepare these nibbles, you just need a few dried dates (as a snack for 3, I used 15 dates) and replace their seeds with some chutney (the plum chutney was very good but I tried one with rhubarb and it was good too). I cut a strip of thinly sliced bacon into 3 and wrapped each piece around a filled dated. Baked in the oven on 200°C / 390°F they turned golden and crisp after a few minutes!
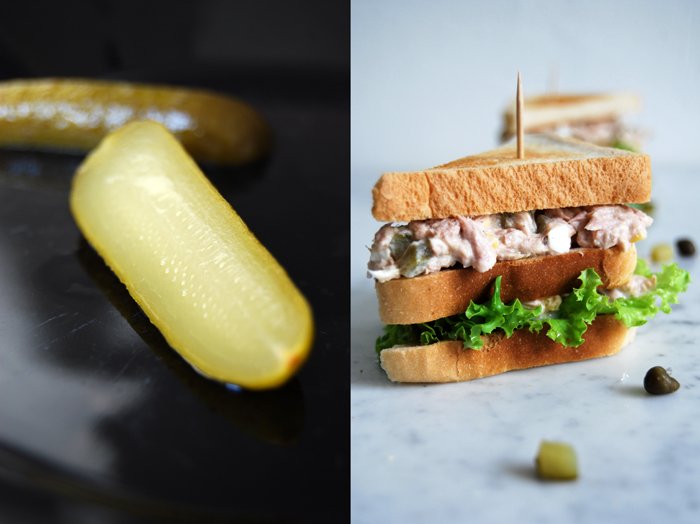
Tuna Club Sandwich and the advantages of old fashioned traveling

When I visit my mother I usually take the train as I prefer to cross the country on the ground rather than in the air. I like this old fashioned, slow kind of traveling, when you see the different landscapes passing by, the busy train stations, cities and villages flying passed your window. You really feel the distance and enjoy the changes instead of just getting it done.
My choice of transportation has another advantage. Before I jump on my train back home, my mother and I follow one of our many traditions, this one started many years ago. We have a cappuccino, a glass of wine or champagne and a little snack at an elegant hotel right opposite the city's famous, nearly 800 year old cathedral. Most of the time we sit right next to the windows of the hotel's old fashioned bistro, always amazed by the sight of the imposing gothic building which seems to grow right into the sky. Sometimes we sit at the bar, on leather covered bar stools, surrounded by a couple strangers reading newspapers, served by waiters who are as elegant as the women and gentlemen sitting at the small tables quietly talking. It's as if time stops at this place and I always loved it for this reason!
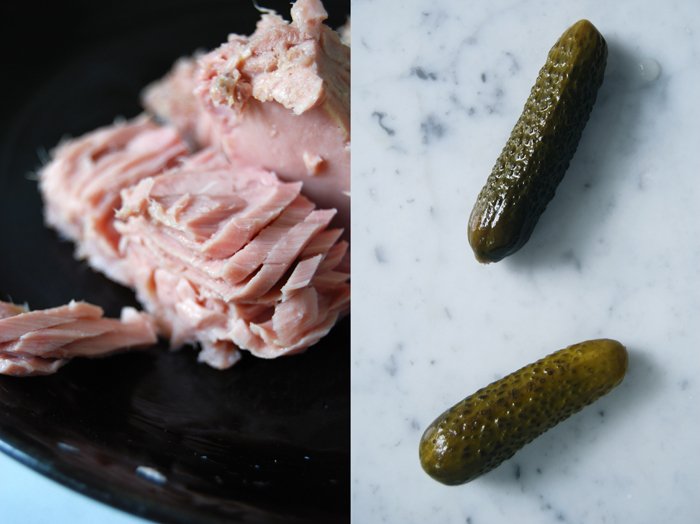
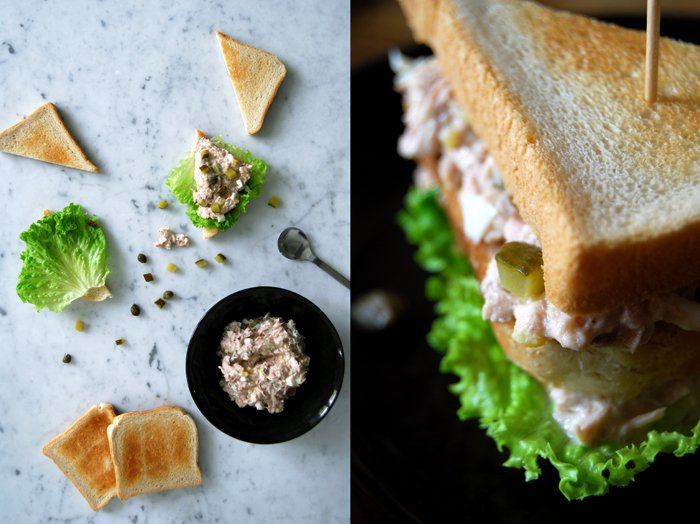
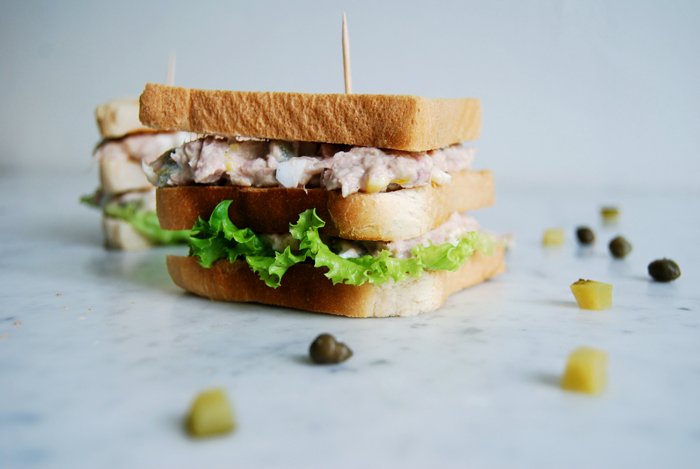
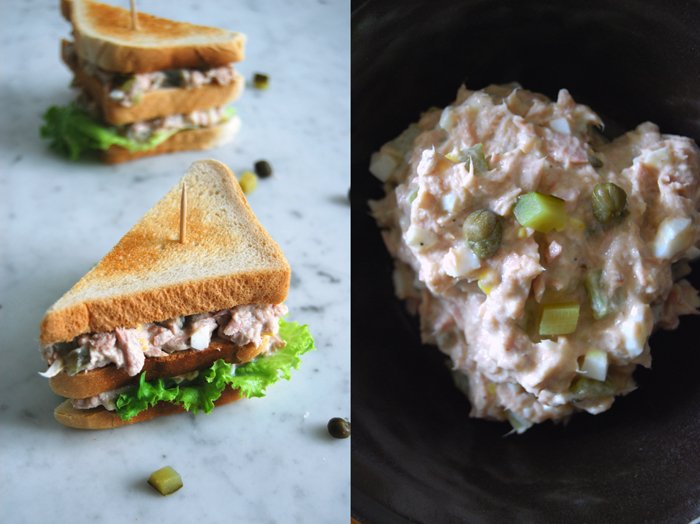
We enjoy our drinks and our last hour together before we go separate ways again. To feed my constant hunger I usually eat a snack as old as the hotel, a club sandwich. The earliest written proof of this sandwich's existence is from 1899, the hotel opened in 1857 and the current building was completed in 1893. The classic recipe for a club sandwich is made with turkey, bacon, lettuce, tomato and mayonnaise. Today I will share my club sandwich variation filled with a tuna dip mixed with gherkin, egg, capers, tomato paste and mustard, another one of my mother's recipes.
Unfortunately our favourite hotel is closed for renovations at the moment and we're still waiting impatiently for the reopening!
Tuna Club Sandwich
For 4 club sandwiches with 2 layers of tuna dip you need
white bread, toasted, cut in half, 12 slices
green lettuce 4 small leaves
For the tuna dip
tinned tuna in water, drained well (it's best to squeeze the water out), 185g / 6.5 ounces
organic egg, hardboiled and finely chopped, 1
gherkins, finely chopped, 2
capers, finely chopped, 7-10
yoghurt 7 tablespoons
olive oil 1 tablespoon
freshly squeezed lemon juice 1 teaspoon
liquid from the gherkins 1 teaspoon
mustard to taste
tomato paste to taste
salt and black pepper
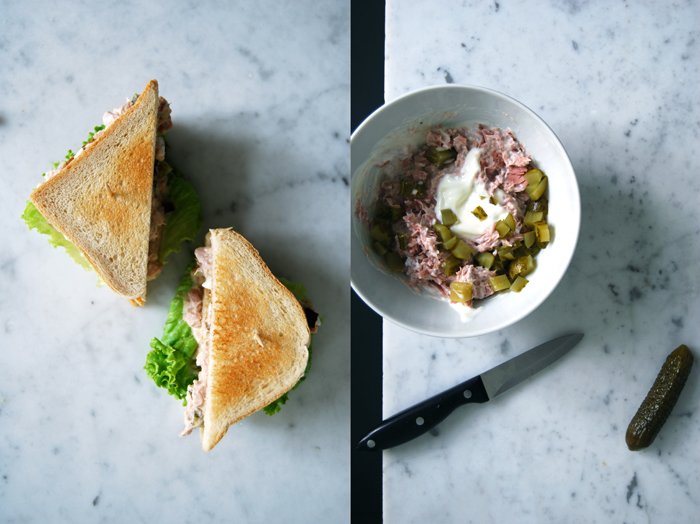
Mix the ingredients for the dip with a fork and adjust the flavours to taste. Lay a leaf of lettuce on half a slice of toasted bread, spread with tuna dip, put another slice of bread on top covered with tuna dip and a final layer of bread, fix with a tooth pick.

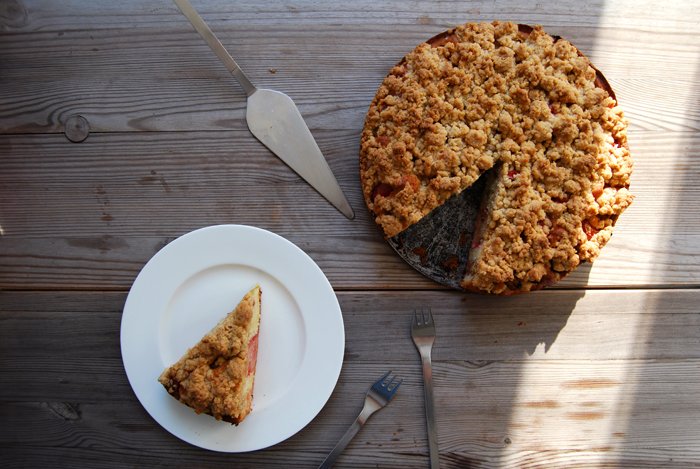
Rhubarb Crumble Cake, truly addictive!
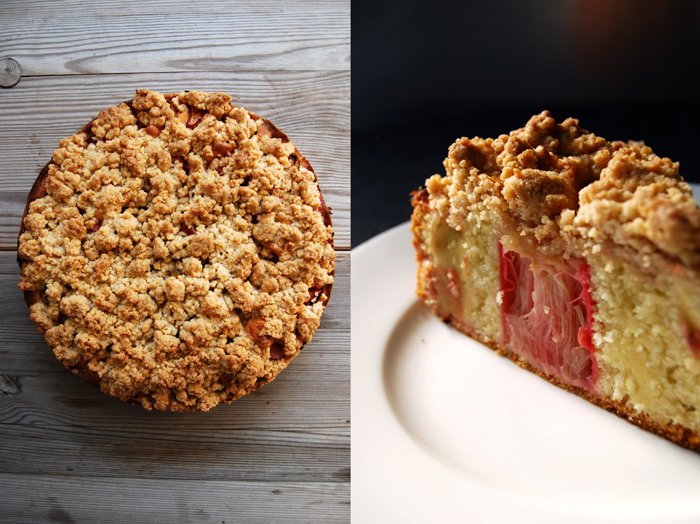
There are two of my recipes, classics, that I can't live without. I constantly adapt and change them according to the seasons and there isn't a month without them. I'm talking about my beloved quiche and my crumble cake, filled with seasonal fruit and topped with the most amazing crumbles, buttery and crunchy! In winter I filled it with apples, now it's time for rhubarb and there will be more to follow. I have no preference, I love all of them!
For this cake, I like to choose fruit with a strong texture, the dough rises around these moist pockets and stays juicy without becoming soggy. I use lots of cinnamon for the crumbles, one of my favourite spices for baking which refines the fruit's flavours perfectly. The rhubarb brings in a bit more sourness than the apples, it fits to the fresh feeling of this season. In the post about my apple crumble I've praised the cake's light and spongy base, the perfect composition of soft, juicy and crunchy and its dessert and teatime qualities. Now it's time to bake rhubarb crumble, but be prepared, this cake is truly addictive!
Rhubarb Crumble Cake
Prepare the dough for the base first, the rhubarb afterwards and the crumbles at the end.
For a 26cm /10″ springform pan you need
For the cake
butter 125g / 4.5 ounces
granulated sugar 125g / 4.5 ounces
a pinch of fresh vanilla
organic eggs 3
plain flour 250g / 9 ounces
baking powder 2 teaspoons
a pinch of salt
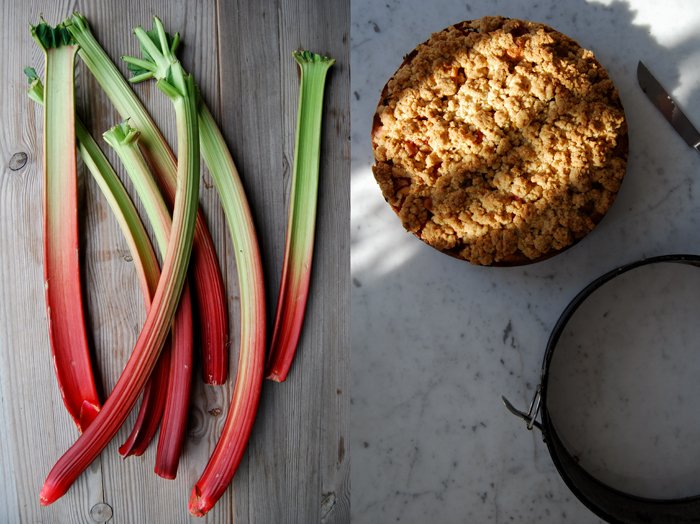
rhubarb, cut into 4cm / 1.5" pieces, 800g / 28 ounces
For the crumbles
plain flour 200g / 7 ounces (you might need some more if the crumbles are too sticky)
granulated sugar 125g / 4.5 ounces
a pinch of fresh vanilla
ground cinnamon 2 teaspoons
butter, melted, 125g / 4.5 ounces (plus more if the crumbles are too fine)
Set the oven to 180°C / 355°F.
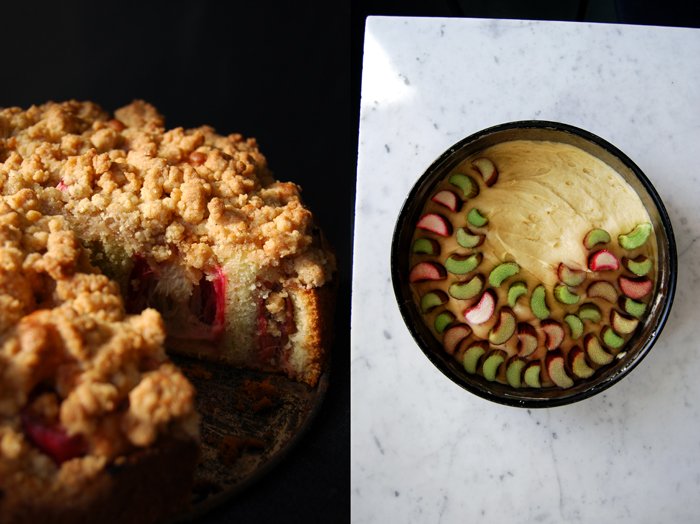
For the cake base, beat the butter, sugar and vanilla till fluffy. Add the eggs, one at a time and continue mixing for a few minutes. Add the flour mixed with the baking powder and salt and continue mixing until well combined. Scrape the dough into a buttered springform pan and arrange the rhubarb vertically in circles pushing it into the dough.
The crumbles need good preparation as you have to make sure that the mixture is neither too moist nor too dry. Have some extra flour and melted butter close at hand so that you can add some immediately if necessary:
Combine the dry ingredients in a bowl. Pour the melted butter on top and mix quickly with the hooks of your mixer, stop as soon as it crumbles. If the crumbles are too moist and sticky add a bit more flour (1-2 tablespoons). If they are too fine and don’t form bigger crumbles add more melted butter. Spread quickly on top of the rhubarb. If you have bigger lumps of crumbles you may have to separate and spread them.
Bake in the oven for 55 minutes or until golden. Check with a skewer, it should come out clean, and let it cool.
You can serve the cake with sweet whipped cream or vanilla or cinnamon ice cream.


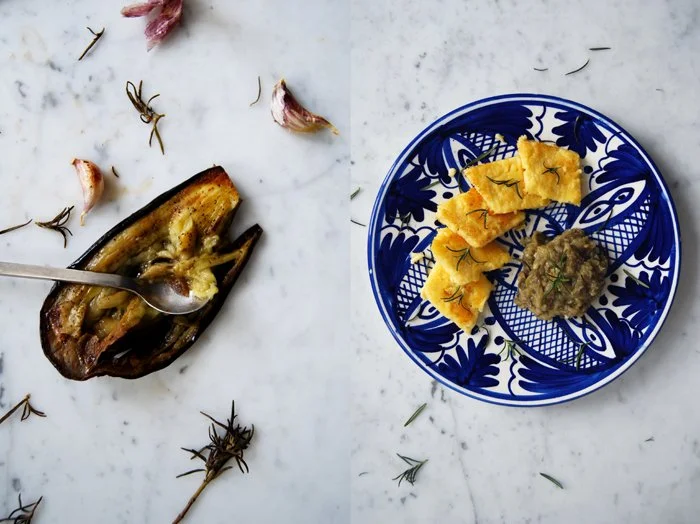
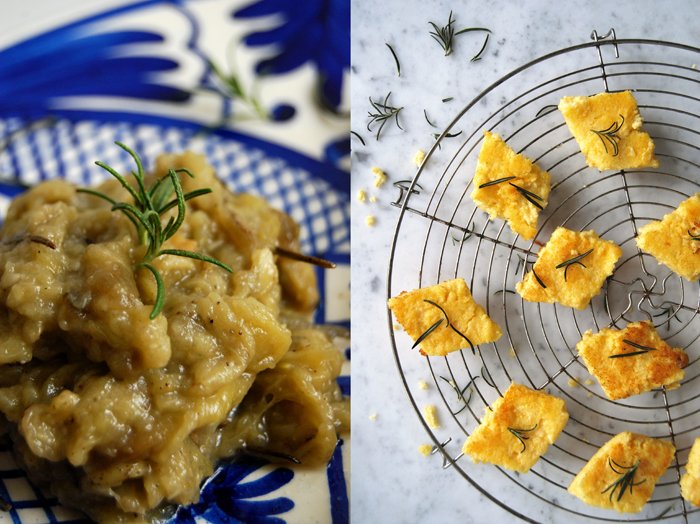
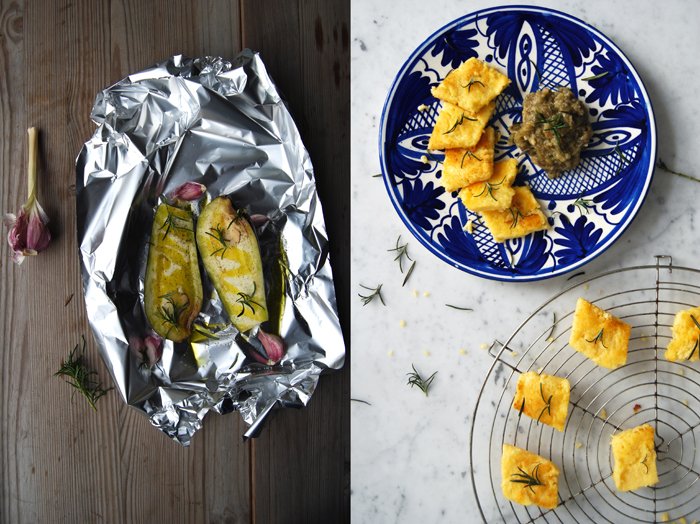
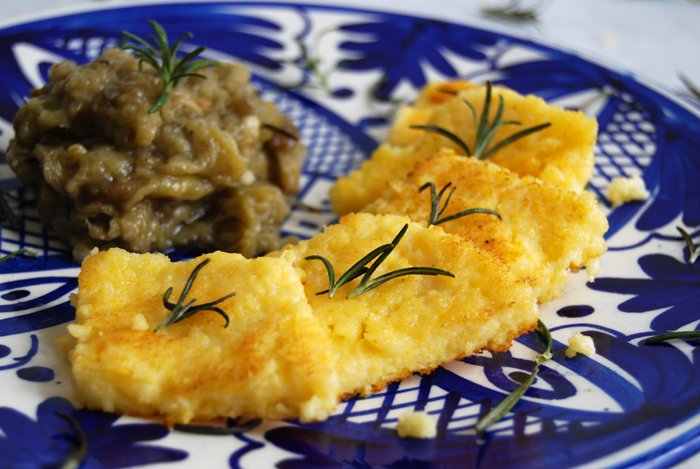
Baked Aubergine Mousse with Rosemary and golden Polenta Slices

This pale aubergine mousse isn't a beauty but its taste and smooth texture make up for it! Something changes in the purple fruit's flavour when it has been cooking in the oven. If you fry it in a pan or cook it in a stew it's nice but only oven baking manages to extract the aubergine's finer qualities. Sliced, grilled and filled like my aubergine rolls or baked in foil which turns the aubergine into a soft mousse. Both recipes leave no doubt as to why aubergines are so popular in Mediterranean cooking!
Baking aubergines al Cartoccio together with spices and herbs allows them to become infused with lots of different flavours. The spongey flesh, its soft texture is perfect to absorb tasty liquids and aromatic steam which is why they are also know to soak up so much olive oil! Rosemary was my herb of choice this time which I also used for the golden fried polenta slices. I'm a big fan of this yellow corn, either turned into a thick purée and mixed with gravy and meat or fried, buttery and crisp.
Baked Aubergine Mousse with Rosemary and golden Polenta Slices
For 2-3 people you need
aubergine, cut in half, 1
garlic, 4 cloves in their skin
rosemary, the needles of 3-4 sprigs
olive oil 2 tablespoons
salt and pepper
Set the oven to 200°C / 390°F.
Place the aubergine on a big piece of aluminum foil, sprinkle with olive oil and some rosemary and season with salt and pepper. Turn the fruit's cut side down, add some more rosemary and the garlic and close the pouch. Bake on a baking sheet for about 40 minutes till soft. Check if the flesh is soft and scrape it out with a spoon. Mix in a bowl together with the soft roasted garlic, some of the roasted rosemary and season with salt and pepper, mash with a fork.
For the polenta
polenta 120g / 4 ounces
water 250ml / 8.5 ounces, plus around 100ml / 3.5 ounces for cooking
milk 250ml / 8.5 ounces
salt 1 teaspoon
olive oil 2 tablespoons plus more to grease the baking dish
butter for frying 3-5 tablespoons
rosemary, the needles of 2 sprigs
In a sauce pan, heat the water and milk, add the salt and bring to a boil. Take the pan off the heat, add the olive oil and polenta and whisk. Turn down the heat to the lowest temperature and put the pan back on. Cook the polenta for 10 minutes mixing and adding more water once in a while.
Grease a 28 x 20cm / 11 x 8" baking dish with olive oil. Pour the polenta into the baking dish, let it cool for around 10 minutes. When the polenta is cold and a bit hard, flip the baking dish gently around, either on cling film or directly on your working surface, mine is made of marble and it worked fine. Cut the polenta into diamond shapes and fry in hot butter together with the rosemary on both sides, just for a couple minutes till golden.
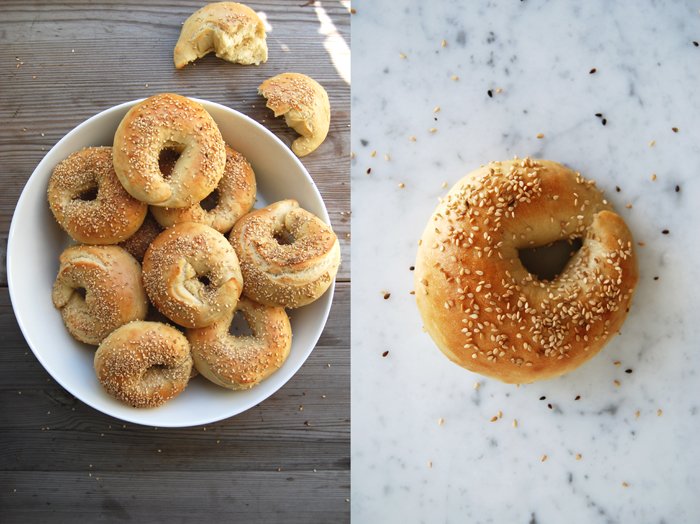
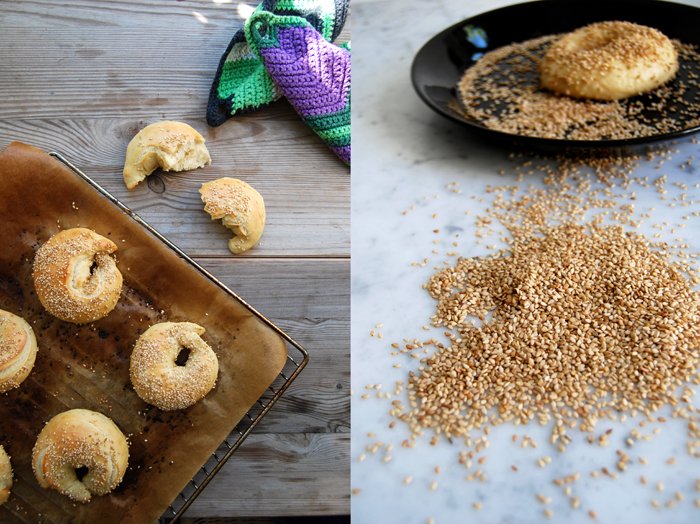
Sesame Seed Weekend Bagels

My Sandwich Wednesdays became a tradition shortly after I started eat in my kitchen more than 5 months ago. Usually I choose the bread according to the toppings when I share one of my sandwich recipes but sometimes it's the other way around. The first sandwich post on the 4th December started with a homemade bagel, a defrosted one as I like to bake them in big batches and fill my freezer with them. It's so convenient to have them on hand, I just have to warm them up in the hot oven for a few minutes. The crust becomes a little bit more crunchy but the inside stays soft and as soon as I cut the warm bagels in half the sweet smell of homemade bread fills the air in my kitchen. That's what happened on a cold day in early December, when I smelt the bagel I felt like butter fried leek, sweet tomatoes, hot red chili peppers and smooth cream cheese, the first eat in my kitchen sandwich was born!
Here's the recipe I promised to share! One batch gives me 12 well sized bagels. Most of the time I use organic white spelt flour (type 630) which I prefer to use for my baking in general, for sweet and savory. It's similar to wheat, the results don't differ in taste or texture but it's better for the body as it has much higher nutrition values. My extensive baking demands lots of flour therefore I prefer to go for good ingredients. Another nice side effect is that ever since I changed over to spelt flour a few years ago I lost 2 pounds! When I run out of spelt, I still use wheat without changing the recipes, also for the bagels and they look, feel and taste the same, delicious!
Sesame Seed Bagels
For 12 bagels you need
plain flour, wheat or white spelt type 630, 700g / 1.5 pounds
dry yeast 1 package (for 500g / 1 pound of flour)
water, lukewarm, 380ml / 13 ounces
granulated sugar 2 tablespoons
salt 1 1/2 scant tablespoons
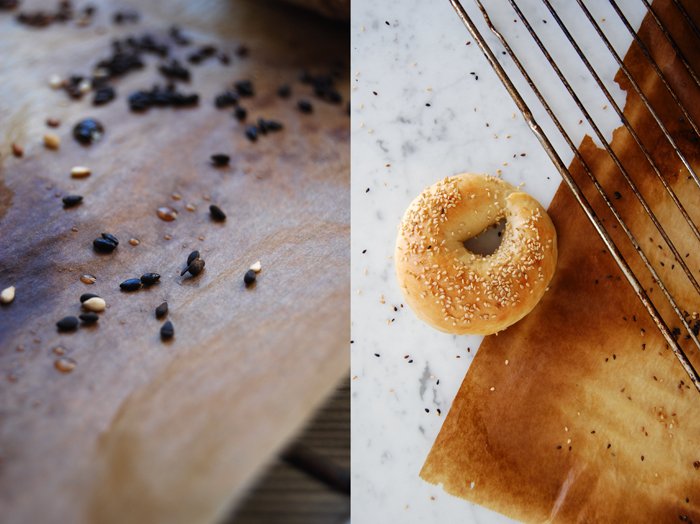
sesame seeds, for sprinkling
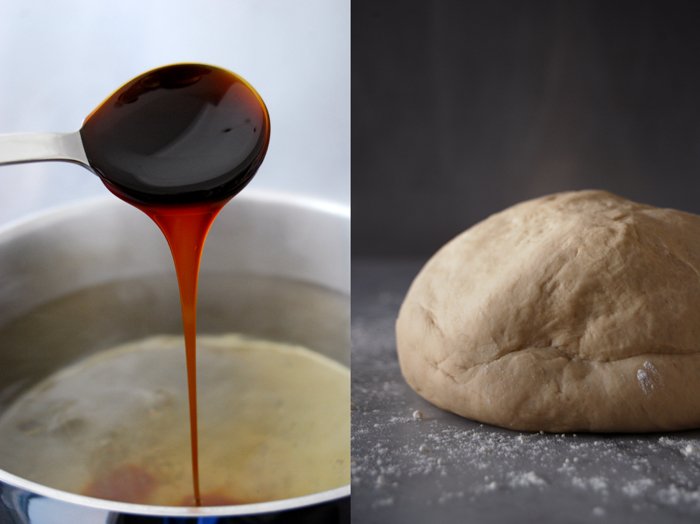
sugar cane syrup or molasses 1 heaping tablespoon, for poaching the bagels
In a large bowl, combine the flour with the yeast, sugar and salt, add the lukewarm water (you might not need all of it). Mix with your dough hooks for a few minutes. The dough shouldn’t be moist and sticky at all, more on the dry side. Continue kneading and punching with your hands until you have an elastic and soft dough ball. Grease the bowl lightly with vegetable oil and put the dough back in. Cover with a tea towel and let it rise in the warm oven (35°C / 95°F) for 60 minutes. This works really well but make sure that your oven is set to top/ bottom heat and not to fan.
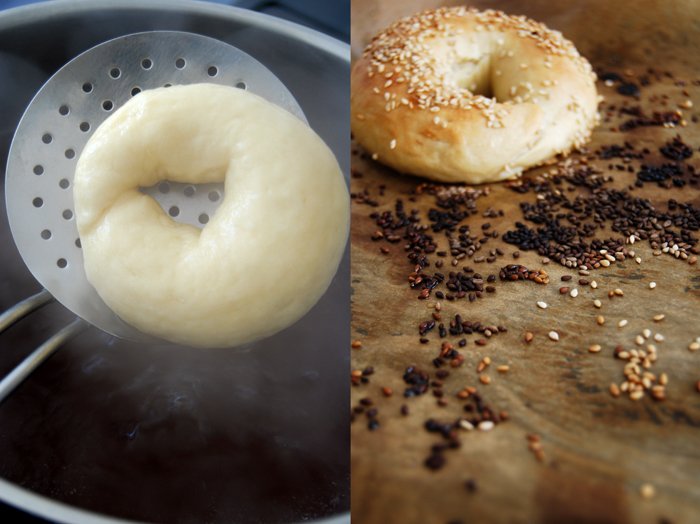
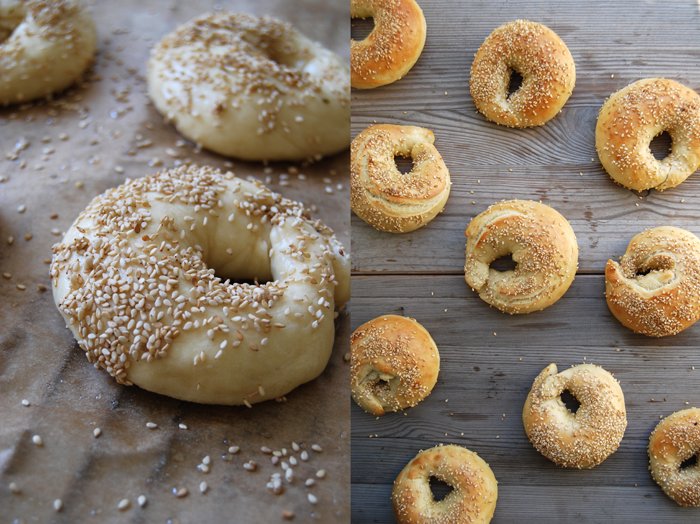
Take the dough out, punch it down and knead for 1 minute. Divide the dough in half and each portion in 6 for 12 bagels. Roll each piece into a round ball between your hands and shape into a thick rope. Connect the ends to a ring, sealing and pinching well. Place on two baking sheets lined with parchment paper and greased with vegetable oil, cover with a tea towel and let the bagels rise for 30 minutes in a warm place.
Set your oven to 260°C / 500°F top/ bottom heat. Fill a large pot with water and bring to a boil.
Add the syrup to the boiling water and poach the bagels for around 30 seconds on each side turning them with a spatula or a slotted ladle. I boil 3 bagels at a time, they should swim freely. Put them back on the baking sheets, sprinkle generously with sesame seeds and bake for 8 minutes until golden brown.


The secret to the perfect Schnitzel and a light Swabian Potato Salad
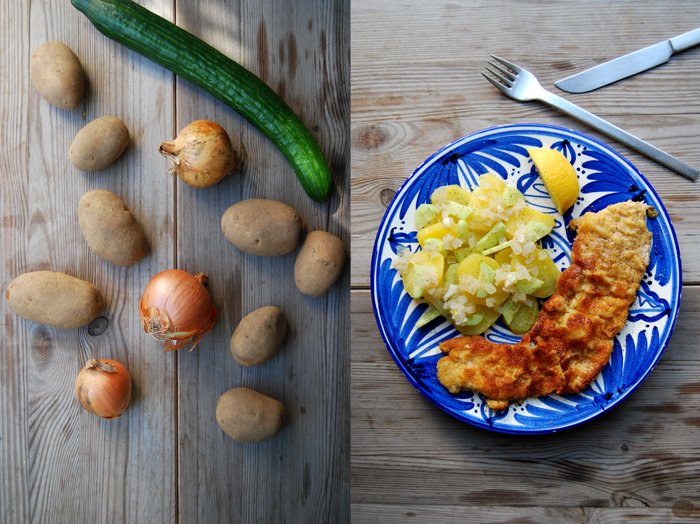
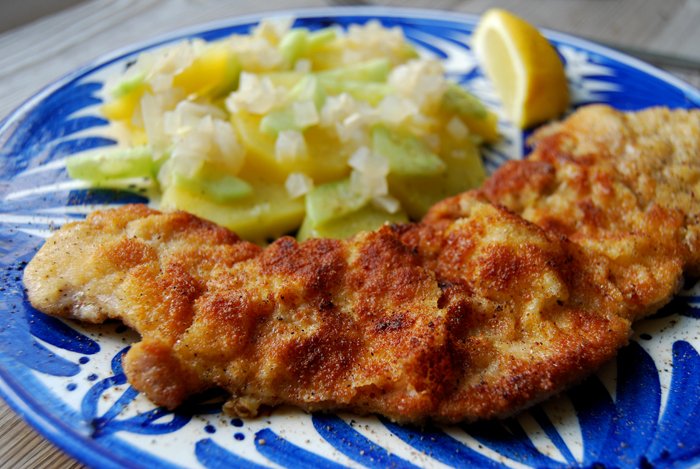
Thin, juicy and tender, with a golden crust, crisp and light, that's what a Schnitzel should be and it's easier to achieve than you may think! You just have to follow a few rules and you'll be rewarded with a delicious breaded cutlet on your plate.
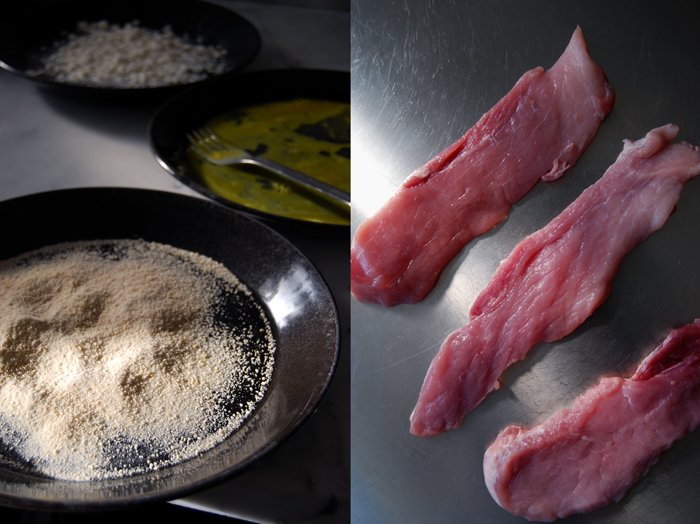
First and foremost, you need good quality meat, fresh and thinly cut, about 4mm / 1/4" thin. Schnitzel have to fry in a mixture of oil and butter or lard which has to stay hot throughout, otherwise the breading will soak the oil. Try to avoid cutlets which are too thick as they will take too long to get done, they just turn dry and tough. If your cut of meat is too thick, you could also cut it in half yourself and open it like a butterfly. For a more tender texture you should pound the meat lightly with a meat tenderizer or the back of your fist. You can either use pork which is very popular or veal, which is used for traditional Wiener (Viennese) Schnitzel. It's a bit more expensive and I like both.
The breading is made in three steps, first you have to turn the meat in flour, then in lightly beaten egg followed by breadcrumbs. The fried crust should be crisp, thin and light, the breading shouldn't stick to the meat but form light waves around the Schnitzel when it has been fried.
To fully enjoy a Schnitzel and its great crust, I prefer to eat it without a sauce, just salt and pepper and some fresh lemon juice drizzled on top. It's a hearty meal, but not as heavy as the cliché of German food suggests, to keep it light I serve a traditional Swabian potato salad on the side. The sweet dressing is made of lots of finely chopped onions shortly cooked in white Balsamico vinegar and water. I just add some crunchy cucumber and a little olive oil, salt and pepper to the salad. My step father is from Swabia in the South of Germany and he added this salad to our family recipes which is loved so passionately by all of us that we regularly fight over the last bits left in the bowl!
Schnitzel with Swabian Potato Salad
For 4 people you need
For the Schnitzel
cutlets, pork or veal, 4mm / 1/4" thin, lightly pounded, 4 (around 600g / 21 ounces)
plain flour, for the breading
organic eggs, lightly beaten, 2, for the breading
dry breadcrumbs, for the breading
vegetable oil for frying
butter for frying 5 tablespoons plus more depending on the size of the pan
lemon wedges 4, for serving
In a large heavy pan, heat a generous splash of oil and 2 tablespoons of butter over a high temperature. The bottom of the pan should be covered in fat and allow the meat to swim. I fry 2-3 Schnitzel in my pan at the same time but depending on your pan you may have to fry less.
Prepare 3 big and deep plates, fill one with the egg, the other with flour and the last with breadcrumbs. Lightly dust and turn the meat in the flour, turn it in the egg and then quickly in the breadcrumbs until covered. You have to work quick now as you have to fry the Schnitzel and prepare the other cutlets at the same time. Put the breaded meat in the hot pan immediately and fry for 1 - 2 minutes on each side until golden brown. Take the meat out, season with salt and pepper and set aside. Add more oil and butter to the pan and let it heat before you fry another batch of Schnitzel. You may have to add some more butter in between flipping the meat as well. Serve with lemon wedges and Swabian potato salad.
For the Swabian potato salad
potatoes, peeled, cooked and thickly sliced, 1 kg / 2 pounds
cucumber, cut in half and thinly sliced, 1
onions, finely chopped, 160g / 6 ounces
white balsamic or white wine vinegar 100ml / 3.5 ounces
water 100ml / 3.5 ounces
olive oil 2 tablespoons
salt 1 teaspoon
black pepper
In a sauce pan, bring the onions, vinegar and water to a boil. Cook for 3 minutes on medium heat. Take it off the heat, close with a lid and let it sit for 5 minutes. In a large bowl, gently mix the potatoes, cucumber, onions in vinegar, olive oil, salt and pepper, season to taste.
The salad tastes great the next day if you manage to keep some leftovers.


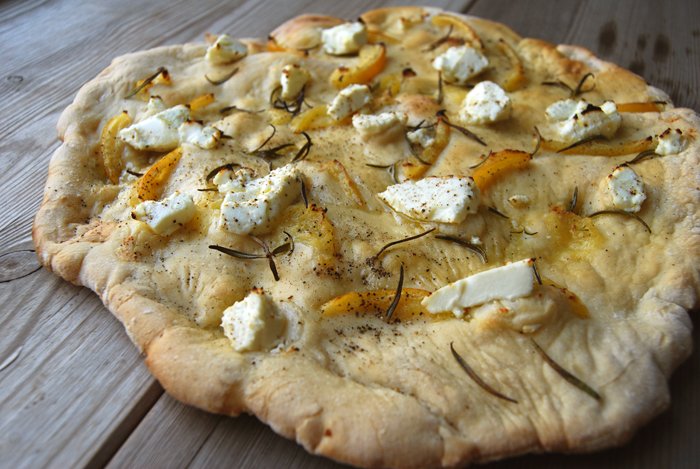
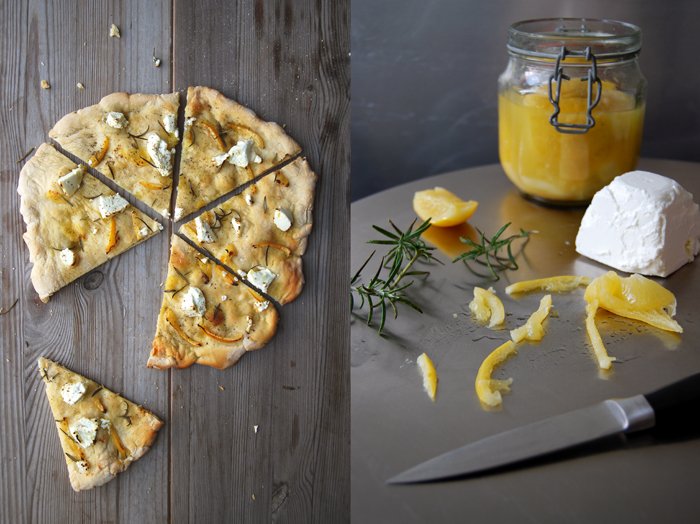
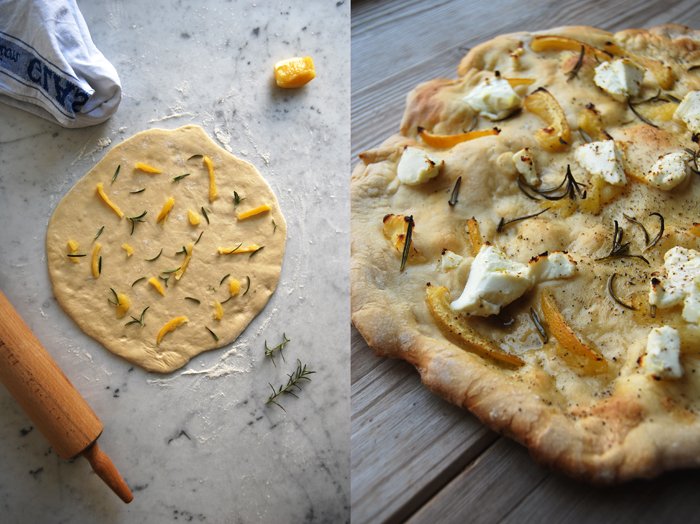
Pizza Bianca with Moroccan Lemons, Chèvre and Rosemary
When I wrote about my Moroccan Preserved Lemons about a month ago, Kelly from My Soulfull Home got in touch. I met Kelly through a blog tour in February which she had organised. She asked me to join the tour together with 15 other bloggers, it was carnival and I shared my family's Berliner experience. A few weeks ago she told me about a delicious pizza bianca with lemons and rosemary which one of her friend's makes and she told me that I should give it a try as soon as my lemons were ready. Here they are, sour, soft and juicy!
When I had the first piece of my own preserved lemons in my mouth, I felt a bit excited! My aunt was with me in my kitchen, she was the one who inspired me to preserve lemons in the first place. The first bite was intense, a bit salty as I forgot to rinse the slice of lemon, too much excitement! When I let some water rinse off a bit of the saltiness (for 2-3 seconds), they were perfect! The preserving liquid, concentrated juices of all the lemons, tastes as good and is great for strong sauces and stews.
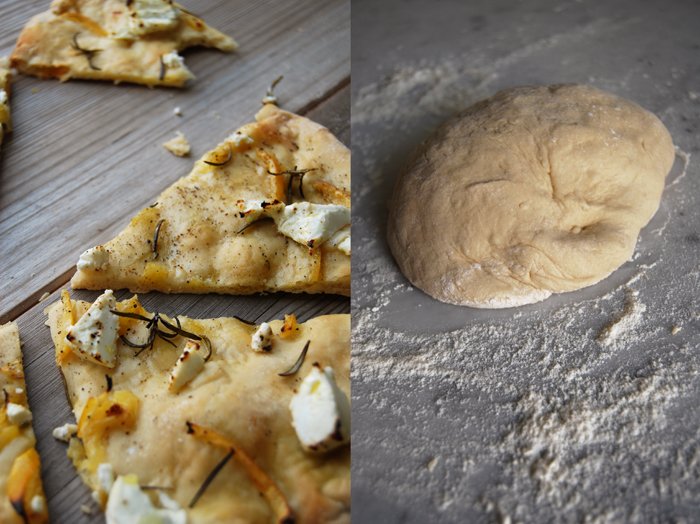
For my pizza bianca, I decided to add some chèvre to mix its smooth milkiness with the lemon's sourness and the woody rosemary. Ricotta would have worked too, but I wanted the strong aroma of this soft goat cheese. I sprinkled some olive oil on top which gave it a bit of a focaccia feeling, some sea salt and pepper and enjoyed this absolutely delicious summery snack. Thank you Kelly!
If you like pizza as much as I do, you can also try my Aubergine and Pecorino Pizza or my Spinach and Ricotta Pizza.
Pizza Bianca with Moroccan Lemons, Chevre and Rosemary
I always start to prepare the dough 2 hours before I bake it to give it enough time to rise. I bake my pizza on a hot baking sheet which has a similar effect to a pizza stone.
For 1 large pizza (size of 1 baking sheet) you need
For the topping
chèvre or ricotta, 200g / 7 ounces
preserved lemon, rinsed and thinly sliced, 1(you could also use lemon zest)
fresh rosemary, the needles of 5 sprigs
olive oil 4-6 tablespoons
salt and black pepper
For the dough
plain flour 350g / 12.5 ounces plus more for mixing
dry yeast 1 package (for 500g / 1 pound of flour)
water, lukewarm, 190ml
olive oil 3 tablespoons
salt 1 teaspoon
Combine the flour with the yeast and salt, add the lukewarm water (you might not need all of it) and olive oil. Mix with your dough hooks for a few minutes. The dough shouldn’t be moist and sticky at all, more on the dry side. Continue kneading and punching with your hands until you have an elastic dough ball, not too hard, not sticky. Put the dough back in the bowl, cover with a tea towel and let it rise in the warm oven (35°C / 95°F) for 40 minutes. This works really well but make sure that your oven is set to top/ bottom heat and not to fan.
When the dough is well risen, roll it out on a very well floured working surface (this is very important or you'll have problems taking it off again). It should be a bit smaller than the size of your baking sheet. Cover with a tea towel and let it rise for another 10-15 minutes.
The pizza
Set your oven to 260°C / 500°F. My oven has a special pizza setting but you can use top / bottom heat as well. Put the baking sheet on the bottom of your oven to heat it (for around 10 minutes).
Take the hot baking sheet out of the oven, turn it around and place it carefully on two stable wooden boards or mats as it will be very hot. Place your risen dough carefully but quickly (best done by two people) on the baking sheet, push it gently into place if necessary. Sprinkle with the slices of lemon, rosemary and olive oil and dollop the chèvre with a tea spoon on top.
Put the baking sheet back into the oven, on the bottom again, and bake for a few minutes until the pizza is golden, season with salt and pepper.