Espresso Meringue Cookies with Spiced Chocolate Ganache
The peace and silence of a Sunday morning is just perfect for an Advent baking session. I take my time to choose a recipe that fits my mood, lay out the ingredients and I'm filled with a kind of excitement that isn't too far away of what I felt as a child when I used to prepare this same ritual with my mother. Years have past and now it's my own kitchen filled with the most beautiful smell of cookies and Christmas cakes but the magic of this moment touches me just as much.
Although my oven doesn't see meringue too often, I have to make my luscious meringue sandwich beauties at least once during the Christmas season. Two delicate drops of espresso meringue cookies stuck together with the most aromatic bittersweet chocolate ganache refined with cardamom and cinnamon are such a sumptuous treat! The whipped egg whites turn into crisp bites which are a perfect contrast to the creamy lusciousness of the dense filling.
This is an adult cookie, it needs a bit of care and gentle handling but it's worth it. There are so many festive treats which don't ask for much, a quick short crust dough, some fancy or nostalgic cookie cutters and the kitchen turns into a christmassy bakery. My meringue cookie is a little diva, it demands special treatment, care and attention, but the result is so amazing that the attitude is forgiven. The great thing about the Advent season is that there are four weeks of festive baking, four weekends to choose from traditional family recipes, experimental new discoveries and delicious finds from various culture's culinary cookie collections. Every week, there are new spices to use, new pastries to work with to bring the sweet classics from our childhoods back to the table. Nuts and seeds, flour, chocolate, spices and icing sugar spread all over the kitchen tops, this is a picture full of memories which makes this time of the year so special to me.
I had an unexpected little visitor this weekend who joined my baking. Our godchild visited me to take a look at our Christmas tree and also helped me prepare a batch of Gianduja cookies. The two of us listened to some music, rolled out the dark Kipferl between our hands and had a chat. Now I'm the one who can pass on my cookie knowledge to the next generation and maybe he will remember this moment when he's in his own kitchen one day, as a man, rolling Kipferl. We were both really sad when his father came to pick him up but we already have a date for another baking session!
Have a wonderful 2nd Advent!
And here's some inspiration for more christmassy cookie recipes:
Espresso Meringue Cookies with Spiced Chocolate Ganache
The ganache has to cool in the fridge for a few hours or in the freezer, or you can let it harden overnight, like I did.
For about 20 sandwich cookies you need
For the ganache
good quality bittersweet chocolate 150g / 5.5 ounces
heavy cream 150 ml / 5 ounces
instant espresso powder 1/2 teaspoon
ground cardamom 1/8 teaspoon
ground cinnamon 1/4 teaspoon
In a sauce pan, heat the cream and add the chocolate, espresso and spices. When the chocolate is melted whisk the mixture until well combined, let it cool and keep in the fridge for a few hours until stiff.
For the meringue cookies
organic egg whites 4
granulated sugar 180g / 6.5 ounces
a pinch of salt
white wine vinegar 1/2 teaspoon
instant espresso powder 2 teaspoons
Set the oven to 140°C / 275°F (top / bottom heat) and line a baking sheet with parchment paper.
Whisk the egg whites and salt until stiff. Slowly add the sugar and vinegar and continue mixing until stiff and glossy. Mix in the espresso powder and fill the meringue mixture in a piping bag (with a wide opening). Pipe walnut sized mounds on the lined baking sheet, leaving some space in between them. Bake for 50-55 minutes or until they are golden and firm on top, place a wooden spoon in the door to keep it open a bit while the meringues are baking. They should easily peel off the parchment paper when they are done. Let them cool completely on a wire rack before you stick them together with the ganache.
Assembling the cookies
Whisk the hard ganache until light and creamy (like a frosting). Spread the ganache on one cookie and gently (!) stick another one on top.
Elisenlebkuchen - Juicy Spice Cookies with Bittersweet Chocolate
Elisenlebkuchen are essential German Christmas treats! A bite of these juicy spice and chocolate cookies, a sip of my mulled wine and some John Fahey tunes in the background and I'm right in the mood for the 1st Advent!
These dark sweets are a special kind of Lebkuchen, made without any flour or butter but lots of ground hazelnuts, almonds, spices and citrus fruits. They are often compared to gingerbread (which I find difficult as there's no ginger involved in the recipe), with a similar aromatic juiciness which is no surprise as they combine all the wonderful flavours associated with festive baking, like cinnamon, cardamom, cloves, all spice and citrus. A simple Lebkuchen officially becomes the queen of all Lebkuchen, the fine Elisenlebkuchen, when the dough contains more than 25% of nuts and less than 10% flour. It's kind of a royal upgrade to keep the quality and protect its tradition. Originally from Nuremberg (Nürnberg in German), the city gained fame all over the world for this sweet delicacy. I remember emptying one package of them after the other as a child at Christmas, preferably the ones covered in bittersweet chocolate. The Nuremberg Lebkuchen are either 'naked' or glazed with sugar or chocolate, which were the most popular ones in my family so I had to eat them quick.
After years of stuffing my belly with them under the Christmas tree, the time has come to start the Lebkuchen production at my home. Elisenlebkuchen are often quite big but I wanted a smaller size, just a small bite to enjoy them more often. The preparation is surprisingly easy. The dough can be used as soon as it's mixed although some bakers recommend keeping it in the fridge overnight. It's a bit sticky but manageable. You just have to drop a dollop of it on a thin edible wafer paper for cookies (also known asoblate) and put them in the oven until they are golden but still soft inside. The result is almost spongy and so fragrant that it wasn't easy for me to watch them cool before I could brush them with bittersweet chocolate. When you have a treat like this in front of you, the last thing you want to do is wait!
In the past, certain bakeries were specialised in the production of Lebkuchen all over the country to create their own christmassy signature sweet for their region. The textures and shapes vary, some are cut into squares like in Aachen in the west of Germany, or baked in the shape of hearts like in Bavaria. Elisenlebkuchen are still my favourite, with chocolate of course and preferably in large amounts!
Have a jolly 1st Advent!
Elisenlebkuchen
For 40 cookies you need
organic eggs (at room temperature) 3
granulated sugar 210g / 7.5 ounces
hazelnuts, roughly chopped, 40g / 1.5 ounces
ground hazelnuts 200g / 7 ounces
ground almonds 80g / 3 ounces
candied lemon peel 50g / 2 ounces
candied orange peel 50g / 2 ounces
lemon zest 2 teaspoons
orange zest 2 teaspoons
ground cinnamon 1 1/2 teaspoons
ground cardamom 1/4 teaspoon
ground cloves 1/2 teaspoon
ground coriander 1/2 teaspoon
ground allspice 1/4 teaspoon
ground mace 1/4 teaspoon
a pinch of salt
edible round wafer papers for cookies (50mm / 1/4" diameter), 40 (if you use a bigger size, add a little more dough on each of them and bake the cookies a bit longer)
bittersweet chocolate 300g / 10.5 ounces, for the topping
butter 1 1/2 tablespoons, for the topping
almonds 40, for the topping
Set the oven to 180°C / 355°F and prepare a baking sheet with parchment paper.
In a saucepan, melt the chocolate and butter for the topping.
Mix the eggs and sugar with an electric mixer for about 7 minutes until light and creamy, there shouldn't be any sugar crystals left.
Combine the ground nuts, almonds, candied peel, zest, spices and salt and gently stir into the egg sugar mixture with a wooden spoon until combined. Stir in the chopped nuts and put a heaped teaspoon of the dough on each round wafer paper. Put the cookies on the baking sheet and bake in the oven for about 13 minutes or until golden, they should stay soft inside.
Let them cool on a rack before you brush them with the melted chocolate and garnish each of them with an almond.
Reflections on 1 Year of eat in my kitchen, 365 Recipes and an Apple Strudel
When I decided to start a food blog in October last year, at the breakfast table on a cold and misty morning in Berlin, I had no idea what I was getting myself into. I felt recklessly excited, so much so that I made a big decision which changed my life drastically in the past twelve months. My goal was to share a recipe a day, for at least 1 year. I was so inspired by this idea, my head was full of recipes and stories that I wanted to write down on the as yet empty pages of eat in my kitchen. I knew I would have enough of a repertoire to cook, to bake and to talk about for a few years so I thought I might as well share all this with the world once a day.
It has been intense if not tense at times, I completely underestimated how much time it would take to capture a dish in mouthwatering photos, to describe what I do in my kitchen, what your taste buds can expect, but also to inspire you to go to your own kitchen, to pull out the pots and pans and trust me. When I shared the first recipes, I didn't think about the fact that you would have to believe me that my recipes would work out for you as much as they do for me. You would have to buy the ingredients, take some time out and cook with the same excitement that I felt. At one point, after I had been writing for a few days, it clicked, I understood what it meant and it overwhelmed me. Until today, every time I get an email from someone who felt enticed by one of my posts and cooked or baked my recipes and tells me about the result, I'm as happy as a child at Christmas. It's a wonderful experience and there are no words to describe how thankful I am for this journey which put so many amazing moments into my life, and a written collection of more than 365 recipes!
In the past few months, I've written a lot about enjoyment, culinary pleasures and the fun of cooking in your own kitchen and treating the ones you love with the fruit of your work, that's not a cliché, this fills me with true happiness. No matter if the final result on the table is mind-blowing or if a recipe still needs some work, the time spent creating this meal is precious. No one forces us to put our money into good quality and natural ingredients, no one tells us to turn them into a delicious meal, it's our decision, one that we make every day to treat our body well but also to let our minds rest. Beyond all the satisfaction which my taste buds get from a great home cooked meal, I call my daily dinner a feast because I feel complete bliss as soon as I go into my kitchen to get out the vegetables and knifes, to chop and stir, to taste and experiment. I take this time out for myself, sometimes I get the record player started, open a bottle of wine, and I slow down my pace, always. There are a million other things I could do instead but I decided that this would be a part of my life, this is what I would do every evening for a couple hours. This choice has always been a gift and it still is, as it has given me some of my best memories, all saved in food.
For about three days, I thought about a recipe which I would like to share with you today. I was looking for something which tastes exceptionally good to celebrate this special day, but I also wanted to write about an experience which I felt quite a few times in the past year, to struggle, to doubt, to feel like giving up but in the end, to trust and follow your inner voice which guides you into the right direction.
One of the earlier dishes I made for eat in my kitchen, was a rabbit stew. It tasted fantastic but it didn't look pretty and I had no experience whatsoever capturing every kind of food deliciously in a picture. I was used to taking photos of our dinners or lunches once in a while to freeze the moment but not to make it look good and appealing on a plate. So I sat on the floor of our kitchen, crying, it was late in the evening, my boyfriend was my light man standing on a chair and holding a fluorescent tube from the hardware store, trying to make it work. The scene was ridiculous and so funny at the same time, at least now when I look back! It didn't work out, the rabbit never made it onto the blog and that night I thought I would give up, but instead I made a few changes and moved on. No more artificial light and no more stews until I felt experienced enough to capture their rustic beauty in a photo.
I'm not going to share a rabbit recipe with you today but another advanced kitchen task, Tyrolean apple strudel. This isn't a quick and easy cake but it teaches you to trust. It's a bit of a challenge but it will reward you with one of the greatest enjoyments of the sweet world, pure buttery fruitiness. The strudel is filled with lots of apples, raisins and spices all wrapped in a cinnamony short crust. The pastry isn't crisp like a pie, it's a bit soft, almost juicy which makes it quite delicate to handle. There is another strudel variation made with a very thin and flaky dough called Ziehteig in German but I prefer my strudel with short crust. It's my favorite of all strudels, buttery, soft and slightly crisp on the outside.
The final result is fantastic but you will have to work for it and trust yourself and maybe improvise at times. There may be moments you want to give up, when you feel that you can't get it right and for a second, you believe that it's over, you're done with it (although it's just a cake, it can feel quite dramatic). But then, out of the deepest corner of the mind comes a spark, a pull, like a defiant little child that doesn't want to accept a "no", and this feeling that seems like a mood at first, doesn't want to fade, it grows instead until it becomes a force. It fills you up with energy again, confidence, the exact power you need to overcome this low, because that's what it is in the end, nothing more and nothing less than a low that will pass. Maybe these words fit more to my last year than to a strudel but anyhow, it can feel similar in the kitchen at times. So back to my strudel, the first 10 minutes in the oven are the critical phase, it can be tricky. The dough can crack, it happens sometimes but it's not a problem, you just have to close it again. And here's when the trust comes in. I've been making this recipe for almost 15 years but today's strudel opened more than any other before as I took my time taking pictures so the pastry got warm. I was used to a few cracks on the top which you can easily close with two spoons, but this time, one side opened completely. So I had to react quickly, I pulled the pastry up again with the help of the parchment paper and stabilized it with small baking dishes on each side. I got a bit nervous but it worked, as always.
And maybe that's one of the biggest lessons I've learned in the past year, not for the first time in my life, but with a kind of intensity I never felt before. As long as you don't give up and trust everything will work out. The peace discovered through this experience is a treasure.
I want to thank you so much for joining me while I fill these pages of eat in my kitchen. I hope you enjoy the time in the kitchen and at the table with these recipes as much as I do. There will be many more to come, not every day but about four times a week. I need a little break once in a while to feed my inspiration.
Thank you to my mother and my whole family in Germany, Malta and in the US for being such an amazing inspiration to my kitchen and a big thank you to my boyfriend for his patience!
Lots of love from Berlin,
Meike xx
Tyrolean Apple Strudel
For 1 large apple strudel you need
For the dough
plain flour 300g / 10.5 ounces
granulated sugar 150g / 5.5 ounces
ground cinnamon 1 teaspoon
baking powder 2 leveled teaspoons
a pinch of salt
butter, cold, 150g / 5.5 ounces
organic egg, beaten, 1
Combine the flour with the sugar, salt, baking powder and cinnamon. Cut the butter with a knife into the flour until there are just little pieces of butter left. Continue with your fingers and rub the butter into the flour until combined. Add the egg and continue mixing with the hooks of your mixer until you have a crumbly mixture. Form a thick disc, wrap in cling film and put in the fridge for 1 hour.
For the filling
sour apples (like boskoop), peeled, cored, cut into 8 pieces each and sliced thinly, 800g / 1 3/4 pounds (weight of the apples before peeling and coring)
raisins 100g / 3.5 ounces
dry breadcrumbs 60g / 2 ounces
butter 1 teaspoon
vanilla, the seeds of 1/2 pod
ground cinnamon 2 1/2 teaspoons
zest of 1/2 lemon
zest of 1 orange
freshly squeezed lemon juice 1 tablespoon
freshly squeezed orange juice 1 tablespoon
Kirsch schnaps 2 tablespoons
granulated sugar 80g / 3 ounces
Roast the breadcrumbs in the butter, stirring constantly until golden brown. Let them cool.
In a large bowl, mix all the ingredients for the filling apart from the sugar; you add the sugar when the filling is spread out on the pastry.
The strudel
organic egg, beaten, 1 for the egg wash
icing sugar for the topping
Set the oven to 180°C / 355°F (fan assisted oven).
Roll out the dough between cling film, about 35 x 30 cm / 14 x 12". Take the top layer of cling film off the pastry and put a large piece of parchment paper on instead. Flip the dough around so that the parchment paper is at the bottom and take off the cling film on top. Gently spread the filling evenly on the pastry but leave a 2cm / 1" rim around it, sprinkle the filling with the sugar. Carefully roll up the dough from the long side, it should be quite tight, if possible, push the apples back in that fall out. When the strudel is rolled up put the fold at the bottom and close the sides by pushing the dough together. Quickly move the strudel on the parchment paper onto the baking sheet, brush with the egg wash and bake for 40 minutes or until golden brown. Watch the strudel in the first 10 minutes, if it opens, quickly close it with the back of a spoon. If it opens on the side, pull up the parchment paper to put the pastry back into place and hold it in place with a small ovenproof dish put right next to the strudel. When it's done, take it out of the oven and let it cool on the baking sheet for a few minutes before you sprinkle it with icing sugar.
Enjoy pure, with whipped cream or custard sauce.
For the custard sauce
organic egg yolks 4
cornstarch 3 tablespoons
granulated sugar 100g / 3.5 ounces
milk 700ml / 3 cups
a pinch of salt
vanilla pod, slit slightly, 1
Whisk the egg yolks with the cornstarch, sugar, salt and 50ml / 2 ounces of the milk until well combined.
In a sauce pan, bring the remaining milk with the vanilla pod to the boil. Take the vanilla pod out and scrape the seeds out of the bean into the milk. Add the egg mixture to the hot milk, whisking well. Take the sauce pan off the heat after 1 minute and continue whisking for 2 minutes, serve hot.
Breakfast Crêpes with sweet Sour Cream
This is one of the best things you can do with a golden crêpes, fill it with sweet whipped sour cream! The cream is so simple that whenever I make it for my friends, no one manages to guess what's in it. It's definitely not much, just sour cream whipped with icing sugar but for whatever reason, it creates a unique taste between sweet and sour which is far more fine than you would imagine.
I learned about this recipe from my stepfather who lived in Paris for a few years. Uli adores this country, the food and lifestyle and he praises its cuisine almost as much as the one he grew up with, the traditional Swabian cooking. He's a true gourmet, one of the most joyful and critical I know who loves his food and wine with such passion that he celebrates every meal. A dinner with him is a feast and even the smallest nibble for lunch turns into a special treat. It's the way he talks about it, how he appreciates every bite, that it becomes more than just food, it's a celebration of life. Uli brought a huge French influence into my family's cooking, yesterday's Coq au Vin, my Daube de Boef Provençale, the creamy Vichyssoise or my mother's Tarte Tatin, I'm sure I would have cooked these recipes at one point in my life anyway, but his notes and comments to the recipes, his authentic knowledge and the stories about his life in France which he has told us since we were children turn these dishes into something very special (and delicious!). I still call him when my cooking turns French for some tips and advice.
I remember that we often used to make these crêpes as a spontaneous dessert after a long dinner when we all didn't feel like finishing our gathering at table but rather listening to more stories while eating these wonderfully luscious crêpe rolls. Uli always used to remind us in the kitchen that we have to make them thinner, like in France! Today, I love to make them for a late breakfast on the weekend, with a Café au Lait at hand and some Jacques Brel in the background. Although he was Belgian he's still one of my favourite singers when it comes to French chansons! He makes me feel like I'm in Paris!
Crêpes with sweet Sour Cream
For about 20 crêpes (for 4-6 people) you need
plain flour, sieved, 250g / 9 ounces
granulated sugar 50g / 2 ounces
a pinch of salt
organic eggs 4
milk 1/2l / 2 cups
butter, to fry the crêpes
For the sweet cream
sour cream 400g / 14 ounces
icing sugar 6 tablespoons plus more to taste
Whisk the sour cream and icing sugar to a light and fluffy cream and sweeten to taste.
Mix the ingredients for the crêpes to a smooth dough (with an electric mixer) and let it sit for 15 minutes.
In a non-stick pan, heat a teaspoon of butter. Pour in a ladle of the dough, holding the pan in your hand and turning it so that the dough spreads evenly and very thinly. The temperature should be on medium-high as the crêpes won't need more than 1 minute on each side once the heat is set right. I always use the first two crêpes to find the right setting. When the crêpe is golden on both sides, fold it twice and keep it warm in the oven at 80°C / 175°F. Always heat a teaspoon of butter before you add new dough to the pan. When the last batch is done serve with the sweet sour cream.
Ottijiet - Maltese Tea Time Cookies with Sesame Seeds, Cloves and Aniseed
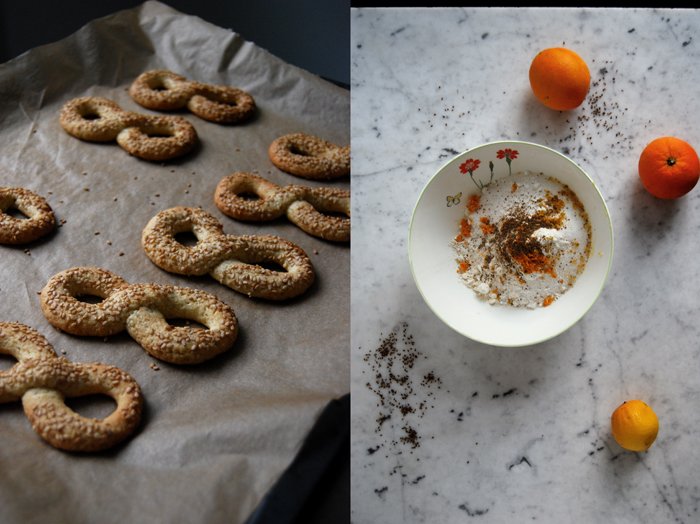
Almost ten years ago, I found my favourite tea time cookie on a little island in the Mediterranean. The Maltese Ottijiet are crumbly short crust based cookies, shaped in a figure of 8, hence the name ottijiet (the plural of otta) derived from the Italian word for eight, otto. The composition is not very sweet but packed with wonderful flavours ripened under the Mediterranean sun: orange, lemon, aniseed, cloves and sesame. It's one of the most aromatic sweets I know. Imagine the smell of the air in my kitchen while they're baking in the oven, it's beautiful!
When we're on the island, I always go to my trusted confectionary Busy Bee in Msida on the first or the second day of our stay to stock up on ottijiet for our traditional 5 o'clock tea breaks in Jenny's kitchen. As I'm not the only one in the house who is obsessed with them, I buy a few bags right away to avoid cookie shortages. This sweet became an important part of our daily ceremony, we all come together and meet around my Maltese mother's big wooden table in the afternoon to chat and savour our caramel coloured teas. Many Maltese like to dip the crunchy rings into their warm beverage and our family has often tried to convince me of this ritual - without success, it's not for me!
Whenever friends and family visit us in Berlin, they know how to make me happy and bring a few packages of ottijiet to our kitchen. But after so many years and cookies, I felt ready to bake my own. I was a bit nervous but luckily we still had a package from Jenny's last visit so I didn't have to depend on my taste memory. Ottijiet are kind of a national dish and I have learned a lot about the various traditional recipes and the obligatory spice mixtures from the cooks I met over the years. I knew roughly what I had to do but it took two batches of dough until my Maltese partner approved the result and I was happy too. But then, they were as good as Busy Bee's!
Ottijiet - Maltese Tea Time Cookies with Sesame Seeds, Cloves and Aniseed
Before you bake the cookies, the dough should rest in the fridge for about 1 hour.
For 22 ottijiet you need
plain flour 300g / 10.5 ounces
granulated sugar 100g / 3.5 ounces
baking powder 2 teaspoons
a pinch of salt
aniseed, ground in a mortar, 3 leveled teaspoons
cloves, ground in a mortar, 20 (about 1 1/2 teaspoons)
vanilla, the seeds of 1/2 pod
orange zest 1 teaspoon
lemon zest 1 teaspoon
butter, cold, 100g / 3.5 ounces
organic egg, beaten, 1
freshly squeezed lemon juice 1 tablespoon
freshly squeezed orange juice 1 tablespoon
water, cold, 1 tablespoon
sesame seeds about 50g / 2 ounces, for the topping
Combine the flour with the sugar, salt, baking powder, spices and citrus zest. Cut the butter with a knife into the flour until there are just little pieces of butter left. Continue with your fingers and rub the butter into the flour until combined. Add the egg, juices and water and continue mixing with the hooks of your mixer until you have a crumbly mixture. Form a thick disc, wrap in cling film and put in the fridge for about 1 hour.
Set the oven to 200°C / 390°F (fan assisted oven) and line a baking sheet with parchment paper.
Put the sesame seeds on a plate.
Break large walnut sized pieces off the dough and roll them between your hands for about 5 seconds. On the kitchen top, roll them into thin, 25cm / 10" long sausage shapes and close them well to form a ring. Twist the ring to an 8 shape, dip it into the sesame seeds and spread the cookies on the baking sheet with some space in between them as they will rise. Bake the ottijiet for 11 minutes or until golden brown and let them cool on a rack. Store them in your cookie jars and enjoy with a cup of tea!
My Granny's Donauwelle - a Marble Cake with Cherries and Buttercream
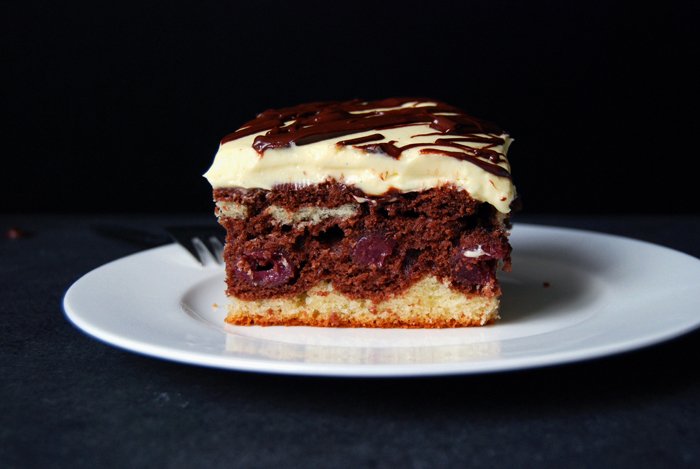
In my young years, I built up a remarkable reputation in my family regarding the amount of cake I could eat at one go. Our regular gatherings at my granny Lisa's house used to start with a huge cake buffet which equaled paradise in my childish eyes. Most of my aunts and uncles are passionate cooks and bakers, they always lined up a scrumptious selection of our sweet family classics, like black forest cake, cheese and fruit cakes, spongy lemon cake, crumbles and my granny's masterpiece, her fabulous Donauwelle (meaning Danube wave). This traditional cake is also known as Snow-White-Cake due to its colour combination. It combines a layer of juicy black and white marble cake with sour cherries, German buttercream and melted bittersweet chocolate on top. The original name refers to the wavy pattern which you see when you cut the pieces. The cherries sink into the dough while it's baking and create waves like the Danube river - Donau in German.
As a child, I used to have quite a healthy appetite, but sometimes I pushed my borders. I could easily eat five or six pieces of cake, especially when I tried to keep up with my well built male cousins. Of course, there were many days I had to suffer afterwards but it was all forgotten by the next family feast.
It's been more than twenty years since my granny passed away and I never baked this cake myself. I kept the recipe safe and waited. But then, when my Maltese mother Jenny visited us last week, I thought about a special German sweet to treat her to. My granny Lisa's Donauwelle was the first one that came into my mind and it felt like the right time to finally give it a try. I was a bit nervous so I called my sister to get some more detailed instructions. After a few adjustments and improvisations on the recipe (we forgot to use the fifth egg as it rolled behind the toaster but we didn't miss it in the final result), we had this luscious family classic on our table. It tasted like my granny's and brought back sweet memories of her in the kitchen, of her cherry tree in her garden and the perfect times I used to spend at her house.
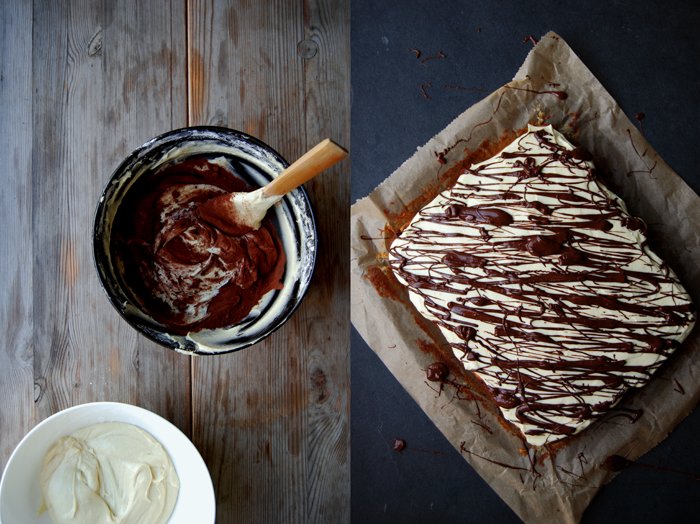
The cake is traditionally completely covered in chocolate decorated with a wavy pattern, my granny made it this way too. I find the bittersweet taste too overpowering so I went for a lighter chocolate sprinkle. I also only used half of the butter for the buttercream, it made it less dense and heavy.
We were all quite impressed with the result and savoured it for days. On the second and third day, we thought it was best but the chocolate wasn't as pretty any more, but who cares! What can I say, food is like music, it saves memories for the rest of our life so that we can recall them at any time, I love that!
Donauwelle
For a 24 x 30cm / 10 x 12" baking dish you need
sour cherries (preserved) 300g / 10.5 ounces
bittersweet chocolate 100g / 3.5 ounces, for the topping
butter 1 tablespoon, for the topping
For the marble cake
butter, at room temperature, 275g / 10 ounces
granulated sugar 275g / 10 ounces
seeds of 1/2 vanilla pod
organic eggs 4
milk 175ml / 6 ounces
plain flour 400g / 14 ounces
baking powder 1 package (4 teaspoons)
a pinch of salt
dark unsweetened cocoa powder 2 heaped tablespoons
Set the oven to 180°C / 355°F (fan-assisted oven) and line the baking dish with parchment paper.
Beat the butter, sugar and vanilla until light and fluffy. Add the eggs, one at a time and continue beating for a few minutes until thick, creamy and light yellow. Combine the flour, salt and baking powder. Fold the dry ingredients and the milk with a wooden spoon gently into the butter egg mixture, alternating, about 1/3 at a time. Divide the dough in half between two bowls and stir the cocoa powder into one of them.
Scrape the light dough into the baking dish, even it out and put the dark one on top. Spread the cherries on top, one by one, and push them lightly into the dough. Bake for 40 minutes or until the top is golden brown and the cake is done. Check with a skewer, it should come out clean. Let the cake cool completely.
For the German buttercream
All ingredients for the buttercream must be at the same temperature (room temperature) to combine well!
butter 125g / 4.5 ounces
organic egg yolks 4
cornstarch 60g / 2 ounces
granulated sugar 120g / 4.5 ounces
milk 500ml / 17 ounces
a pinch of salt
vanilla pod, slit slightly, 1
Beat the soft butter for 5 minutes until white and fluffy.
Whisk the egg yolks with the cornstarch, sugar, salt and 50ml / 2 ounces of the milk until well combined.
In a sauce pan, bring the remaining milk with the vanilla pod to the boil. Take the vanilla pod out and scrape the seeds out of the bean into the milk. Add the egg mixture to the hot milk, whisking well. Take the sauce pan off the heat after 1 minute and continue whisking for 2 minutes until stiff. Fill into a bowl and cover the pudding’s surface with cling film.
When the vanilla pudding has cooled off completely, press it through a sieve and mix it in batches with the beaten butter, first with a spoon and then with your mixer for a few seconds until nice and creamy.
The Donauwelle
For the topping, melt the chocolate and butter and let it cool a little.
Spread the buttercream on top of the cake and decorate with the melted chocolate.
The darkest Gâteau au Chocolat
99% dark chocolate - I went for the darkest Swiss chocolate I could find for my petit gâteau! For months I've had this cake on my mind, dark, moist and rich, an adult cake that combines the best of a luscious mousse au chocolat and a tender cake. So often I've enjoyed this bitter sweet at French patisseries or as a dessert with whipped cream melting on top in one of Paris' pretty bistros in the hidden side roads.
This treat doesn't need many ingredients but the few should be of exquisite quality, especially the chocolate. Sometimes this gâteau is dusted with icing sugar but I don't like to hide its honest dark beauty under a layer of blank white. I also don't see the sense of using one of the best chocolates to blur down its complex taste by using cheap sugar. So my gâteau stays naked! Spiced with a little cinnamon and cardamom, its a rich composition perfect for desserts or for Sunday afternoon tea time, my favourite! I had a few slices with a cup of Darjeeling and it was heavenly!
Gâteau au Chocolat
For a 20cm / 8" springform pan you need
dark chocolate (at least 70% cocoa, preferably 99%) 150g / 5.5 ounces
butter 150g / 5.5 ounces
organic eggs 4
granulated sugar 180g / 6.5 ounces plus 1-2 tablespoons for the whipped cream
plain flour 120g / 4.5 ounces
ground cinnamon 1/8 teaspoon plus a pinch for the whipped cream
ground cardamom 1/8 teaspoon plus a pinch for the whipped cream
a pinch of salt
heavy cream 200g / 7 ounces, for the topping
Set the oven to 180°C / 360°F (fan assisted oven) and line the springform pan with parchment paper.
In a saucepan (or a bain-marie), melt the chocolate and butter and let it cool off for a few minutes.
Whisk the egg whites with the salt until stiff.
Combine the flour with the cinnamon and cardamom.
Mix the egg yolks and sugar until light and fluffy and stir in the chocolate/ butter mixture. Stir in the flour/ spice mixture with a spoon before you gently fold in the stiff egg whites. Put the dough into the lined springform pan and bake for about 30 minutes or until the cake is done. Check with a skewer, it should come out clean. Let the cake cool for a few minutes before you take it out of the springform pan and serve with with the spiced whipped cream.
Whip the cream with sugar, cinnamon and cardamom and season to taste.
Crystallized Stem Ginger
When Food52 asked me if I would like to contribute five recipes to their Halfway To Dinner column I was so excited that I went through my recipe collection on my blog right away. I had to choose one ingredient which would be featured in all dishes, not necessarily for dinner but also for desserts. It's October and I already mentioned that pumpkins are piling up in my kitchen constantly so what else would fit better than the whole range of winter squash featured in gnocchi with pesto, a spicy pumpkin soup with bittersweet chocolate and red hot chili peppers, golden Hokkaido spaghetti, a juicy Irish ginger brack for tea time and finally a pumpkin pie with coriander caramel. You can also find the whole collection on Food52!
One of the recipes, the wonderful Irish tea cake is made with crystallized stem ginger which I usually buy from the store but a lady who commented on the column sparked an idea. She asked for a substitute which isn't really possible as the taste and texture of this kind of ginger is unique. It's like sweet and spicy candy, slightly soft but with bite. So if you can't buy it, you have to make it yourself and here's the recipe! I started this project the same morning as I was really curious to see if it would work out. After some research it took about an hour and a half as I had to cook it twice, once in water and then with sugar and water, but I was rewarded for my work with the tastiest stem ginger I ever had in my kitchen. It's spicier and stronger, exactly what I like! I used very fresh organic ginger, when I cut it the juices started to run out of the roots. The harder and older it is the longer it will take to soften and the taste won't be as good!
Crystallized Stem Ginger
For 1 medium sized jar you need
very fresh organic ginger roots, cut into 1.5cm / 0.5" cubes, 250g / 9 ounces
granulated sugar 250g / 9 ounces plus more to sprinkle the ginger
water
Cook the ginger in 350ml / 1.5 cups of water on medium-low heat (simmering) for about 50-60 minutes until the ginger is between soft and al dente. Cook it open for the first 15 minutes before you close the pot with a lid. When it's done, drain the ginger in case there is any liquid left. If the water evaporates before the ginger is done add a little more water.
In a saucepan, bring the ginger and sugar in 30ml / 1 ounces of fresh water to the boil. Let it cook (bubbling) for about 30 minutes until the sugar starts to crystallize.
Take the ginger out with a slotted ladle immediately and spread it on parchment paper sprinkled with sugar. Separate the single pieces and put the crystallized ginger in one airtight box and the sugar pieces in another one using it for mint or lemon teas or your baking.
Pumpkin Pie with Coriander Caramel
It's only been a few years since I tried my first pumpkin pie. My boyfriend's American side of the family brought this delicious autumn treat into my life and I liked it from the first bite. I think I started with a recipe that was given to me by his mother Jenny who is Maltese but who once got as strongly influenced by American baking traditions as I did over the past few years. She lived in Canada and LA before she went back to her island home in the Mediterranean and took many recipes for sweet temptations with her!
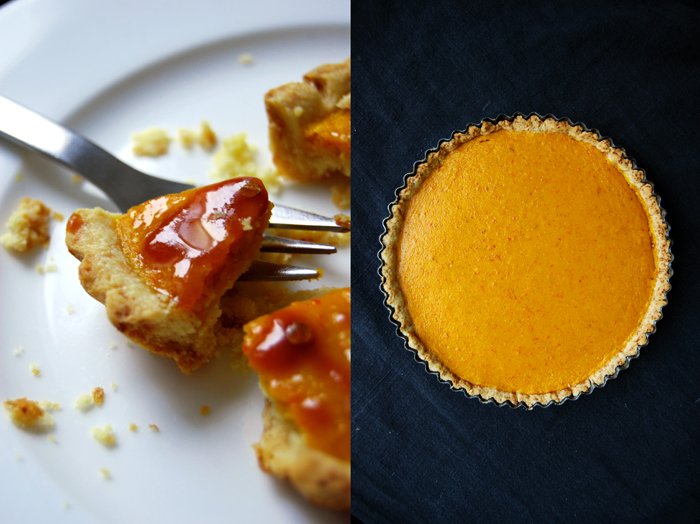
After all the years of baking pies in my kitchen, several Halloweens and quite a few attempts at pumpkin pie I came up with this recipe with a little extravagance in the topping. I make a thick caramel sauce with crushed coriander seeds to drip over the golden pie. The sweet and bitter caramel refined with the aromatic seeds tickles the taste buds just right, it's an amazing combination! I always use homemade pumpkin purée preferably made of the orange Hokkaido as I like the little bits of skin shining through the surface that you can only leave on this kind of squash. The pumpkin takes just half an hour in the oven until it's done and it tastes so much better than the store bought purée. My pie mixture is refined with a good amount of spices, the obligatory mace, fresh ginger, cloves and cinnamon have to be quite present for my taste. The short crust I use is crumbly and buttery - crisp as it should be.
I baked the pie in one big round tart tin and a few smaller tartlets which I almost prefer as the pumpkin mixture was a bit more flat and therefore not too overpowering. It can easily cover up the flavours of the delicate pastry which is a pity, it has to be well balanced as always in life!
This recipe has been featured on Food52 Halfway To Dinner!
Pumpkin Pie with Coriander Caramel
For 1 big 22cm / 9" tart tin (preferably loose-bottomed) and 4 small tartlets (or 2 big pies) you need
For the short crust
plain flour 250g / 9 ounces
granulated sugar 1 1/2 tablespoons
salt 1/4 teaspoon
butter (cold) 140g / 5 ounces
water 2 tablespoons
Combine the flour with the sugar and salt. Cut the butter with a knife into the flour until there are just little pieces of butter left. Continue with your fingers and rub the butter into the flour until combined. Add the water and continue mixing with the hooks of your mixer until you have a crumbly mixture. Form a disc, wrap in cling film and put in the freezer for 10 minutes.
For the pumpkin filling
pumpkin purée 400g / 14 ounces or pumpkin (squash), without the fibres and seeds, cut into cubes, 500g / 17.5 ounces (Hokkaido with skin or peeled butternut or Musquée de Provence pumpkin)
milk (warm) 250ml / 1 cup
organic eggs 2
Demerara sugar 80g / 3 ounces
ground cinnamon 1 teaspoon
ground mace or nutmeg 1/4 teaspoon
ground cloves 1/8 teaspoon
salt 1/4 teaspoon
freshly grated ginger 1 heaping teaspoon
For the pumpkin purée
Set the oven to 200°C / 390°F (fan assisted oven).
Put the pumpkin into a baking dish. Cover the bottom of the dish with around 100ml / 3.5 ounces of water. Wet a piece of parchment paper under water, scrunch it up a little and cover the pumpkin in the baking dish, tucking the sides in. Cook for 30 minutes in the oven or until the pumpkin is soft. Purée the pumpkin in a blender or with a stick mixer and set aside (you could keep it in the fridge for a day).
For the pumpkin mixture
Mix the pumpkin purée with the milk and eggs until well combined. Stir in the sugar mixed with the spices, ginger and salt.
Set the oven to 200°C / 390°F (top/ bottom heat).
Roll out the dough between cling film and line your tart tins with the pastry. Prick with a fork and blind bake for 10 minutes or until golden.
Take out the tart tin and turn the oven up to 220°C / 430°F (top/ bottom heat).
Fill the pumpkin mixture on top of the pastry, even it out and bake for 10 minutes. Turn the temperature down to 180°C / 355°F and bake for another 5 minutes (small tartlet tins) or for 10 minutes (in the bigger tart tin) or until the pie is golden and just set. Take the pie out and let it cool before you pour over the caramel.
For the coriander caramel
granulated sugar 100g / 3.5 ounces
water 50ml / 2 ounces
heavy cream 100ml / 3.5 ounces
coriander seeds, lightly crushed in a mortar, 1 teaspoon
In a large pan, bring the sugar and water to the boil, don't mix it. When it turns into a caramel-brown colour (neither too light nor too dark), take the pan off the heat, add the coriander seeds and slowly pour in the cream, whisk gently but well, the caramel should be thick and smooth.
Apple Cinnamon Breakfast Cake
This is my new breakfast love! After French toast, muffins and pancakes I have a new addiction, I fell for the lightest and most perfect fruity cake you can imagine. I mixed the flour with cornstarch which makes the texture more fine, it's soft, fluffy and tender. That's all I could ask for on a morning table which doesn't mean that it wouldn't work for tea time either. The problem is that the cake didn't last that long!
I went for an apple topping but I already have a few variations in mind, with blueberries, plums, pears, even some sour gooseberries when their time has come again. The apples were just right for now, I cut them in half and scored their surface. That's how I prepare them for my crumble cake and it keeps them juicy. Before I put the cake in the oven I sprinkled it with a bit more cinnamon sugar than I would normally use and it made a nice thin crust, aromatic and crisp. I recommend making this cake in a springform pan not bigger than 20cm (8"). If you work with a bigger form the cake will turn out flat and possibly dry. It needs the height and here's were the quality of this cake lies, its lightness and sweet juiciness!
Apple Cinnamon Breakfast Cake
For a 20cm / 8" springform pan you need
sour baking apples (like boscoop), cored, peeled, cut in half and scored on the surface, 2-3
butter (at room temperature) 160g / 5.5 ounces
granulated sugar 90g / 3 ounces plus 2 tablespoons for the topping
organic eggs 3
plain flour 130g / 4.5 ounces
cornstarch 30g / 1 ounce
baking powder 1 heaping teaspoon
a pinch of salt
ground cinnamon 1/2 teaspoon, for the topping
Set the oven to 180°C / 355°F (fan assisted oven) and butter the springform pan.
Mix the sugar and cinnamon for the topping.
Combine the flour, cornstarch, baking powder and salt.
In a large bowl, beat the butter and sugar until fluffy. Add the eggs, one at a time and continue mixing for a few minutes until the mixture is thick and creamy. Mix in the dry mixture until well combined. Fill the dough into the buttered form and arrange the apples on top. Sprinkle with cinnamon sugar and bake for 40-45 minutes or until golden on top. Check with a skewer, it should come out clean. Let the cake cool for a few minutes before you take it out of the springform.
The Best Tiramisù
Berlin, October 2014:
Tiramisu! This has been my favourite dessert for twenty years. The recipe I use these days is the result of hundreds of variations tested in my own kitchen, at restaurants and at friends’ dinner parties. To me, now, mine is the best and the formula to get there is simple: 1 egg and 25g (1 ounce) of sugar for 100g (3 1/2 ounces) of mascarpone.
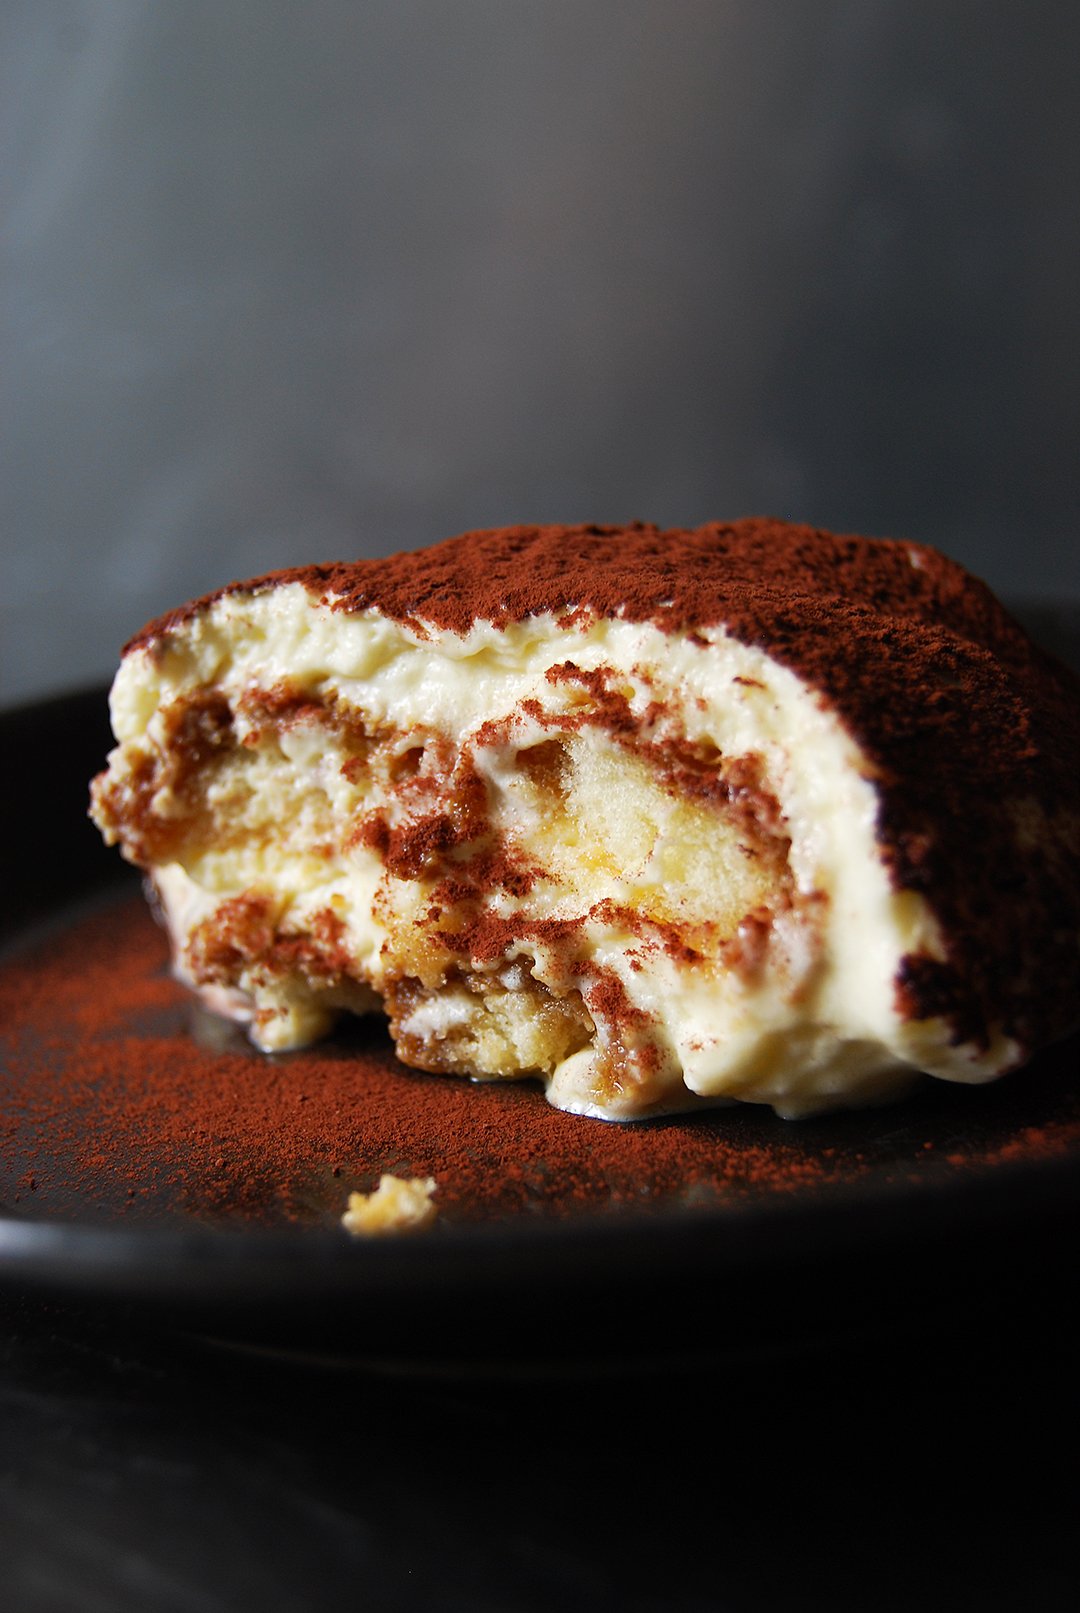
It's lush and creamy, the tender ladyfingers soaked with a well balanced (!) mixture of strong espresso and brandy. Once soaked overnight, they are light and soft yet still have structure, far from being too soggy and mushy (I can't stand when they are ‘swimming’ in liquid). I make the creamy filling with mascarpone, very fresh organic eggs and sugar, some people add whipped cream but I don’t like that - it makes it lack in taste. In case you’re worried about eating raw eggs in a dessert, I can only say that I (and my guests, and there were many) have never had any problems in all those years.
Tiramisu is an absolute crowd pleaser, invented to make a whole Italian family happy after a delicious meal. Although its name means "lift me up," I can't really agree with that. The coffee and sugar have a pushy effect but the amount that I can eat of it definitely works against that. So I prefer to make it when I have friends over, which means that I have to share it and eat a bit less. I always prepare it around 8-10 hours in advance and make a very large portion as it doesn't make much of a difference if you prepare it for six or sixteen people.
One thing is for sure, as soon as it is on the table, the room is filled with silence - the silence of joy!
Here's the summer version of this dessert I made a few months ago: Strawberry Tiramisù!
Tiramisù
I use a round dish of 25cm /10" that’s 6cm / 2.5" tall.
For 6-8 people you need
strong espresso (warm) 125ml / 4.5 ounces
brandy 50ml / 2 ounces
granulated sugar 125g / 4.5 ounces, plus 2 tablespoons for the ladyfingers
mascarpone (at room temperature) 500g / 17.5 ounces
very fresh eggs, divided, 5
a pinch of salt
ladyfingers 300g / 10.5 ounces
unsweetened cocoa powder for dusting
In a deep plate, mix the espresso and brandy with 2 tablespoons of sugar.
Beat the mascarpone until creamy; it won't combine well with the egg yolks and sugar mixture if you leave out this step.
In a large bowl, whisk the egg yolks (just the yolks, not the whole eggs!) and sugar until light and fluffy. Add the mascarpone and mix until well combined.
Whisk the egg whites with the salt until stiff and fold gently into the mascarpone-egg mixture.
Dip just the unsugared side of the ladyfingers for just 1 second (not longer or they will get mushy) into the espresso-brandy mixture and lay them with the sugared side down into a deep dish. They should lay very closely to each other. Spread half of the mascarpone mixture on top and cover with another layer of ladyfingers dipped in the coffee mixture. Spread the remaining mascarpone mixture on top and cover with cling film. Keep in the fridge for at least 8 hours (or longer) and dust with sieved cocoa powder just before serving.
meet in your kitchen | Dutch Baby for a late Breakfast with Marta Greber
This smile! This woman has the most beautiful and infectious smile! I met Marta Greber from the blog What Should I Eat For Beakfast Today in her kitchen and her charm and positivity impressed me as much as the dish she pulled out of the oven, her delicious Dutch Baby!
Marta came to Berlin three years ago after traveling the continents, she lived in Australia, in Asia and in various countries in South America. She grew up in Poland and started studying law before she spent some time in Barcelona, San Francisco and Amsterdam. This lady is restless and blessed, she always comes back home with the most exciting stories, food experiences and memories. In her husband Tomasz, she found a great travel partner but also a handsome hand model for her blog. Many of the delicious morning goodies that she shares on What Should I Eat For Beakfast Today are presented (and enjoyed!) by Tomasz. Both of them have a weak spot for traditions, especially the ones in the morning. The two get up early to start every day with a little walk through their neighborhood, a good coffee from one of their favourite cafes in hand followed by Marta's amazing breakfast creations that she writes about. Her love for the culinary celebration of the new day and her passion for photography led to the beautiful blog that she started in 2011. What started as a passion became her profession, she's now a full time photographer. Her artistic work is just stunning and everybody wants to see what Marta and Tomasz have for breakfast! When I asked Marta why this time of the day is so important to her to devote a blog to it, she said that it's the only time of the day she can plan and control as you never know what the day will bring. That's not a surprise for someone who is as restless as she is!
The two of us almost chatted the afternoon away but when Marta pulled her Dutch Baby out of the oven topped with melted chocolate, fruit and nuts, I was speechless! It looked scrumptious but unfortunately both of us wanted to take pictures of her work so we had to wait, including Tomasz who came into the kitchen twice to see if we were finally done so that we could eat!
Marta's Dutch Baby with melted Chocolate, roasted Nuts and Plums
For 1 Dutch Baby in a small heavy ovenproof pan or baking dish you need
butter 90g / 3 ounces
milk 110ml / 4 ounces
plain flour 120g / 4.5 ounces
eggs 2
a pinch of salt
For the topping
milk chocolate, melted, 100g / 3.5 ounces
mix of nuts, roasted, a handful
plums, sliced, 3
fresh mint 6 leaves
coconut flakes 1-2 tablespoons
Set the oven to 220°C / 430°F.
Put the butter in an iron pan or baking dish and place in the hot oven.
Melt the chocolate in a small saucepan or in a bain marie if you prefer. Take the pan off the heat as soon as the chocolate is melted. Roast the nuts in a pan (you can add a little coconut oil if you like). In a small bowl, mix the flour, eggs, milk and salt until combined.
When the butter is melted in the hot pan, gently pour the dough into the middle of the pan and bake in the oven for about 12 minutes or until golden.
When your Dutch Baby pancake is done, carefully remove the butter on top (with a spoon or pour it out) and cover with the toppings.
Your blog is called 'What Should I Eat For Breakfast Today', why does this specific meal play such an important role in your life? How did that start?
Morning is the only time during my day that I can control. If I get up earlier (and I usually do) I can prepare a great meal for me and my partner Tomasz, sit together over a nice cup of coffee, talk or simply enjoy food, morning light and silence. Later during the day it’s more complicated as we never know if we’ll be having other meals at home or not. I can also see how a good meal influences our frame of mind and day, so why not start in the morning.
You grew up in Poland, what are your food memories?
I was and still am addicted to polish racuchy - pancakes with apples. My grandma used to make them for me whenever I asked and I asked a lot. I could eat it for every meal. I can remember my grandma making great simple flavours that I loved like kogiel-mogiel (egg yolk bitten with sugar) or homemade pasta with milk and sugar. It was simple but delicious and I still prefer basic flavours.
How did your travels influence your cooking and eating habits?
It doesn’t help with finding my new small obsessions for sure. I try a lot of food but it doesn’t mean that I like everything. My fascination with breakfasts started in Sydney actually, where I had an amazing one in Bill’s Restaurant - ricotta pancakes with banana and it couldn’t be better. In Sydney I had a chance to try international cuisine and to figure out what I like. Then I traveled in Asia for almost a year and I understood that I could eat sticky rice with mango on an everyday basis and that Thai flavours are truly loved by my taste buds. There were some victims as well as after a long time of traveling on budget and eating mostly rice and asian soups, I still have a problem with eating them now. Ups.I travel quite a lot with Tomasz, we try to go to different countries for longer, like a few months and stay there, so we can truly experience the food culture and local flavours. I am lucky that my partner Tomasz is really interested in food, he likes to taste and try things and he’s much braver than I am. If he had a food blog, you’d love it. But for now he’s my hand model (laughs).It would take much too long to describe what made me happy in different cuisines, but I’ll mention that a cinnamon toast I had in San Francisco blew my mind, sobrassada served with a young Champagne in Barcelona is something I enjoy, cheese in Holland is amazing, chipa in Paraguay can make a perfect breakfast, coffee in Sydney tastes like it should.
What does traveling mean to you? What do you miss when you stay in one place for a long time?
I never thought of what it means to me, it’s a part of my life which I don’t want to change. I made a few sacrifices in my life to have this kind of lifestyle (which don’t feel like sacrifices anymore) and this is what I truly like. It goes with my nature. For instance I always had a problem with sitting on a beach - I walk around, run, swim, go to look for something, but can’t just sit there. Whenever we go I push Tomasz to walk a lot. We go hundreds of kilometres on foot and I love it. When I stay in one place I have the feeling that I’m missing something and sometimes I stop to appreciate a city I’m in. Nowadays I really like to go back to Berlin, because traveling helps me to remember how awesome this city is.
What effect did the move to Berlin have on your cooking?
I eat healthier, I use organic products, I learned a lot about grains, good flours, spices. I have this feeling that everyone over here is fascinated with food. I attend many events related to food and it influences my choices and stimulates curiosity.
What was the first dish you cooked on your own, what is your first cooking memory?
I don’t really remember but most probably racuchy.
What are your favourite places to buy and enjoy food in Berlin?
Local farmers markets, I like to walk around with my basket and collect veggies. I truly enjoy small shops with imported goods where I buy things without knowing how I can use them. But also Frischeparadies - I can walk around and look at beautiful sea food and veggies from all over the planet for long minutes and KADEWE, as they have an awesome stuff!
You are an internationally acclaimed photographer, your work has been featured in the media around the world, when did you first pick up the camera and why?
I don’t remember why, I always liked it. I was the annoying kid taking pictures at camps and trying to stage cool frames (usually it wasn’t as cool as I attempted it to be). But it really kicked in when I moved to Sydney and finally had time to improve it. Australia is crazy awesome and beautiful. For a Polish gal everything was very exciting and I am an emotional beast so for me it was double great. I took hundreds of pictures every day, always had a camera on me, bothering friends, people, animals and nature. But also I’m lucky as my partner Tomasz agrees with my ideas and he’s always happy to be my object, however I dress him up or even when he has to move around for an hour so I get a proper shot.
What are your upcoming projects?
The biggest one will be my baby. And for now this is the only project I’m concentrating on. You should ask me in a few months when I’m a mother already and know what it means to me.
Why did you choose Berlin as a place to live and work?
By accident really. We could choose any city in Europe thanks to Tomasz’ work. I voted for Barcelona as I learned some Spanish in South America and Tomasz chose Berlin (he says his German is poor, but believe me it’s really good). Then we decided to spend a year in Berlin and another one in Barcelona. Well, it didn’t work out as Berlin is most probably the best city in Europe to be in, so we stayed.
What did you choose to share on eat in my kitchen and why?
I chose Dutch Baby with melted chocolate, roasted nuts and plums. And the reason - it’s easy, fast, delicious and can’t go wrong (laughing).
If you could choose one person to cook a meal for you, who and what would it be?
Someone from The Growlers and obviously the rest of the band would be invited as well. I’ve been to their concert and I think it would be nice to hang out.
You're going to have ten friends over for a spontaneous dinner, what will be on the table?
Mushroom risotto prepared by Tomasz!
What was your childhood's culinary favourite and what is it now?
It used to be racuchy made by my grandma, nowadays racuchy made by myself.
Do you prefer to cook on your own or together with others?
Both, no preferences really.
Which meals do you prefer, improvised or planned?
Both, as both are a totally different experience.
Which meal would you never cook again?
Pumpkin gnocchi - I tried it three times and totally failed, never again!
Thank you Marta!
Kaiserschmarrn - an Austrian Pancake with Darjeeling Orange Raisins
This Austrian classic is one of the best dinner party crowd pleasers when the night calls for an easy rustic dessert. So many people have sat at my long wooden table and enjoyed this cozy dish, which is basically a torn fluffy pancake. Every time I serve Kaiserschmarrn, it creates joyful silence in the room, a silence that only moments of happy bliss and culinary satisfaction can create; moments that remind us of our childhood food and memories, when our mothers or grandmothers would turn the kitchen into the best smelling place in the world on a Sunday morning - simply by cooking some golden pancakes.
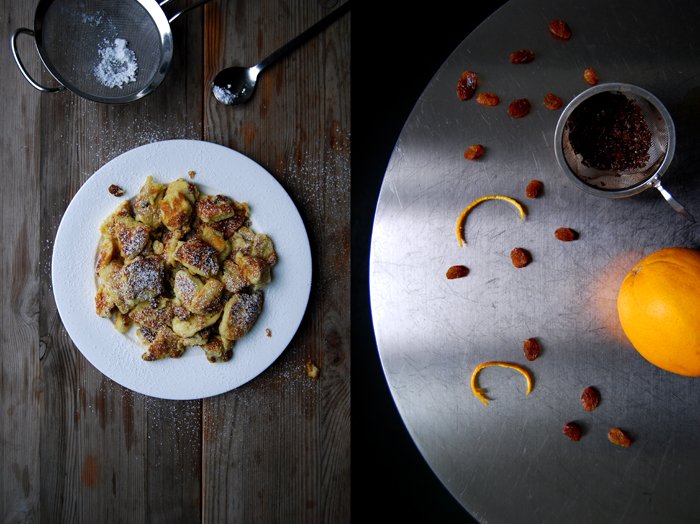
Kaiserschmarrn is the Austrian take on this nostalgic treat, which is also popular in South Tyrol, in the Italian Dolomites, and Southern Germany. The fluffy pancake is dotted with raisins and torn by using two forks right after it turned golden on both sides. The name derives from the Austrian Kaiser (emperor) Franz Joseph I of Austria. He used to love this dessert so much that people referred to it as his folly, meaning Schmarrn in Austria and Bavaria.
I feel with the emperor and can easily call it one of my sweet follies. I've had so many Kaiserschmarrn in my life that it's good to bring in a change once in a while. Sometimes I add fresh fruits, like apples (in my book 365), berries, or plums, or spices, like cinnamon or cardamom, but for the one that I will share with you today, I soaked the raisins in Darjeeling tea infused with strips of orange.
Kaiserschmarrn
For 2-3 people you need
raisins 50g / 2 ounces
orange peel, 2 long strips
strong black tea (like Darjeeling), 1 cup, for soaking the raisins
organic eggs 3, separated
a pinch of salt
milk 360ml / 1 1/2 cups
granulated sugar 3 tablespoons
orange zest 1/4 teaspoon
all-purpose flour, sieved, 130g / 1 cup
unsalted butter 4 tablespoons, to cook the pancake
confectioners’ sugar, for dusting the pancake
Soak the raisins and orange peel in the tea for about 10 minutes then drain the raisins for a 4 minutes; discard the tea and orange peel.
Beat the egg whites and salt until stiff.
Mix together the milk, egg yolks, sugar, and orange zest until combined. Add the flour to the milk mixture and whisk until smooth, then stir in the raisins. Using a wooden spoon, gently fold the egg white into the pancake batter.
Heat 2 tablespoons of the butter in a 30cm /12-inch cast-iron pan or nonstick skillet. Pour all of the the pancake batter into the pan and cook over medium heat for 4-6 minutes minutes or until golden on the bottom and the pancake is just set but still soft. Flip the pancake; you can also cut the pancake in half and turn both halves separately, which is easier. Lift the pancake a little and let 1 tablespoon of butter melt underneath it then continue cooking for 4-6 minutes until the other side is golden. Carefully tear the pancake into chunky pieces, add the remaining 1 tablespoon of butter and cook, stirring gently, over medium-high heat for about 2 minutes or until golden brown and the edges start to crisp.
Transfer to a large platter, dust with a little confectioners’ sugar, and enjoy immediately. You can serve berries on the side, or seared apples wedges, cooked in butter and deglazed with Grand Marnier (recipe in 365).
Buttery Blue Cheese Crackers
Buttery, flaky little bites of blue cheese! These crackers are the perfect savory snack, too good actually and a bit addictive but that's often the case when butter and cheese are combined in a recipe. I just made a few more than 20 crackers, that was a mistake that I regret, I should have doubled the amount!
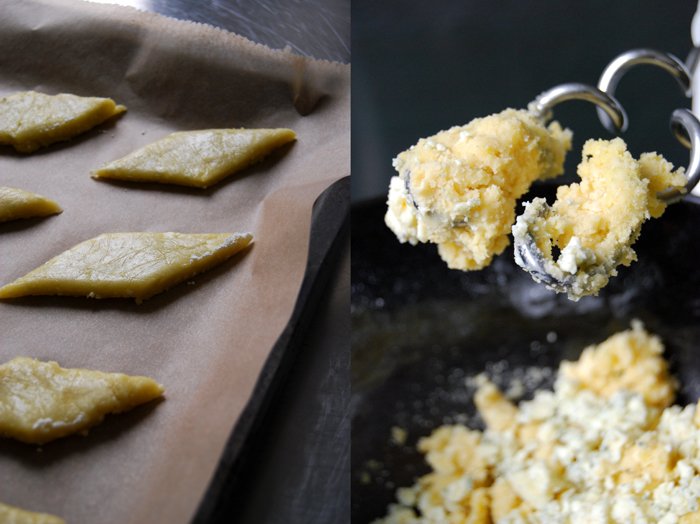
For the right cracker texture, you need a crumbly blue cheese, mine was a Bavarian strong in taste and not creamy, more on the dry side. Stilton would be perfect as well, or Roquefort, but I wouldn't use Gorgonzola. The dough is made like a simple short crust refined with nutmeg and cheese mixed in at the end. I kept it in the freezer for 15 minutes to make it workable and less sticky. It's a little fiddly but if you roll out the dough between cling film and always use a floured knife you will have the diamond shaped crackers ready on your tray in less than half an hour.
Blue Cheese Crackers
For 22 crackers you need
plain flour 150g / 5.5 ounces
salt 1/4 teaspoon
a pinch of freshly grated nutmeg
cold butter 120g / 4.5 ounces
organic egg yolk 1
crumbly blue cheese (like Stilton), crumbled, 100g / 3.5 ounces
Set the oven to 200°C / 390°F (fan assisted oven). Line a baking sheet with parchment paper.
Combine the dry ingredients. Cut the butter with a knife into the flour mixture until there are just little pieces of butter left. Continue with your fingers and rub the butter into the flour until combined. Add the egg yolk and mix with the hooks of your mixer for 1-2 minutes. Add the cheese and continue mixing until you have a crumbly mixture. Form a thick disc, wrap in cling film and put in the freezer for 15 minutes.
Roll out the dough between cling film (about 1/2cm / 1/4" thick). With a floured knife, cut square or diamond shaped crackers, about 4 x 4cm / 1 1/2 x 1 1/2". Lift the dough gently with a knife (always dip it in flour when it becomes too sticky) and put the crackers on the baking sheet. Bake for 11 minutes or until golden and cooked through.
Plum Dumplings with Cinnamon Breadcrumb Butter - Swabian Zwetschgenknödel
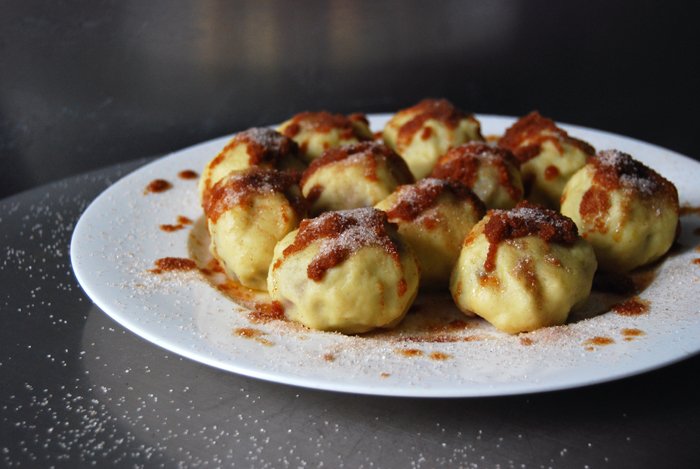
Plums, potato dough, browned breadcrumb butter, sugar and cinnamon - this southern German sweet doesn't call for many ingredients but it puts them together in just the right way. The result is heavenly: sweet plum dumplings with browned breadcrumb butter and cinnamon sugar - or in German - Zwetschgenknödel!
My versatile Gnocchi dough makes another appearance for this recipe. For Friday's Bavarian beer roasted pork, I recommended savory potato dumplings with the same dough. For this traditional Swabian dish, I use it to wrap sweet and sour plums with a thin layer of the potato mixture to turn the blue fruits into sweet, fruity dumplings.
Whenever I make this recipe, I consider reducing the amount of butter and sugar for just a split second, but luckily I never do. This dish really needs all the lusciousness of its decadent topping. I learnt about these dumplings from my Swabian step father Uli and he taught me that a dessert is there to enjoy and not about counting calories. Every time we make the Knödel together in my mother's kitchen, he reminds us to keep the potato dough layer very thin, that's how he learnt to do it from his mother and grandmother. It's our job to form the dumplings but it's his to take care of the quality control, and he is a very picky instructor!
It can be a bit fiddly getting the little balls in shape, to make it a little bit easier you should use small plums like Damsons and keep your fingers moist while you're working with the dough.
Plum Dumplings with cinnamony Breadcrumb Butter - the Swabian Zwetschgenknoedel
For about 30 plum dumplings you need
small plums (like Damsons) 30 (about 800g / 2 pounds)
sugar cubes 30
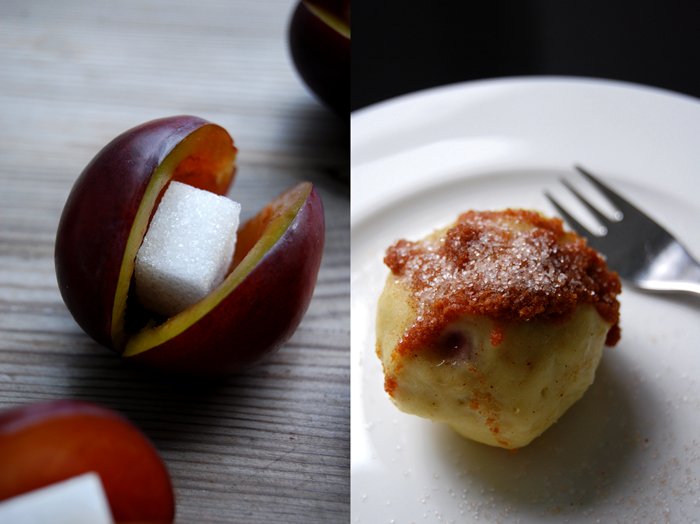
Cut the plums open on one side, take out the seed and fill each fruit with a sugar cube, close the fruit as well as possible.
For the topping
butter 100g / 3.5 ounces
dry breadcrumbs 50g / 2 ounces
granulated sugar 50g / 2 ounces
ground cinnamon 1 teaspoon
Combine the sugar and cinnamon.
In a sauce pan, melt the butter with the breadcrumbs. Cook the mixture for a few minutes on medium-high temperature until golden brown. Don't let it burn or it will taste bitter.
For the potato dough
potatoes, cut into cubes, 450g / 16 ounces
butter 30g / 1 ounce
organic egg yolks 2
plain flour 120g / 4.5 ounces
salt 1/2 teaspoon
Cook the the potatoes in salted water until soft (around 15 minutes), drain them when they are done. Press the drained, warm potatoes through a potato ricer and mix immediately with the butter and egg yolks. Let the mixture cool completely before you continue with the next step!
With a spoon (or your hands), mix the cold potato mixture with the flour and salt until combined.
The plum dumplings
Your fingers should be wet while you're forming the dumplings, so keep a little bowl of water right next to you.
In a large pot, bring lots of water with 1/2 teaspoon of salt to the boil.
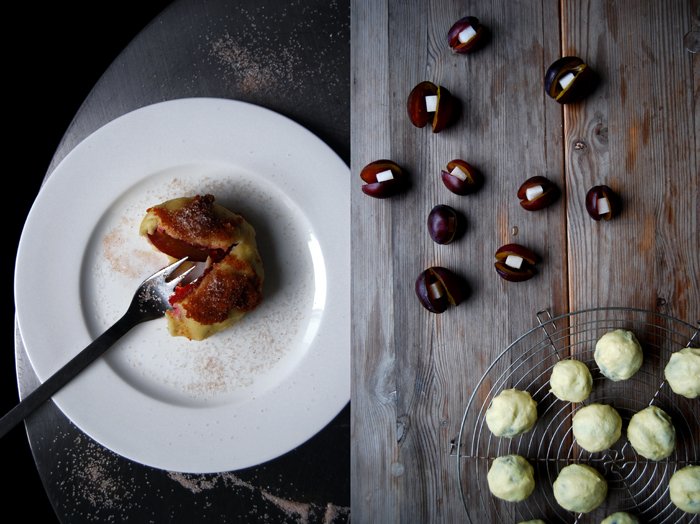
With a tablespoon, take a walnut sized ball of the potato dough. Shape a flat ball and lay it flat in the palm of your moistened hand, pushing down the middle with the thumb of your other hand. Lay the plum (cut side down) into the center of the dough and gently start pushing and rolling up the dough until the whole fruit is covered with a thin layer (the blue of the plums will be just visible in some places, see my second to last picture). If the dough starts tearing, take a little bit more to cover the fruits. Place the dumplings on a grid until you're done with all of them (when you take the dumplings off the grid you might have to even out the grid's mark with your fingers).
Poach the dumplings in batches in the hot but not boiling water (simmering) for about 8-10 minutes or until they start to float on the surface. Take the dumplings out with a slotted ladle and let them drain on a grid for a few seconds.
Put the cooked dumplings into a large bowl or onto a plate, pour over the warm browned breadcrumb butter and sprinkle the cinnamon sugar on top.
Pumpkin and Ginger Brack - an Irish Tea Cake
When we moved to England a few years ago to live in Whitby in North Yorkshire, it didn't take me too long to fall in love with the locals, the food, the little harbour and its long pier right next to the endless beach. It's a dreamy village, cut off the world - I have a weak spot for these places! I felt great from day one and when I discovered the famous local bakery (it must have been the day after my arrival) with its beautiful name, Botham's written in big letters over the shop on Skinner street I found my second home! You can send me to any village or town in the world and I will find the best bakery or confectionery within 10 minutes, I find my way intuitively and it has never let me down. Through the eyes of a bakery you learn so much about a place and its people. The bread, cookies and cakes, the local delicacies, the whole presentation but also the service tells you many secrets and gives you an insight into a new world. That's one of the many reasons why it's so important to keep up this tradition and support those small local businesses!
At Botham's, I discovered thin Shah tea biscuits, eccles cakes, English muffins, Sally Lunn loaves, millionaire's shortbread, flapjacks, Maids of Honour and fruit breads. I tried so many different kinds of loaves of this famous English tea time cake, that I lost track at one point. I love the simplicity of this sweet and cakey bread paired with the richness of dried fruits soaked in tea mixed with ginger, spices, citrus zest or nuts. Botham's Stem Ginger Brack was my favourite, an Irish fruit cake made without any fat but with lots of raisins, sultanas, stem ginger and orange zest. It's so juicy and it tastes divine with butter spread on top (the fat had to come in at one point!).
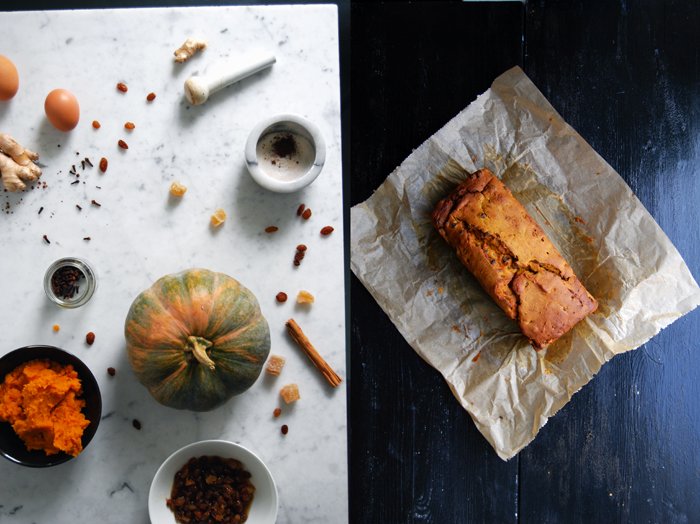
Years later, back in my own kitchen, I started to bake my own bracks. The first loaf was inspired by the one I got to love in Whitby but then I got a bit more experimental. Here's one made with puréed pumpkin in addition to the tea soaked raisins, grated fresh ginger and stem ginger. I also added a nice spice composition of cinnamon, nutmeg, allspice and cloves. The result is aromatic and moist, but still structured. The pumpkin makes the loaf more juicy and smooth than the one I bake without the puréed vegetable. It would be a perfect Halloween cake although it's still a month ahead. In Ireland, bracks are traditionally made for this festive season, but at Botham's (and in my oven) you can find them all year round!
This recipe has been featured on Food52 Halfway To Dinner!
Pumpkin and Ginger Brack
You need to prepare 2 steps in advance for this cake:
1. If you don't buy canned pumpkin purée, the pumpkin has to cook in the oven for 30 minutes before you can turn it into a purée.
2. The dried fruits have to soak in tea overnight.
For a 24.5 x 10cm / 10 x 4″ loaf pan you need
pumpkin purée 400g / 14 ounces or pumpkin (squash), without the fibres and seeds, cut into cubes, 500g / 17.5 ounces (Hokkaido with skin or peeled butternut or Musquée de Provence pumpkin)
strong black English tea 150ml / 5 ounces
raisins and/ or sultanas 250g / 9 ounces
stem ginger, finely chopped, 60g / 2 ounces
fresh ginger, grated, a 3.5cm / 1.5" piece
Demerara sugar 140g / 5 ounces
organic eggs, beaten, 2
plain flour 220g / 8 ounces
baking powder 2 teaspoons
a pinch of salt
ground cinnamon 1 teaspoon
ground nutmeg or mace 1/4 teaspoon
ground allspice 1/8 teaspoon
ground cloves 1/8 teaspoon
For the pumpkin purée
Set the oven to 200°C / 390°F (fan assisted oven).
Put the pumpkin into a baking dish. Cover the bottom of the dish with about 100ml / 3.5 ounces of water. Wet a piece of parchment paper under water, scrunch it a little and cover the pumpkin in the baking dish, tucking the sides in. Cook for 30 minutes in the oven or until the pumpkin is soft. Purée the pumpkin in a blender or with a stick mixer and set aside (you could keep it in the fridge for a day).
For the brack
In a large bowl, mix the tea, raisins, stem ginger, grated ginger and sugar and soak overnight.
Set the oven to 175°C / 350°F (fan assisted oven).
Combine the flour, baking powder, salt and dry spices.
Mix the eggs into the raisin tea mixture with an electric mixer, add 400g (14 ounces) of pumpkin purée and mix until well combined. With a wooden spoon, stir in the flour spice mixture until combined and fill into the loaf pan lined with parchment paper. Bake the brack for 50 minutes, turn the temperature down to 160°C / 320°F and bake for another 30-35 minutes or until the cake is golden brown on top. Check with a skewer, it won't come out clean, there will be a few moist pieces but there shouldn't be any liquid dough left on it. Take the cake out of the pan after 10 minutes and let it cool for at least 10 minutes before you cut off your first slice. The cake is best after 1-3 days, wrapped in parchment paper after it cools down completely. The outside will be soft by then.
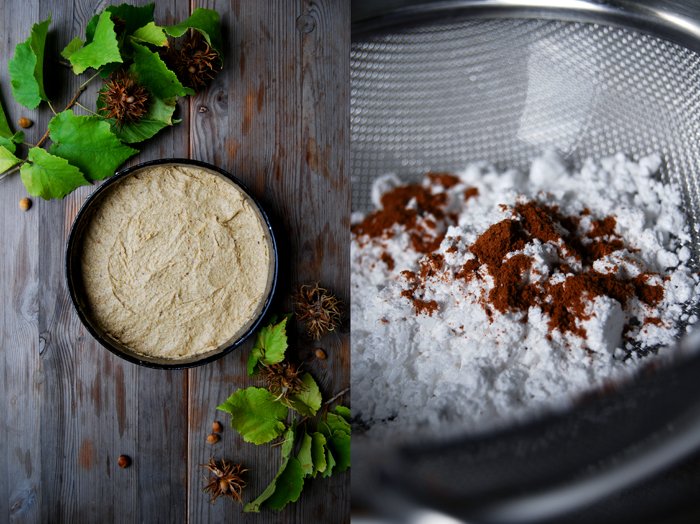
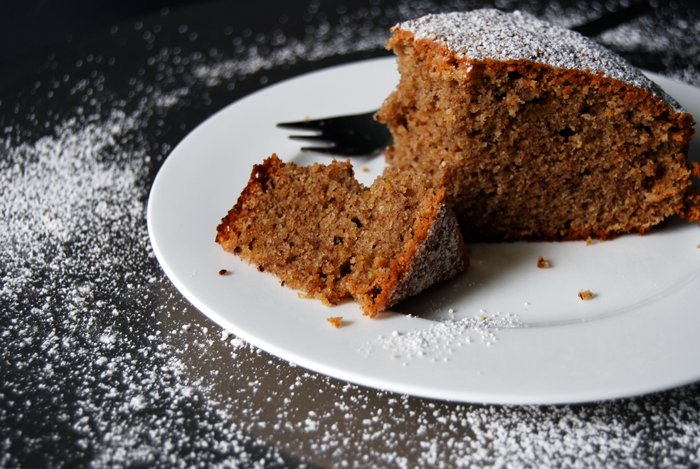
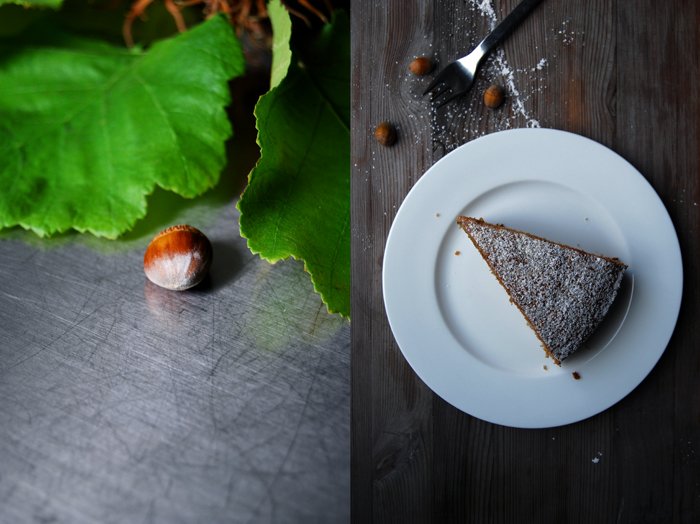
Hazelnut and Buckwheat Cake with Cinnamon Icing Sugar
Family guests from LA! Our American grandfather Jim and his wife Gina came to visit us and - as always when guests stay with us - we let the feast begin from day one! When they arrived at noon, we sat down at our long wooden table and we only got up in the early evening, after hours of savoring. I carried one dish after the other to the table, so much so, that at one point my boyfriend stated I must have mistaken his grandparents for goats! There was so much to talk about, so many memories and stories to share, so much to show after years of not seeing each other, that a good amount of nice food seemed like the perfect company for a day like that. Also, it was a very successful way to fight their jet lag. 9 hours of time difference and my food kept them awake till 9!
One of my personal table highlights of that first day was my hazelnut and buckwheat cake. I love to welcome friends and family with a cake on the table. The sweet smell of freshly baked food in the house wakes you up even after the longest flight and makes you feel home right away! I had been in the mood for a cake like that for days, simple and spongy with the deep flavour of hazelnuts and I got what I asked for. I made the dough with ground nuts and buckwheat which adds a nuttiness to it that I wouldn't have achieved with wheat or spelt flour. It's a very popular combination in the Tyrolean mountains which always start to have a growing influence on my cooking and baking as soon as the temperatures drop. So it's a mountain cake, honest and rich in taste, refined with lots of cinnamon mixed in and sprinkled on top with some icing sugar.
I wanted to put even more food on the table, but at one point, they all stopped me. My plan was to finish the day off with my famous Swabian Cheese Spaetzle, hearty cheese and onions with homemade southern noodles, but they didn't let me go back to my kitchen! I saved it for another night and dinner and they loved it, like the Blue Cheese Crackers, Beluga Lentils with Pear, Tyrolean Plum Dumplings, Sicilian Chard, Radicchio Crespelle and all the other goodies I will write about in the coming days!
Hazelnut and Buckwheat Cake
For one 26cm / 10" springform pan or two 18cm / 7" pans you need
ground hazelnuts 225g / 8 ounces
buckwheat flour 225g / 8 ounces
granulated sugar 200g / 7 ounces
ground cinnamon 1 teaspoon plus more for dusting
baking powder 4 1/2 teaspoons
a pinch of salt
butter, at room temperature, 250g / 9 ounces
organic eggs 6
icing sugar for dusting
Set the oven to 180°C / 350°F (fan assisted oven).
Combine the dry ingredients.
Beat the egg whites and salt until stiff.
Beat the butter and sugar until fluffy. Add the egg yolks, one at a time and continue mixing for a few minutes until the mixture is thick and creamy.
Gently fold the dry mixture and the egg whites with a wooden spoon into the butter and sugar mixture, alternating, 1/3 at a time, combining well in between.
Bake for 35 minutes (or a bit shorter if you use smaller pans) or until golden brown on top. Check with a skewer, it should come out clean. Let it cool for a few minutes.
Combine 2-3 tablespoons of icing sugar with 1/4 teaspoon of cinnamon and sprinkle over the cake.
Yellow Plum Cobbler
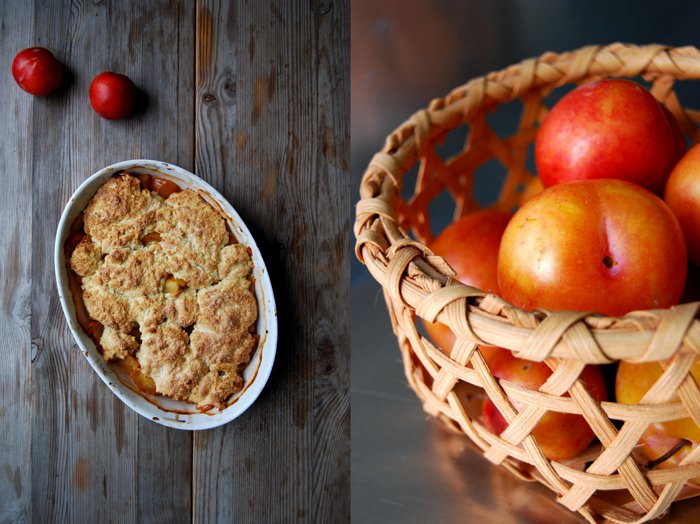
A fruity cobbler is one of the quickest, most comfortable and delicious morning sweets you can put on your breakfast table, with short preparation (unlike my Friday's brioche) and a satisfying result! The pastry is a smooth scone dough with sour cream, thrown together in just a few minutes. It turns into a light golden crust lying on top of the fruity filling like fluffy clouds.
Plums are my favourite addition to this dish and yellow plums are my latest discovery for desserts. It's not only the warm glowing colour that's so striking, it's their honey sweet taste. Uncooked, they aren't too far away from blue plums, just a bit sweeter, but when they are cooked, seasoned with a little cinnamon, they develop a very deep flowery taste, almost like rosewater. Their fragrant sweetness made me choose them for this easy pie. My cobbler is made with just a little sugar, you could also use the pastry for a savory pie, but when the yellow fruit kicks in, the sweet richness takes over. Warm and fragrant, I couldn't stop shoveling one portion after the other onto my plate!
Yellow Plum Cobbler
You could replace the yellow plums with red plums and add a few drops of rosewater.
For 4 people you need
yellow plums, sliced, 600g / 1.5 pounds
granulated sugar 4 tablespoons
ground cinnamon 1/2 teaspoon
For the pastry
plain flour 200g / 7 ounces
granulated sugar 2 tablespoons plus 1 tablespoon for the topping
ground cinnamon 1/4 teaspoon
baking powder 1 1/2 teaspoons
a pinch of salt
butter, cold, 100g / 3.5 ounces
sour cream 160ml / 5.5 ounces
Set the oven to 190°C / 375°F (fan assisted oven).
Spread the plums in a baking dish and coat with the sugar mixed with cinnamon.
For the pastry, combine the dry ingredients. Cut the butter with a knife into the flour until there are just crumbly pieces left. Continue with your fingers, rub the buttery pieces into the flour until combined. Mix in the sour cream with a spoon until combined. Break the soft dough into pieces, gently flatten them and put them on top of the plums, they should be almost covered. Sprinkle with a tablespoon of sugar and some more cinnamon if you like and bake in the oven for 35 minutes or until golden brown on top. Serve warm.
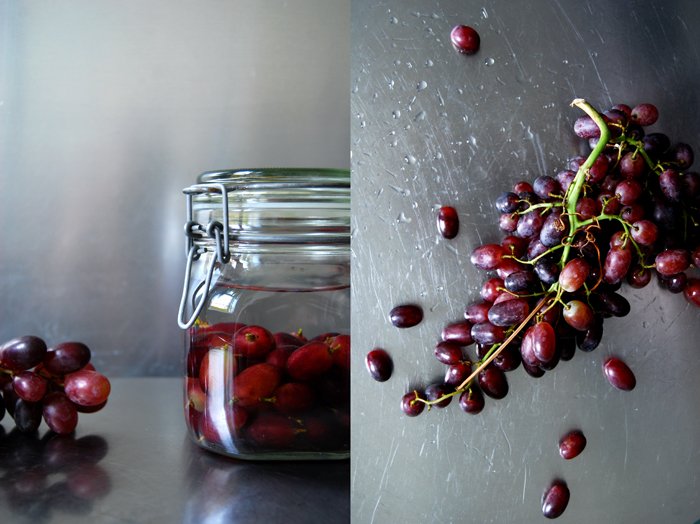
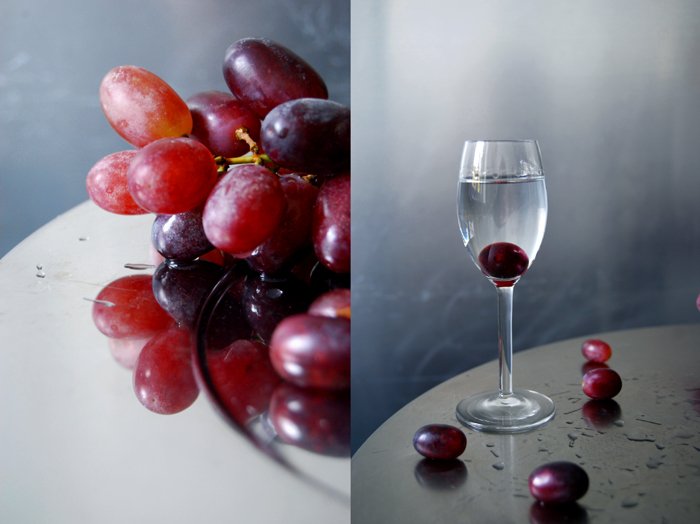
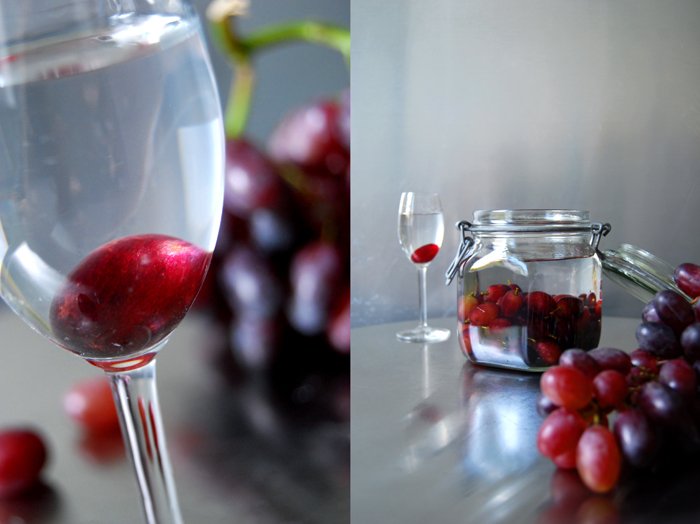
Mary's fantastic Drunken Grapes in Anisette
After I visited Mary Licari in her old watch tower in Malta for one of my meet in your kitchen features, I came home with lots of inspiration and a long list of recipes which I couldn't wait to try in my kitchen! On that hot afternoon in August, she treated me to so many delicacies and one of them was red grapes in anisette which she made in 1985! She topped her homemade banana ice cream (which was also to die for!) with these amazing grapes that have been in the bottle for almost 30 years! I almost felt too shy to eat them, that's such a treasure, fruit soaked in three decades of aroma!
It was my second visit to her house, just a day before I left the island to go back to Berlin. As always when meeting Mary, you have to be prepared for food, lots of good food! We wanted to stop at her house to say a quick good bye but as soon as we got into the house, Mary got out the plates and treated us to an amazing three course meal, finished with these fantastic drunken fruits. They were sweet and strong, a bit wrinkled, enhanced with the strong flavour of anise. The texture was a bit like jelly, but not as soft, they still had some crunch. It was a special culinary experience that I will never forget!
I've been back home for more than a month and I still can't get Mary's amazing grapes out of my head. There's no reason to wait any longer! The Italian grapes taste amazing at the moment and there's a bottle of Ouzo waiting to be emptied. I won't wait for 30 years to eat them (I'm too impatient!) but maybe I will keep some of them for a year or two.
Mary taught me to keep a little stalk on the grapes, that prevents the fruit from soaking up too much of the liquid!
Drunken Grapes in Anisette
For 1 large jar of grapes you need
Ouzo (or any other anisette) 600ml / 1.5 pints
red grapes 200g / 7 ounces
Cut the single grapes off the bunch. Don't pull them off, keep a short piece of stalk of about 1/2 cm / 1/4 " on each of them.
Put the grapes in a clean jar and fill with anisette until the fruits are covered. Let it sit for at least a month, or for years, like Mary. Serve with ice cream or cheese.
Weekend Brioche
Lots of butter and many eggs - that’s the secret to a great brioche! I enjoy this rich, sweet, fluffy bread when it’s still warm, right out of the oven, and the next day, toasted for breakfast or lunch. So, when I bake brioche, I bake a big batch of it.
The dough has to rise three times, but that shouldn't put you off. If you time it well and let it rise overnight the second time, you can be rewarded with the best French breakfast treat ever - apart from croissants maybe but their preparation put me off! I never managed to move myself to give them a try but one day their time will come even in my kitchen. Back to the brioche, this recipe makes a wonderful buttery bread, rich but tender. I like to tear it into pieces and spread even more butter on top and some of my homemade strawberry or Tyrolean plum jam, a hot latte macchiato on the side and I'm happy!
I always bake one loaf and a few little round brioches. The bread stays fresh for days wrapped in parchment paper and it's great for teatime, sliced, toasted and - again - with some butter melted on top. It also makes a delicious dessert, in a trifle or bread pudding, or thick fresh slices topped with warm berry compote and some whipped cream!
Brioche
For 2 loaves you need
butter, at room temperature, 250g / 1 cup
whole milk, lukewarm, 60ml / 1/4 cup
plain flour 700g / 5 1/3 cups
granulated sugar 60g / 2 ounces
fast-acting yeast 1 (7-g / 1/4-ounce) envelope
salt 1 1/2 teaspoons
large eggs, whisked with a fork, 5, plus 1 beaten egg mixed with a pinch of salt for the glaze
Melt 50 g / 3 tablespoons of the butter, let it cool then mix with the milk.
In the bowl of a stand mixer, fitted with the dough hook attachment, combine the flour, sugar, yeast and salt. Add the lukewarm milk-butter mixture and the 5 eggs and mix with the hook for about 5 minutes or until well combined. Add the remaining butter cut into 5 portions, 1 portion at a time, mixing well before adding the next portion to the dough; keep mixing for about 10 minutes or until you have a smooth and shiny ball, soft and sticky.
Cover the bowl with a kitchen towel and let rise in a warm place for about 1 to 1 1/2 hours or until doubled in size.
Take the dough out of the bowl, knead for 30 seconds then form into a smooth ball. Return the dough to the bowl, cover with plastic wrap and keep in the fridge overnight.
The next morning, take the dough out of the fridge and let it sit for 10 minutes. Knead the dough with your hands for 1 minute then divide it into 2 portions (or more depending on the loaf or cake pans you use to bake the brioche). Butter the baking tins generously then push the dough into the tins; the tins should be filled about 1/2 to 2/3, not more. If you bake a round brioche you can shape little (or big) balls and place them on top: form a little hole with your finger in the middle of the dough and gently push the ball in to prevent it from falling off. Cover the baking tins with a kitchen towel and let the brioche rise in a warm place for about 45 minutes.
Preheat the oven to 175°C / 350°F (conventional setting).
Brush the top of the brioche with the egg wash then bake the brioche for 35 minutes or until golden brown on top and baked through, depending on the tins' shape and size the baking time can be shorter or longer. If you’re not sure if the brioche is done turn the brioche around and knock on its underside, it should sound hollow. Enjoy warm.


