Olive Oil Ice Cream with flaky Sea Salt
Smooth ice cream, a bit oily on the tongue, with a strong vanilla aroma and a pinch of sea salt. I experienced this combination for the first time two summers ago in Sicily, in Ragusa, where I spotted a small ice cream shop which offered flavours I had never even thought of before. They made ice cream from grapes which I know well from wine but they used them for their frozen sweets. Moscato was one of them and it became my grape ice cream favourite.
Another very sensual experience was their olive oil ice cream with sea salt, it's like frozen velvet! It's one of those things you have to taste as you can't imagine it. I got hooked on it. Both ingredients, the oil and the salt sound very unusual but make a lot of sense, much like my Mousse au Chocolat with olive oil, the oil adds a soft nuttiness which comes through even stronger through the salt. The texture it creates leaves a nice feeling in the mouth, soft and smooth. Unfortunately, I only made half the amount of my recipe, a mistake I won't repeat!
Olive Oil Ice Cream
For 4 people you need
organic egg yolks 6
granulated sugar 160g / 5.5 ounces
milk 500ml / 17 ounces
heavy cream 200ml / 7 ounces
vanilla bean, slit slightly, 1
olive oil 160ml / 5.5 ounces
flaky sea salt for topping
Beat the eggs and sugar for 3 minutes till thick and creamy.
In a saucepan, bring the milk, cream and vanilla bean to a boil. Take off the heat, take the vanilla bean out and scrape the seeds out of the bean into the milk. Add the egg mixture and cook for around 8-10 minutes on a medium-low heat till it starts to thicken, whisking constantly. Stir in the olive oil and a pinch of salt and cool in the fridge. Freeze in the ice cream maker for 20 minutes and put in the freezer for 1 hour. Mix with a spoon and serve sprinkled with flaky sea salt.
Chunky Chocolate Fruit Loaf with Dates and Prunes
Raisins, prunes, dates, there are always lots of open bags in my kitchen shelves. Sometimes it's just too much! When there's no corner left which isn't occupied by dried fruits I know it's time for a recipe to empty them at one go and a fruit loaf is one of them. My fruity mixtures change depending on my shelf finds, I've often stocked up on figs, apricots or cranberries a bit too excessivly during the winter months as well, they can all go into the cake to add their concentrated fruity sweetness. It works for morning loaf cakes as much as for muffins, it makes them rich and won't leave you hungry! I'm particularly fond of this in combination with bittersweet chocolate, big chunks that melt into the dough and merge with the fruit, delicious!
This time I had dates, prunes and a dark Belgian chocolate which ended up in the lumpy dough, roughly chopped and sticky. It made the loaf dense and moist and so pleasantly sweet that it felt like a sweet bread rather than a cake. You can replace the dried fruit with any other you find in your shelves and add some nuts or white chocolate. I often bake it on Sundays when I feel the urge to bake all of a sudden, I can be sure that I will find something in my shelves worth turning into a fruit loaf.
Chocolate Fruit Loaf with Dates and Prunes
For a 24 x 10cm / 10 x 4" loaf pan you need
plain flour 340g / 12 ounces
granulated sugar 100g / 3.5 ounces
baking powder 2 teaspoons
baking soda 1 teaspoon
salt 1/4 teaspoon
butter, melted, 120g /4.5 ounces
milk 220ml /7.5 ounces
organic eggs 2
bittersweet chocolate, roughly chopped, 120g / 4.5 ounces
dates, roughly chopped, 100g / 3.5 ounces
prunes, roughly chopped, 100g / 3.5 ounces
Set the oven to 190°C / 375°F (fan-assisted oven). Line a loaf pan with parchment paper.
Combine the dry ingredients. Whisk the butter, milk and eggs and mix in the dry mixture with a wooden spoon. Don't over mix, the dough should be lumpy. Gently stir in the dried fruit and chocolate and scrape into the pan. Bake for 30 minutes, turn the oven down to 175°C / 350°F and bake for another 15 minutes or until golden. Check with a skewer, it should come out clean. Let the loaf cool in the pan for a few minutes before you take it out.
Strawberry Cream Roll for Tea Time in June
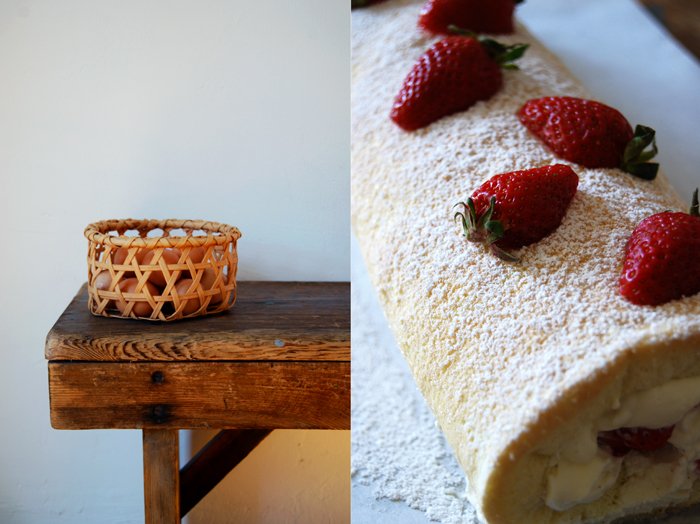
This is the ultimate strawberry dessert to me, the lightest sponge roll you can imagine filled with vanilla whipped cream and lots of sweet red berries. This cake just makes me happy, and lots of my friends too! There are many cakes, pies, creams, meringues, puddings or trifles which can be tastefully refined with strawberries but nothing beats my fruity summer roll. There is only one variation on this roll which is as good but it demands a bit more work and time, and that's to replace the whipped cream with a Bavarian vanilla cream. It has the same effect on me, I just can stop eating it!
For now it's whipped cream which makes this dessert a very quick one. The sponge dough only needs 6 minutes in the oven and it can even be prepared a day before. Then you just need to whip the cream, cut the berries and roll everything up in a big, beautiful roll. I love to eat it at tea time on a Sunday, preferably on a sunny day in my mother's garden in the countryside. Sitting in the shade under one of her big trees, a plate of this creamy cake in my hands is one of the best treats in June I can imagine. I'm lucky, I will be there next week and I'm sure I'll bake it again!
Strawberry Cream Roll
For one big roll made of 38 x 30cm / 15 x 12" sponge you need
organic eggs 6
granulated sugar 100g/ 3.5 ounces plus more for the whipped cream and sprinkling (around 4 tablespoons)
a pinch of salt
plain flour, sieved, 100g / 3.5 ounces
cornstarch 40g / 1.5 ounces
strawberries, rinsed and cut into slices, 370g / 13 ounces (keep 4 berries cut in half as decoration)
heavy cream 300g / 10.5 ounces
a pinch of fresh vanilla
icing sugar to dust the roll
Set the oven to 220°C (top / bottom heat) and line a baking sheet (around 38 x 30cm / 15 x 12") with parchment paper.
Whisk the the egg whites with a pinch of salt for 10 seconds, add 40g of the sugar and continue beating till stiff. Mix the egg yolks with a pinch of vanilla and 60g of the sugar for a few minutes till thick and creamy. Fold the egg whites with a wooden spoon into the egg yolks. Combine the flour and cornstarch and fold gently into the egg mixture. Spread the dough on the baking sheet and bake in the middle of the oven for 6 minutes until spongy.
Sprinkle a kitchen towel with sugar (around 2 tablespoons) and flip the hot sponge onto the towel. Roll it up carefully as you can see in the picture below and let it cool.
Whip the heavy cream with a pinch of fresh vanilla and 1 1/2 tablespoons of sugar (or more if you prefer it sweeter) till thick.
Unwind the sponge roll carefully and lay it flat onto a working surface. Spread the whipped cream on the cake, cover with slices of strawberries and roll it up again, slowly and gently, not to squeeze the cream out from the sides. Dust with icing sugar and decorate with the strawberries cut in half. Serve immediately or keep in the fridge for a few hours before serving.
An Upside Down Cake with Rhubarb, Cinnamon and Strawberries
An upside down cake is the easiest and most convenient way to put juicy fruits into a quick cake. They just sit on the bottom, soften slowly in their juices and spread their aroma into the dough baking on top. The pastry can grow spongy with a thin crisp layer and the fruits turn into a thick compote. Juiciness where juiciness belongs! Technically the cake should be flipped upside down when it's done, I just skipped this part. I liked the rustic look of its golden top, like a pie that you scoop out of the pan with a spoon, and to be honest, the bottom doesn't look as pretty!
In the past few weeks I've been using lots of rhubarb in my recipes, I love its fresh, sour taste but its season is quickly coming to an end. No reason to be sad as I'm slowly changing over to what nature offers next, like strawberries! Much sweeter, yet no less versatile in the kitchen. My upside down cake combines the qualities of both fruits, sweet and and sour with a pinch of cinnamon. Not to forget the pastry, it is so good that the cake only lasted a few hours! While I was taking the photos my kitchen was filled with the sweet smell of cinnamon, fruit and fresh pastry, I could barely stop myself from taking the first bite!
Rhubarb and Strawberry Upside Down Cake
For an oval baking dish (around 25cm / 10") you need
plain flour 210g / 7.5 ounces
granulated sugar 150g / 5.5 ounces plus 6 tablespoons for the fruit
baking powder 1 1/2 teaspoons
a pinch of salt
butter, melted, 60g / 2 ounces
organic eggs 2
milk 100ml / 3.5 ounces
a pinch of fresh vanilla
rhubarb, sliced thickly, 650g / 1.5 pounds
strawberries, cut in half, 200g / 7 ounces
ground cinnamon 1 teaspoon
Set the oven to 190°C / 375°F.
Spread the fruits in a baking dish and sprinkle with 6 tablespoons of sugar mixed with a teaspoon of cinnamon.
Combine the flour, sugar, baking powder and salt. In another bowl, mix the butter, eggs, milk and vanilla with a mixer and fold into the dry mixture, stir with a wooden spoon until you have a lumpy dough. Don't over mix! With a big spoon dollop the dough on top of the fruits and spread gently until roughly covered. Bake in the oven for 45 minutes or until golden brown. Check with a skewer, it should come out clean.
Fruity Blueberry Muffins
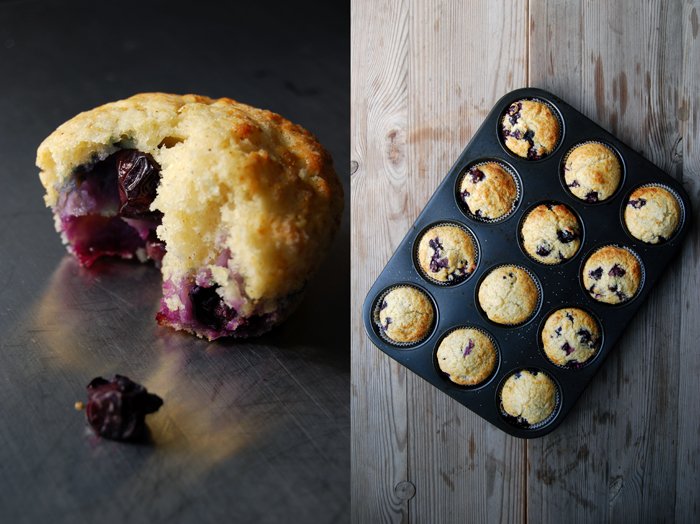
Muffins! Spongy, sugar coated and full of big, juicy blueberries that pop open in your mouth when you take the first bite, that's the perfect muffin to me! After my wintery blood orange marmalade muffin and my drunken Irish Coffee Muffin, the time was ripe for a fresh and fruity weekend muffin. I make the dough with buttermilk which gives them a light and fluffy texture, it's so light that you can empty half a tray without noticing!
You could also replace the blueberries with raspberries or strawberries which are at the peak of their season here at the moment. Peaches are nice too although I think it's still a bit early for them. I've spotted them at the markets already, from Italy mainly, but they don't look ripe and juicy yet, more pale and hard as a rock. I'd rather wait another month or two for a satisfying peach experience.
Frozen fruits work as well but keep in mind that they will soak the dough a bit more as they are a bit soggy when they have been defrosted. The muffins may need a little longer in the oven and won't give you the full berry aroma, so if possible, throw in the fresh ones!
Blueberry Muffins
You need a muffin tray with 12 molds and paper baking cups.
plain flour 200g / 7 ounces
granulated sugar 70g / 2.5 ounces plus 1 teaspoon for the topping
baking powder 2 1/2 teaspoons
baking soda 1/2 teaspoon
a pinch of salt
buttermilk 190ml / 6.5 ounces
butter, melted, 90g / 3 ounces
organic egg 1
a pinch of fresh vanilla
blueberries 180g / 6.5 ounces
Set your oven to 200°C / 390°F.
Combine the dry ingredients in a large bowl (except the vanilla). Whisk the melted butter, buttermilk, vanilla and egg in another bowl. Pour the liquid mixture into the dry mixture, stir with a wooden spoon until you have a lumpy dough and gently fold in the blueberries. The more you mix it the more it will lose its light texture so don’t mix it too long.
Fill the muffin tray, sprinkle some sugar on top and bake for 14 minutes or until golden.
Linzer Torte, a family recipe
Although Linzer Torte has a Christmassy image, nothing I'm too fond of in May, there is a reason why I put this cake in my oven at this time of the year. It was my uncle's birthday a few days ago and he is the biggest fan of this traditional cake I know, he keeps his mother's fabulous recipe for this famous Austrian cake like a big treasure. I'm lucky, he shared it with me which made me feel very honoured but we had a deal, I would bake it for his special day in May.
To me, Linzer Torte is not particularly wintery, it's made of two layers of buttery short pastry sandwiched with raspberry jam. It feels a bit like a dense fruit pie, maybe not as juicy as the layer of jam is quite thin and not a proper filling. It gives the pastry's flavours more space and makes it a bit softer. That's why the cake is best when it sits for a few days, a week is even better. The jam soaks the crumbly base and spreads its fruity aroma.
I recently found out that the recipe for this cake which is named after the city of Linz is supposed to be the oldest known cake recipe in the world, dated 1653. Discovered in the archives of the Admont Abbey, it was found in Countess Anna Margarita Sagramosa's cookbook, a lady who liked to develop, collect and record good recipes as much as I do!
Linzer Torte
For a 25cm / 10" springform pan you need
plain flour 300g / 10.5 ounces
almonds (or hazelnuts), ground 300g / 10.5 ounces
cocoa powder 1 teaspoon
a pinch of salt
a pinch of cloves, ground
a pinch of ground cinnamon
butter, at room temperature, 300g / 10.5 ounces
granulated sugar 250g / 9 ounces
organic egg 1
Kirschwasser (cherry schnaps) 2 tablespoons
raspberry jam, whisked, 6 tablespoons
Set the oven to 170°C / 340°F (fan-assisted oven) and butter the springform pan.
Combine the dry ingredients (except the sugar). Beat the butter with the sugar till fluffy. Add the egg and the Kirschwasser and continue mixing adding the dry mixture.
Take 1/5 of the dough and set aside for the decoration and place the rest in the pan, pushing it down evenly. Spread with the jam.
For the decoration, you could put the dough in the freezer for 10 minutes which makes it easier to handle. I left it soft, it worked but it was a bit more fiddly. Roll out the dough between cling film (around 28 x 25 cm / 11 x 10") and cut into 1.5 cm / 1/2" strips. Arrange the stripes in a lattice top (you can make a woven pattern, but I didn't have the patience, I just put them on top of each other).
Bake in the oven for 35 minutes and keep in an airtight container for at least 1 day (3 days to a week would be better) before you serve the cake.
Sticky German Cinnamon Schnecken with Raisins and Maple Syrup
Sunday morning, the cosy smell of espresso bubbling in my espresso maker and fresh, warm buns on the table, there's no better weekend treat! This week, my breakfast buns are German schnecken, sticky pastry snails, filled with cinnamon and raisins, sweet, juicy and buttery. The top is crisp but when you pull the buns apart you can feel their soft inside, it's puffy, infused with cinnamon, slightly soaked with a thick syrup made of butter, sugar and a splash of maple syrup. They taste divine, I love them!
I had planned to bake cardamom buns for days but a package of raisins changed my mind in the last second and brought the cinnamon in. I like this combination so much that I forget about other spices sometimes, but next time it'll be cardamom again!
Cinnamon Schnecken
For 14 Schnecken you need
plain flour 600g / 21 ounces
granulated sugar 75g / 3 ounces
dry yeast 1 package (for 500g / 1 pound of flour)
salt 1 teaspoon
ground cinnamon 1 leveled teaspoon
butter, melted, 100g / 3.5 ounces
milk, lukewarm, 225ml / 7.5 ounces
organic eggs 2
For the syrup
water 50ml / 2 ounces
granulated sugar 120g / 4.5 ounces
maple syrup 1 tablespoon
butter 50g / 2 ounces
For the filling
raisins 60g / 2 ounces
granulated sugar 30g / 1 ounce
ground cinnamon 1 tablespoon
Combine the dry ingredients. Mix the hot melted butter with the cold milk and the 2 eggs, this way the liquid mixture will have the right lukewarm temperature (check with a finger). Mix the dry and the liquid mixture with your dough hooks for 5 minutes until well combined. Continue kneading with your hands for around 5 minutes until you have an elastic dough ball. Put the dough back into the bowl and cover with a tea towel. Let the dough rise in a 35°C / 95°F warm oven for 70 minutes. Make sure that your oven is set to top/ bottom heat and not to fan.
Bring all the ingredients for the syrup to a boil and cook on a medium heat for 3 minutes. Mix the raisins, sugar and cinnamon for the filling.
Take the dough out, punch it down and knead for 1 minute. Roll it out on a working surface (roughly 36 x 32cm / 14 x 12.5"), spread with the syrup and sprinkle with the sugared raisins. Roll it up tightly, cut into 14 schnecken and put into a buttered springform pan (around 26cm /10″), arrange them in a circle. Cover with a tea towel and let them rise for 20 minutes in a warm place.
Set your oven to 175°C / 350°F (fan-assisted oven).
Bake for 30 minutes or until golden brown. Let them cool for a few minutes before you take them out of the pan.
Frankfurter Kranz, a German Buttercream Cake with caramelized Hazelnuts
The Frankfurt Crown Cake, also known as Frankfurter Kranz is the queen of German buttercream cakes and my grandmother was a master at baking it. There was no special occasion, no family Sunday lunch without this opulent cake on the table. If you're on a diet you should avoid it because as all buttercream cakes, it needs lots of eggs, sugar and butter to transform into a delicious layered sponge cake filled and covered with German vanilla buttercream and sprinkled with caramelised hazelnuts. My Granny's lunches used to start with a green salad with a sugared cream dressing followed by the best beef rouladen (beef olive) filled with prosciutto, gherkin and mustard. While everyone else was worried about how one would manage to eat her traditional Frankfurt Crown Cake so soon at tea time, I was already excited and looking forward to eating my beloved buttercream cake.
The outside of the spongy cake, made with lots of vanilla and eggs, soaks a bit of the cream, which is made of vanilla pudding mixed with butter, that's why the cake is best after 2 days. The aromas have to spread, the vanilla and also the buttery caramelized hazelnuts infuse the cake. It's best to keep it in the fridge but it should always be eaten at room temperature. I didn't manage to wait for a couple days, the cake looked so good, I had to eat it as soon as I sprinkled the last hazelnuts on top. It was great but when I ate a piece on the 3rd day, I was reminded why it's good to be patient. The cake was amazing, it had developed its full deep taste and I understood why this cake was my Granny's famous signature cake.
Sometimes life is just about enjoying a piece of cake, no matter how much butter or eggs were needed to make it. Mother's and grandmother's know that!
Happy Mother's Day!
Frankfurt Crown Cake, Frankfurter Kranz
For a 23cm / 9″ bundt pan you need
For the sponge cake
butter, at room temperature, 200g / 7 ounces
granulated sugar 225g / 8 ounces
a pinch of fresh vanilla
organic eggs 6
plain flour, sieved, 200g / 7 ounces
cornstarch, 100g / 3.5 ounces
baking powder 3 teaspoons
a pinch of salt
dry breadcrumbs to sprinkle the bundt pan
Set the oven to 180°C / 355°F top/ bottom heat. Butter a bundt pan and sprinkle with bread crumbs.
Beat the butter, sugar and vanilla till fluffy, add the eggs, one at a time and continue beating for a few minutes till thick, creamy and light yellow. Combine the dry ingredients and fold gently into the butter egg mixture with a wooden spoon (in batches, combine well in between). Scrape the dough into the bundt pan and bake for 45 minutes or until golden. Check with a skewer, it should come out clean. Let the cake cool for 2-3 minutes before you turn it over onto a wire rack to cool completely. When the cake has cooled off completely, slice it 3 times into 4 layers.
For the buttercream
All ingredients for the buttercream must be at the same temperature (room temperature) to combine well!
butter 250g / 9 ounces
organic egg yolks 4
cornstarch 60g / 2 ounces
granulated sugar 120g / 4.5 ounces
milk 500ml / 17 ounces
a pinch of salt
vanilla bean, slit slightly, 1
Beat the butter for 10 minutes till white and fluffy.
Whisk the egg yolks with the cornstarch, sugar, salt and 50ml / 2 ounces of the milk till well combined.
In a sauce pan, bring the remaining milk together with the vanilla bean to a boil. Take the vanilla bean out, scrape the seeds out of the bean into the milk. Add the egg mixture to the hot milk, whisking well. Take the sauce pan off the heat after 1 minute and continue whisking for 2 minutes till stiff. Fill into a bowl and cover the pudding's surface with cling film.
When the vanilla pudding has cooled off completely, press it through a sieve and mix in batches with the beaten butter, first with a spoon and then with your mixer for a few seconds till nice and creamy.
For the caramelized hazelnuts
hazelnuts, finely chopped, 200g / 7 ounces
granulated sugar 100g / 3.5 ounces
butter 35g / 1.5 ounces
In a large heavy pan, heat up the hazelnuts, sugar and butter on high-medium temperature and roast for around 5 minutes till golden brown and caramelized, stirring constantly. Take off the heat and spread on parchment paper.
Assembling the Frankfurter Kranz
Leave around 1/3 of the buttercream to cover the Frankfurter Kranz and spread the remaining cream on the 3 layers of cake. Start with the bottom one, spread with cream, cover with the next layer of cake and continue with the other layers. When the cake is assembled, spread the remaining cream gently all over the cake and sprinkle with the caramelized nuts on all sides, inside and out.
You can eat the cake right away or be patient and keep it in the fridge for 1-2 days before you serve it.
Rhubarb Crumble Cake, truly addictive!
There are two of my recipes, classics, that I can't live without. I constantly adapt and change them according to the seasons and there isn't a month without them. I'm talking about my beloved quiche and my crumble cake, filled with seasonal fruit and topped with the most amazing crumbles, buttery and crunchy! In winter I filled it with apples, now it's time for rhubarb and there will be more to follow. I have no preference, I love all of them!
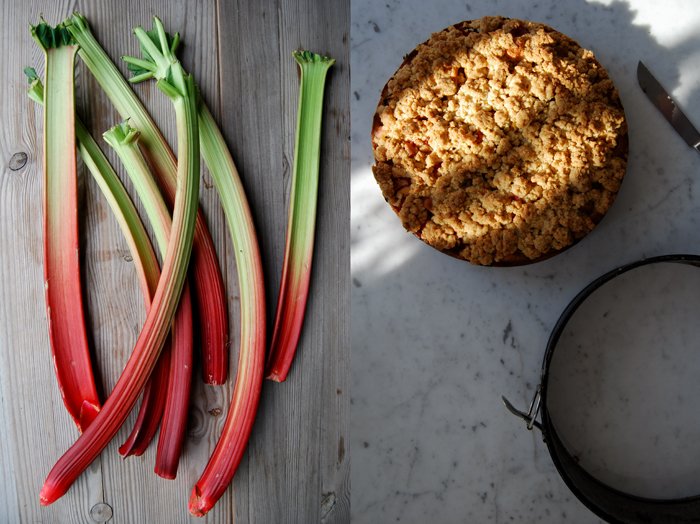
For this cake, I like to choose fruit with a strong texture, the dough rises around these moist pockets and stays juicy without becoming soggy. I use lots of cinnamon for the crumbles, one of my favourite spices for baking which refines the fruit's flavours perfectly. The rhubarb brings in a bit more sourness than the apples, it fits to the fresh feeling of this season. In the post about my apple crumble I've praised the cake's light and spongy base, the perfect composition of soft, juicy and crunchy and its dessert and teatime qualities. Now it's time to bake rhubarb crumble, but be prepared, this cake is truly addictive!
Rhubarb Crumble Cake
Prepare the dough for the base first, the rhubarb afterwards and the crumbles at the end.
For a 26cm /10″ springform pan you need
For the cake
butter 125g / 4.5 ounces
granulated sugar 125g / 4.5 ounces
a pinch of fresh vanilla
organic eggs 3
plain flour 250g / 9 ounces
baking powder 2 teaspoons
a pinch of salt
rhubarb, cut into 4cm / 1.5" pieces, 800g / 28 ounces
For the crumbles
plain flour 200g / 7 ounces (you might need some more if the crumbles are too sticky)
granulated sugar 125g / 4.5 ounces
a pinch of fresh vanilla
ground cinnamon 2 teaspoons
butter, melted, 125g / 4.5 ounces (plus more if the crumbles are too fine)
Set the oven to 180°C / 355°F.
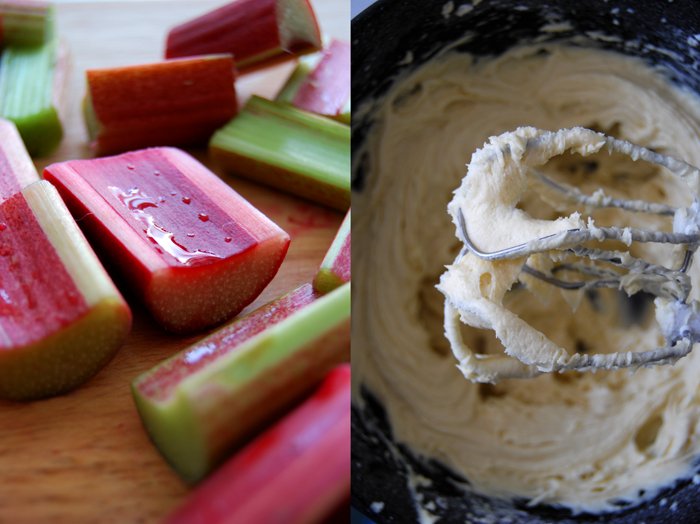
For the cake base, beat the butter, sugar and vanilla till fluffy. Add the eggs, one at a time and continue mixing for a few minutes. Add the flour mixed with the baking powder and salt and continue mixing until well combined. Scrape the dough into a buttered springform pan and arrange the rhubarb vertically in circles pushing it into the dough.
The crumbles need good preparation as you have to make sure that the mixture is neither too moist nor too dry. Have some extra flour and melted butter close at hand so that you can add some immediately if necessary:
Combine the dry ingredients in a bowl. Pour the melted butter on top and mix quickly with the hooks of your mixer, stop as soon as it crumbles. If the crumbles are too moist and sticky add a bit more flour (1-2 tablespoons). If they are too fine and don’t form bigger crumbles add more melted butter. Spread quickly on top of the rhubarb. If you have bigger lumps of crumbles you may have to separate and spread them.
Bake in the oven for 55 minutes or until golden. Check with a skewer, it should come out clean, and let it cool.
You can serve the cake with sweet whipped cream or vanilla or cinnamon ice cream.
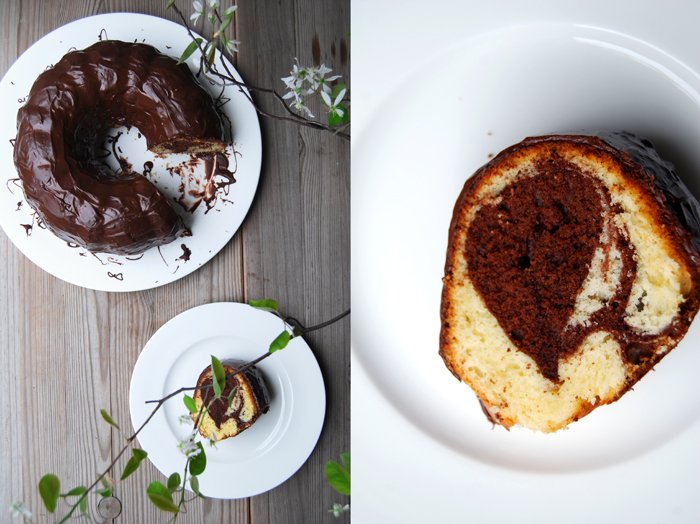
My favourite Chocolate Marble Cake
My favourite marble cake needs 6 eggs to turn into a bundt cake so fluffy and juicy, light and enjoyable that I just can't stop eating it. Most of the time I just sprinkle it with icing sugar but some days ask for more. When I'm in a chocolaty mood I cover it in a crunchy layer of bittersweet chocolate.
This cake is so simple but whenever I hold a slice of it in my hand and take the first bite I ask myself why I don't bake it more often. It's a typical childhood cake, a birthday party classic which had to be on every coffee table. It's also the cake my mother used to bake for my own special day. In the morning, I used to find it on my birthday table together with all my presents and it always had my name and age written on it, with colourful smarties pushed into the glossy chocolate. Two year's ago I baked it for the first time for our godchild's first birthday, with smarties of course to continue the tradition.
Chocolate Marble Cake
For a 23cm / 9″ bundt pan you need
butter 200g / 7 ounces plus 1 tablespoon for the chocolate glaze
granulated sugar 250g / 9 ounces
a pinch of fresh vanilla
organic eggs, divided, 6
a pinch of salt
milk 100ml
plain flour, sieved, 300g / 10.5 ounces
baking powder 3 teaspoons
cocoa powder 30g /1 ounce
bittersweet chocolate 200g / 7 ounces, for the topping
dry breadcrumbs to sprinkle the pan
Set the oven to 180°C / 355°F (fan-assisted oven). Butter a bundt pan and sprinkle with bread crumbs.
Whisk the egg whites with the salt and 1 tablespoon of the sugar till stiff.
Combine the flour and baking powder in another bowl.
In a large bowl, mix the butter, sugar and vanilla till fluffy. Add the egg yolks and continue mixing till thick, creamy and light yellow. Add the milk and mix until well. Fold the egg whites and the flour with a wooden spoon gently into the butter and egg mixture, alternating, 1/3 at a time, combining well in between.
Scrape half of the dough into the bundt pan and stir the cocoa powder into the remaining batter. Dollop the dark batter on top of the light one and swirl with a small fork through the 2 batters, carefully, from top to bottom pulling slowly all the way around the pan. Don't over mix the different batters to keep the marble pattern.
Bake for 40 minutes or until golden and spongy. Check with a skewer, it should come out clean. Let the cake cool for 2-3 minutes before you turn it around onto a wire rack to cool completely.
Melt the chocolate and mix in 1 tablespoon of butter, let it cool for 2 minutes before you drizzle it over the cake. Spread it or leave it sprinkly, as you like.
Traditional Maltese Easter Figolli
There are three cultures which have a big influence on my life, the German which I grew up with and the Maltese and the American through my boyfriend and his family. Our life is a daily mix of different traditions, habits, mentalities and languages, this is a gift to me but it also brings a lot of potential to create friction. The German and the Maltese background especially couldn't be more different. My Northern European mind, focussing on logic and order, black and white thinking, clashes sometimes (often) with the Mediterranean mentality, its relaxed trust in life, its chilled out pace, its emotional and sometimes dramatic approach to conflicts of any kind. It can be frustrating, for both sides, but it has made our lives so much richer! It's a challenge, testing out how much one is willing to accept that we are all different. I want to stay open for this experience which involves so much love from and for so many people and on top it is so much fun and entertainment and there's plenty of that! When I'm together with my Maltese family, after all theses years we're still confronted with cultural misunderstandings that bring us to tears as we have to laugh so hard. When my German seriousness clashes with Mediterranean humour, the potential for comic situations is practically never ending!
The cakes and pictures in my posts from yesterday and today couldn't reflect the two cultures and differences in a better way. Yesterday's eggnog sponge cake with whipped cream, its clean and minimal look, the concentrated focus on the pure taste of German eggnog meets today's Maltese figolla which is opulent and dramatic, lusciously and colourfully decorated. It's stuffed with various exotic flavours like orange, cinnamon and almonds. Two cultures packed in two cakes!
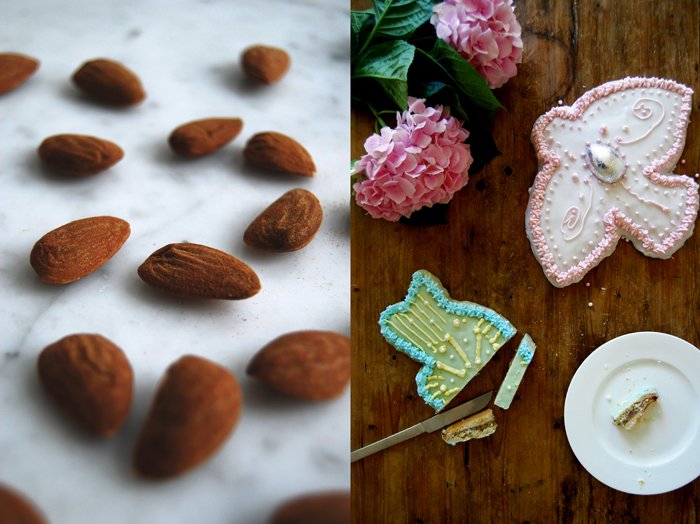
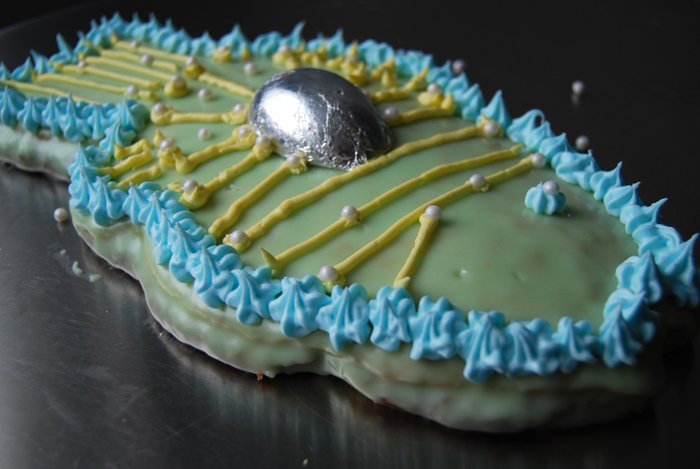
Figolli is the plural for figolla coming from the Latin word figura, it's a famous traditional treat eaten on Easter Sunday in Malta. To me, it's a bit like a big cookieish cake although every Maltese would disagree with that. Originally it was made in the shape of a woman, a man, a fish or a basket, ancient symbols of fertility like the chocolate egg which is always placed on top of each figolla. Without the egg (which is actually cut in half) it's not an original figolla! Times changed and more shapes became popular such as lambs, hearts, stars and a few other Easter related figures. I was given a fish and a bird by my mother in law and to be honest I was happy about her choice as the dough extends quite a bit while it's baking. I have my doubts that, if she had given me a lamb, there would have been any association left with this animal.
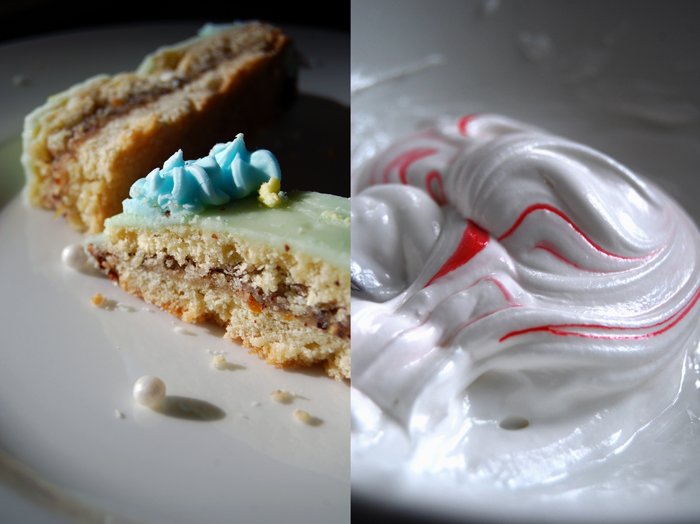
The decoration of a figolla is very important and involves lots of colourful sugar coating and icing. The pastry itself is made of a short crust like dough, sandwiched and filled with almond paste. There are lots of different recipes, my Maltese family gave me about six to prepare me for this experience. I was very thankful for this support but in the end I took a bit of each and added and changed after my own taste. The almond paste for example had to be exchanged with a hazelnut paste with a hint of almonds enhanced with orange zest and cinnamon. When it came to decorating the figolla I was happy to have my assisting sister in law Julia at my side to give me stylistic instructions. That's what she does when she makes figolli in Malta together with one of her aunts.
When I wrote about my rhubarb meringue tartlets last week I had mentioned that I'm not the best decorator when it comes to pastry. After we managed to put around 1kg (2 pounds) of icing sugar in both the lemony sugar glaze and in the royal icing which is made with egg whites and used for the icing decoration, we were equipped with two thick pastes and food colouring, we were ready to start! I was prepared that decorating a figolla would be very difficult, maybe stressful but I was mistaken. It was fun and I can admit that we were quite impressed with the results. I was an inexperienced German beginner after all but thanks to our North-South European cooperation we were rewarded with two beautiful and delicious figolli!
I wish you a Happy Easter!
Traditional Maltese Figolli
You need figolli cutters with a high rim.
For two big figolli (around 30cm x 20cm / 12" x 8") you need
For the dough
plain flour 400g / 14 ounces
granulated sugar 200g / 7 ounces
a pinch of salt
zest of 1 lemon
a pinch of fresh vanilla
butter 200g / 7 ounces
organic eggs 2
Combine the flour with the sugar, lemon zest, vanilla and salt. Cut the butter with a knife into the flour until there are just little pieces of butter left. Continue with your fingers and work the butter into the flour until combined (there shouldn’t be any lumps of butter left). Add the eggs and continue mixing with the hooks of your mixer until combined, the dough will be a bit sticky and soft. Form a flat ball, wrap in cling film and put in the fridge for at least 1 hour.
For the hazelnut/ almond paste
hazelnuts, ground 90g / 3 ounces
almonds, ground 60g / 2 ounces (you can also use just 150g of almonds or just hazelnuts if you prefer)
granulated sugar 100g / 3.5 ounces
ground cinnamon 1/2 teaspoon
zest of 1 orange
juice of 1/2 orange
organic egg whites 2
Combine the dry ingredients and add the orange juice. In a separate bowl, mix the egg whites until stiff, add the hazelnut-almond mixture and mix to a thick paste.
For the figolli
Set the oven to 180°C/ 355°F (fan-assisted oven) and line 2 baking sheets with parchment paper.
Divide the dough into 4 pieces, roll each one out between cling film (about 3/4 cm / 1/3" thick) and cut out 2 equal figures for each figolla. Place one pastry figure on the baking sheet (this works best when you put the parchment paper on top of a rolled out figure, flip it and put it back on the baking sheet). Spread half the hazelnut paste on top and cover gently with the corresponding figure. Continue with the second figolla and bake for 25 minutes in the oven or until golden brown. Let them cool completely.
For the decoration
For the sugar glaze
icing sugar, sieved, around 400g / 14 ounces
lemon juice 2 tablespoons
water 3 tablespoons, you might need less
food colouring
Mix the icing sugar with the lemon juice and add the water, one tablespoon at a time until you have a thick and slightly runny paste (you may not need all of the water), if it's too liquid it won't stay on the figolla. Add food colouring after your own taste.
For the royal icing
organic egg whites 3
icing sugar, sieved about 600 g / 21 ounces
food colouring
Lightly whisk the egg whites, add the icing sugar a little at a time and continue beating. Stop adding more sugar when you have a very thick and stiff paste. To check the texture, fill a piping bag and press out a little drop, if it stays in shape, the icing is done. Add food colouring after your own taste.
Spread the sugar glaze on top of the figolla and let it dry for a couple minutes. When the glaze is hard, fill a piping bag and decorate with the royal icing. By experience I can say, be brave and it will look much better!
Eggnog Sponge Cake with Whipped Cream
Eggnog has a bit of an old fashioned reputation but let someone try a sip, even rather doubtful gourmets, and you will see a hint of appreciation on their faces.
It used to be a popular drink in bars, both of my grandmothers used to love it and even made their own in their kitchens. This was once a true party classic, in the 1950s and 60s! Today, people pour it over their ice cream or cake like my mother who always keeps a little bottle of it in her fridge for this reason. Some make it at home for Christmas but it feels like it lost its popularity. I find this unfortunate, I have quite a soft spot for it - eggnog is creamy, smooth, sweet and eggy. I like to drink it sometimes, as a digestif, preferably out of tiny old fashioned glasses with a short stem - 50s style to make the experience complete.
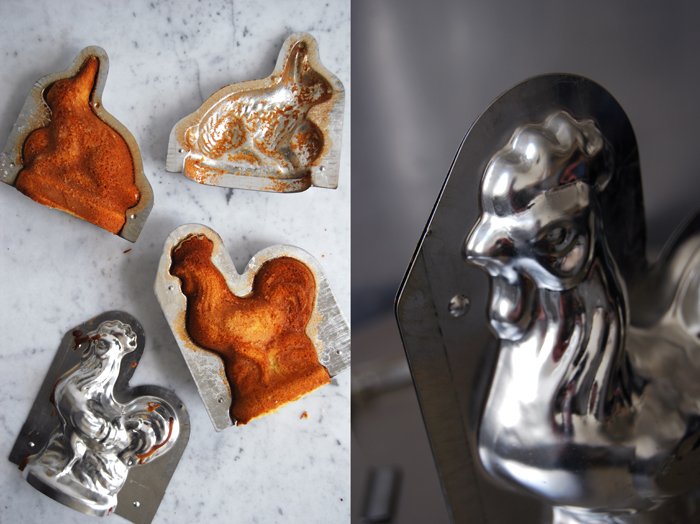
I believe that something that was so passionately enjoyed a few decades ago - and that tastes so good - is reason enough to be included in my today’s kitchen activities. I'm up for an easy Easter cake, a spongy cake made with lots of eggnog. A few days ago my aunt Ursula gave me two 3d-cake pans and wrote down one of her recipes for a juicy cake laced with the yellow liqueur that her own mother used to like so much. I doubled the recipe and baked it in lovely rabbit and chicken molds (but you can use a 20cm / 8″ cake pan).
I prepared some whipped cream with even more eggnog while the cakes were in the oven and noticed at one point that the cakes started to overflow. Luckily, my miscalculation didn't do the final cake any harm. It rose and dropped off the molds like a volcano and continued to bake on the tray but turned out as spongy and juicy as the cake in the molds.
This is a quick cake. After only 30 minutes in the oven, I was rewarded with a delicious eggnog-y teatime treat, best dipped into eggnog whipped cream and enjoyed with an extra shot of this special liqueur from the past, in an old fashioned glass of course. Cheers to our grandmothers!
Eggnog Sponge Cake with Whipped Cream
For a 20cm / 8″ cake pan you need
organic eggs 4
granulated sugar 140g / 3/4 cup
a pinch of fresh vanilla (scraped out of a vanilla pod)
vegetable oil (I use sunflower oil) 140ml / 2/3 cup
eggnog 140ml / 2/3 cup plus one shot for the whipped cream
plain flour 220g / 1 2/3 cups
baking powder 2 teaspoons
a pinch of salt
heavy cream 200ml / 3/4 cup plus 1 tablespoon
Set the oven to 170°C / 340°F (preferably convection setting) and butter the cake pan.
Beat the eggs together with the sugar and vanilla until fluffy. Slowly, add the oil and and eggnog and continue mixing. Combine the flour, salt and baking powder and mix quickly into the liquid mixture. Scrape the batter into the prepared pan and bake for 40 minutes or until golden brown. Check with a skewer, it should come out clean. In the 2 figure molds, the cake needed just 30 minutes. Let the cake cool for 5 minutes.
Whip the cream, stir in a shot of eggnog and serve with the cake.
Rhubarb Meringue Tartlets
My long loved rhubarb crumble cake has been my favourite rhubarb cake so far, but these little meringue tartlets caused a change on my list. I can't say that I prefer them over my buttery cinnamon crumble (I made the apple version a couple months ago, the recipe is here) but they are definitely just as good!
Until I started taking the ingredients out, I wasn't even sure about the recipe. I wanted a crumbly short crust, strong enough to carry the juicy rhubarb compote and not as flaky as the one I make for my Tarte Tatin. I thought I would give it a try but expected that I would have to refine the recipe over the next few weeks before I would be rewarded with a satisfying result. I was wrong! The pastry was exactly what I wanted, buttery, crumbly with a strong structure, neither too fragile nor to compact. When the tartlets had cooled off, I topped them with a tablespoon of my thick rhubarb compote and some fluffy meringue. As I'm not very good at decorating cakes, I tried to keep them simple. Usually I try to avoid piping bags as they make me nervous but here I made an exception, I wanted them pretty! The result was worth it, a bit sweet, a bit sour, buttery but still light, and all of this in a cute little rhubarb meringue tartlet!
Rhubarb Meringue Tartlets
When the tartlets are finished and baked with the meringue, you should serve them within the next 15 minutes as that's when they are at their best (I had one the next day and it was still delicious but a bit softer). If you want to prepare them for guests, you can bake the tartlets and cook the compote beforehand (both should be cold either way). Then you just need to beat the egg whites, assemble the tartlets and bake them for 3 minutes in the oven.
You will need round 10cm / 4" tartlet pans.
For 10 tartlets you need
For the short crust
plain flour 250g / 9 ounces
granulated sugar 80g / 3 ounces
a pinch of salt
a pinch of vanilla
butter, cold, 160g / 5.5 ounces
organic egg yolks 2
Combine the flour with the salt, vanilla and sugar. Cut the butter with a knife into the flour until there are just little pieces of butter left. Continue with your fingers and work the butter into the flour until combined (there shouldn’t be any lumps of butter left). Add the egg yolks and continue mixing with the hooks of your mixer until you have a crumbly mixture. Form a thick disc, wrap in cling film and put in the freezer for 10 minutes.
Set your oven to 200°C / 390°F top / bottom heat. Butter the tartlet pans and dust with flour.
Roll out the dough about 3mm thick between cling film and cut out 10 12cm / 5" circles. Line your tartlet pans with the pastry and prick with a fork. Blind-bake in the hot oven for 9 minutes or until golden. Take them out, let them cool for a couple minutes before you flip them over and let the tartlets cool off completely.
For the compote
rhubarb, sliced thinly, 400g / 14 ounces
granulated sugar 3 tablespoons
ground cinnamon 1/4 teaspoon
water 2 tablespoons
In a sauce pan, heat all the ingredients for the compote on medium temperature, keep the lid closed. Cook for 10 minutes or until the rhubarb has become a thick compote and let it cool completely.
For the meringue
organic egg whites 4
granulated sugar 120g / 4.5 ounces
a pinch of salt
Set the oven to 220°C / 430°F top / bottom heat.
Beat the egg whites with the salt for 10 - 20 seconds until they start to stiffen. Add the sugar gradually and continue beating until stiff and glossy.
Put a tablespoon of the rhubarb compote on top of the tartlet, spread evenly. Fill the meringue mixture in a piping bag and decorate generously. Bake them on a baking sheet for 2-3 minutes until the tops of the meringue become golden. Let them cool for 1 minute, put them on plates with a spatula and serve immediately.
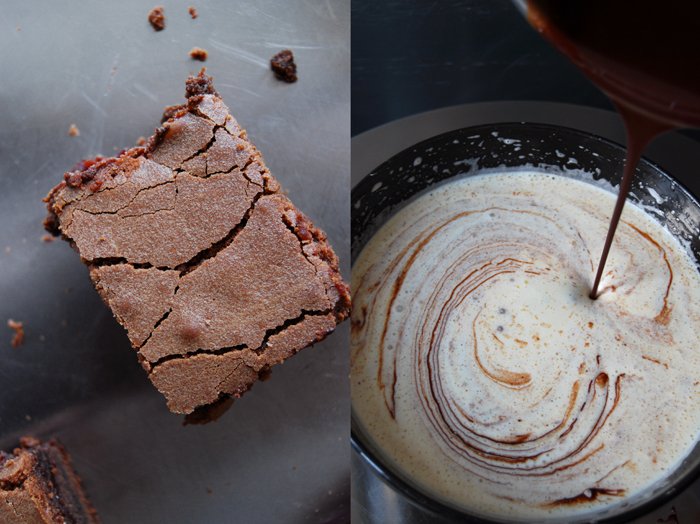
Fudgy Raspberry Chocolate Brownies
The first bite of these chocolate brownies changed my opinion about this cakey treat completely. After a few rather dry, too heavy or painfully sweet experiences with brownies I already felt like giving up on them. I never felt inspired and motivated to give them a try in my own kitchen but this recipe changed everything! They are fudgy, dense, chocolaty and juicy and a thin layer of sweet raspberry jam even adds a hint of fruitiness. You can't really ask for more when you pull a chocolate cake out of your oven!
It's important to use good quality chocolate, bittersweet, the kind you like to eat without putting it in a cake. Mine is 50% cocoa, I tried stronger ones but this works best for me. Sometimes I make the recipe without the jam layer which doesn't effect the brownie's fudginess, they just have to bake shorter as the fruit keeps the dough soggy for a bit longer. When I want chocolate, pure and intense than that's my choice! I like both, so much that I always make a big tray right away, even if there's just the two of us. I also like to make them for easy dinner parties, a sweet finger food dessert, no plates, just napkins and everybody gets a big brownie in their hands.
This recipe comes from my boyfriend by the way. One day he went into the kitchen, came up with this recipe and baked these wonderful brownies. I don't remember why or how, I don't ask questions, I just enjoy them!
Raspberry Chocolate Brownies
For a 28,5 x 23,5 cm / 11 x 9 " baking dish making 24 brownies you need
butter 350g / 12.5 ounces
bittersweet chocolate 350g / 12.5 ounces
a pinch of fresh vanilla
organic eggs 6
granulated sugar 320g /11.5 ounces
plain flour 250g / 9 ounces
salt 1 teaspoon
raspberry jam, whisked with a fork, 100ml
Set the oven to 175°C / 350°F (fan-assisted oven) and line a 28,5 x 23,5 cm / 11 x 9" baking dish with parchment paper. (It must be roughly this size).
Melt the butter together with the chocolate and vanilla in a sauce pan. Set aside and let cool for a couple minutes. Beat the eggs together with the sugar till fluffy and add to the chocolate mixture. In a large bowl, combine the flour and salt, add the liquid mixture and mix with your mixer until everything is combined. Pour half of the dough into the baking dish, even it out and spread the jam on top, carefully so that the layers stay separate. Add the rest of the dough and spread evenly.
Bake in the oven for 55 minutes. The top will be a pale brown and speckled. When you push in the middle you should feel a soft but spongy resistance. Let it cool for 10 minutes before you cut it into small squares.
If you make the brownies without the jam layer, check them after 30 minutes. It should look and feel as described above.
The Family Waffles and Prokofiev's Peter and the Wolf
I used to have cosy tea time ceremonies with my mother and my sister on the weekends, just the three of us. We lit candles, got comfy in between piles of cushions and listened to music. I always wanted to play either Prokofiev's Peter and the Wolf or Ravel's Bolero, both dramatic and mesmerising. It fascinated me as a child, especially Prokofiev's musical fairy tale, just a narrator telling the exciting story and an orchestra interpreting the characters and scenes. It made me feel like I was right in the story, I could see Peter following the cat through the grass and then, the scene when the duck escapes through the garden gate which little Peter had left open! He shouldn't have because of the wolf (his grandfather had told him a million times) and as one can imagine, it doesn't look so good for the duck. I don't want to reveal the end of the story, I still love listening to it!
When we had our girly afternoons, we either baked a cake or made waffles, my grandmother's waffles who passed her much-loved recipe on to my mother and her siblings before the grandchildren started baking them as well. I'm one of them, still enjoying them as much as my family does. I never made any other waffle recipe myself but I've obviously had others. I'm biased, I know, never as good as my granny's! Hers are light and fluffy, not too sweet as the dough is made with only a pinch of sugar. She used to sprinkle the sugar on top of the waffles after they were baked, still warm out of the waffle maker, which is how I make them too, sometimes with some cinnamon mixed in.
When I thought of my grandmother, I remembered her gold rimmed plates which I don't use very often. I ate my waffles like I always do, sandwiched with whipped cream in between and I played Peter and the Wolf, all the sweet memories came back and with them a happy and thankful feeling!
This recipe has been featured by Food52!
Waffles with Cinnamon Sugar and Whipped Cream
For the 8 waffles you need
butter 50g / 2 ounces
milk 175ml (if you use a Belgium style waffle maker you need only 150ml of milk)
organic eggs 3
a pinch of salt
granulated sugar 1 teaspoon
plain flour 100g / 3.5 ounces
baking powder 1/2 teaspoon
a pinch of fresh vanilla
For the topping
granulated sugar 70g / 2.5 ounces plus 1 tablespoon for the whipped cream
ground cinnamon 1/2 teaspoon
whipping cream 200ml
Warm up your waffle maker.
Combine the sugar and cinnamon to sprinkle on the waffles and whip the cream together with a tablespoon of sugar.
Melt the butter and mix with the milk. Combine the flour and baking powder. Beat the egg whites with a pinch of salt till stiff. Mix the egg yolks with the sugar and vanilla till fluffy and add the milk and flour, mix well. With a spoon, fold the stiff egg whites gently into the dough until well combined.
Pour a ladle of the dough onto the waffle maker and bake until golden brown. Sprinkle with the cinnamon sugar while the waffles are still warm and served with whipped cream.
Bittersweet Chocolate and Orange Sponge Cake
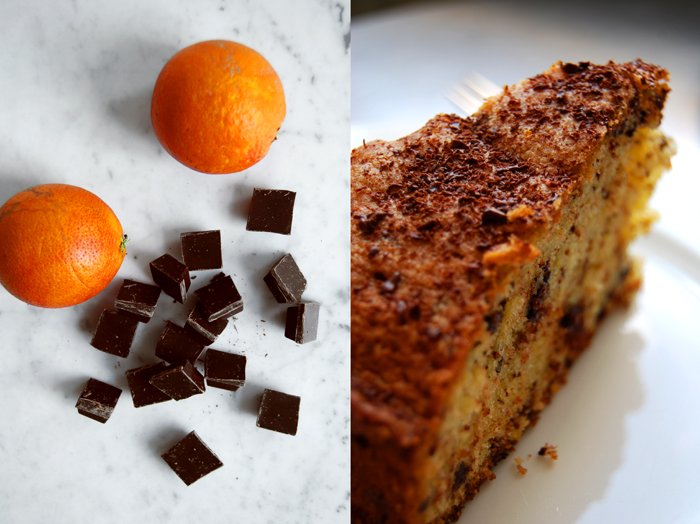
Last week I wrote about one of my numerous phone calls with my Maltese granny who is actually my boyfriend's granny but over the years, after so many stays on her home island and through our shared passion for food she "adopted" me. That's how it feels, she became my granny. In our last conversation she gave me a wonderful recipe for the Maltese tea time cookies with vermouth and she also mentioned a cake made with bittersweet chocolate and orange (juice and zest). I love this combination but my boyfriend isn't so fond of it and I didn't want to end up eating a whole cake on my own. But she insisted on giving it a try, she knows her grandson after all, and she was right!
We both agreed that this cake is amazing, simple but so aromatic. The texture is very spongy and on top it has a fine sugary crust, a bit flaky. I sprinkled it with some more chocolate when the top was still a bit warm and it melted into the crust. Granny Edith was right, I didn't have to eat the cake on my own and it didn't even last for 2 days!
Bittersweet Chocolate and Orange Sponge Cake
For a 20cm / 8″ cake pan you need
butter 180g / 6.5 ounces
granulated sugar 210g / 7.5 ounces
plain flour 180g / 6.5 ounces
baking powder 2 teaspoons
a pinch of salt
organic eggs 3
orange juice 2 tablespoons
orange zest 1 1/2 tablespoons
bittersweet chocolate, chopped coarsely, 100g / 3.5 ounces plus 1 tablespoon finely grated for the topping
Set the oven to 175°C / 350°F (fan-assisted oven) and butter the cake pan.
Mix the butter with the sugar and orange zest till fluffy. Add the eggs, one at a time and mix well for a couple minutes. Add the flour, baking powder, salt and orange juice and mix quickly until everything is combined. Stir in the chopped chocolate and scrape the dough into the prepared pan. Bake for 40 minutes or until golden brown. Check with a skewer, it should come out clean. Let the cake cool for 5 minutes and sprinkle with finely grated chocolate.
Essijiet - Maltese Tea Time Cookies with a shot of Vermouth
When I'm on the phone or video chat with our family in Malta, you can be sure it will go on for hours, it will involve many people, coming and going, lots of laughing and very often the exchange of recipes. Especially when I talk to Granny Edith who has been cooking and baking all her life, so you can imagine her large recipe collection, influenced by her mother, grandmother and all the close relatives and friends which are quite numerous in a Maltese family. I found so many traditional dishes in her collection, true treasures! Like everybody else in the family, I love to sit with Edith at her kitchen table in her beautiful old villa in Msida at the sea, talking about life, cooking, men, fashion, the offers at the vegetable man and the butcher, normal daily life, it feels so easy on this island! We enjoy a cup of tea, some sweets from our local confectionary (which is the best in Malta in our opinion) and appreciate every second!
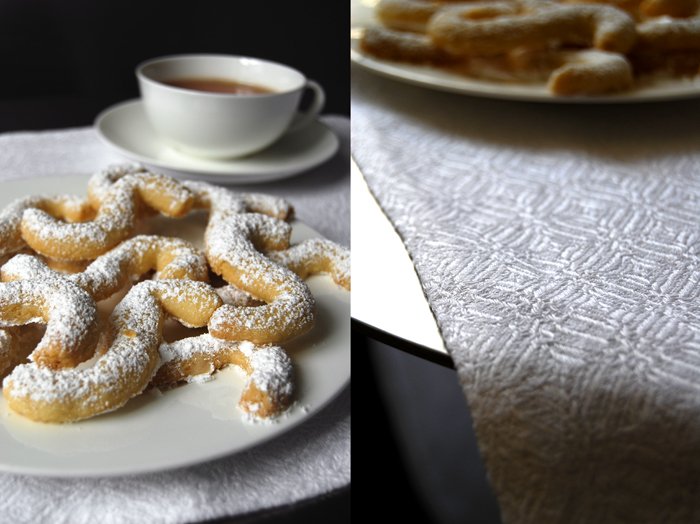
Recently I've been talking to her about baking and she handed some recipes over to me which caught my attention. One is a traditional tea time cookie recipe from her mother-in-law Maria, she used to make them for the family, Edith continued the tradition and now she passes it on to the next generations. It's a very easy cookie recipe, made with so little ingredients that I thought I had left some out when I started preparing the dough. It's just butter, flour, baking powder, salt, sugar and a shot of vermouth making a delicious cookie, fine in taste, buttery and crumbly. I couldn't have asked for more for tea time! The cookies don't really have a proper name apart from the family given one, referring to their shape they are called Essijiet, meaning many "S" in Maltese.
Essijiet - Maltese Tea Time Cookies
For around 60 cookies you need
plain flour 300g / 10.5 ounces
baking powder 1/2 teaspoon
granulated sugar 1 tablespoon
a pinch of salt
butter 200g / 7 ounces
vermouth 2 tablespoons
icing sugar for dusting
Combine the flour with the baking powder, sugar and salt. Cut the butter with a knife into the flour until there are just little pieces of butter left. Continue with your fingers and work the butter into the flour until combined (there shouldn’t be any lumps of butter left). Add the vermouth and continue mixing with the hooks of your mixer until you have a crumbly mixture. Form a ball, wrap in cling film and put in the fridge for an hour or in the freezer for 15 minutes.
Set the oven to 175°C / 350°F and prepare a baking sheet with parchment paper.
Cut thick slices off the dough, make thin rolls and cut into 12cm / 5" pieces. Form the cookies into an S-shape and bake for 9 minutes or until lightly golden (they stay light in colour). Let them cool for a couple minutes and dust with icing sugar.
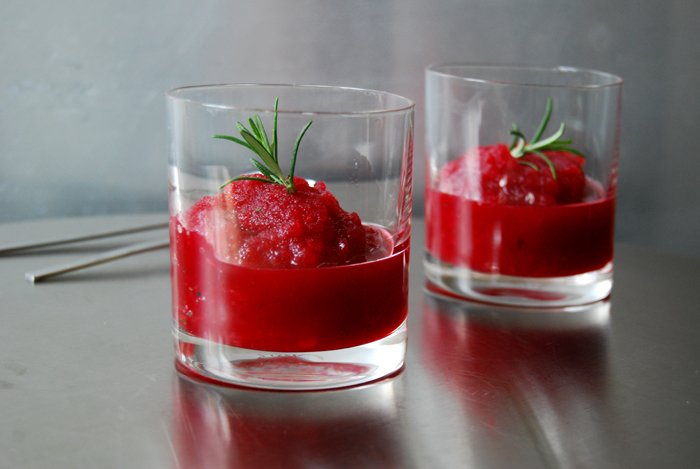
Blood Orange Rosemary Sorbet
When I bought our ice cream maker a couple years ago, I didn't use it at first. I'm not crazy about ice cream although I have a sweet tooth and I can eat sweets all the time - if it's frozen I have to be in the mood. Things changed after I made my own first ice cream, I think it was strawberry, very creamy and far better, fruitier and less sweet than most I had tried before.
I always start my ice cream production in spring as I prefer to make it with fresh fruit, strawberry, blueberry, later in the year I use plums as well, everything sweet and aromatic finds its way into my ice cream maker. It's still quite early in the year and the temperature is far from summery but spring officially starts today, the perfect day to begin the production! Local berries aren't ripe yet so I have to think of something else. I find my inspiration in a frozen delicacy I love to eat in summer when we're in Malta, a fruity granita or sorbet! I love to walk along the promenade at the sea in the late afternoon when the sun is more forgiving, a cup of sour lemon granita in my hand, melting as soon as I dip the spoon into the crunchy bits of ice!
Today, it's not lemon but blood orange. I want to use them as long as they are still juicy and sweet. I'm in the mood for a sorbet with more complex flavours so I add a few chopped needles of rosemary. The result is delicious and the recipe a keeper, I will definitely make another batch soon!
Blood Orange Rosemary Sorbet
For 4 big portions of sorbet you need
freshly squeezed blood orange juice 500ml
juice of 1 lemon
icing sugar 50g / 2 ounces
fresh rosemary, finely chopped, 2 teaspoons
Mix the ingredients well and put into an ice cream maker for around 25 minutes until almost frozen. Serve immediately or keep in the freezer.
My Mother's delicious Tarte Tatin
Tarte Tatin, I know so many people who call this their favourite dessert! Buttery apples fried with lots of sugar until golden brown and caramelised, topped with a crisp shortcrust baked in the oven. It's like a traditional pie, just upside down! There is something very French about it and it's not just the amount of butter and sugar, or its origin. Legend has it that this tarte was first created accidentally by Caroline Tatin. She ran the Hotel Tatin in Lamotte-Beuvron together with her sister Stéphanie. A stressful kitchen moment made her forget about the apples on her cooker, they caramelised and Caroline had an idea. She left them in the pan, put the dough on top and baked the first delicious Tarte Tatin ever. The guests in her hotel were impressed and her signature dish was born!
Now, there are many different ways to bake a Tarte Tatin. I make mine like my mother, with a crisp and buttery shortcrust (it's the one I also use for my Sandwich Cookies). I cut the apples in eight slices each so that they can caramelise evenly on all sides (I find it easier than quarters). I fry them in plenty of butter and sugar, the apples soak up all the syrup and the base stays crisp.
Tarte Tatin
For the tarte you need a 21cm / 8" Tarte Tatin dish or frying pan which is ovenproof.
big sour baking apples, peeled, cored and cut into eight slices each, 4
granulated sugar 90g / 3 ounces
butter 90g / 3 ounces
For the shortcrust
plain flour 130g / 4.5 ounces
butter, cold, 75g / 3 ounces
egg yolk 1
granulated sugar 1 tablespoon
a pinch of salt
cold water 1 1/2 tablespoons
For the shortcrust, combine the flour with the sugar and salt. Cut the butter with a knife into the flour until there are just little pieces of butter left. Continue with your fingers and quickly work the butter into the flour until combined. Add the egg yolk and the water, continue mixing with the hooks of your mixer until you have a crumbly mixture. Form a disc, wrap in cling film and put in the freezer for 10 minutes.
Set the oven to 200°C / 390°F.
In a pan (or Tarte Tatin dish), melt the butter together with the sugar and the apples on high temperature. Let the apples caramelise, watch them and turn gently, mine needed 10 minutes.
Roll out the dough, big enough to cover the pan and lay on top of the apples tucking the edges down the sides. Bake in the oven for 15 minutes or until golden brown. When the tarte is done, place a large heat resistant plate on top and turn the pan carefully upside down, keep in mind that it's very hot!
You can serve the warm Tarte Tatin with whipped cream or vanilla ice cream.
Irish Coffee Muffins
Saint Patrick's Day is close and although it is a religious feast to praise the patron saint of Ireland, it reminds me of a rather profane culinary pleasure, Irish Coffee. It's one of my favourite hot drinks! Sitting at a fireplace, cosy and relaxed, with a glass of warming Irish Coffee in my hands is unbeatable! I like it so much that I decided to put it in my muffins as well.
I mix some Irish whiskey, coffee and cream into the dough to be rewarded with the most delicious and fluffy muffins, but they are for adults only as I also topped them with whiskey infused whipped cream. I wanted strong spirit and coffee flavours and I got it! After cleaning the last drops of dough off the bowl with my fingers I already felt a bit tipsy!
If you like muffins as much as I do you can also try my Blood Orange Cinnamon Muffin recipe.
Irish Coffee Muffins
You need a muffin tray with 12 molds and paper baking cups.
plain flour 270g / 9.5 ounces
granulated sugar 150g / 5.5 ounces
baking powder 1 1/2 teaspoons
baking soda 1/2 teaspoon
salt 1/2 teaspoon
whiskey 50ml
strong espresso 50ml
heavy cream 100ml
butter, melted, 100g / 3.5 ounces
organic eggs 2
For the topping
whipping cream 200ml
whiskey 1 tablespoon
a pinch of fresh vanilla
Set your oven to 180°C / 355°F.
Combine the dry ingredients in a large bowl. Whisk the cream, espresso and whiskey and add the melted butter and eggs. Pour the liquid mixture into the dry mixture and stir with a wooden spoon until you have a lumpy dough. The more you mix it the more it will lose its light texture so don’t mix it too long.
Fill the muffin tray and bake the muffins for 15 minutes or until golden. Check with a skewer, it should come out clean.
Beat the whipping cream with the vanilla and stir in the whiskey.
Cut the tops off the muffins, dollop a spoonful of cream on and put the tops on again.


